Reuse your work without assuming the screen is identical
Move a script to another setup
A package can carry your commands and images, but a different setup can change where targets appear and how they look. Import a separate copy, check its coordinates and access, recalibrate the image reference, then run a short test with a result you can see.
Receive, recalibrate and test a separate copy
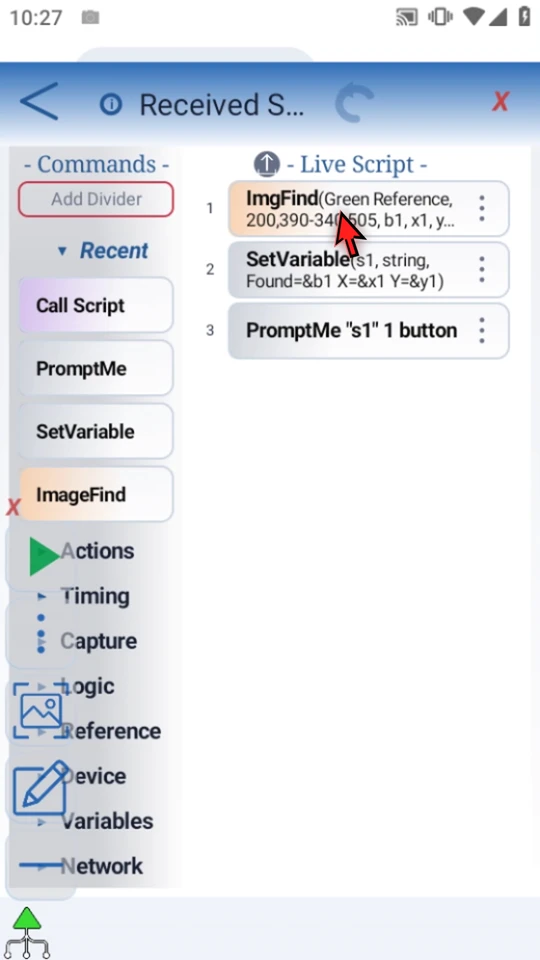
The prepared package contains just three commands: ImgFind searches for a saved portion of the ScriptTap icon and taps it when found; SetVariable formats the real outputs; PromptMe displays them. The page's tap counter changes only after an actual tap, making the result easy to check.
Make the received copy fit its current screen
Import the prepared package with a deliberate coordinate choice
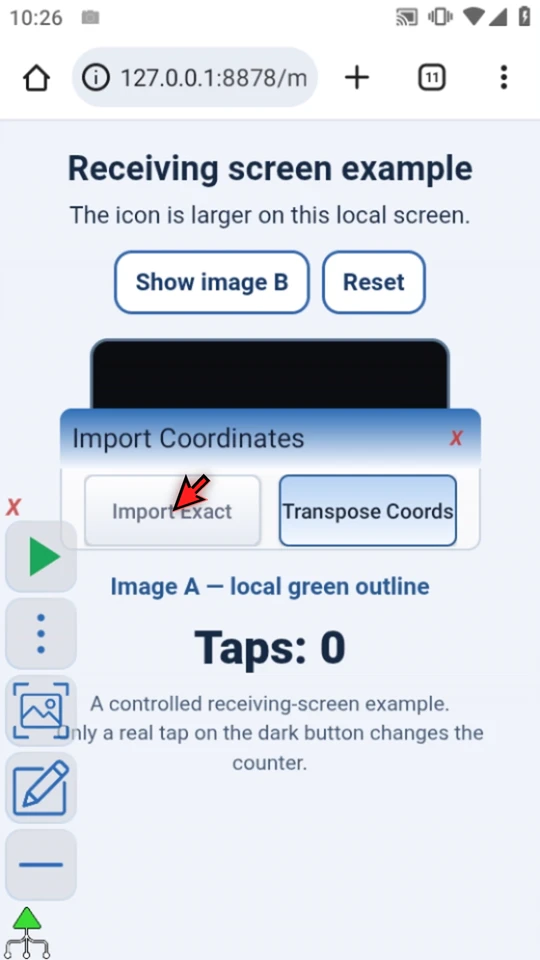
In Script Library, open Files, then the Screen Check STS entry's menu and Import. Files lists registered ScriptTap outputs, not every device file. Import Exact keeps authored coordinates. Transpose Coords converts literal screen coordinates in supported fields for the receiving display; it does not follow variables, arrays or expressions, redesign an app's layout, or resize image assets. This same-display example chooses Import Exact. See Import and Export for creating and transferring a package.
Identify and inspect the separate copy
The imported root has a fresh local identity and becomes active. The original remains intact. Disable the received copy while inspecting it and rename it Received Screen so it is easy to distinguish. Open its menu and choose Edit. The example reviews existing imported commands; it does not rebuild them.
Check what the image search will actually do
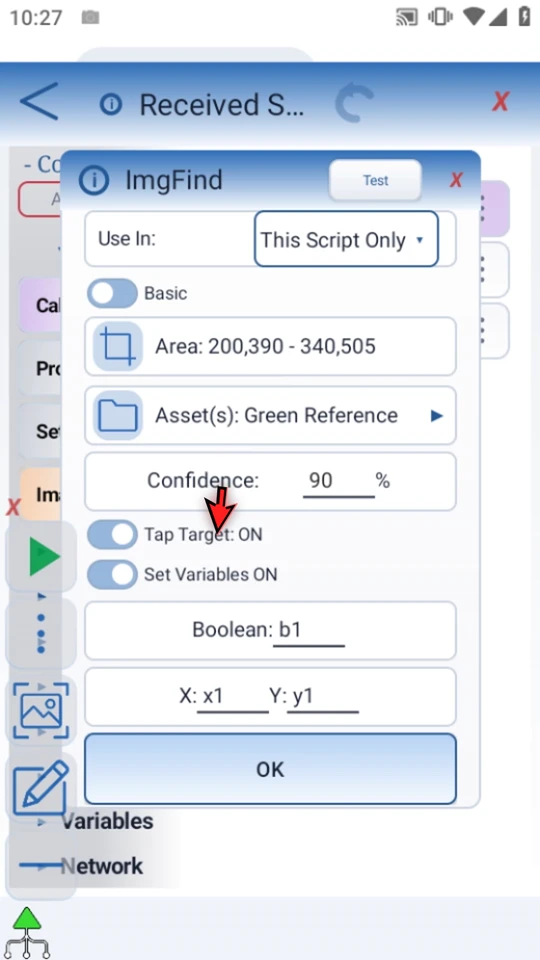
Open the existing ImgFind settings. Here the search area is 200,390–340,505, the reference is Green Reference, confidence is 90%, and Tap Target and Set Variables are on. The local outputs are Boolean b1 and Integer x1/y1. SetVariable formats these into String s1 for PromptMe. A setup-valid script can still target the wrong place on another screen. Close the inspected settings without changing the commands.
Calibrate the received image, not an unrelated script's asset
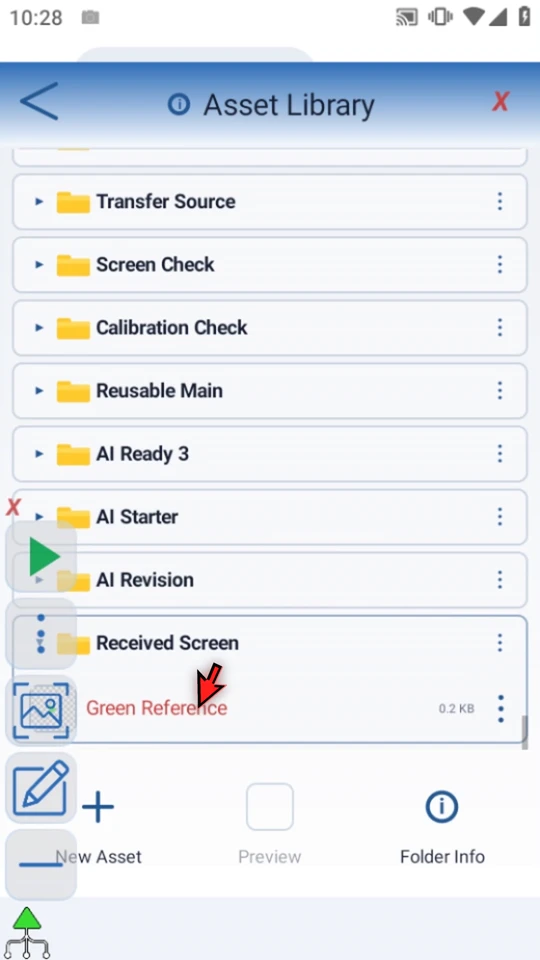
Return to Script Library, open Assets and expand Received Screen. The received reference is marked for calibration even after Import Exact. Open Green Reference's menu and choose Calibrate. Assets belong to their scripts; renaming this received script does not relocate the original's saved image.
Capture and crop the local match
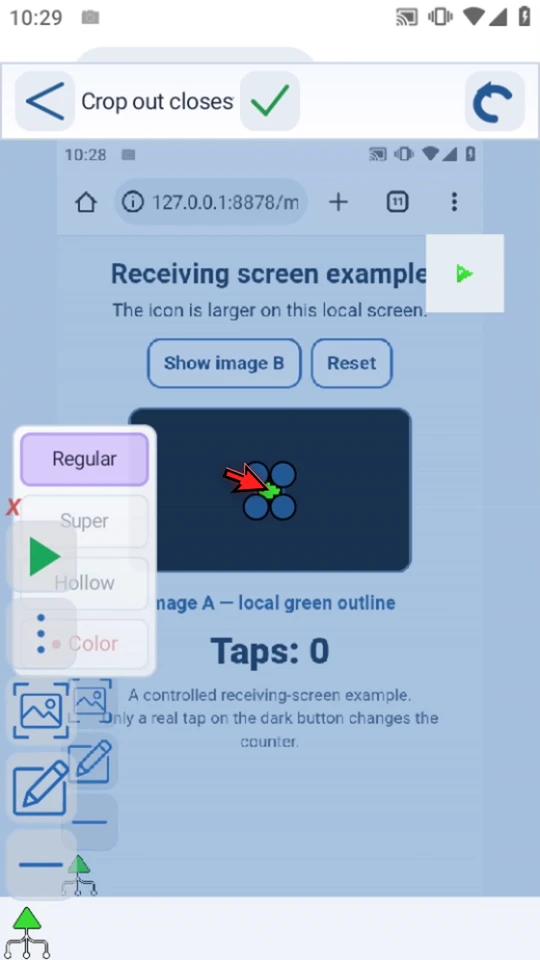
The draggable original thumbnail helps you identify the image. Move it away from the target, then use the check mark to capture the current screen. If Android asks, allow screen capture. In Regular crop, fit the rectangle closely around the local icon and refine the actual handle positions. Keep stable, distinctive pixels. For Super, Hollow, Color and other crop details, use the shared Asset Creation guide; there is no need to recreate the reference for every command tutorial.
Save once and inspect the saved pixels
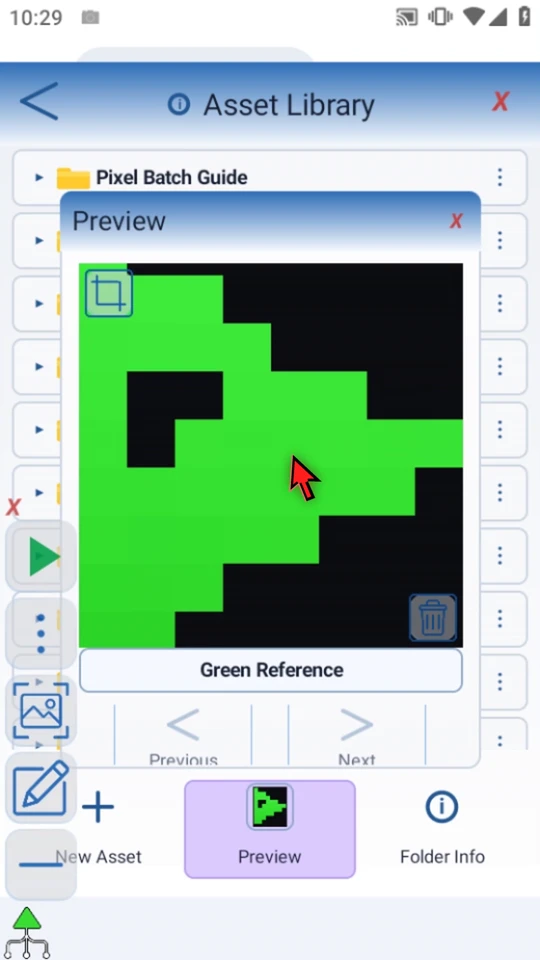
Use the top check mark once to save the calibration. ScriptTap returns to the populated Asset Library. The selected Preview opens this copy's saved local image. The received reference is updated; the source script and saved STS package are not rewritten. Ordinary STS receipt requires local image calibration independently of coordinate choice. Missing historical capture information is not a reason to assume an old reference already fits.
Validate setup and review the requested access
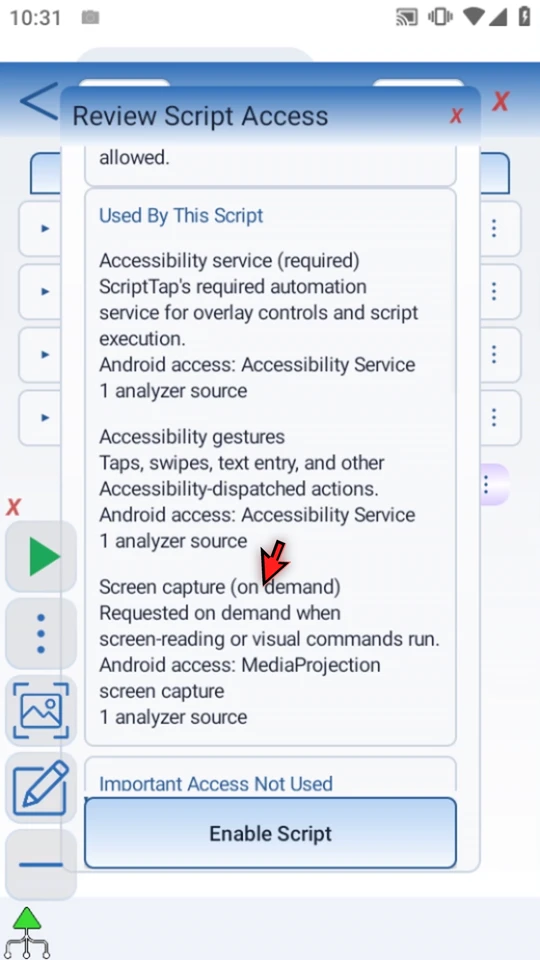
Close Preview, return to the example screen, and use the main overlay menu to open Scripts. Validate Received Screen, then choose Enable. This package originated from an AI-imported script and carries its review requirement, so Review Script Access appears. Read Used By This Script and the separate Important Access Not Used information before selecting Enable Script. This example uses Accessibility service, gestures and on-demand screen capture. The review is not an Android permission grant, and it does not confirm your targets are correct.
Run a small, visible test
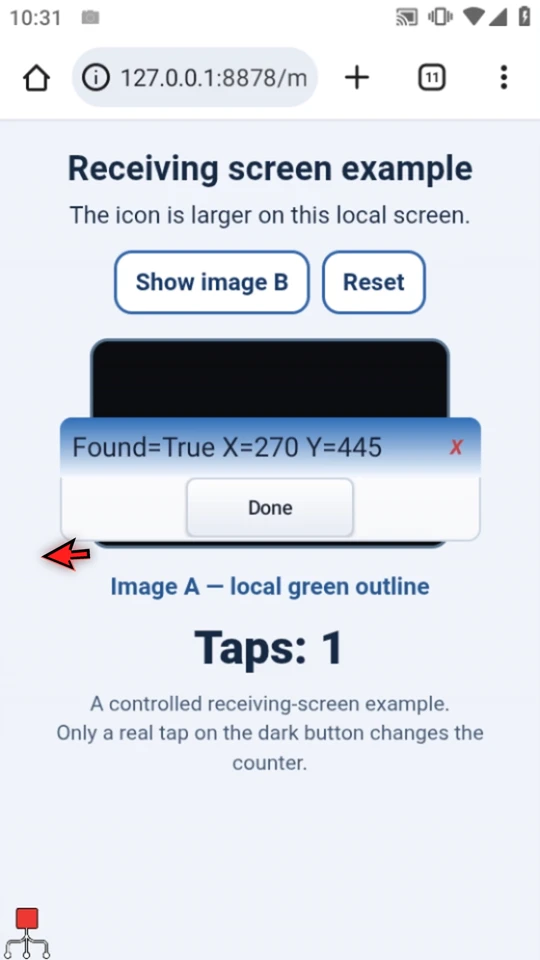
Close Script Library and confirm the icon is visible with Taps: 0. When the script is complete, simply use the Play button in the main overlay. This real run displays Found=True X=270 Y=445, and the counter rises to Taps: 1. Press Done; the script finishes naturally and the overlay returns to idle. Check the absent-target case as well before relying on a workflow on another setup.
Treat these as separate checks
- Coordinates: choose an import policy, then inspect real targets and search areas. Transposition is not app-layout adaptation or runtime scaling.
- Images: calibrate received references against stable pixels on the current screen. Coordinate conversion does not resize those images.
- Access and execution: review the commands and their requested access, allow required Android permissions when prompted, validate setup, and run a controlled test. A successful import alone proves none of these runtime assumptions.
For a more complex workflow, test one small part at a time before running the full sequence. Keep a known-good package and import only from sources you trust.
Build on the same workflow
Read the full narration
Want to reuse a script on another setup? Import its package, review the targets, and test it before relying on it.
This receiving workflow uses one test device. Our example page shows a larger version of the same icon, making the need for a local image reference visible. This is not a second-device compatibility test.
The prepared Screen Check package is already in Files. Open its menu and choose Import. For creating and transferring the package, see the Import and Export guide.
Import Exact keeps authored coordinates. Transpose Coords adjusts supported literal screen coordinates for the receiving display. It does not follow variables or expressions, rearrange an app's layout, or scale saved images.
We are using the same display size, so choose Import Exact. ScriptTap creates a separate, active copy. The original stays intact.
Keep a received script disabled while you inspect it. Rename this copy so it is easy to recognize.
Open the copy in the editor. This prepared example finds an icon, uses SetVariable to format the result, then shows it with PromptMe. Those supporting steps make the image search easy to check.
Check the search area and saved reference. Tap Target is on, and the found status and coordinates go to b1, x1, and y1. A valid script can still point to the wrong part of a new screen.
Open Assets and expand the received script's folder.
The reference needs calibration even though we kept the coordinates. Choose Calibrate for Green Reference.
The original thumbnail helps identify the image. Move it aside so it does not cover the local icon, then capture the receiving screen. If Android asks, allow screen capture.
In Regular crop, fit the rectangle closely around the local icon. Keep only the stable pixels needed for matching. The shared Asset Creation guide explains the other crop tools.
Save once. ScriptTap updates this copy's image reference. Use Preview to check the saved local image. The original package is unchanged.
Close Preview and return to the example screen. Use the main overlay menu to open Scripts again.
Back in Scripts, validate the copy. Validation checks its setup, but a real run is still needed to confirm the target.
Enable the script and review its requested access. This example uses Accessibility, gestures, and screen capture. Approve only behavior you recognize. This review is separate from checking the script's targets.
Return to the example screen, with the icon visible and the tap counter at zero.
When the script is complete, simply use the Play button in the main overlay.
Found is true, the coordinates point to the icon, and the real tap counter rises to one. Press Done. The script finishes naturally.
Run a small test on each setup, including when the target is absent. Coordinates, image calibration, and permissions solve different problems. A successful import alone does not prove the workflow is ready.