Choose where the script works
Choose points and screen areas
Target the location you need without guessing coordinates. Use one point for a tap, or a rectangle when a command needs a screen region. This walkthrough saves both selections, runs a short script, and inspects its captured image.
Watch the point-and-area workflow
Follow the steps
Start with a separate example
Create and select a new blank script. This example is named Targets. Open its editor; the first-script guide covers creation and selection if you need those steps.
Choose one tap location
Manually drag Tap into Live Script, then open the target icon on the placed row. If Android asks, allow screen capture. Drag the selector's crosshair to a clear location away from home-screen icons. Moving this selector chooses a point; it does not activate the app underneath. Use the check mark to save it.
The demonstration saves
429,619. These are this device's coordinates, not a value to copy blindly onto a different screen.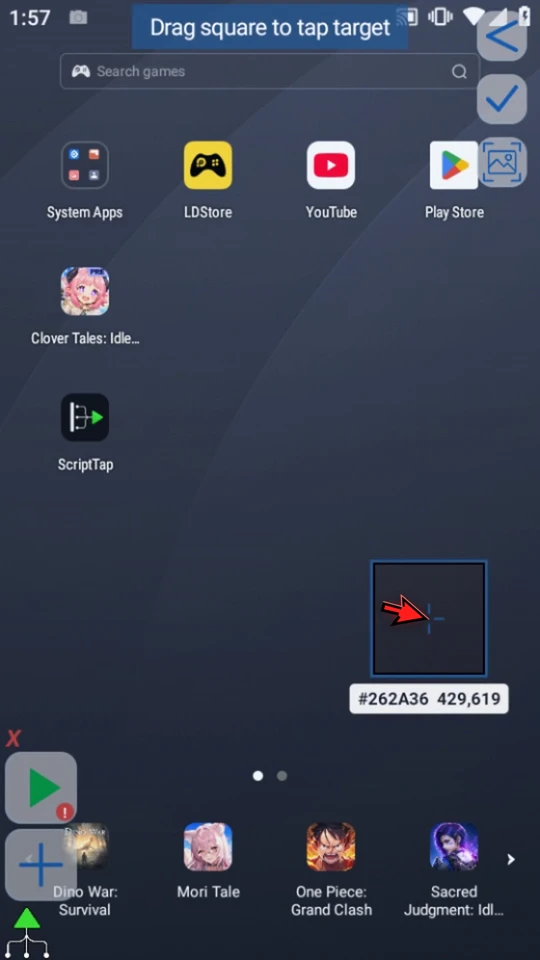
Cancel an unwanted target change
Reopen the placed Tap row's target icon, move the crosshair somewhere else, then choose the selector's Back control instead of its check mark. The row retains
Tap(429,619).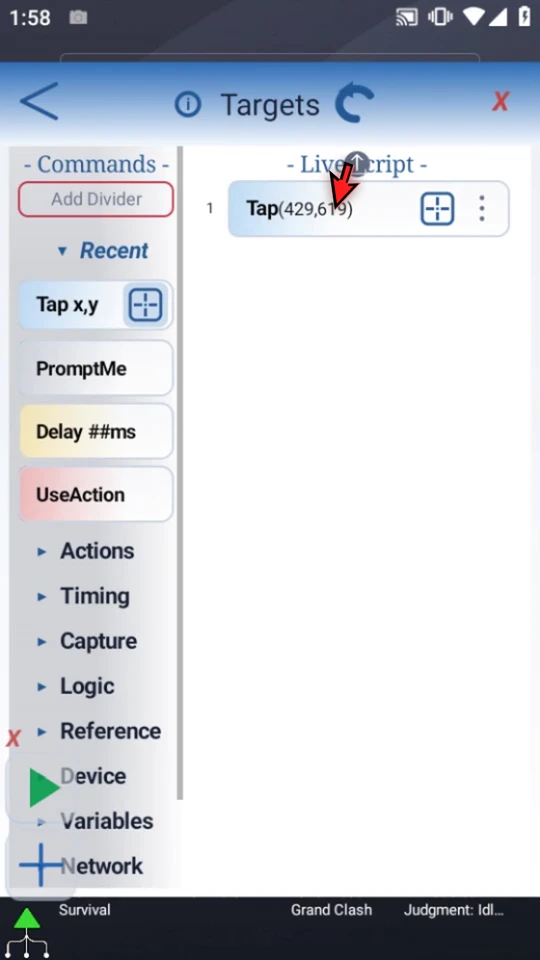
Choose a region instead of one point
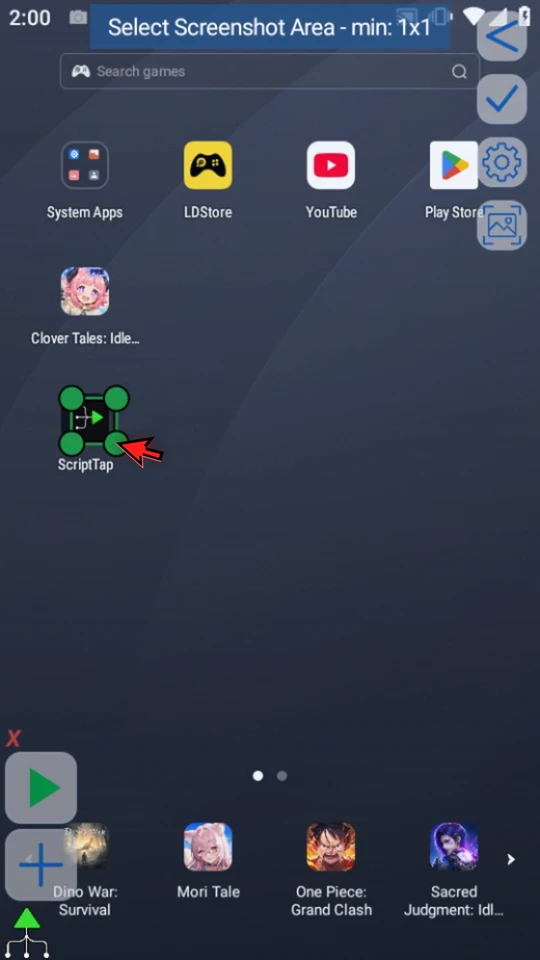
Close Recent and expand Debug. Manually drag Screenshot below Tap. Double-tap the placed row, enable Specify Area, and open its area icon. A point defines one touch location; this rectangle defines which pixels Screenshot will save.
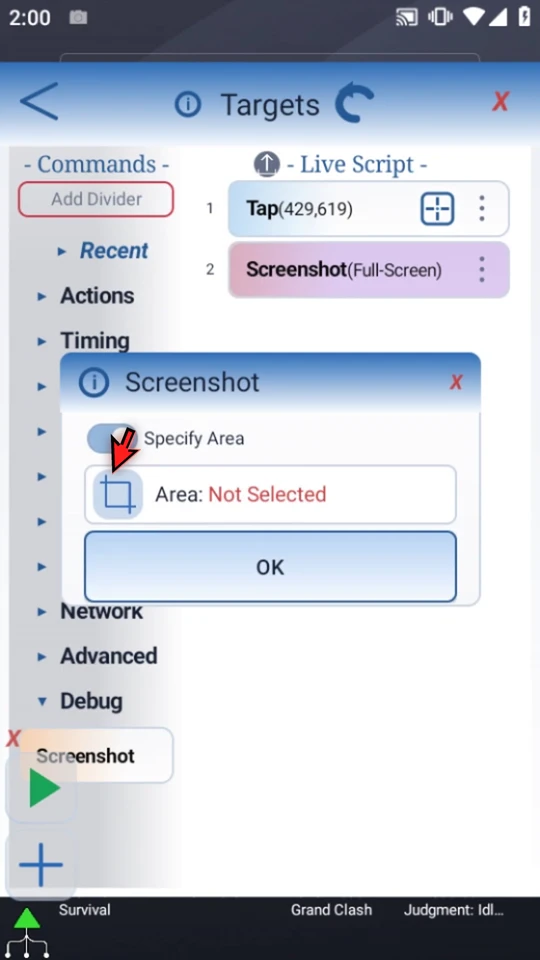
Resize and reposition visually
Drag the green corner handles to resize. While the rectangle is large enough to grab away from its handles, drag its interior to move the whole region without changing its size. Then fine-tune the corners tightly around the icon detail you want. The video preserves all actual drags.
This rectangle is a screen region, not an image-matching asset. In this example it surrounds part of the ScriptTap launcher icon and excludes unrelated content.
Inspect exact bounds and commit the command
Use the selector check mark to return to Screenshot. Tap the Area text to inspect the exact top-left and bottom-right display-pixel coordinates. The demonstration uses
72,399–115,443. Keep those values and confirm the coordinate dialog, then choose OK in Screenshot to save the command draft.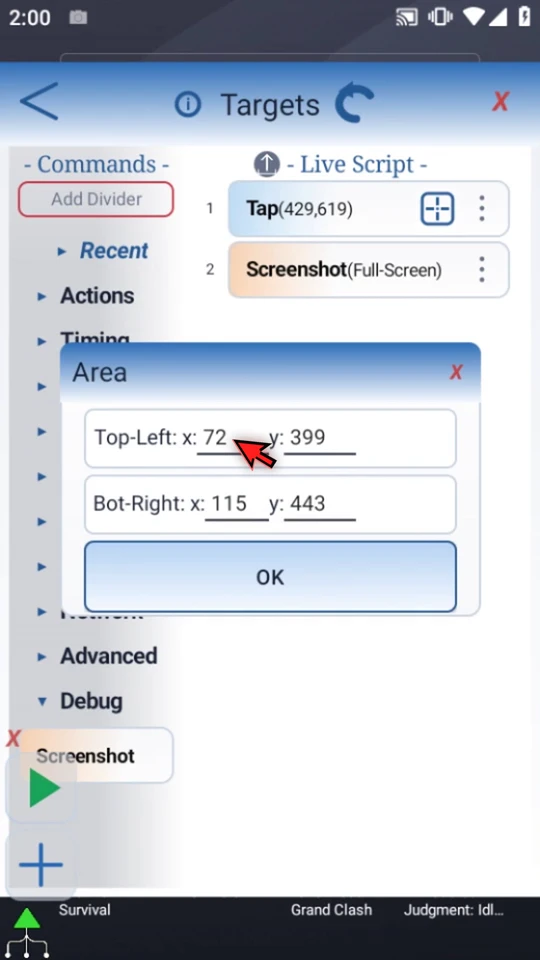
Add a visible finish point
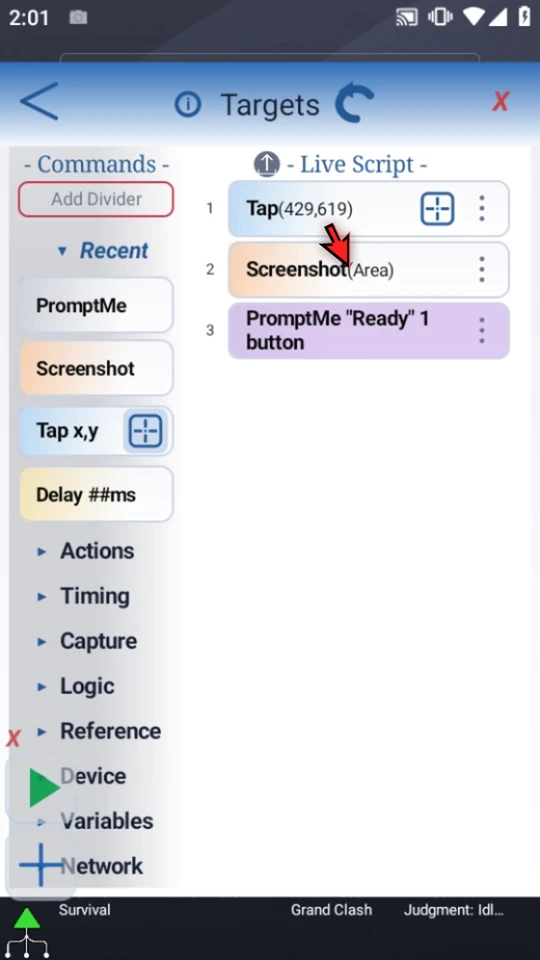
Open Recent and manually drag PromptMe below Screenshot. Keep Standard and This Script Only. Enter Header Ready, add one button with caption Done, and type the actual Boolean output name
b1. Choose OK.The sequence is Tap → Screenshot (Area) → PromptMe. Recheck coordinates after changing the device, orientation, or layout.
Run and inspect the real result
Close the editor, then use Main Overlay Play. The script taps the clear location, captures the rectangle, and displays Ready. Choose Done to finish naturally.
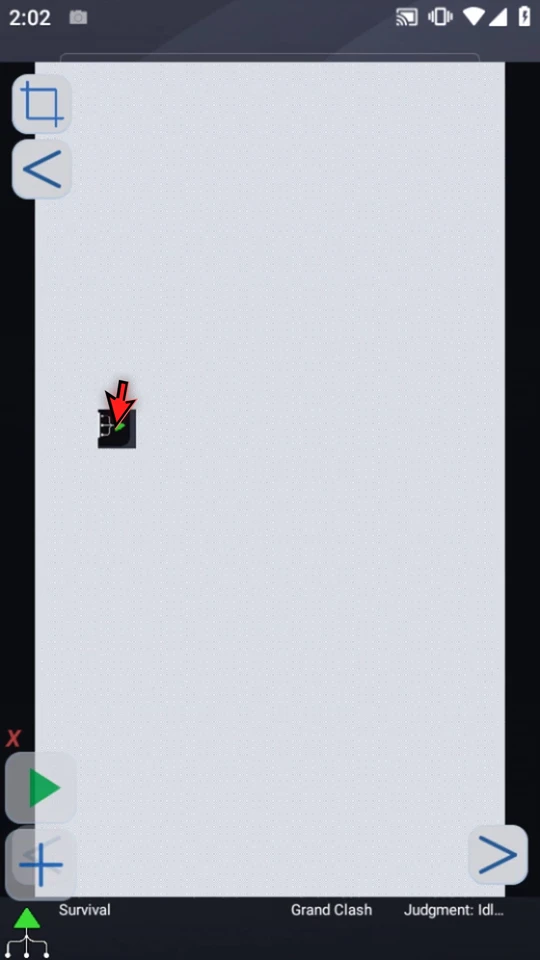
Open the main controls, expand Plus if needed, then choose Menu → Scripts. Compact the overlay, choose Assets → New Asset to open Recent Screenshots, select the newest icon crop, and choose View. Browsing or viewing a screenshot does not create an asset. Only the selected rectangle was saved.
Choose the tool for the task
This walkthrough covers point and rectangular-area selection. Use the related command guides for gesture paths, multiple points, or selecting an app's accessible UI element. Create reusable image references with the separate crop walkthrough.