Command video guide
TextTransform
TextTransform prepares text for later script commands. It can search, extract, replace, split, join, trim, change capitalization and parse numbers. It does not type into another app. This Intro / Case guide builds a short shared demonstration script.
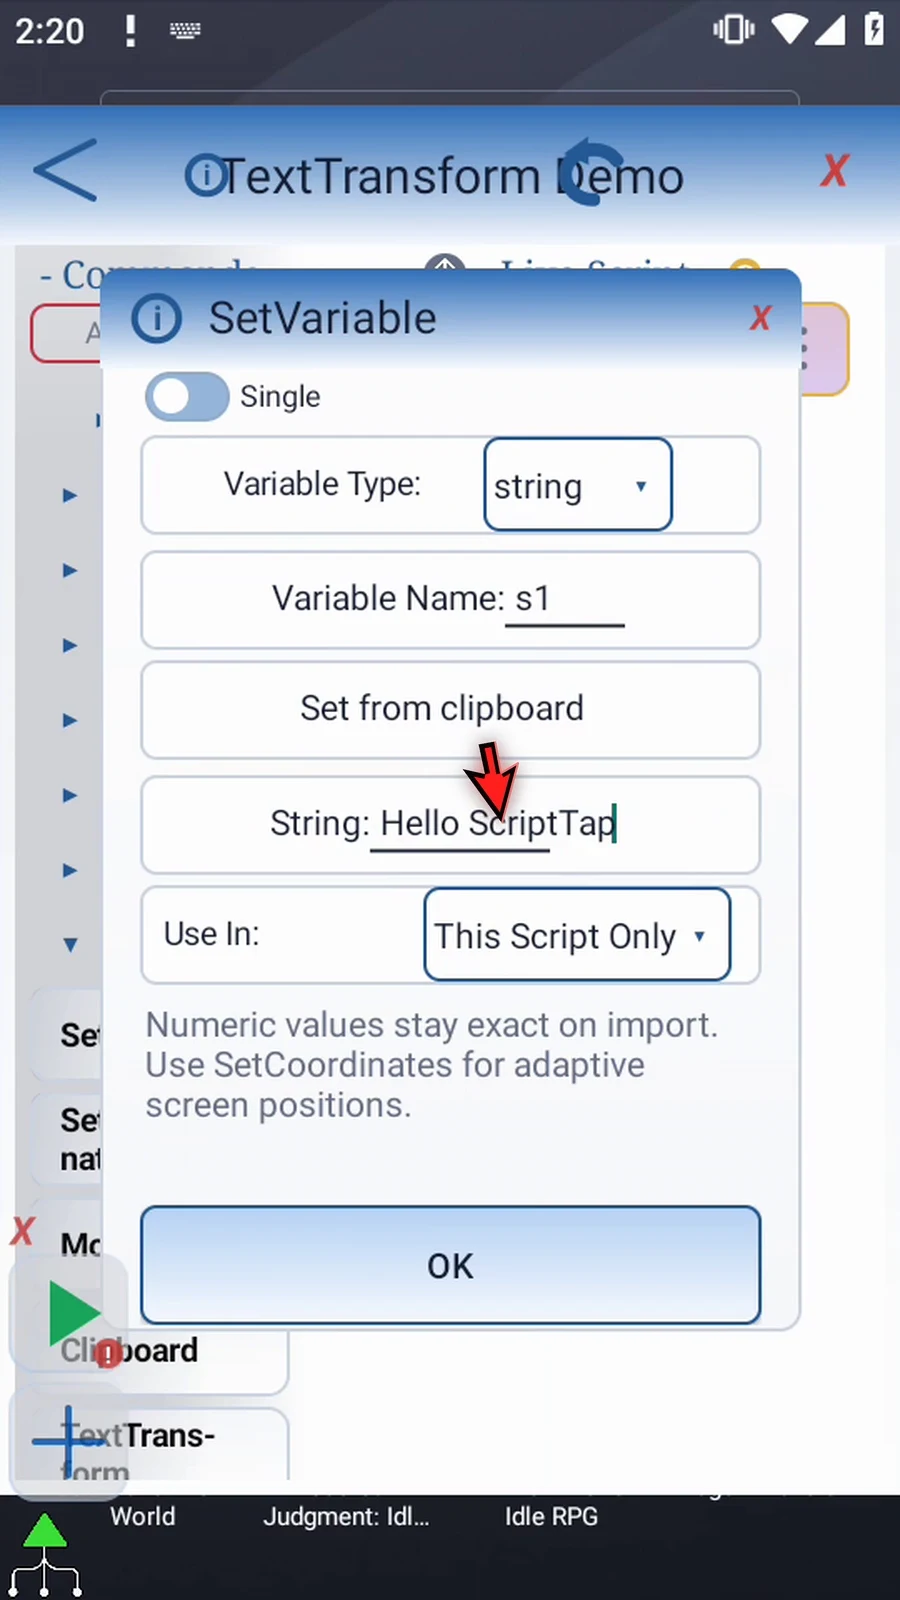
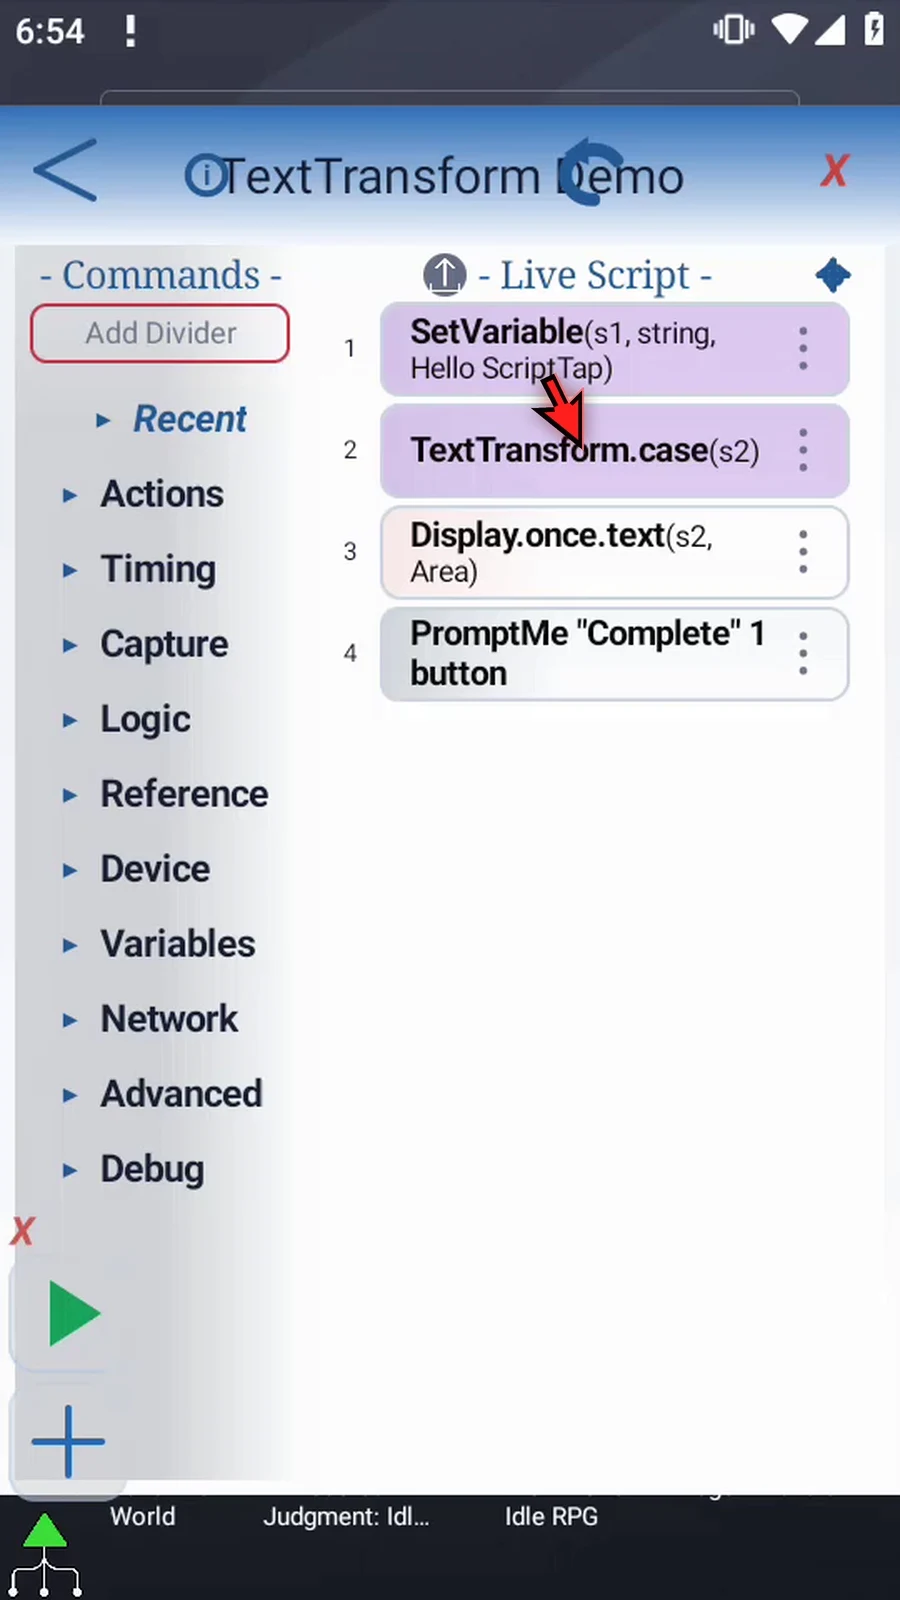
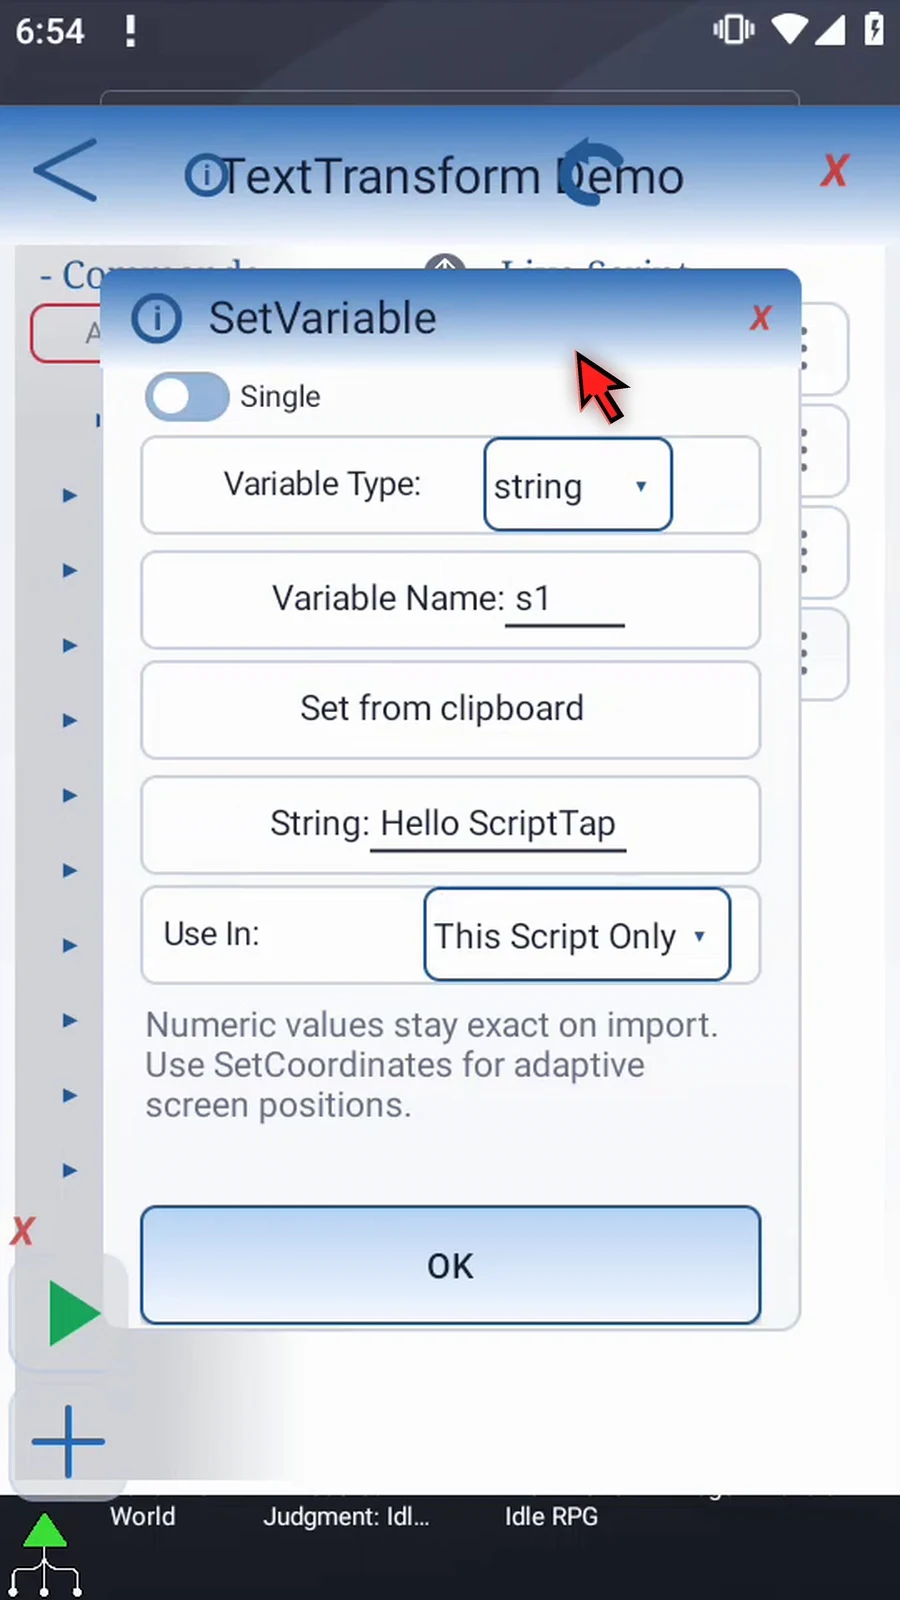
Create and name a new script. Manually drag SetVariable from Variables, keep Single, choose String, and assign s1 the text Hello ScriptTap. Keep This Script Only. This supplies the source before the transformation runs.
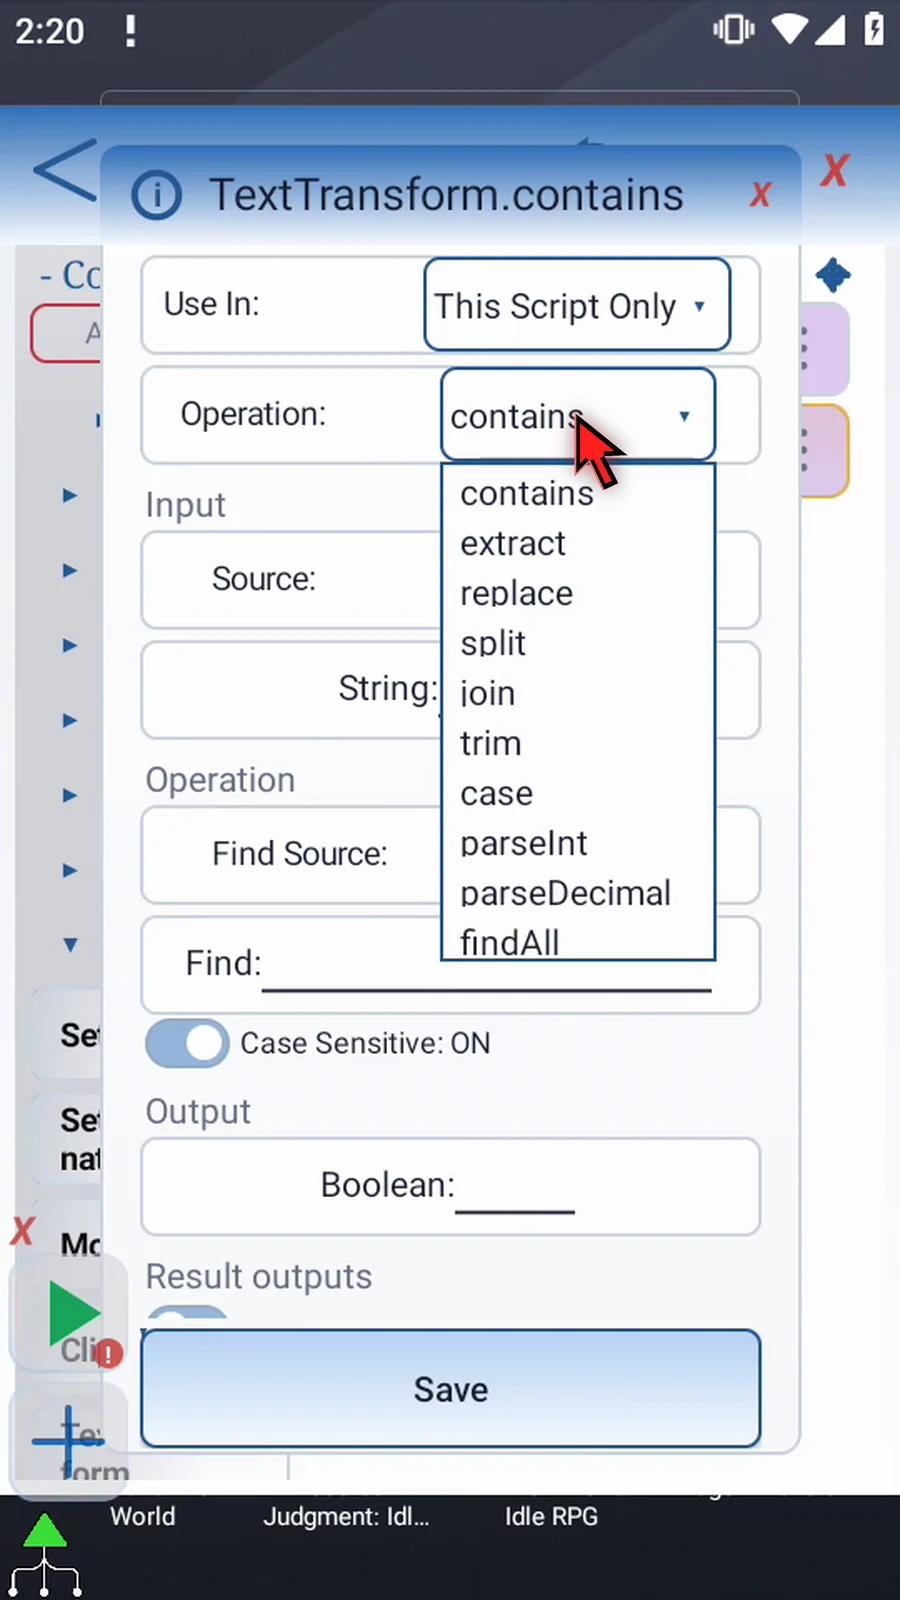
Manually drag TextTransform after the assignment. Its ten native operations are contains, extract, replace, split, join, trim, case, parseInt, parseDecimal and findAll. Choose case here. Changing the operation clears settings owned only by the outgoing operation; review the new operation and its output before saving.
Use In: This Script Only stores results locally; Script Thread shares them within the parent script's call tree. The input can be literal Text or an earlier String var. Choose String var s1 and keep local scope.
Case: Lower converts letters to lowercase; Upper converts them to uppercase. Choose Upper and set the String output to s2. A separate output preserves the original s1. Non-letter characters remain as text; the command stores a String for later commands rather than displaying it by itself.
Save Outputs: optional Success needs a Boolean destination and Error needs a String destination. These are status results, separate from the transformed text. Leave Save Outputs off for this example and tap Save.
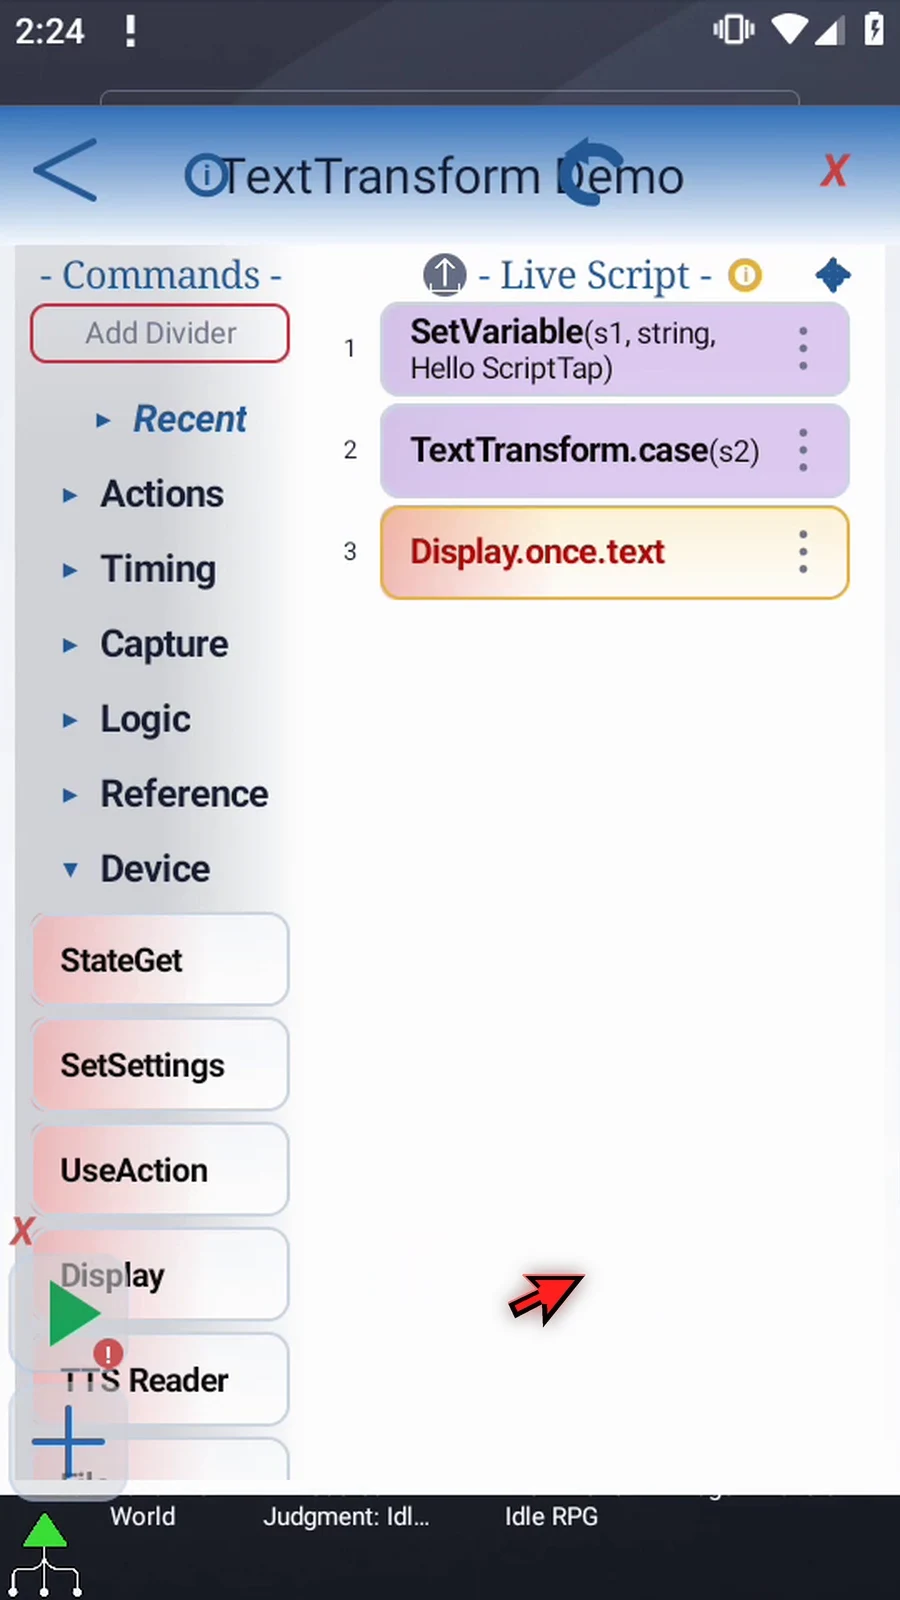
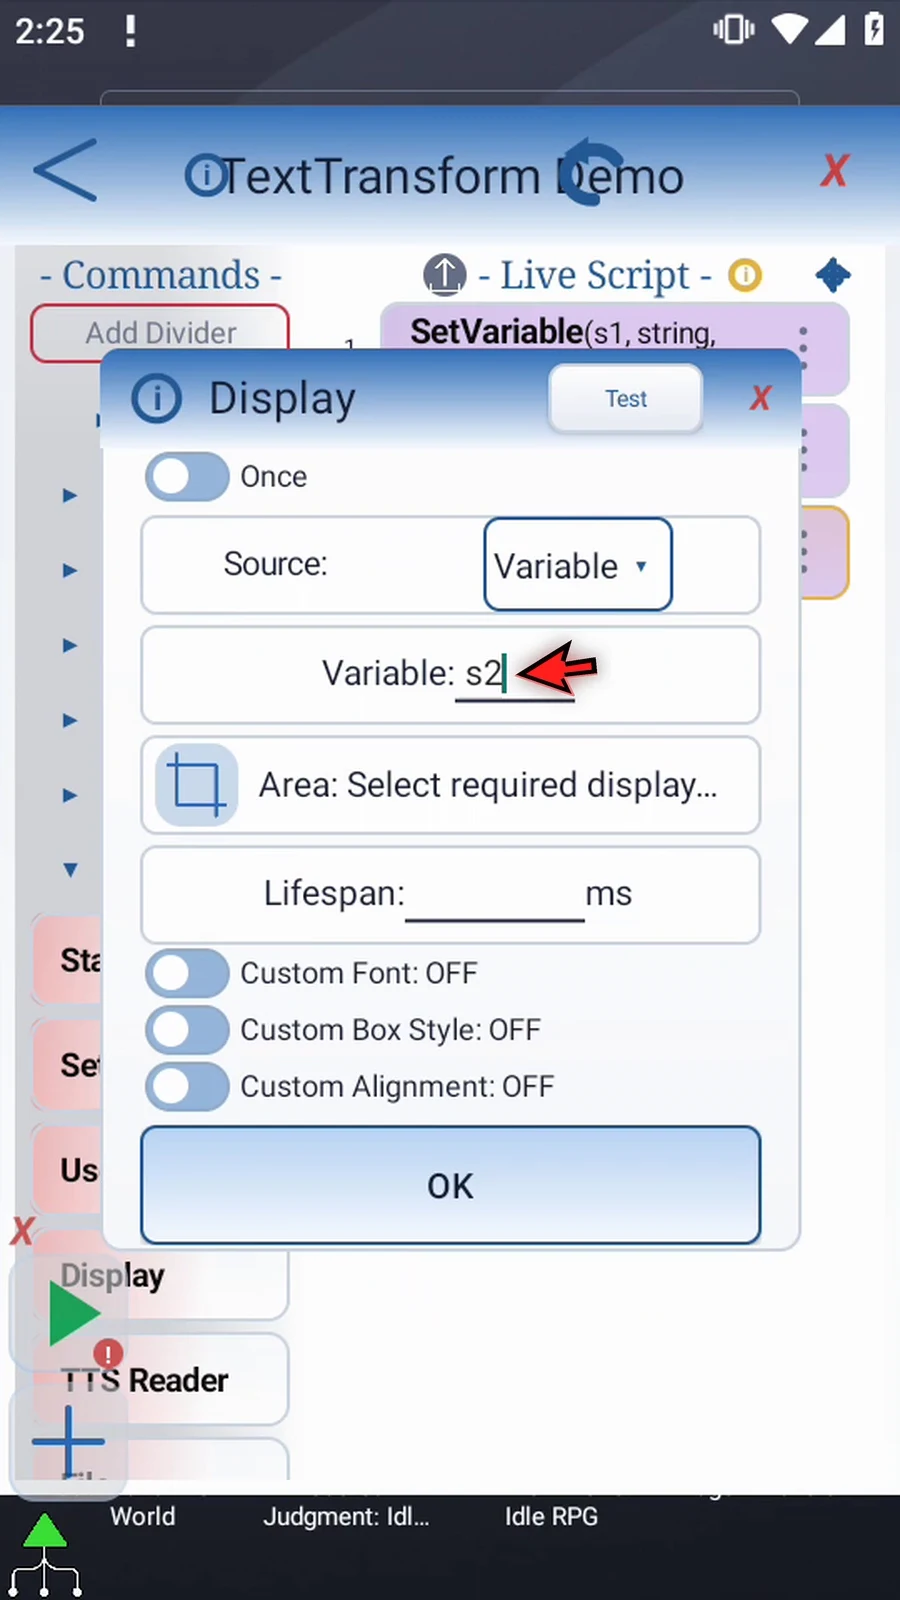
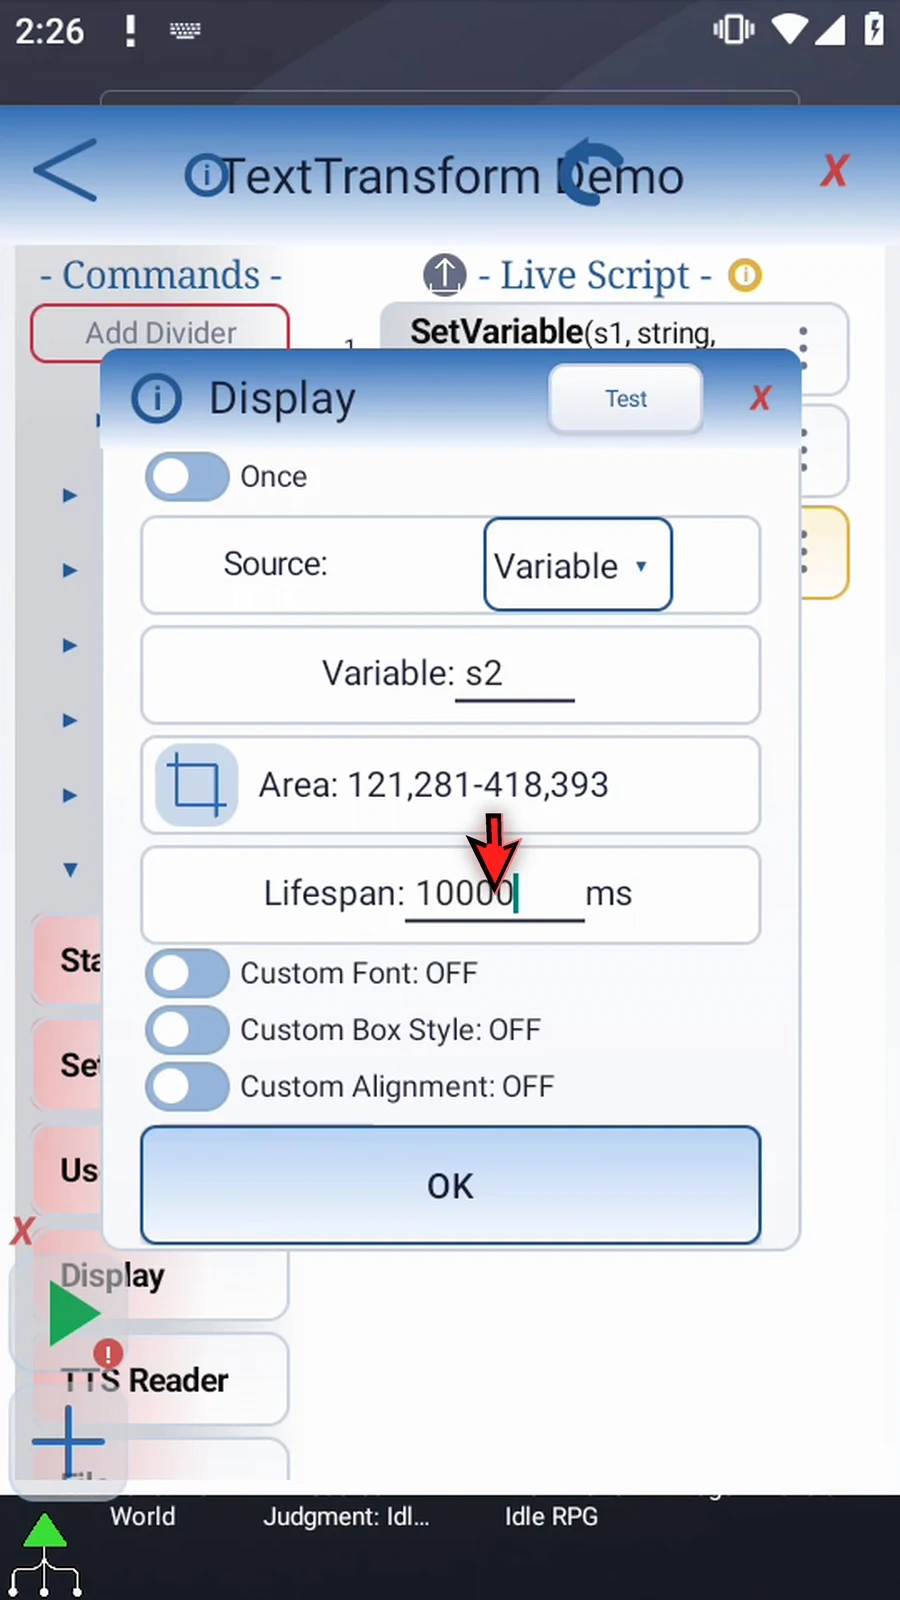
Manually drag supporting Display after TextTransform. Keep Once, choose Variable s2, select a clear screen area, and set lifespan to 10000 ms. If Android asks, allow screen capture. Keep the other display settings at their defaults.
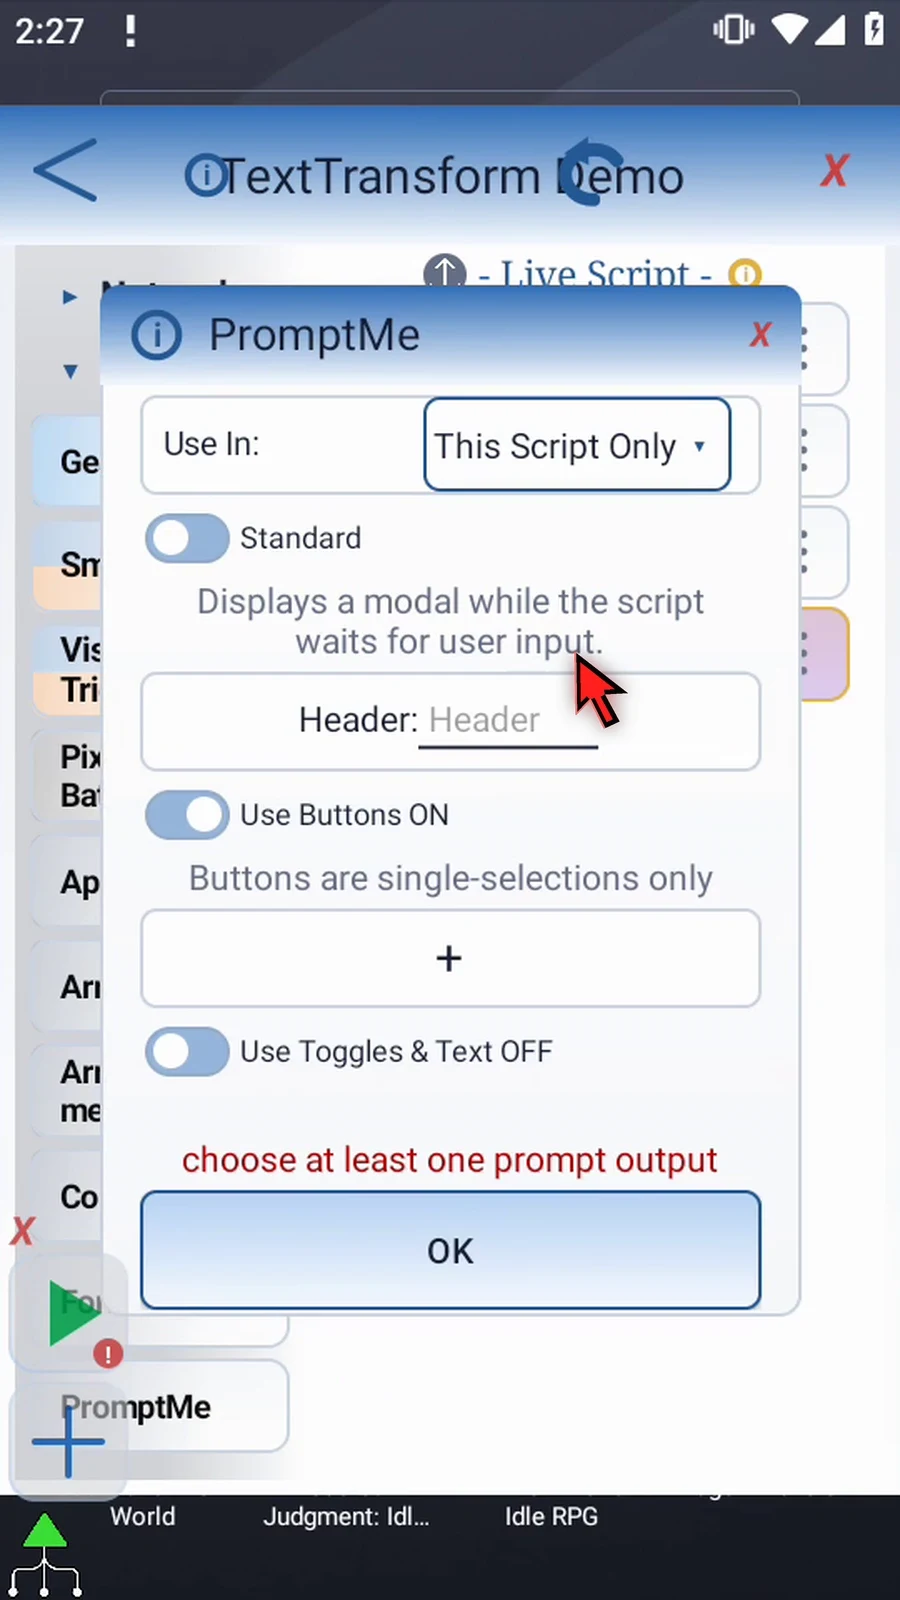
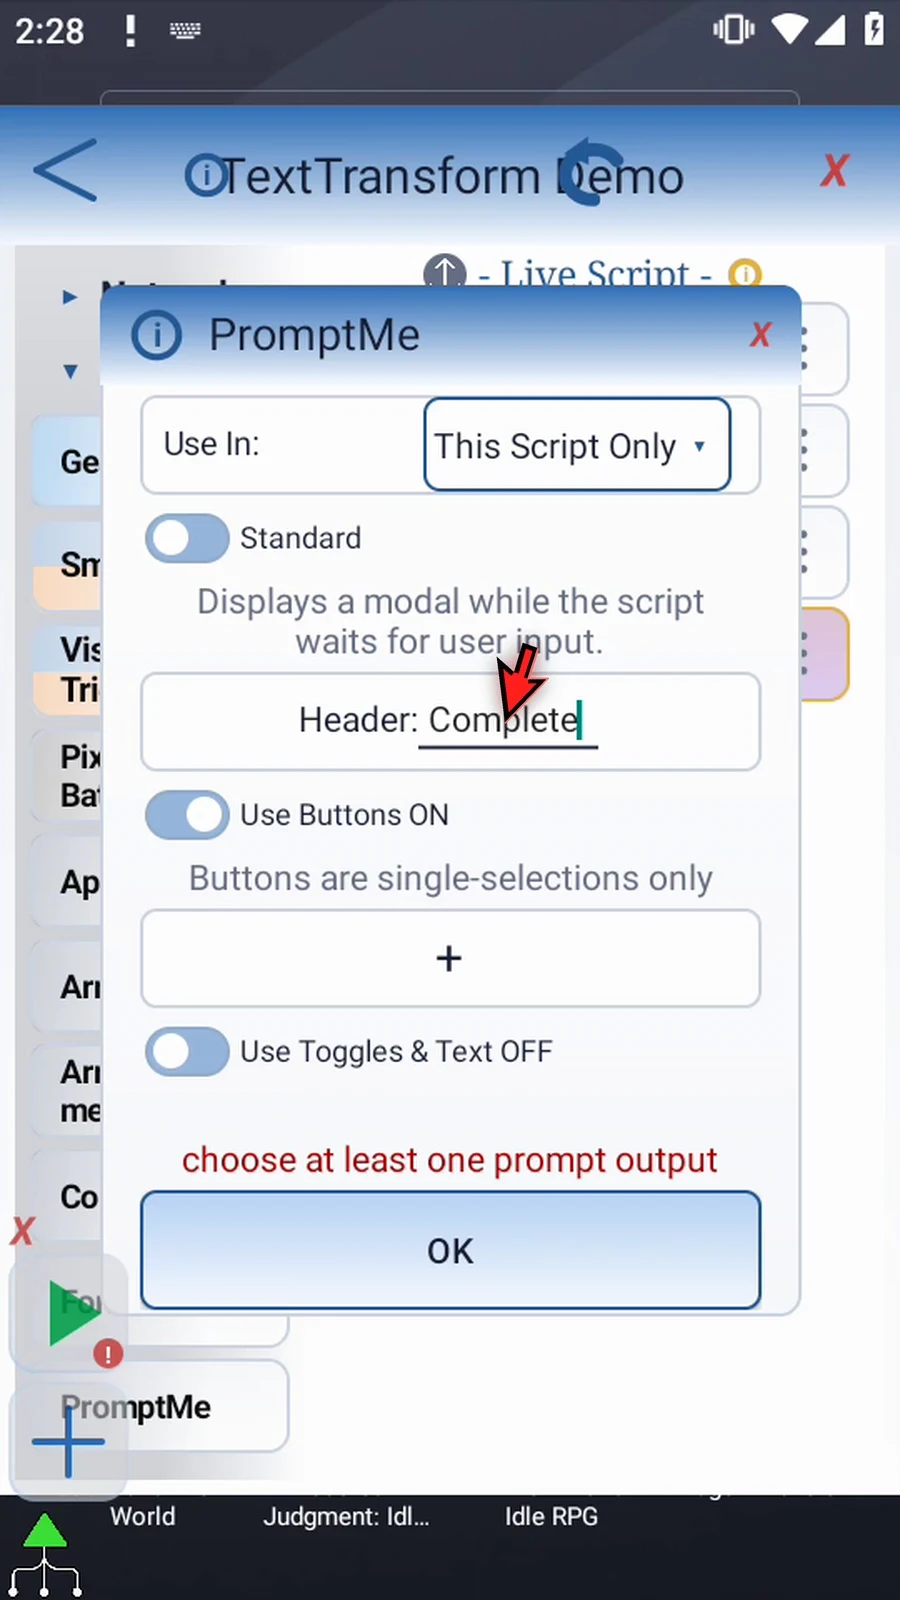
Manually drag a supporting PromptMe last. Keep the regular Standard prompt, Header Complete, and add one Done button with Boolean output b1. Leave Use Toggles & Text off. It confirms that execution reached the next command; Display shows the transformed value.
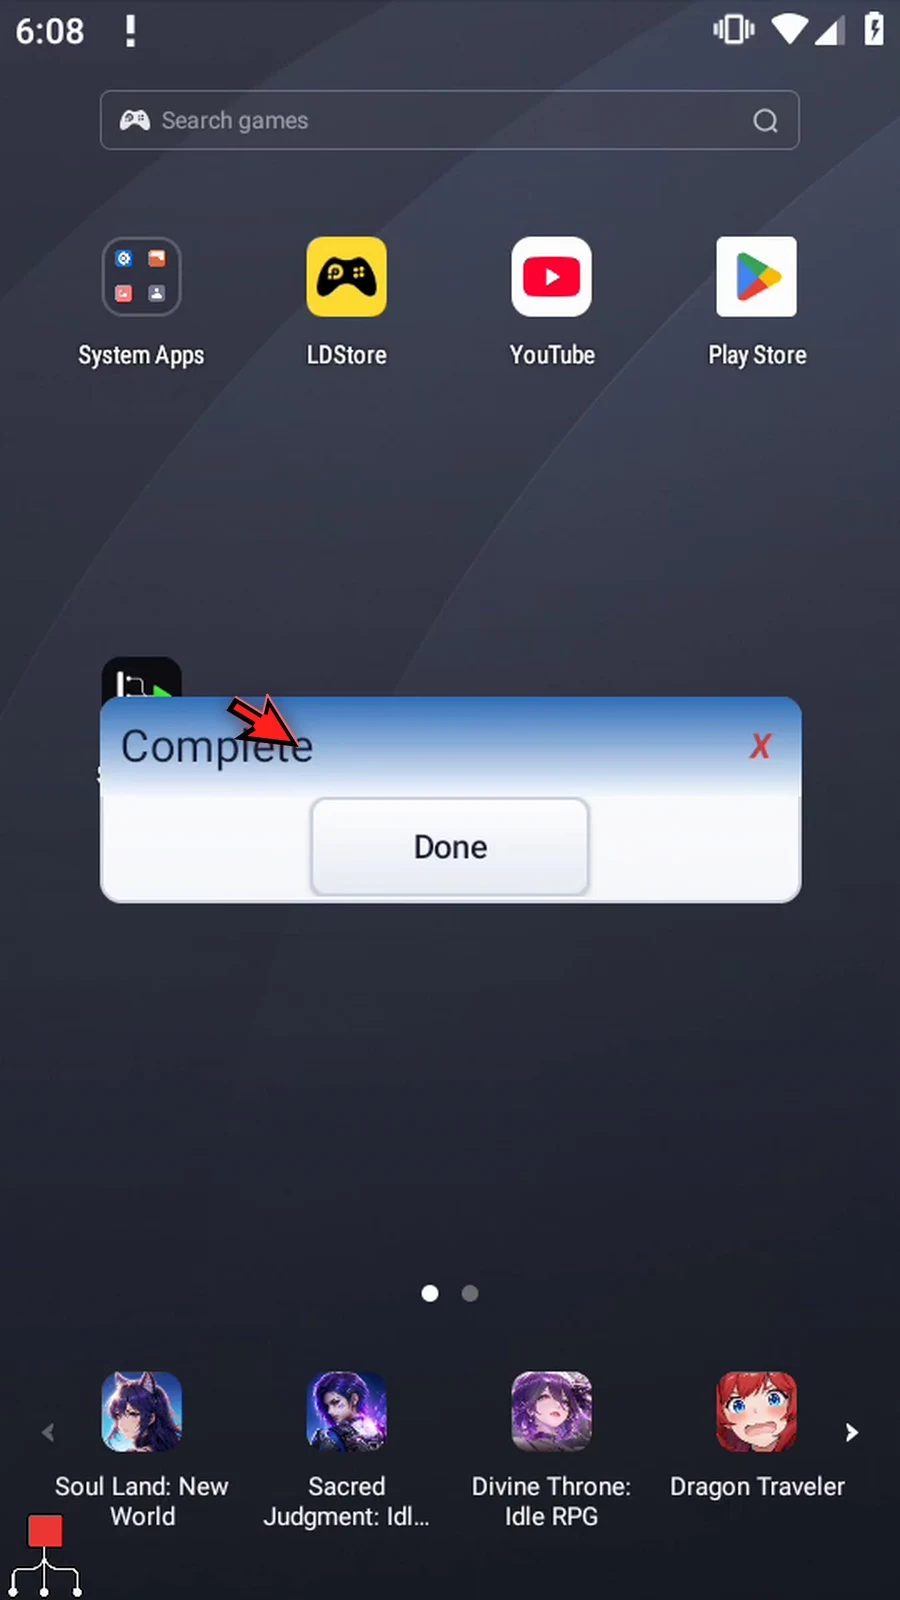
Close the editor and use Play. The genuine result is HELLO SCRIPTTAP, read from s2, while s1 remains Hello ScriptTap. After the real ten-second display, Complete appears. Press Done to finish automatically. Use Case when later commands need consistent capitalization.
Intro / Case
Step-by-step guide
Step 01 Text Transform prepares text for later script commands. It can clean, convert, search, replace, or split text. In this example, we will turn the text stored in s1 into uppercase and display the result.
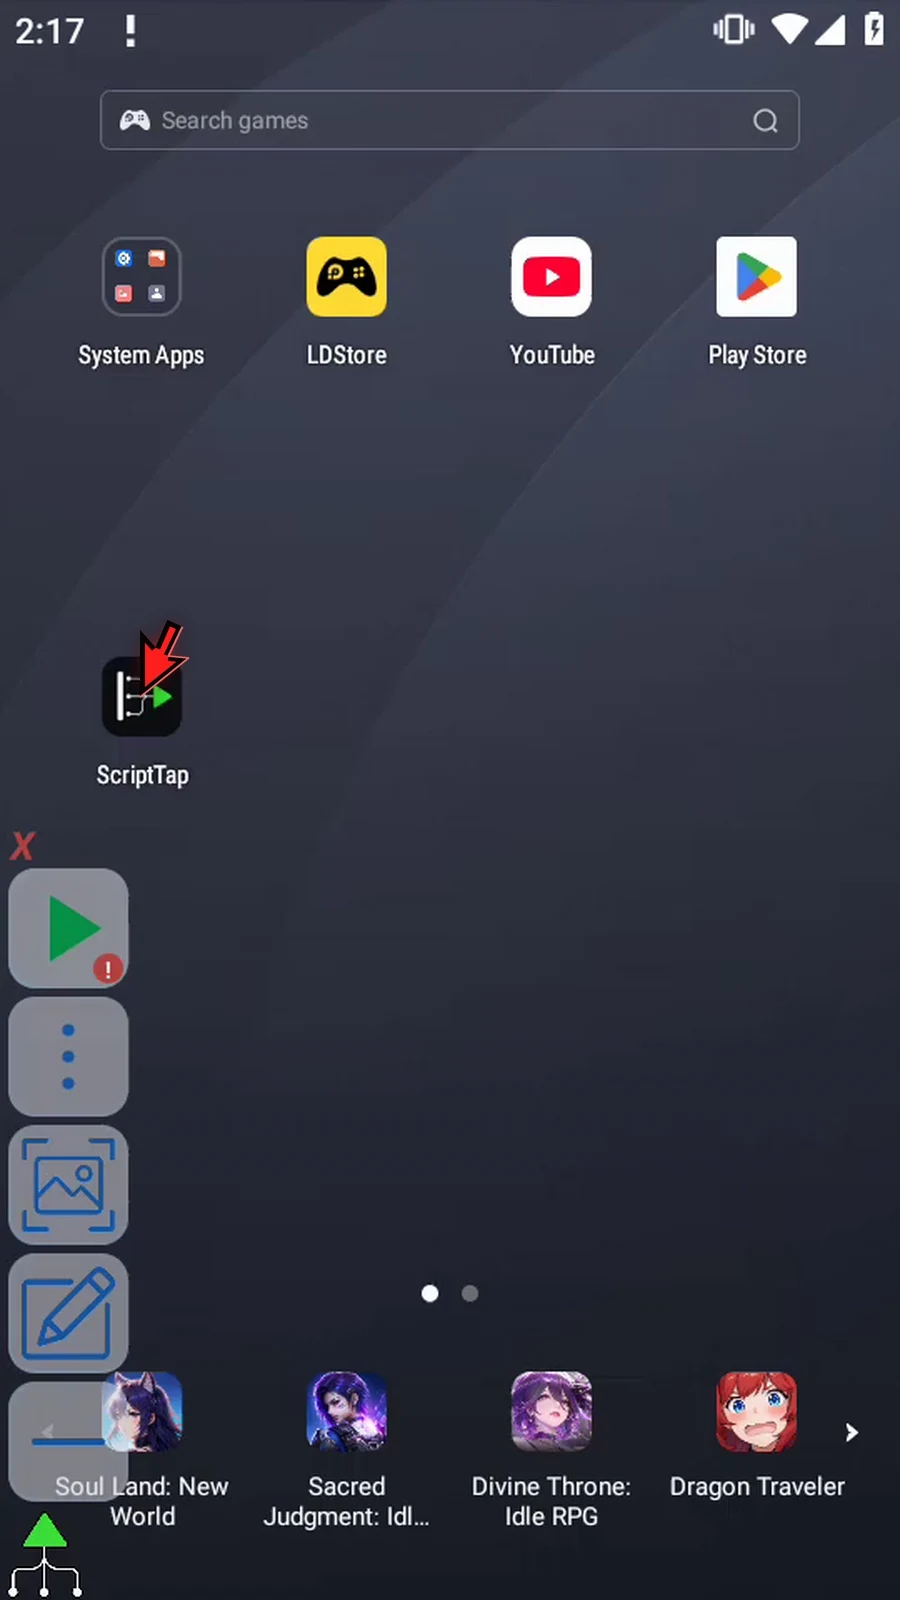
Step 02 Open the main menu, then Scripts.
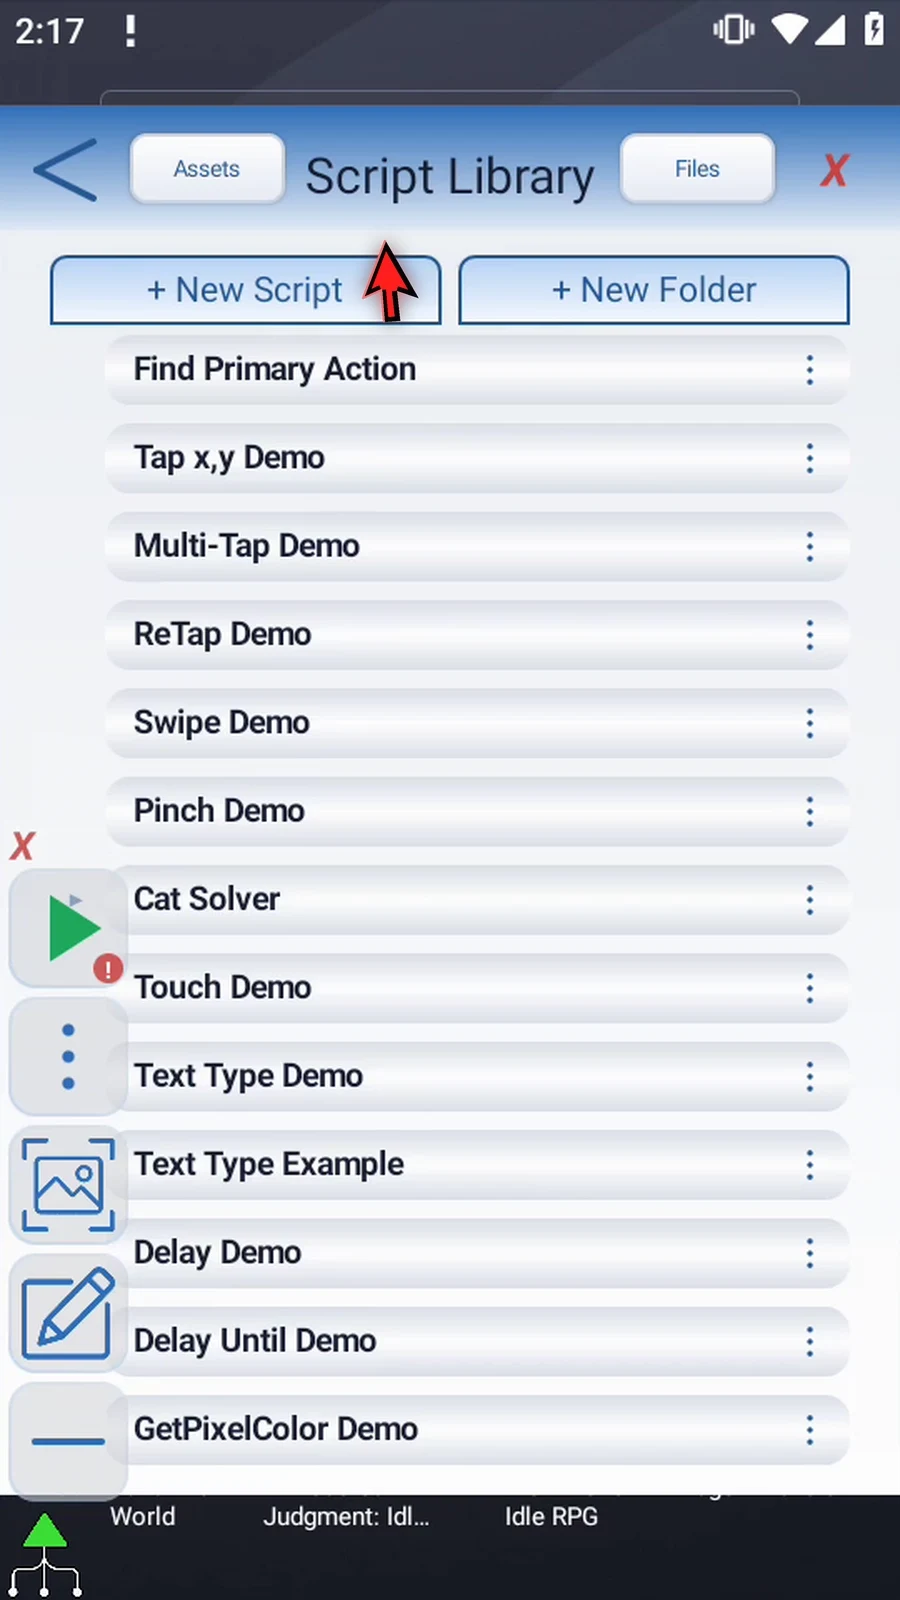
Step 03 Create a new blank script.
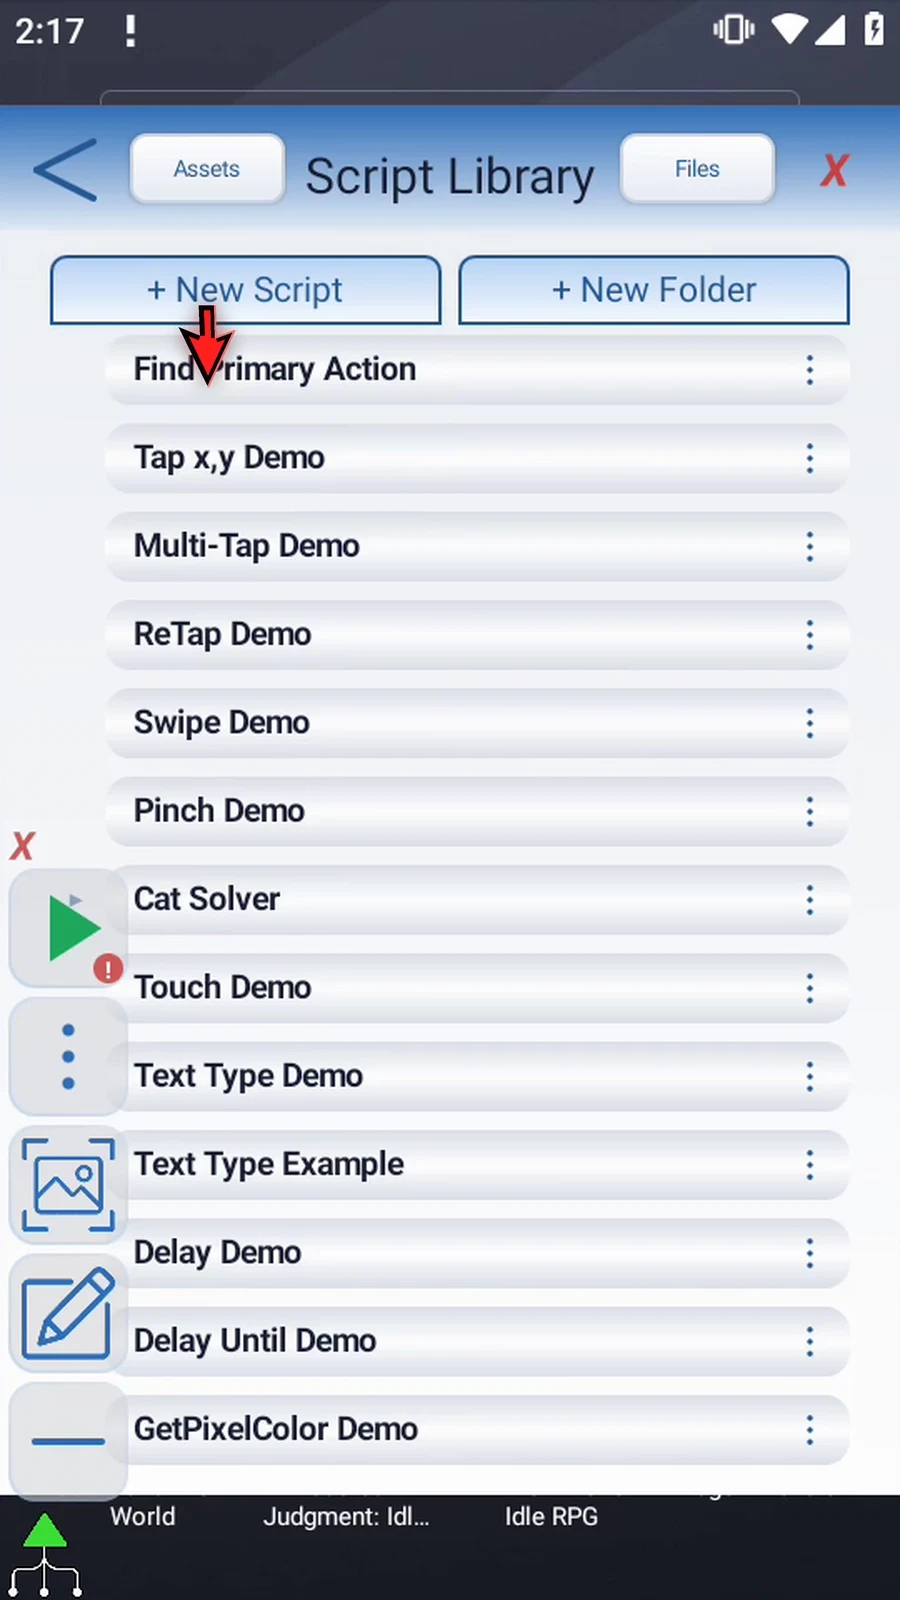
Step 04 Find the new script at the bottom of the library.
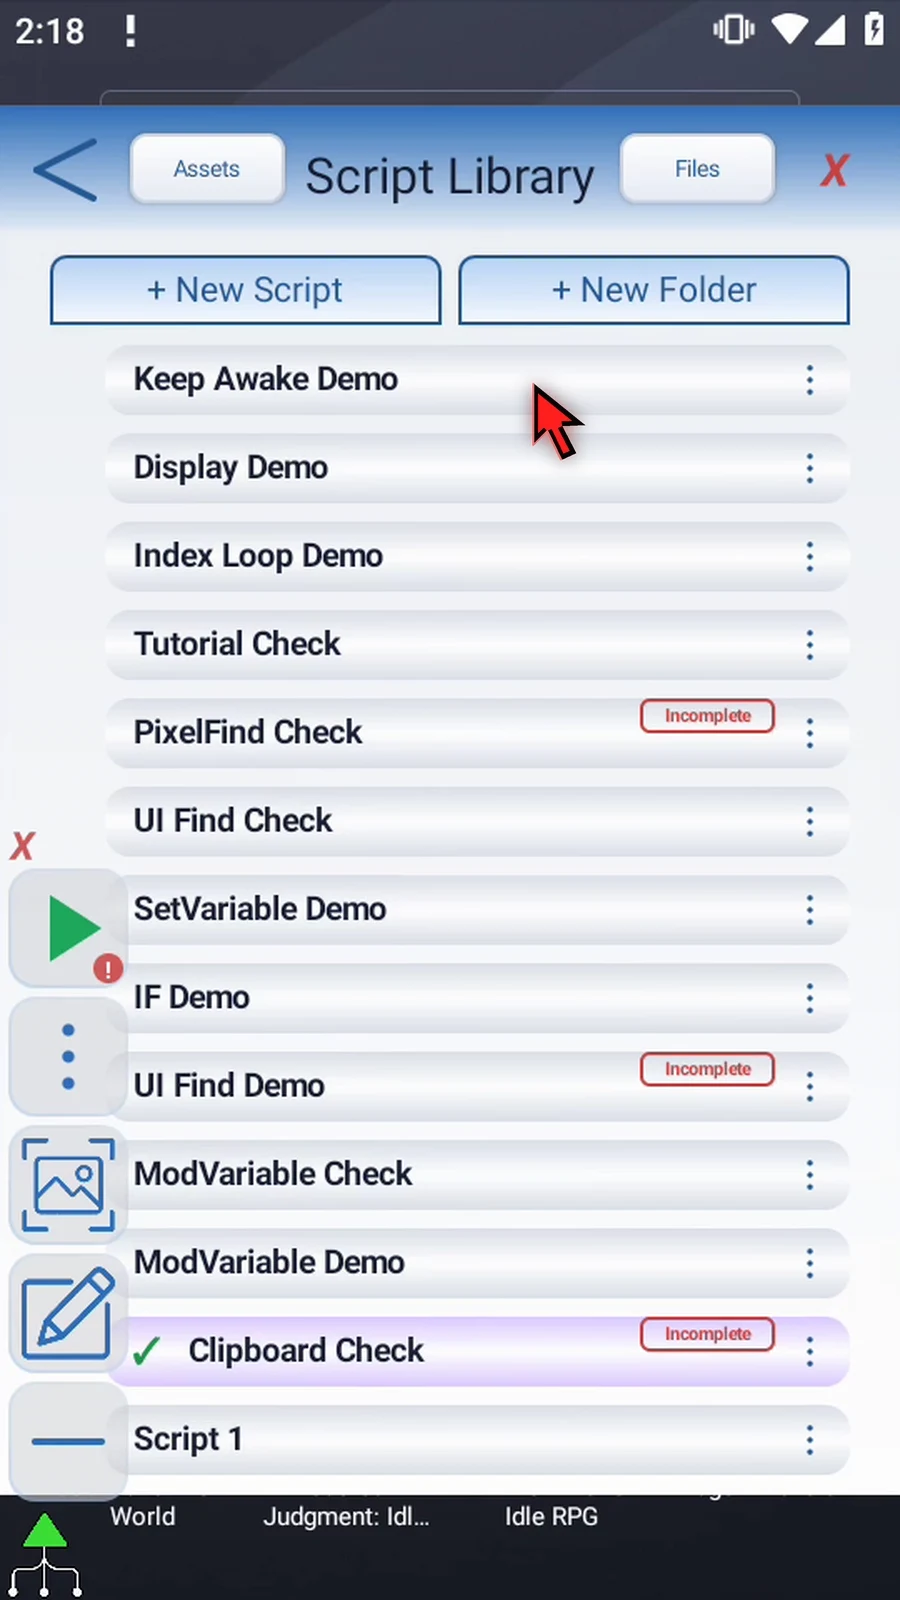
Step 05 Open its options, choose Rename, and pick a descriptive name.
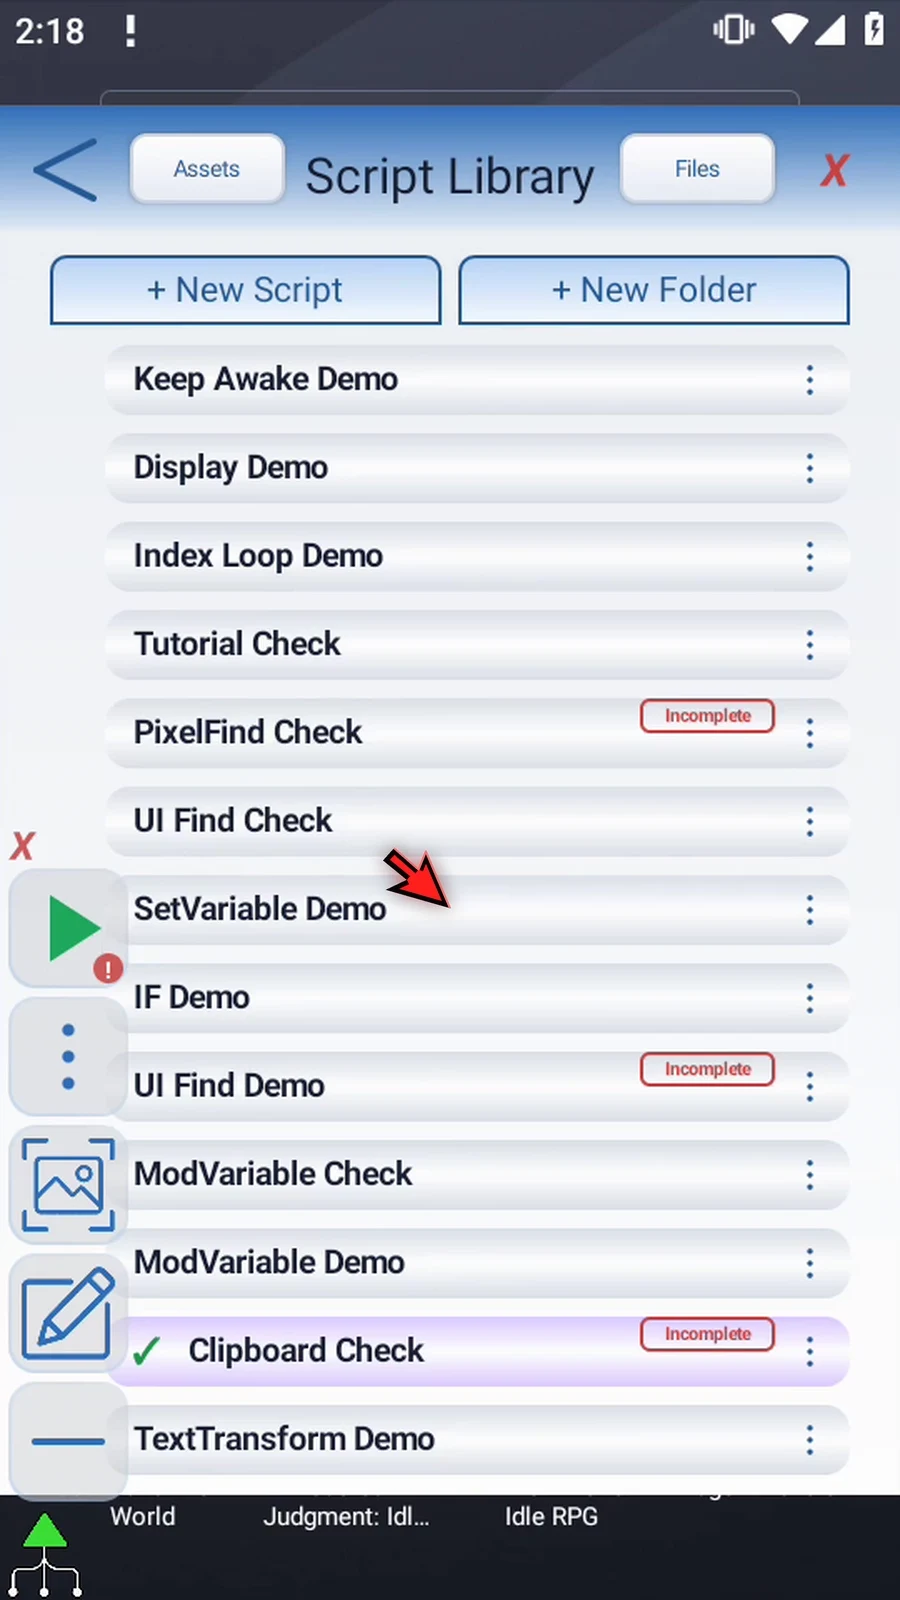
Step 06 Select the new script and open the editor. Collapse the extra overlay controls if needed. If Android asks, allow screen capture.
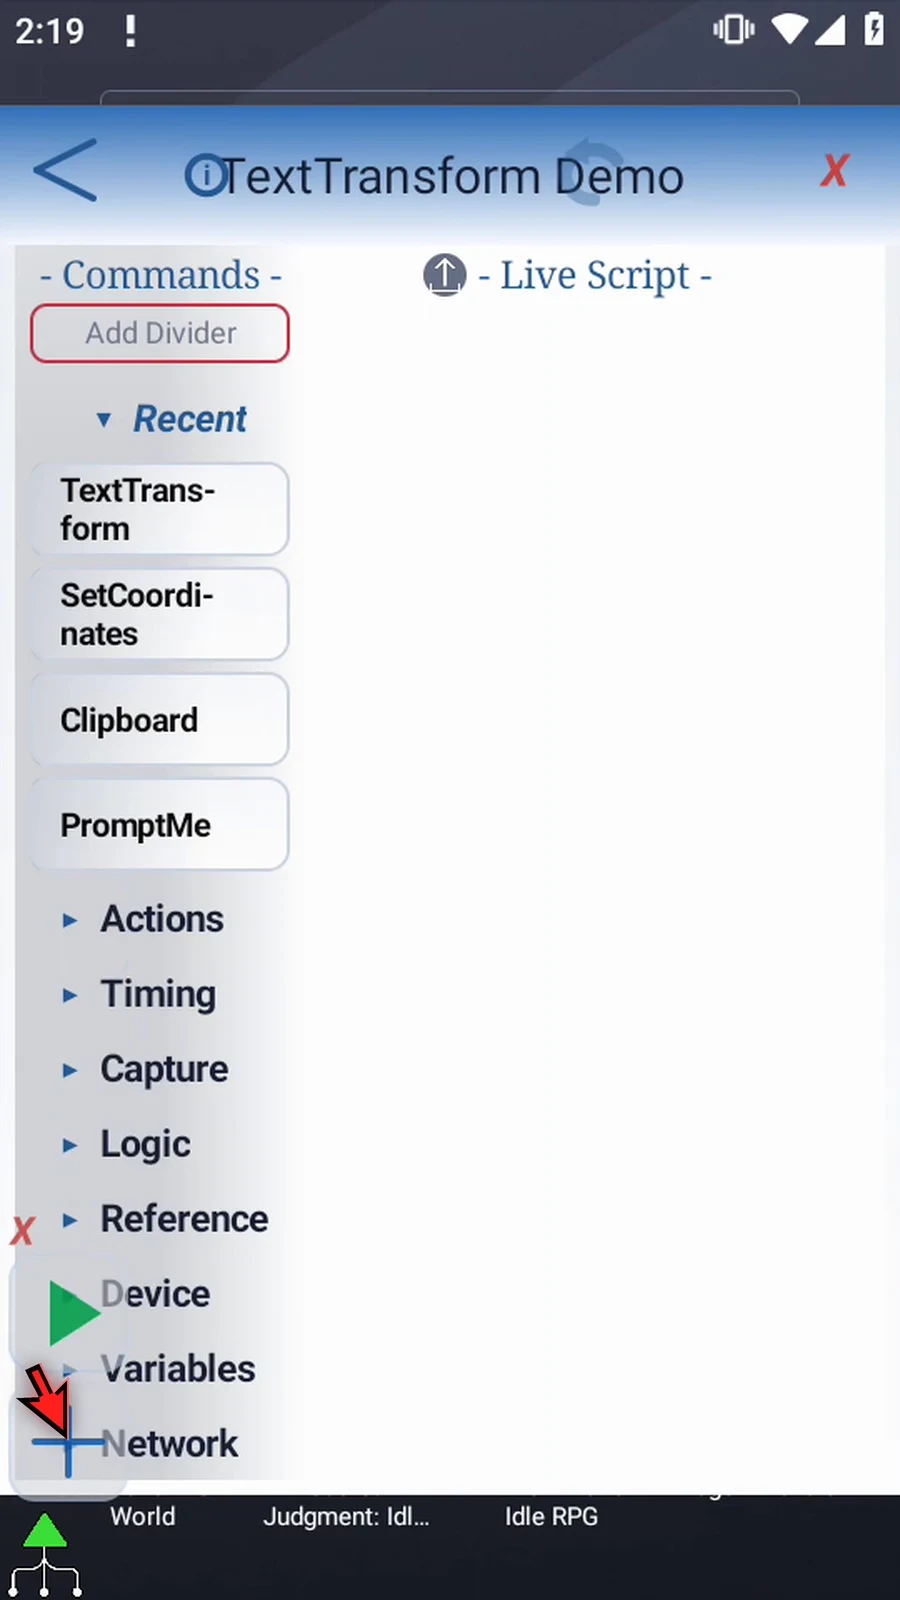
Step 07 First, provide some text to transform. Expand Variables and drag Set Variable into the script.
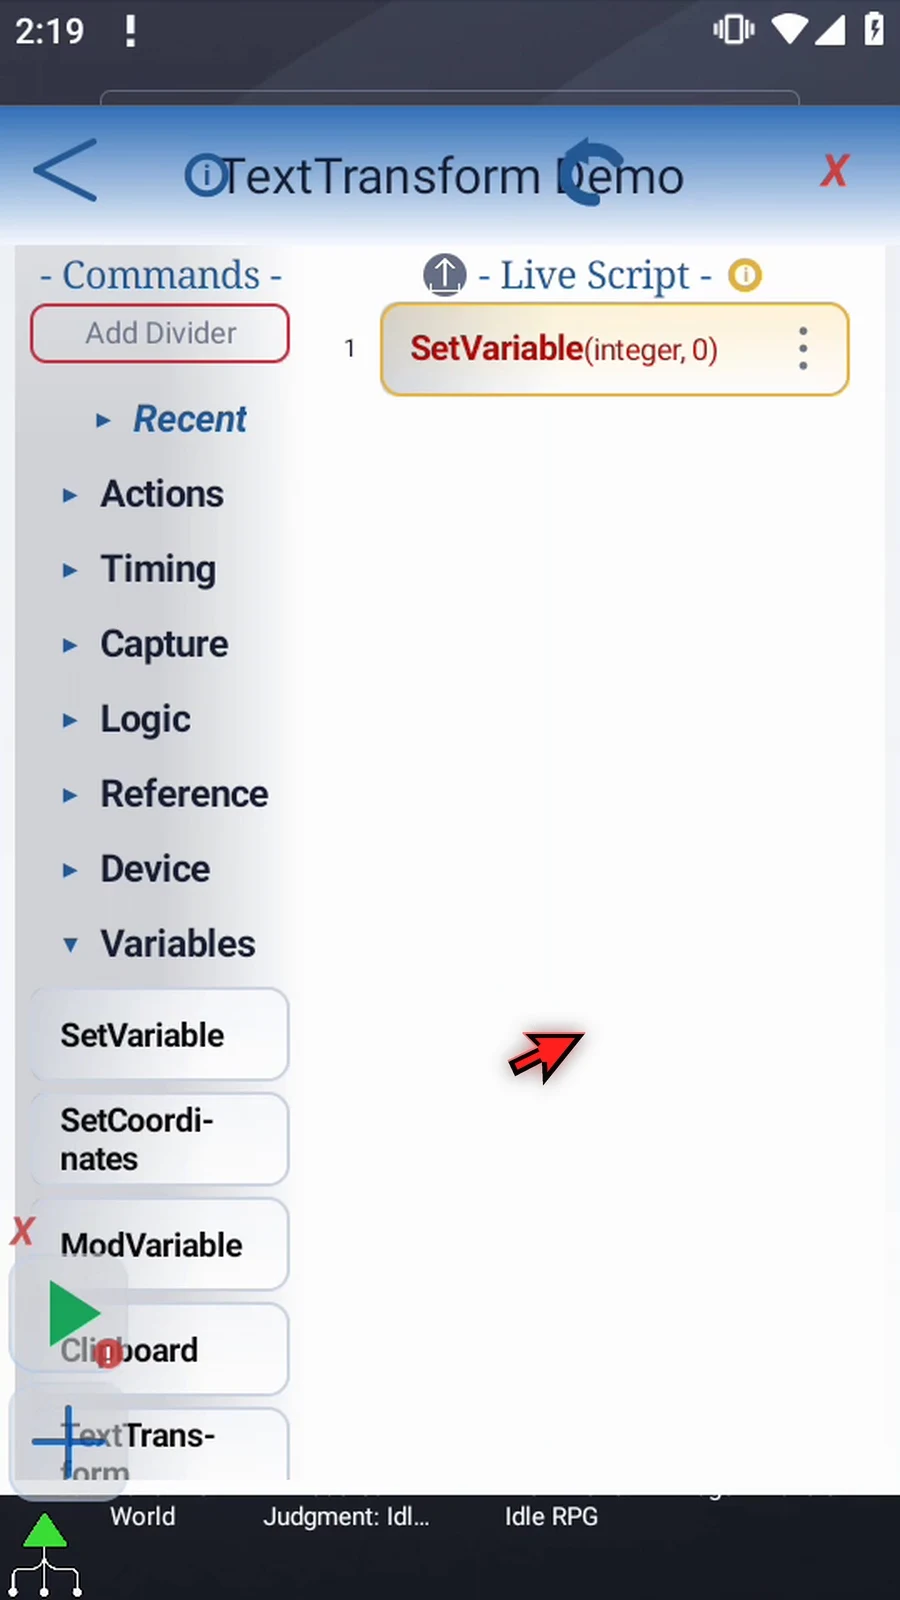
Step 08 Open the frame, keep Single mode, and choose String as the type.
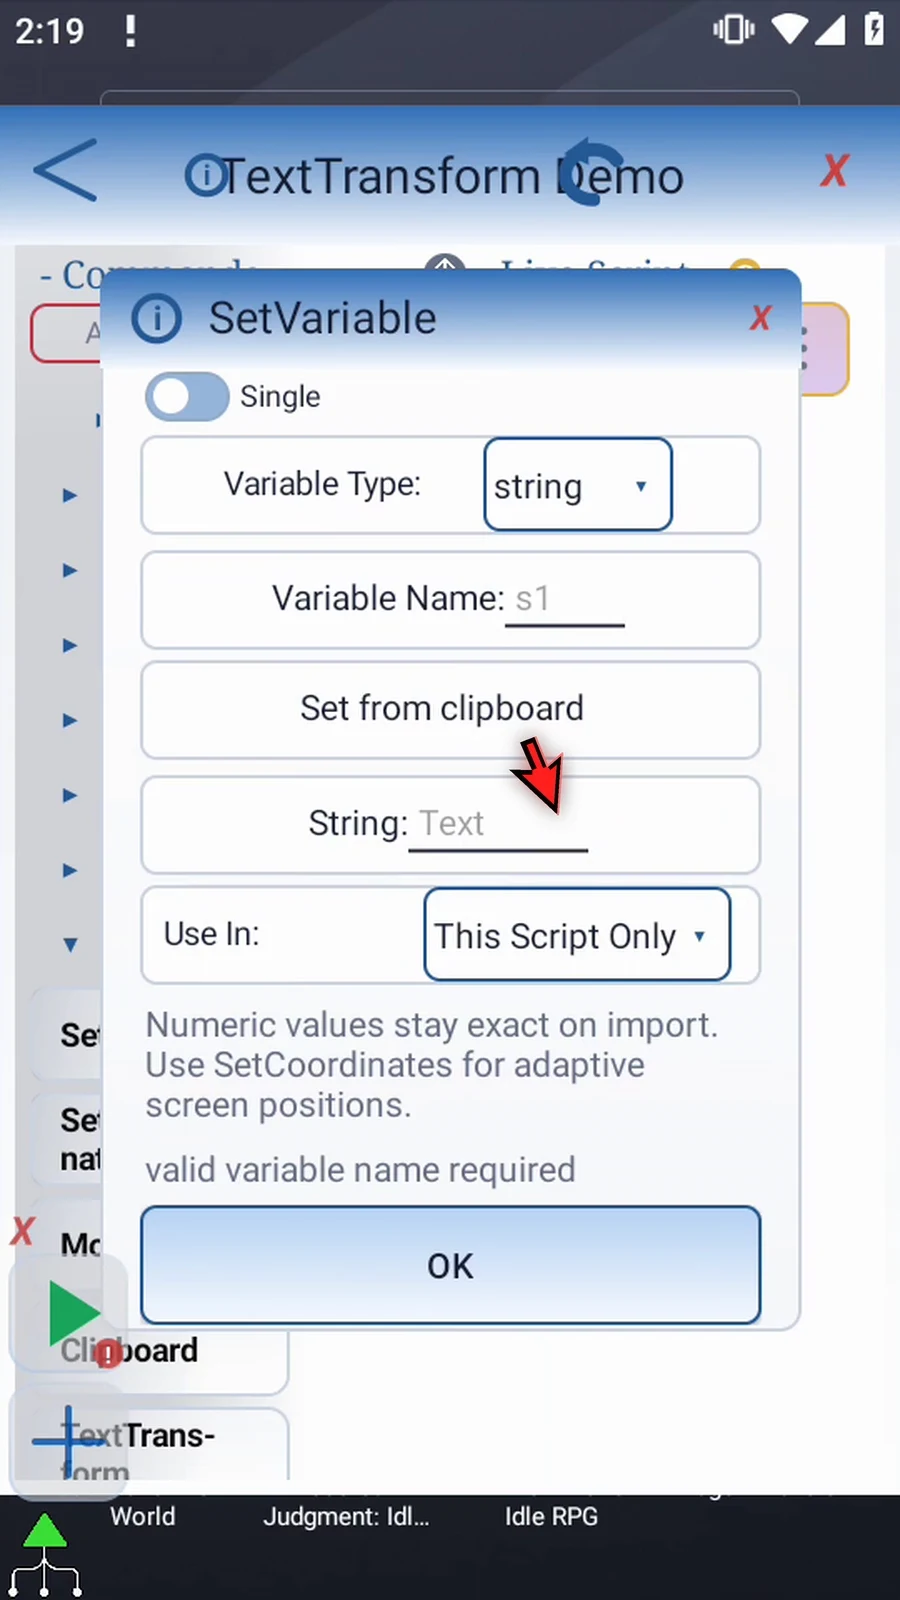
Step 09 Name it s1 and enter Hello ScriptTap as its value. Keep This Script Only and tap OK. This assignment runs before the transformation.
Step 10 Drag Text Transform below the assignment. Then open its frame.
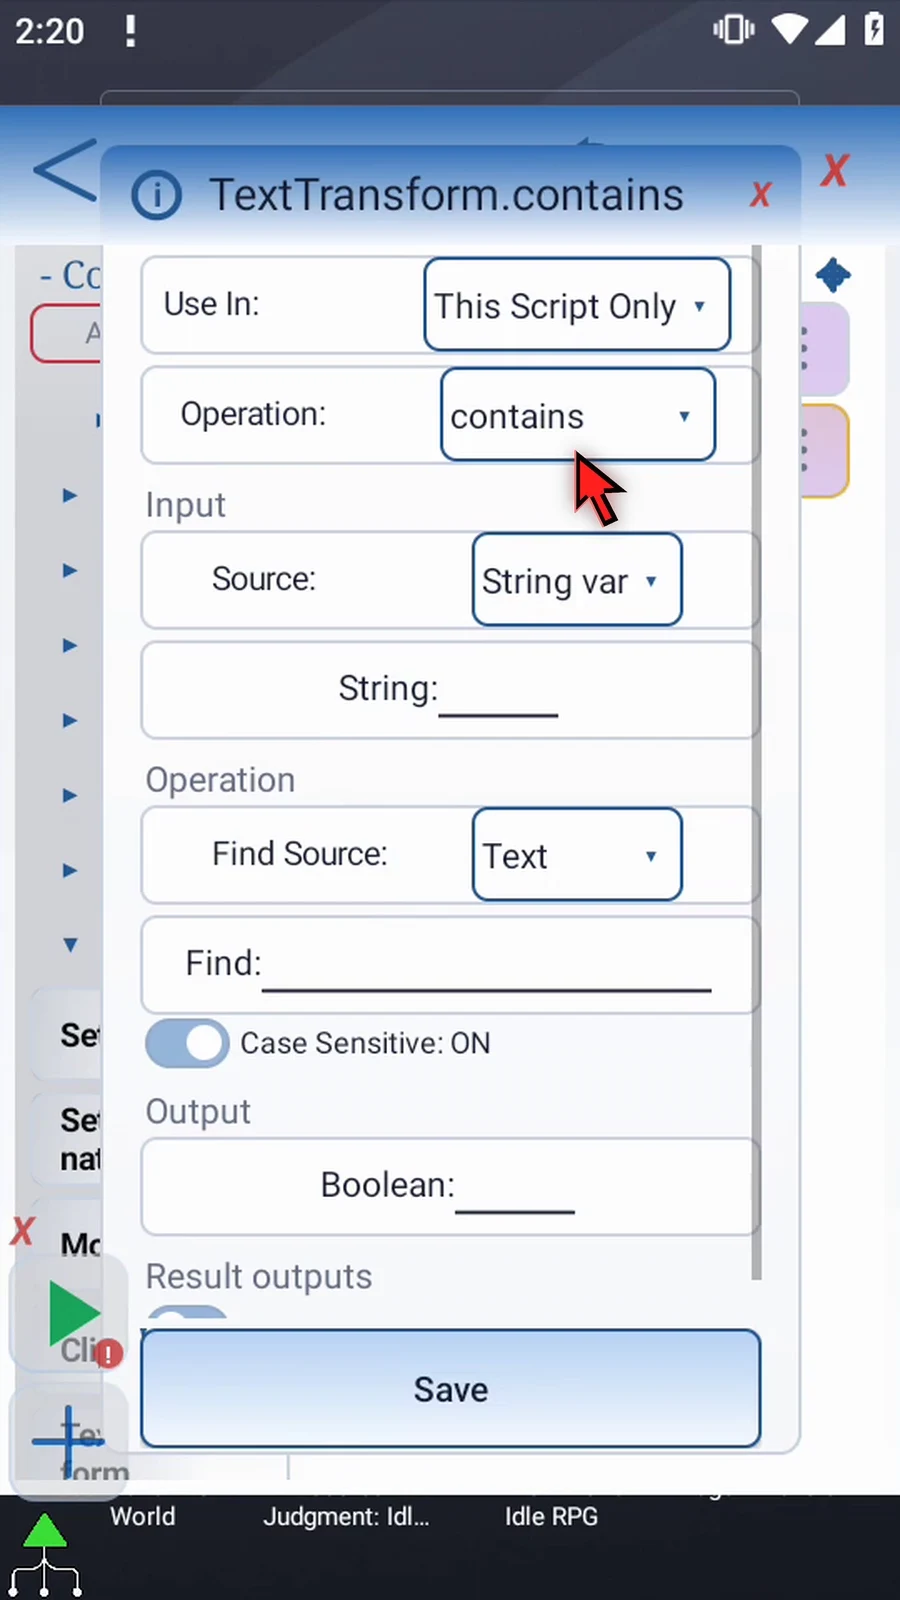
Step 11 The Operation menu selects the job: Contains, Extract, Replace, Split, Join, Trim, Case, Parse Integer, Parse Decimal, or Find All. The other tabs explain these operations. Choose Case for this example.
Step 12 Use In controls where the result is stored. This Script Only keeps it local. Script Thread shares it within the parent script's call tree. Keep the local scope for this example.
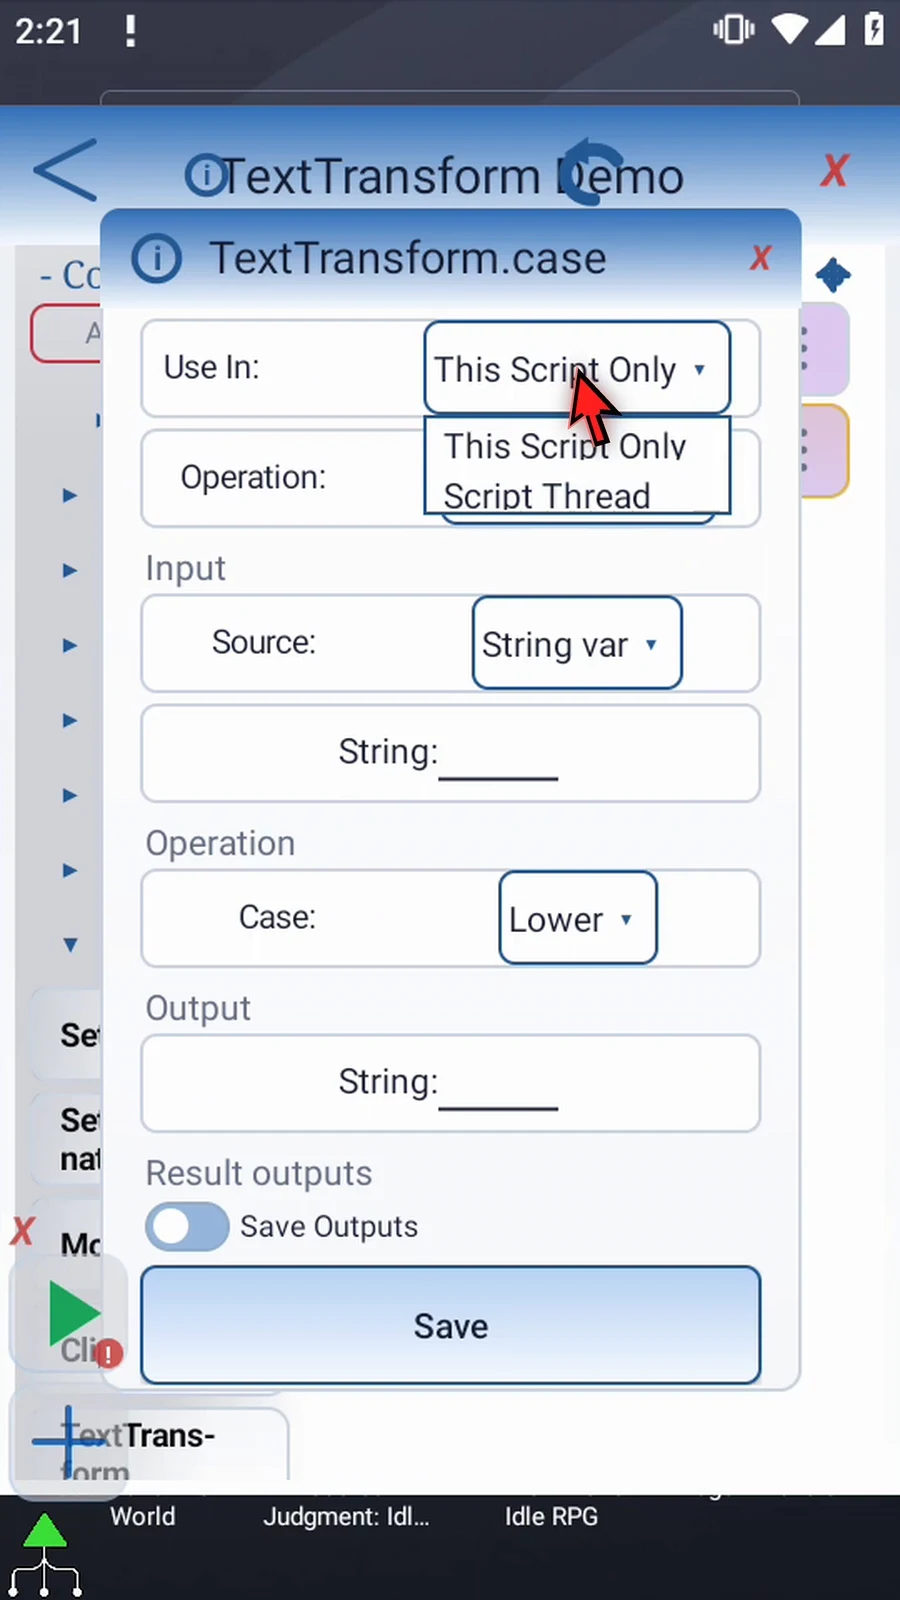
Step 13 Input can be text entered here, or a String variable set by an earlier command. Choose String variable and enter s1, so this command reads the value we just assigned.
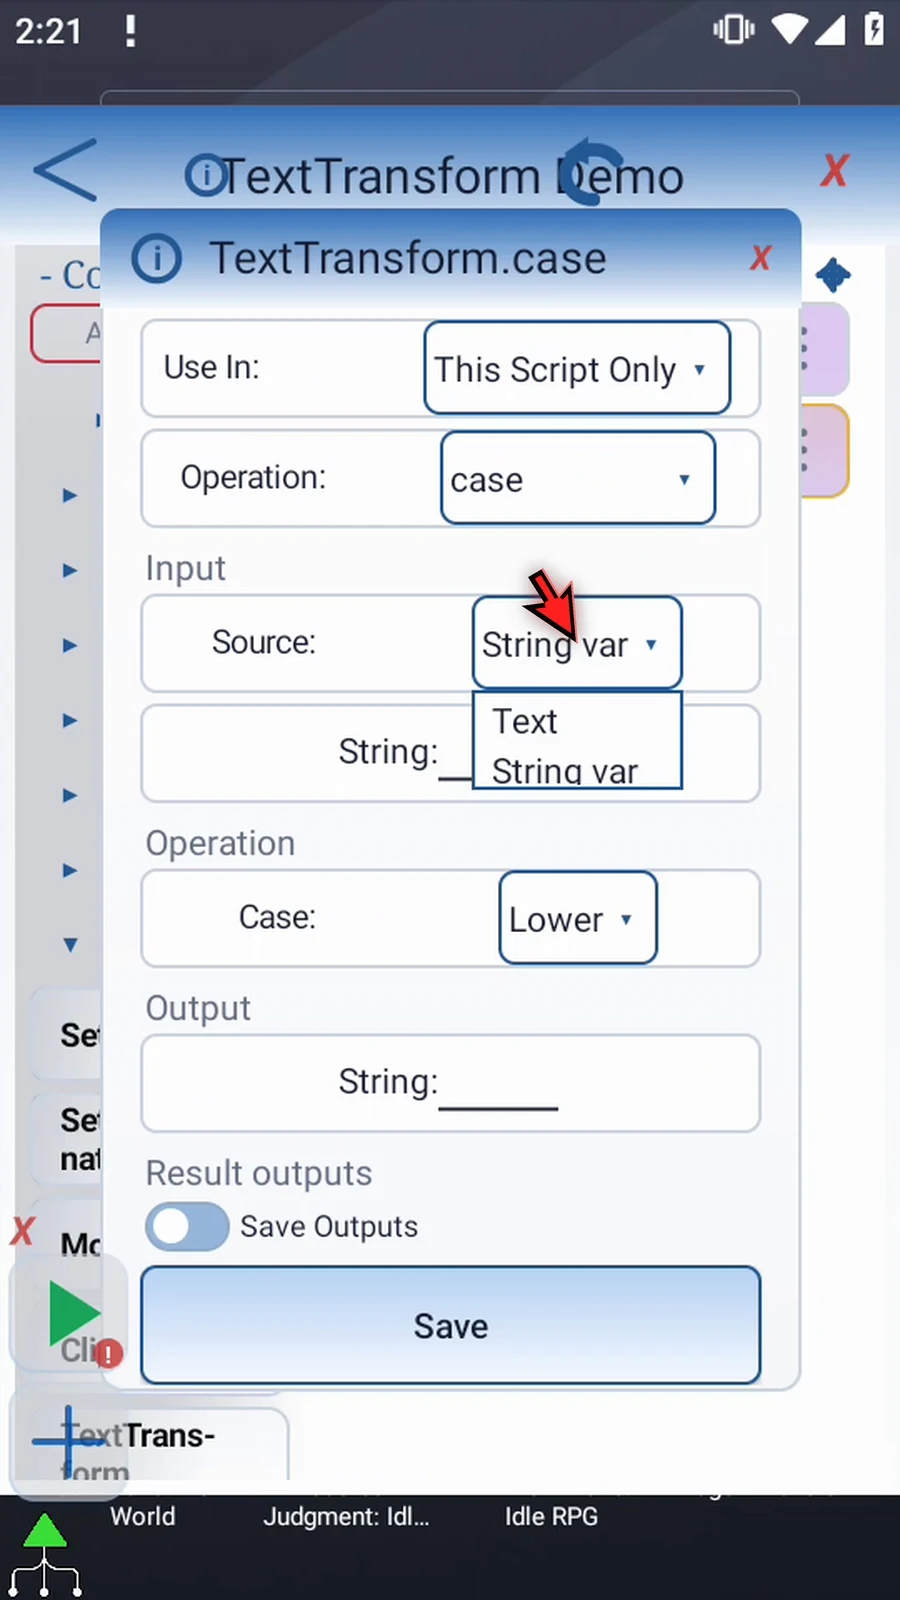
Step 14 Case offers Lower and Upper. Lower converts letters to lowercase; Upper converts them to uppercase. Select Upper.
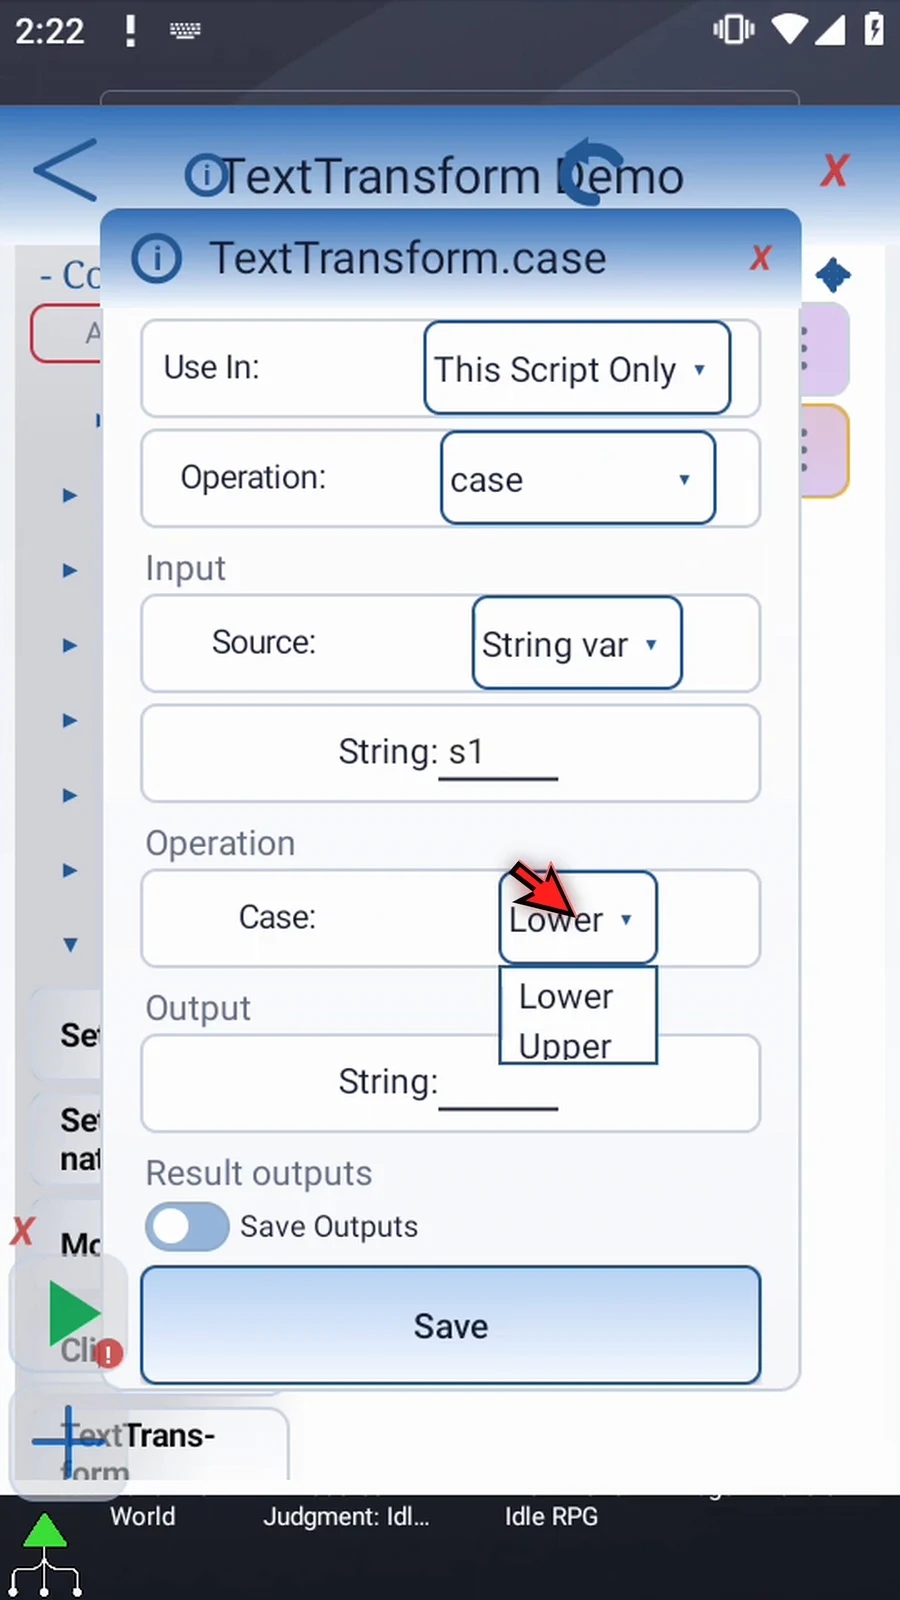
Step 15 Enter s2 as the String output. The transformed text will be stored there for later commands. Using a separate destination keeps the original s1 value intact.
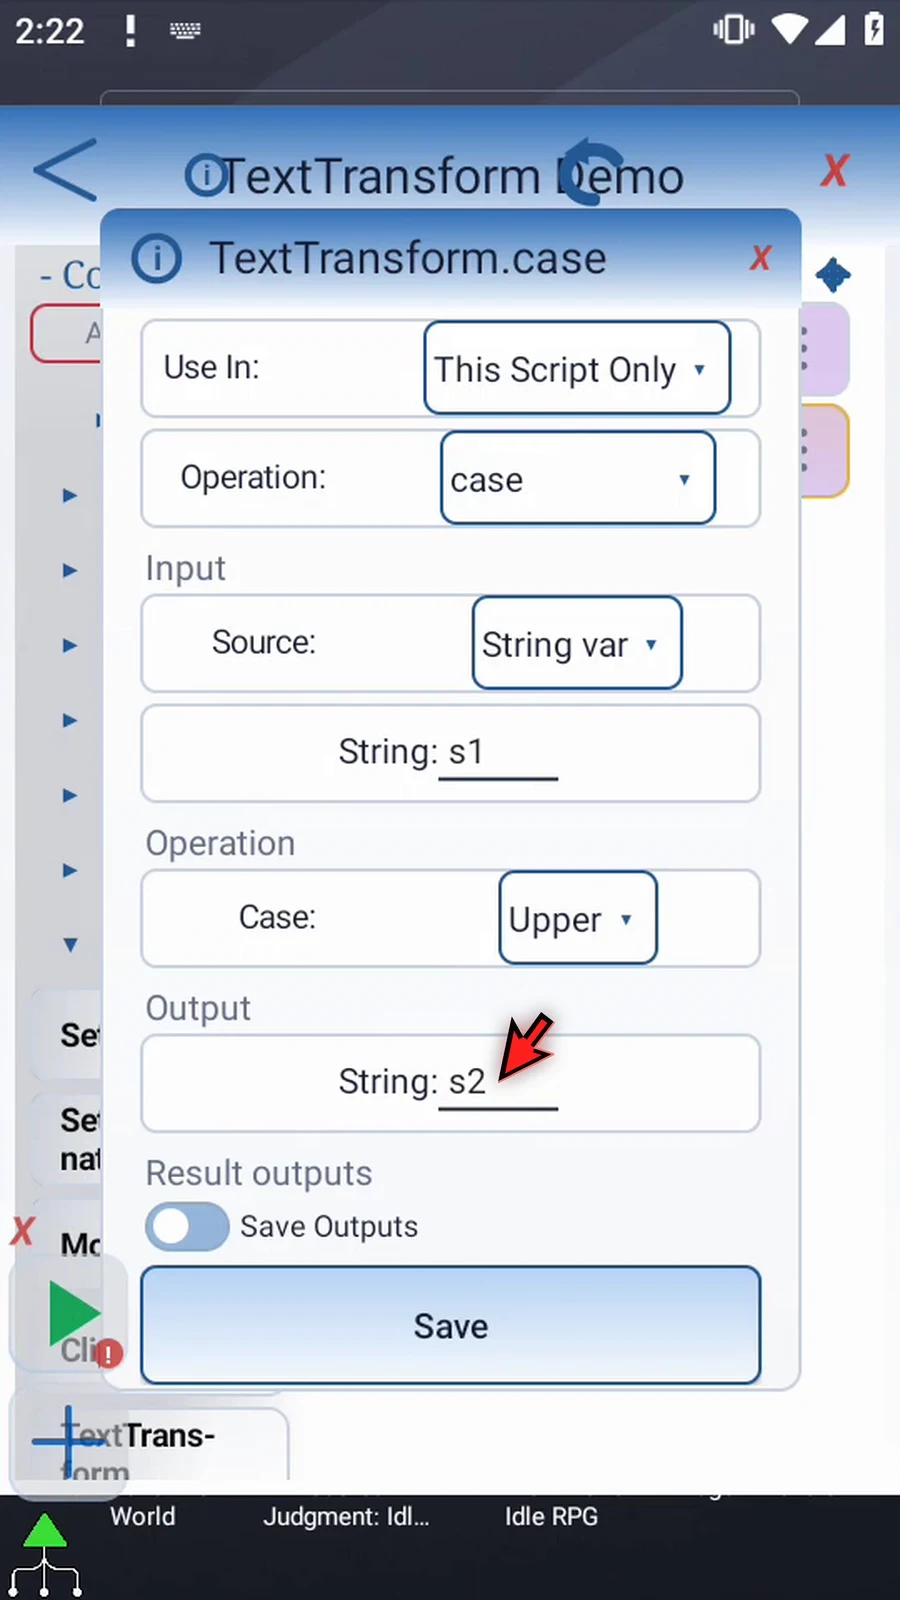
Step 16 Save Outputs adds optional status results. Success uses a Boolean destination, and Error uses a String destination for an error message. These are separate from the transformed text itself.
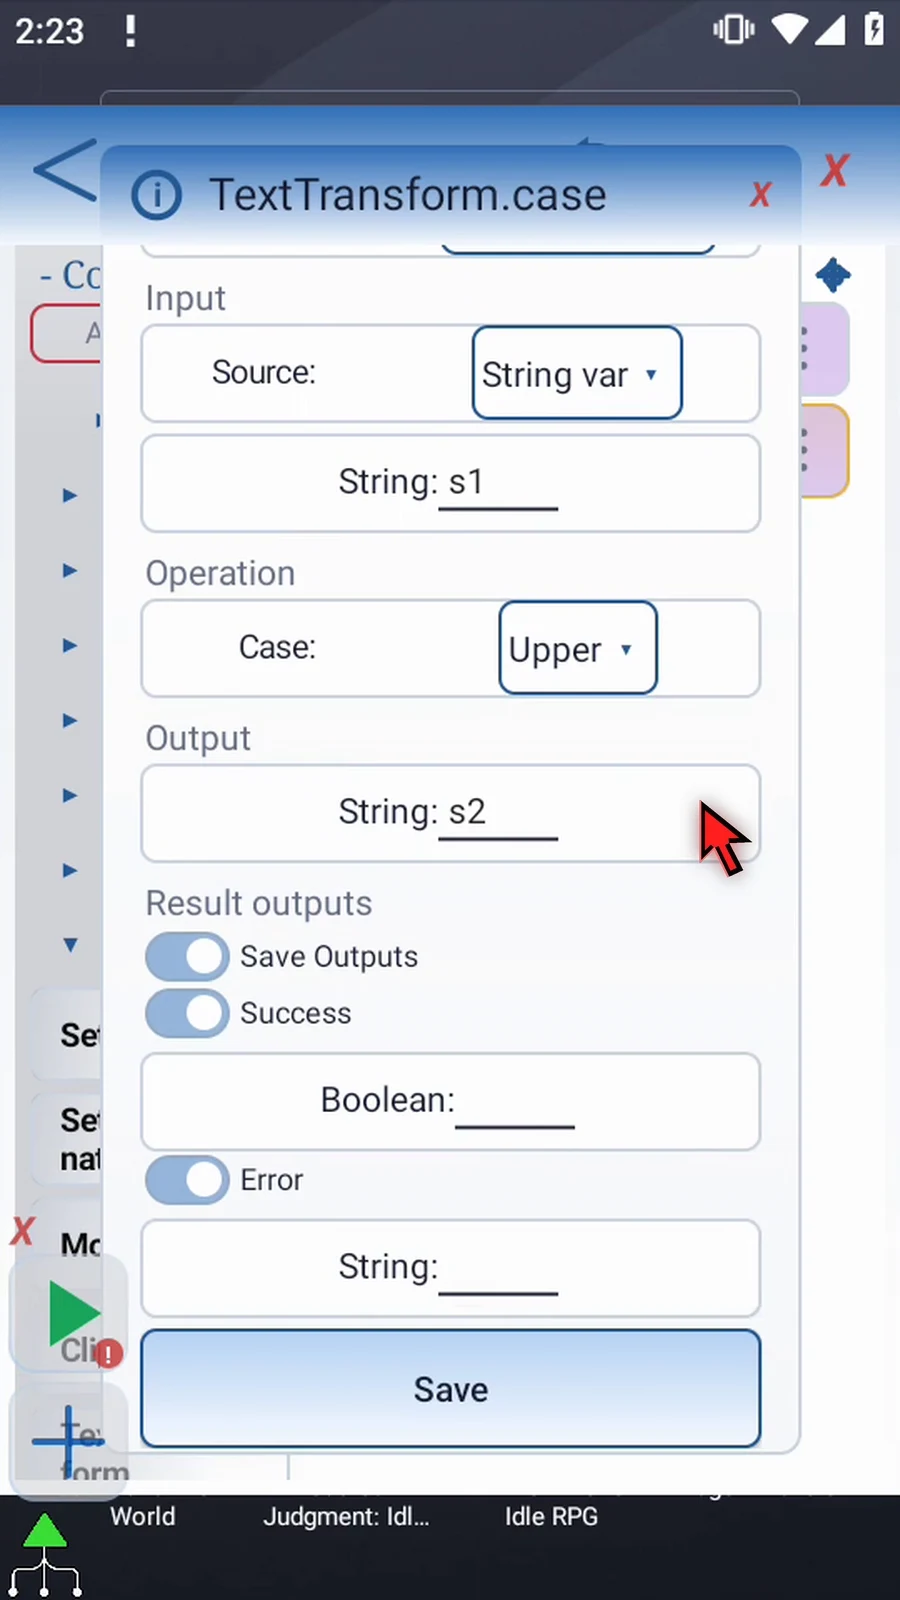
Step 17 We do not need those extra results here, so turn Save Outputs off and tap Save. If you change the operation later, review its settings and output destination before saving.
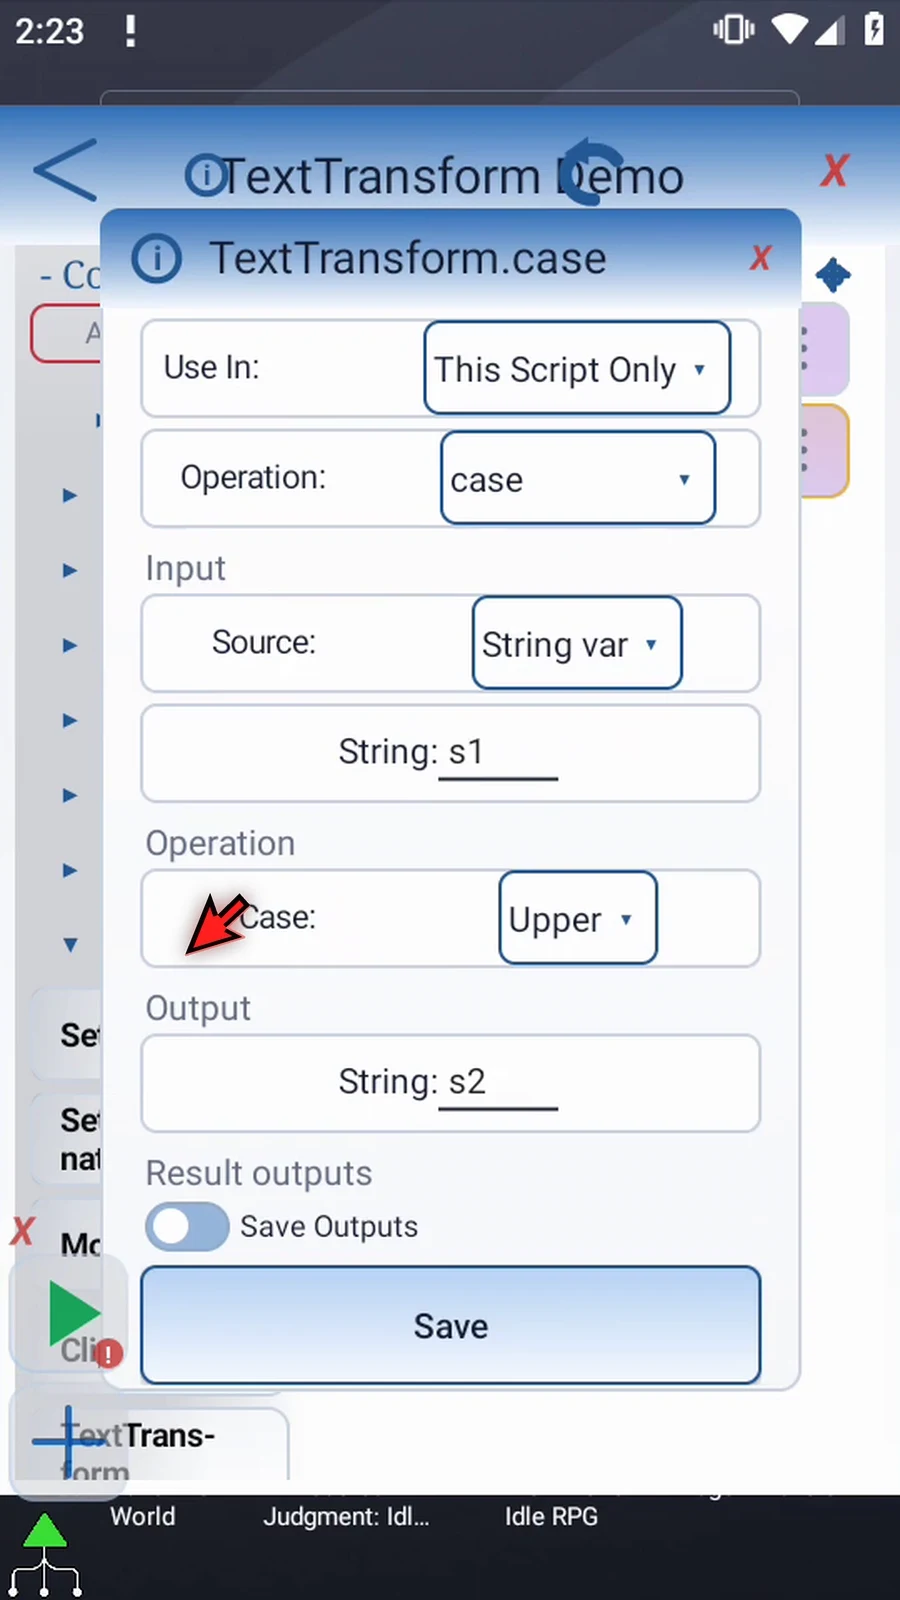
Step 18 To make the result visible, expand Device and drag Display after Text Transform. This supporting command will show the value stored in s2.
Step 19 Open Display, keep Once mode, switch its source to Variable, and enter s2.
Step 20 Open the area selector and resize the box to a clear area. Use the check mark to return.
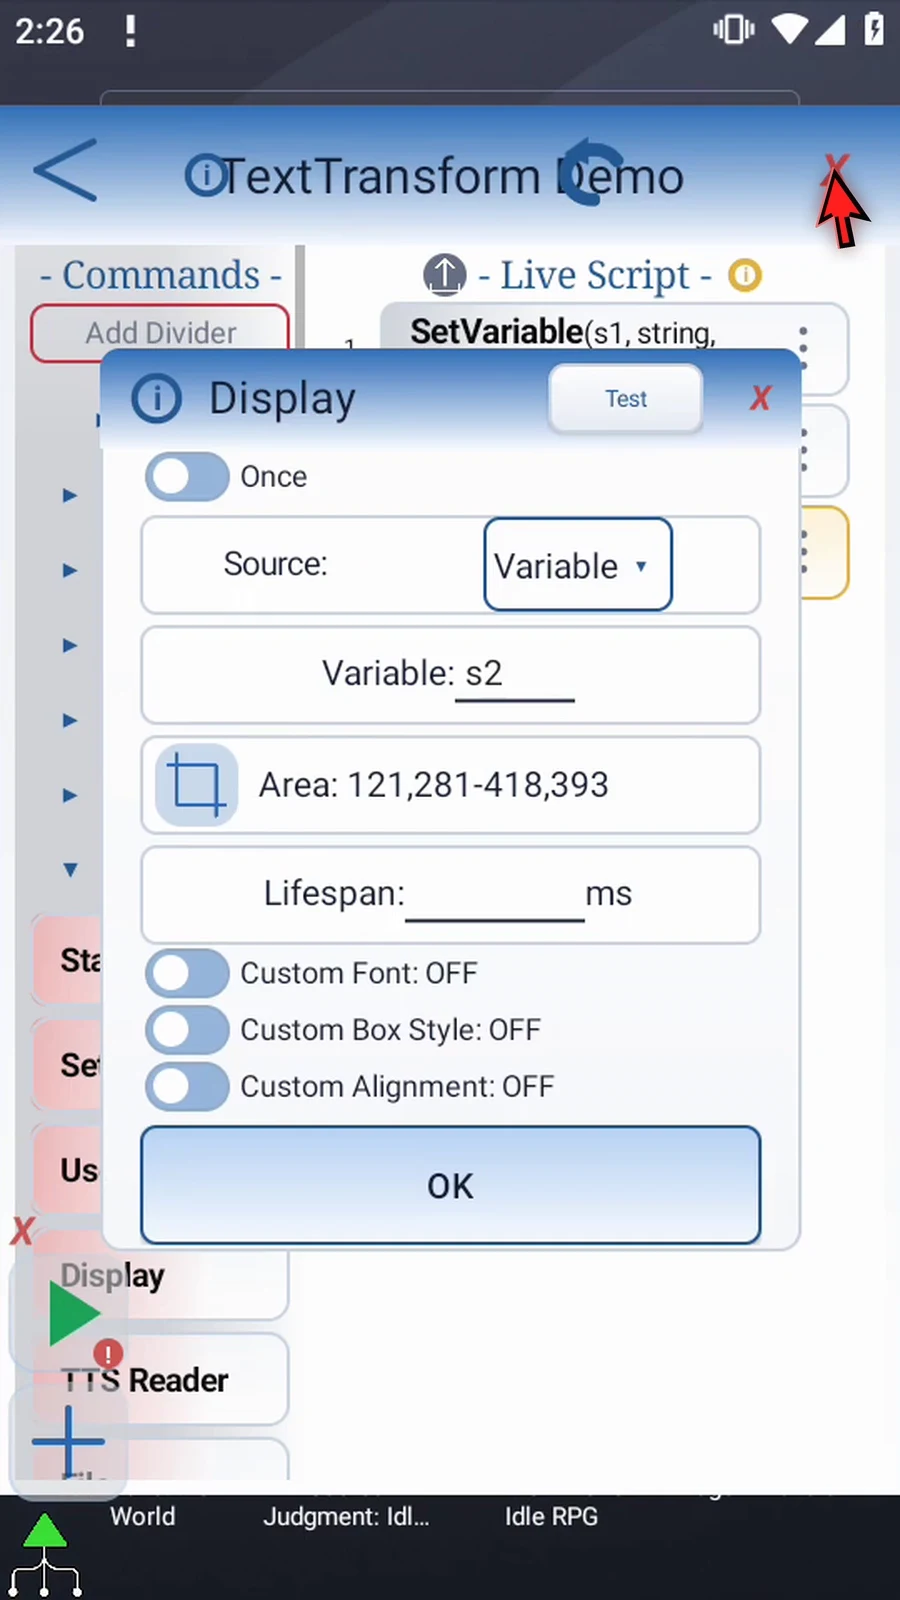
Step 21 Set its lifespan to ten thousand milliseconds, giving us ten seconds to see the text. Keep the other settings at their defaults and tap OK.
Step 22 Add Prompt Me after Display as a final confirmation. It lets us see that the script reached the next command.
Step 23 Keep the regular Standard prompt, and give it the header Complete.
Step 24 Add a button named Done, using b1 for its Boolean output. Then tap OK.
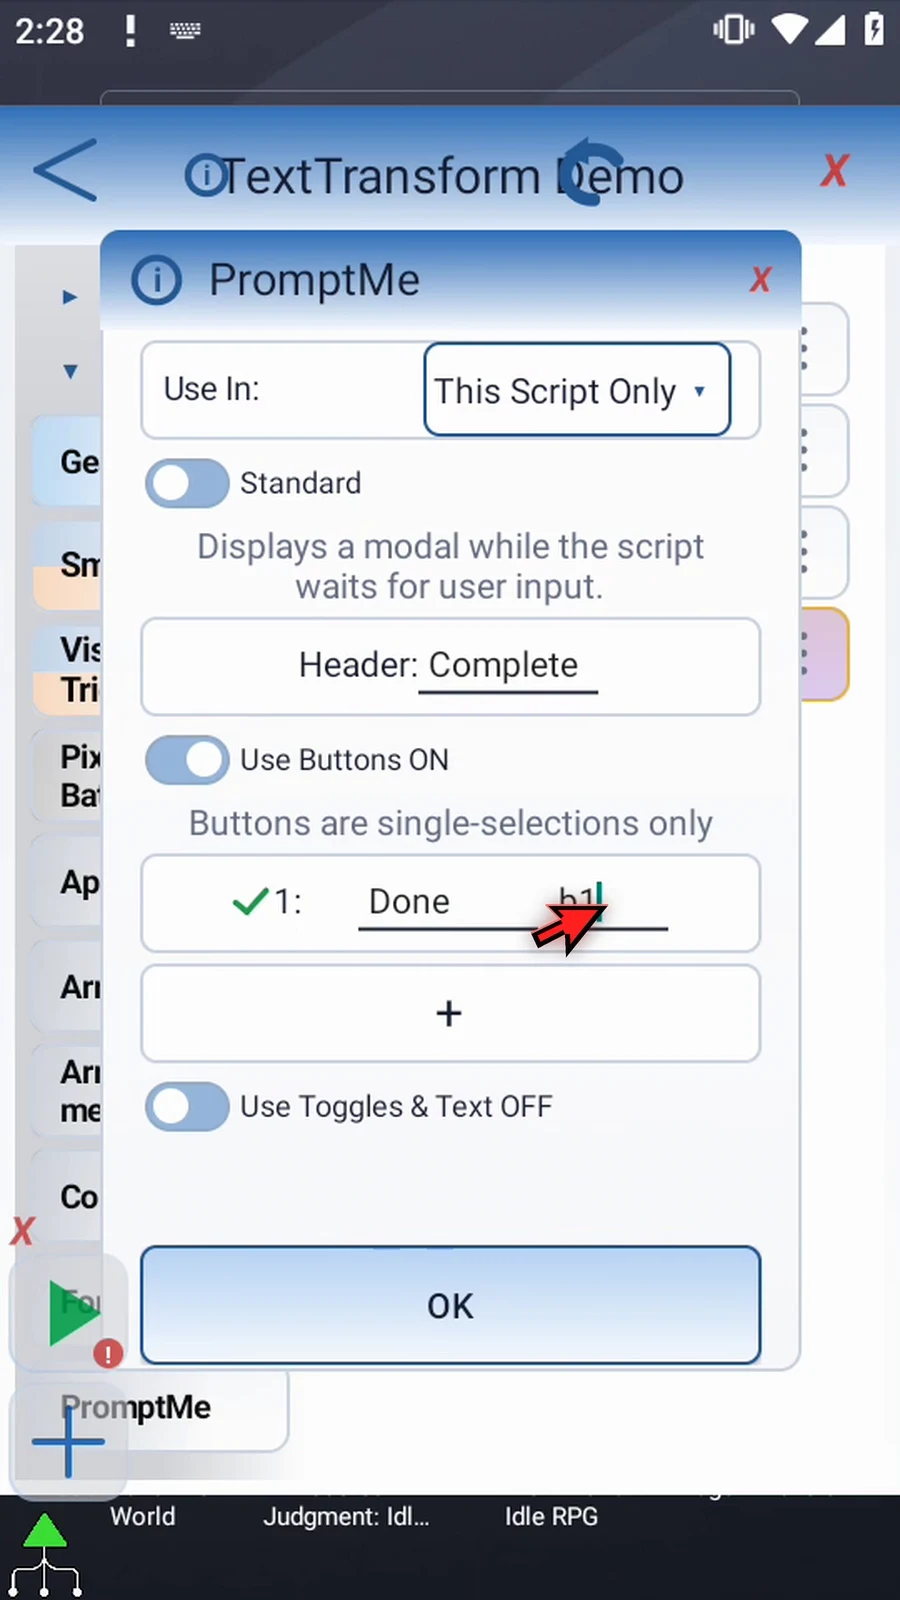
Step 25 The script assigns the source text, transforms it, displays the result, and shows a confirmation. Close the editor to test it.
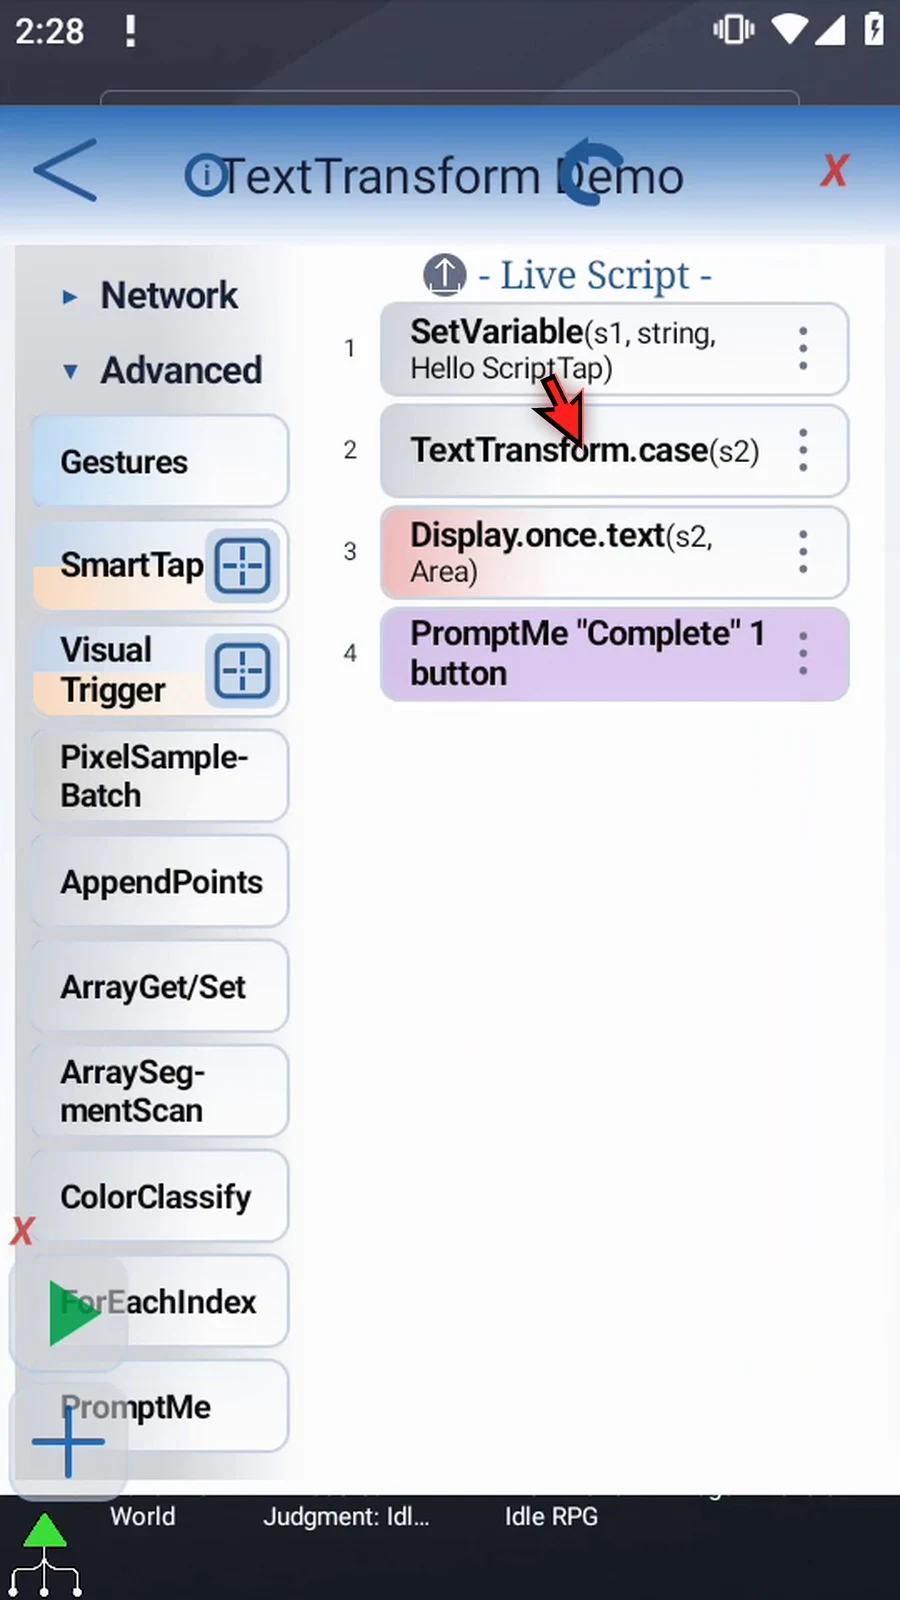
Step 26 When the script is complete, simply use the Play button in the main overlay.
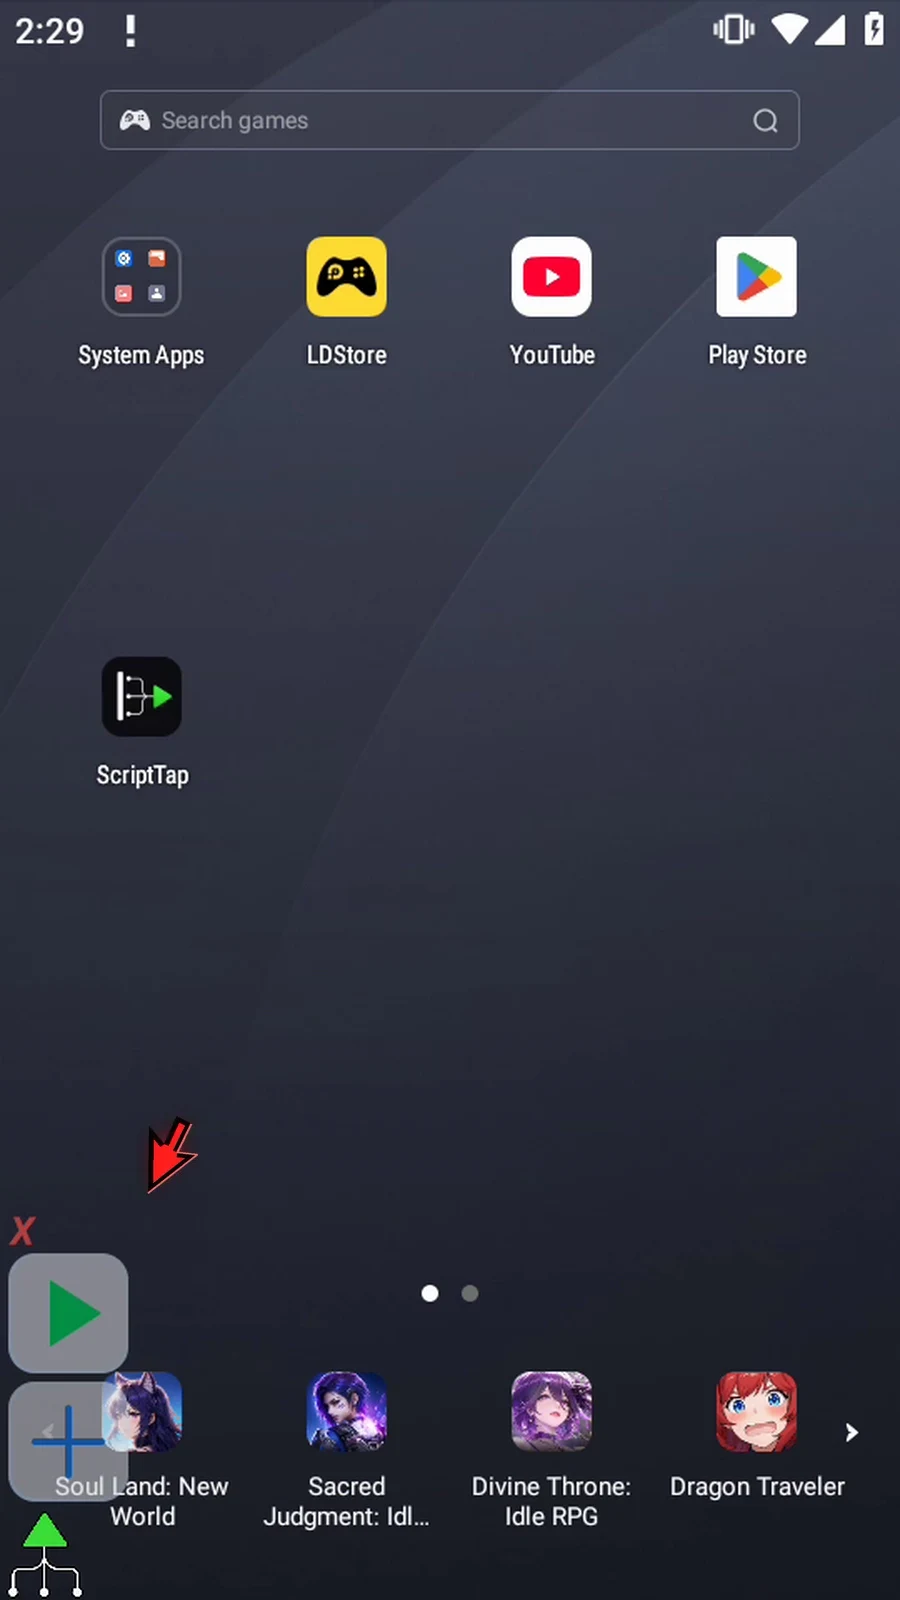
Step 27 The screen shows HELLO SCRIPTTAP. Text Transform read s1 and saved uppercase text in s2. The original value remains unchanged.
Step 28 After ten seconds, Display closes and Complete appears.
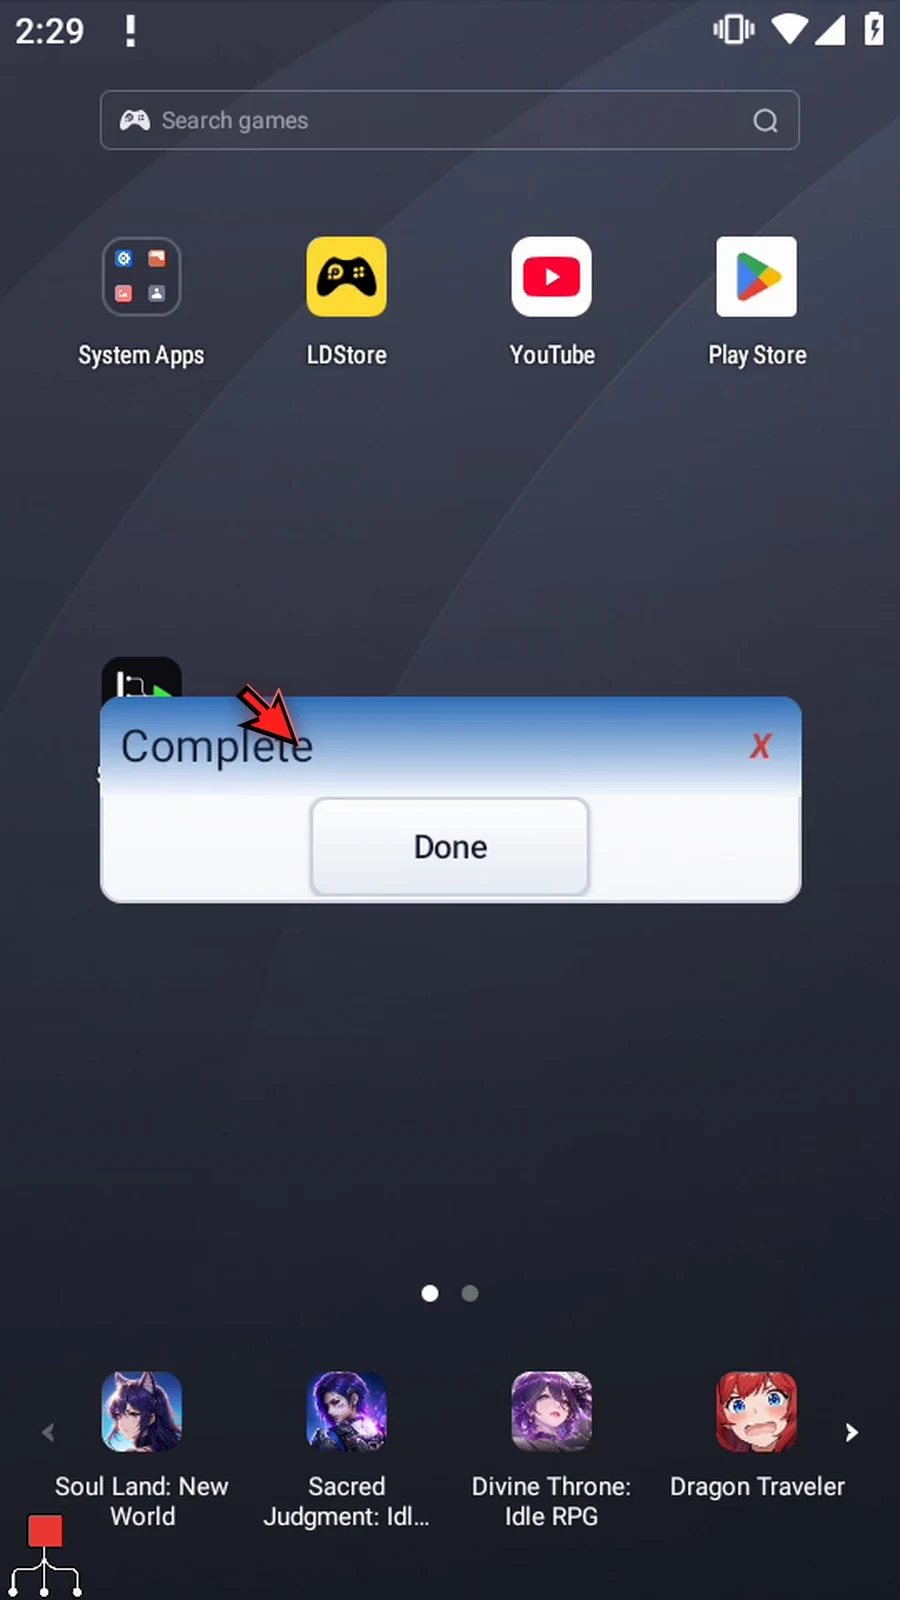
Step 29 Press Done. The script finishes automatically. Use Case when later commands need text with consistent capitalization.

Contains checks whether a substring appears inside text. It stores a Boolean that a later IF command can use. It does not replace, shorten or otherwise change the source text.
Reuse TextTransform Demo from Intro / Case. Keep the first SetVariable assignment s1=Hello ScriptTap and the final Complete/Done prompt. Open the existing TextTransform frame and change Operation from case to contains. The outgoing Case-specific output is cleared; configure the new Boolean output explicitly.
Keep This Script Only and input String var → s1. Input could instead be literal Text. Find Source independently selects literal Text or an earlier String variable for the substring. Choose Text and normally type lowercase script into Find.
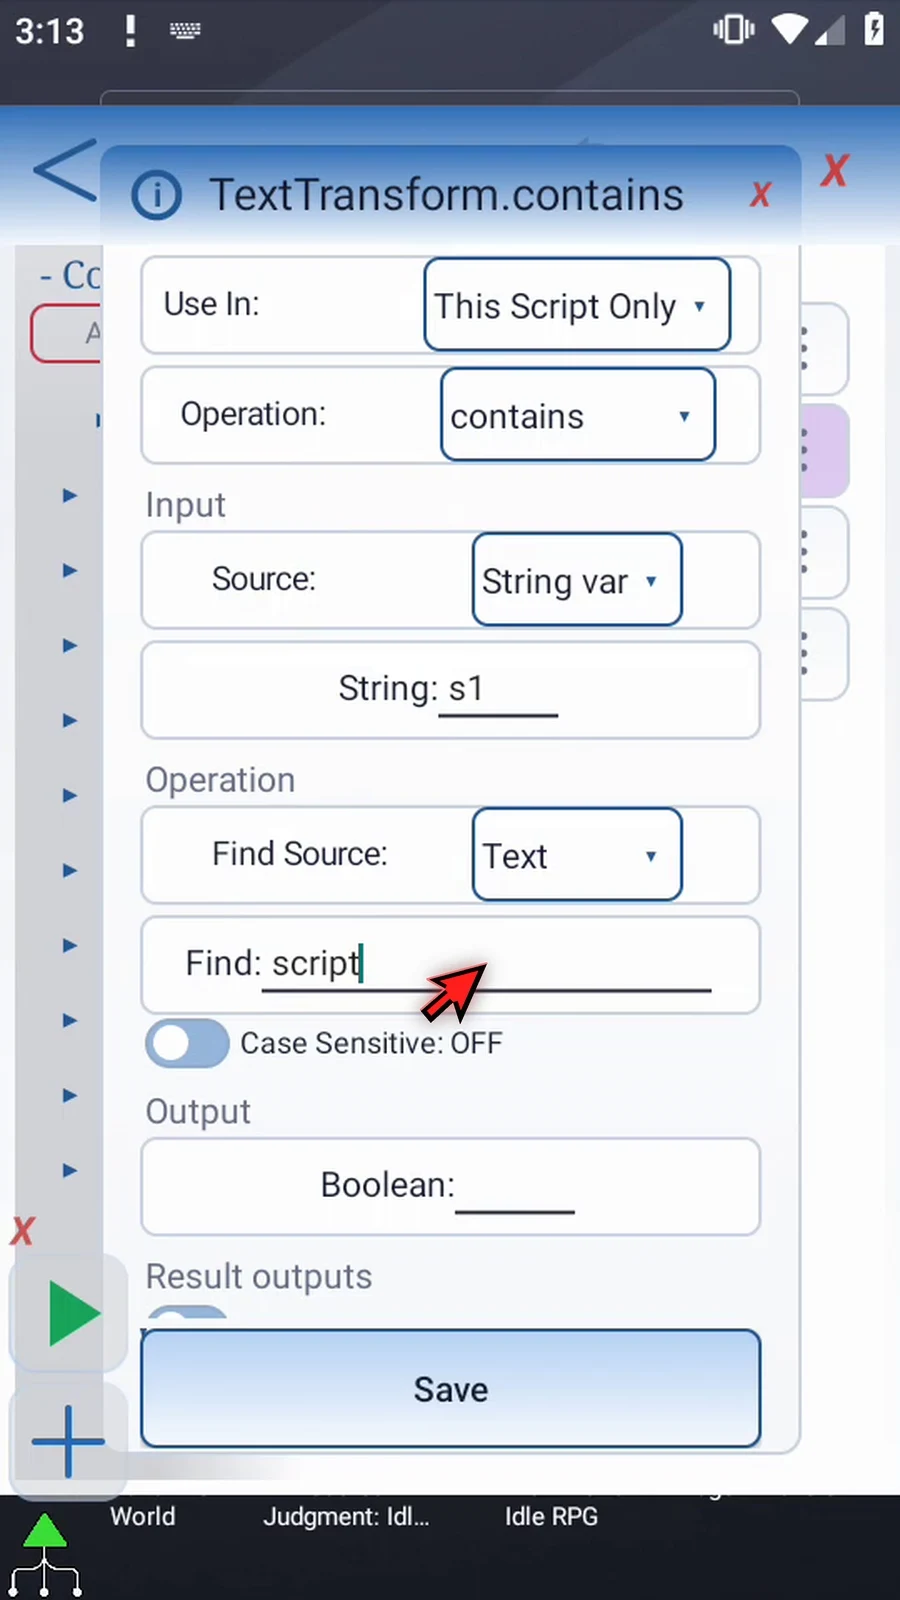
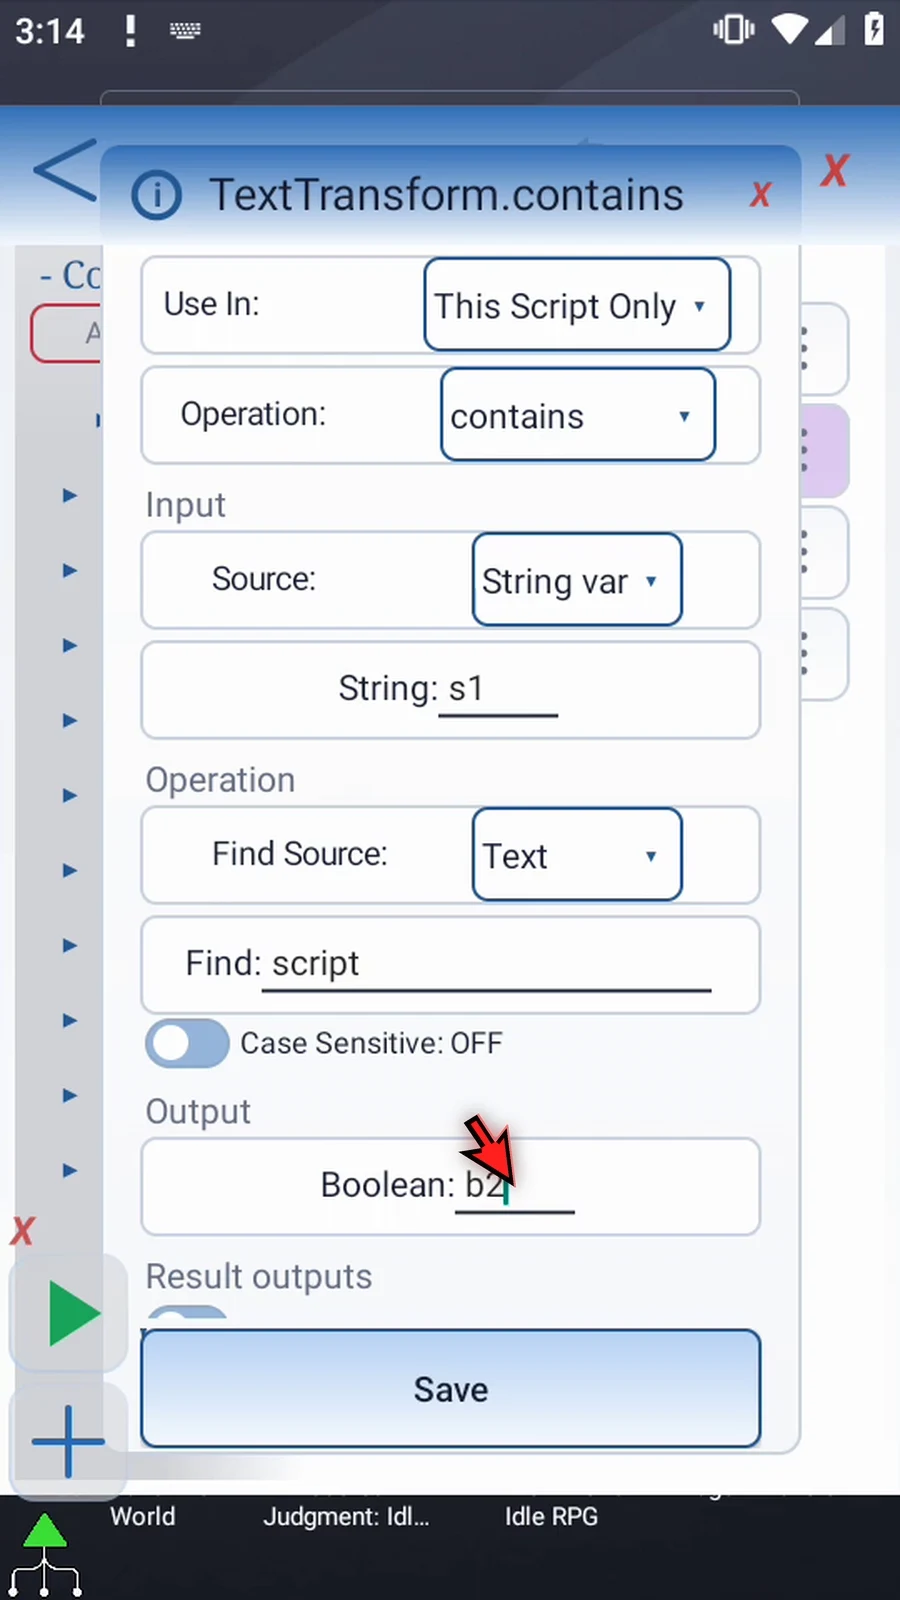
Leave Case Sensitive OFF for the first test. Lowercase script then matches the start of ScriptTap. Enter b2 as the Boolean output. It holds True for a match and False for no match. This match result is distinct from optional Success/Error status outputs; leave Save Outputs off here and save the command.
Open the existing supporting Display. Change only its source variable from s2 to b2, preserving its area, default appearance and 10000 ms lifespan. Save. No extra commands are needed.
Close the editor and use Play. Display shows the actual True result for its full configured lifespan. Complete follows; press Done to finish the first run automatically.
Return to the same editor and reopen TextTransform. Turn Case Sensitive ON. Keep the same source, lowercase substring, local scope and Boolean destination. Save and run the same script again. Only this setting has changed.
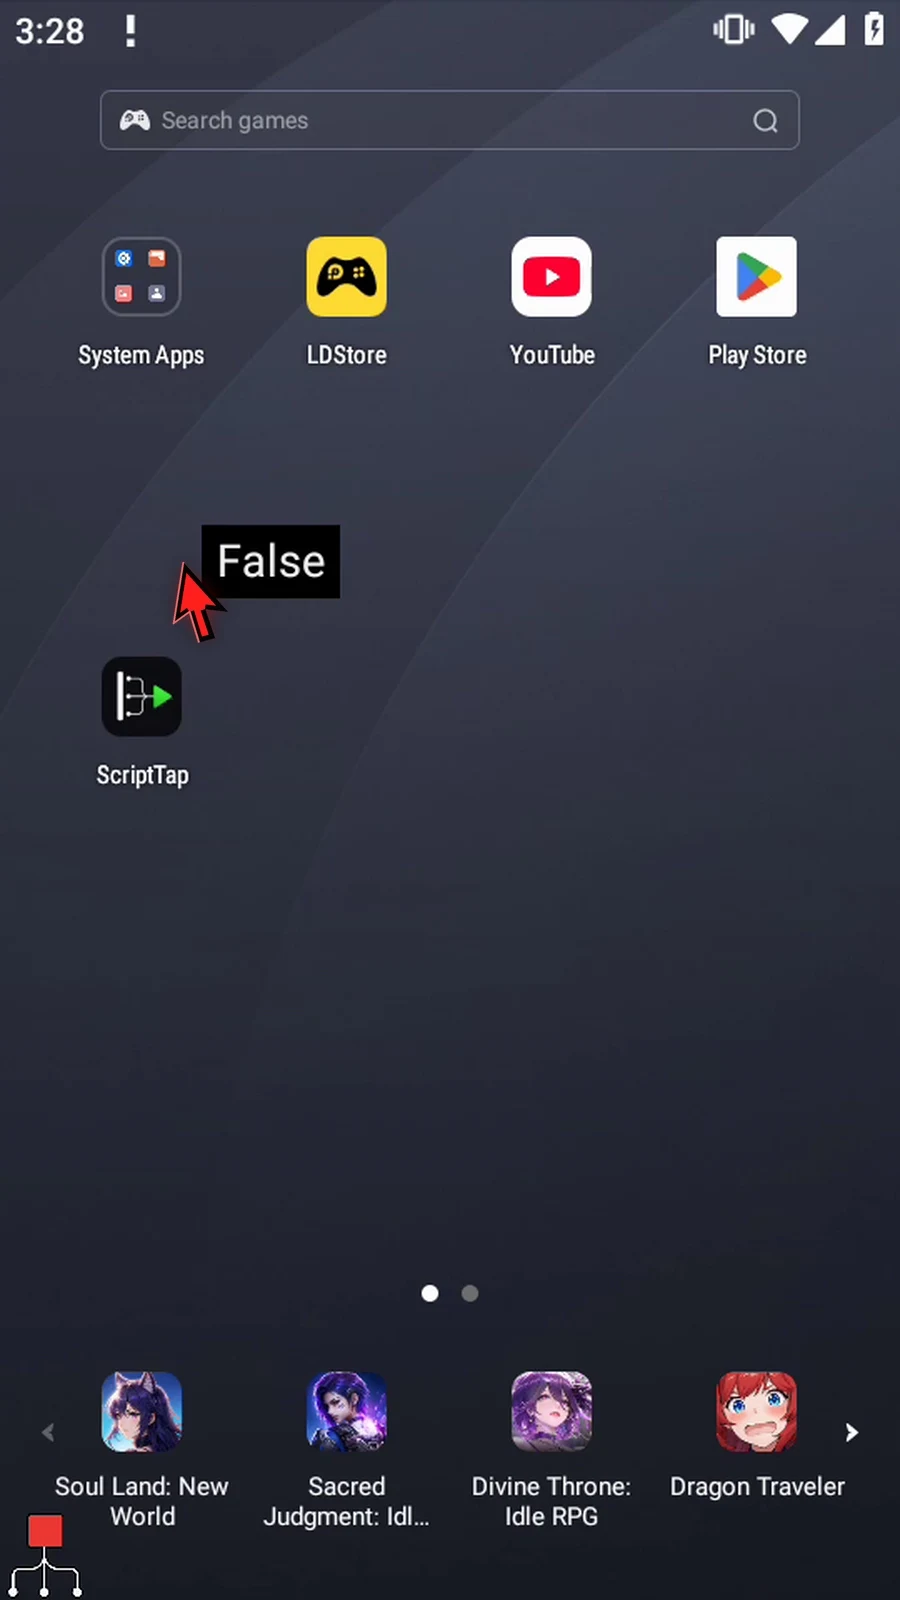
The actual second result is False, because lowercase script does not match the capital S in ScriptTap when case matters. False is a normal match result, not a command failure. Display closes, Complete appears and Done finishes the second run. Both recorded runs completed with zero warnings/errors; s1 remained unchanged.
Contains
Step-by-step guide
Step 01 Contains checks whether one piece of text appears inside another. It stores a Boolean result that a later condition can use. We will reuse the short script from Intro, which assigns Hello ScriptTap to s1.
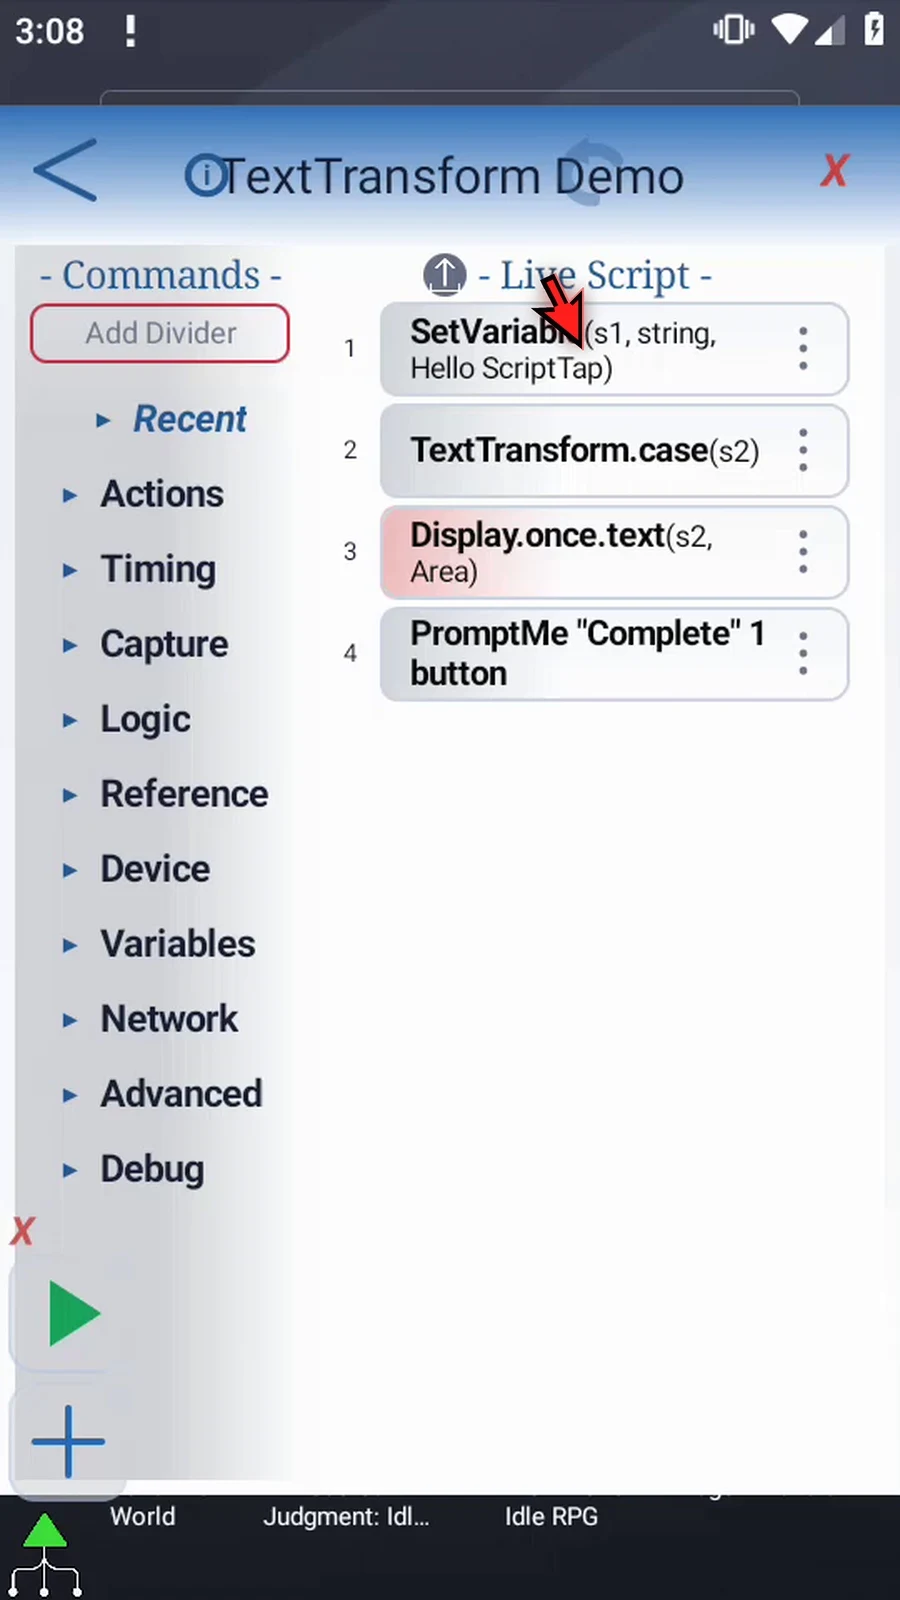
Step 02 Open Text Transform and change its operation from Case to Contains.
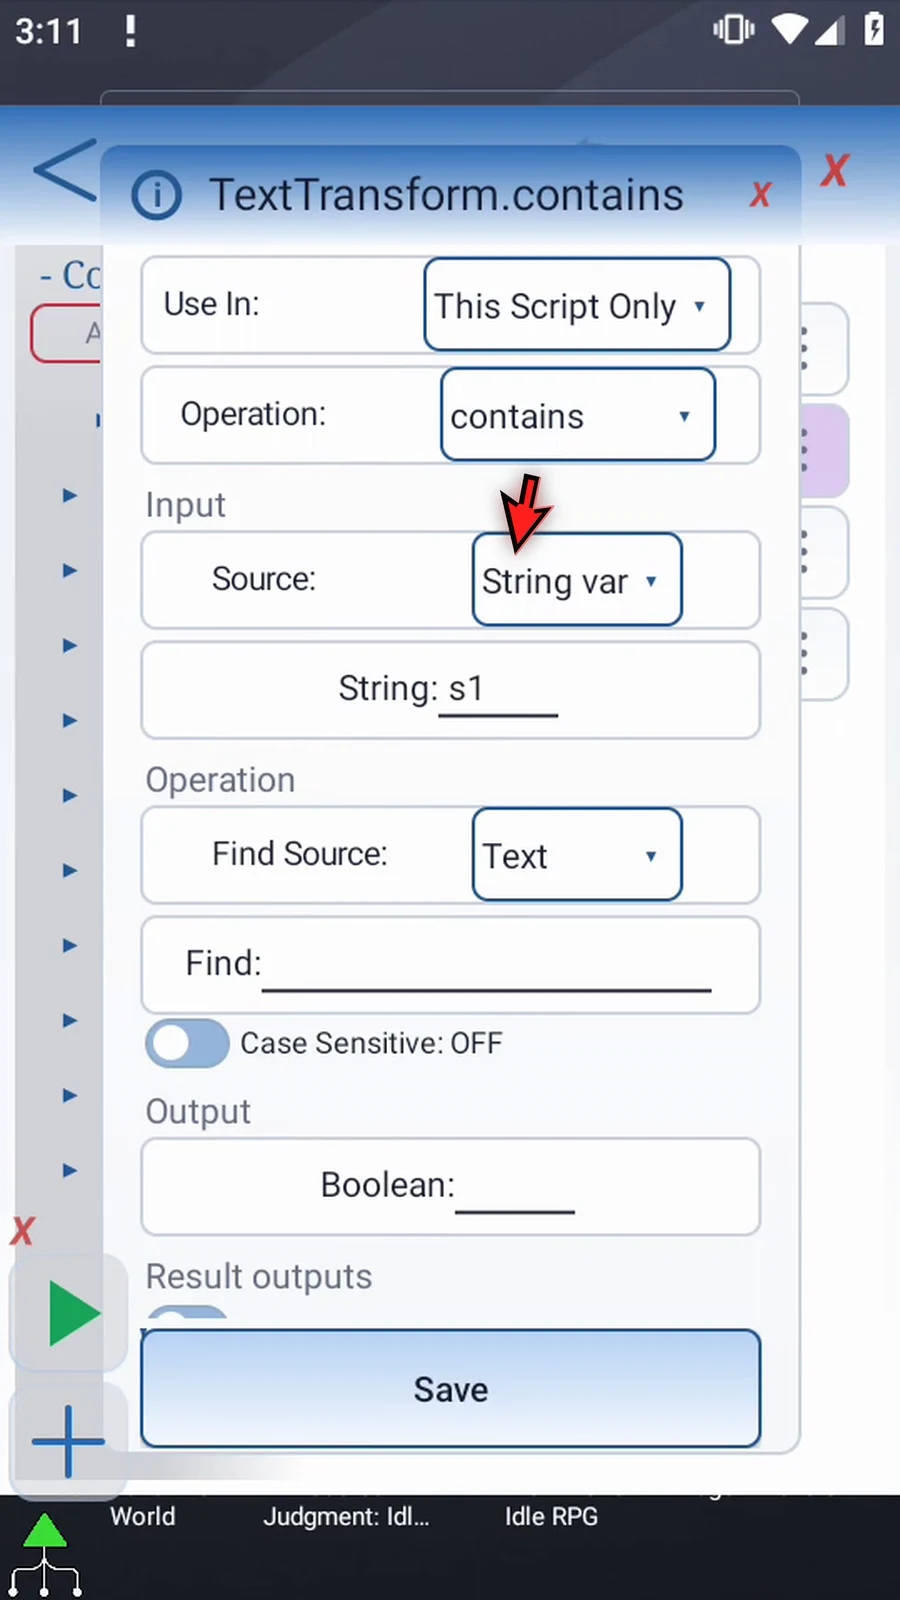
Step 03 Keep String variable s1 as the input and This Script Only as the scope. This is the text we will search within.
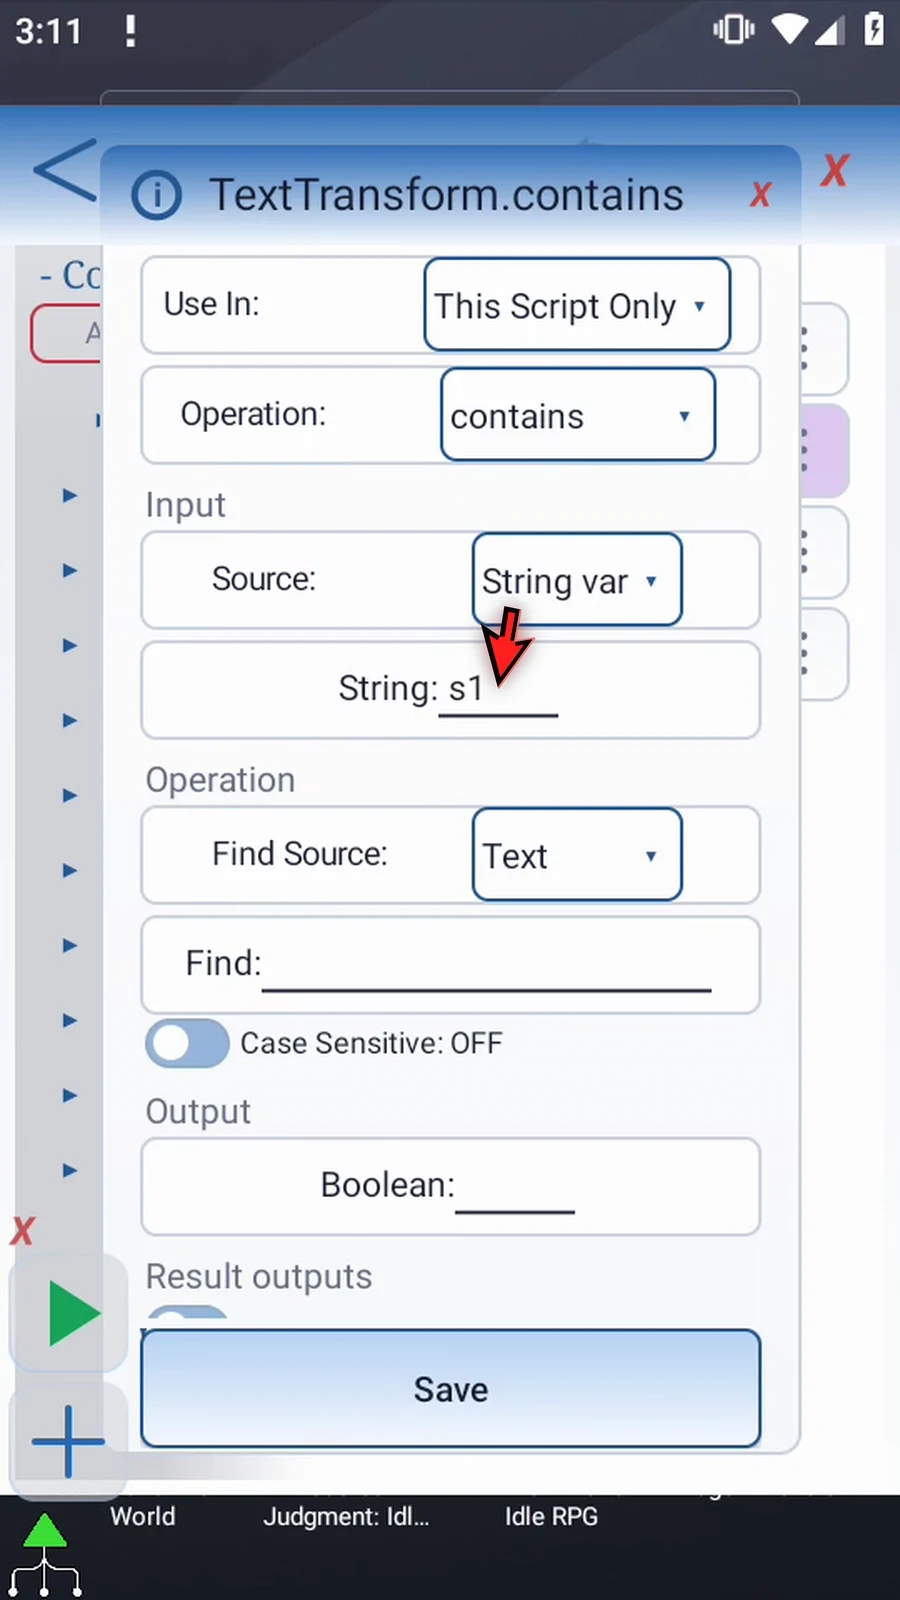
Step 04 Find Source can be text entered here, or an earlier String variable. Keep Text for this example.
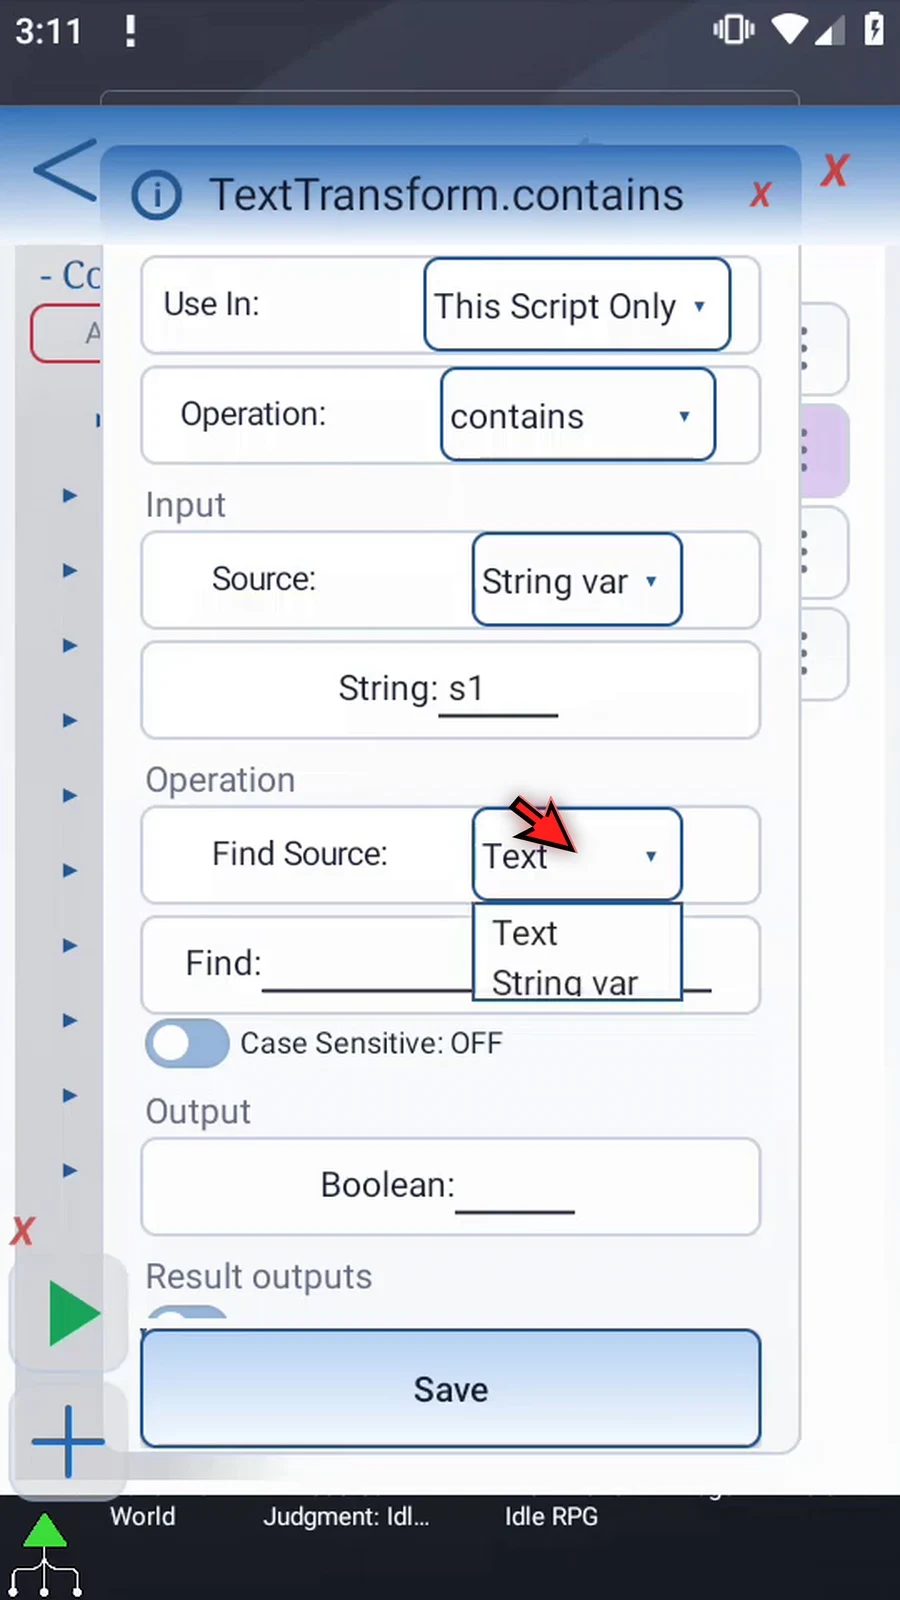
Step 05 Enter script in lowercase as the text to find. Contains looks for this substring; it does not replace the source text.
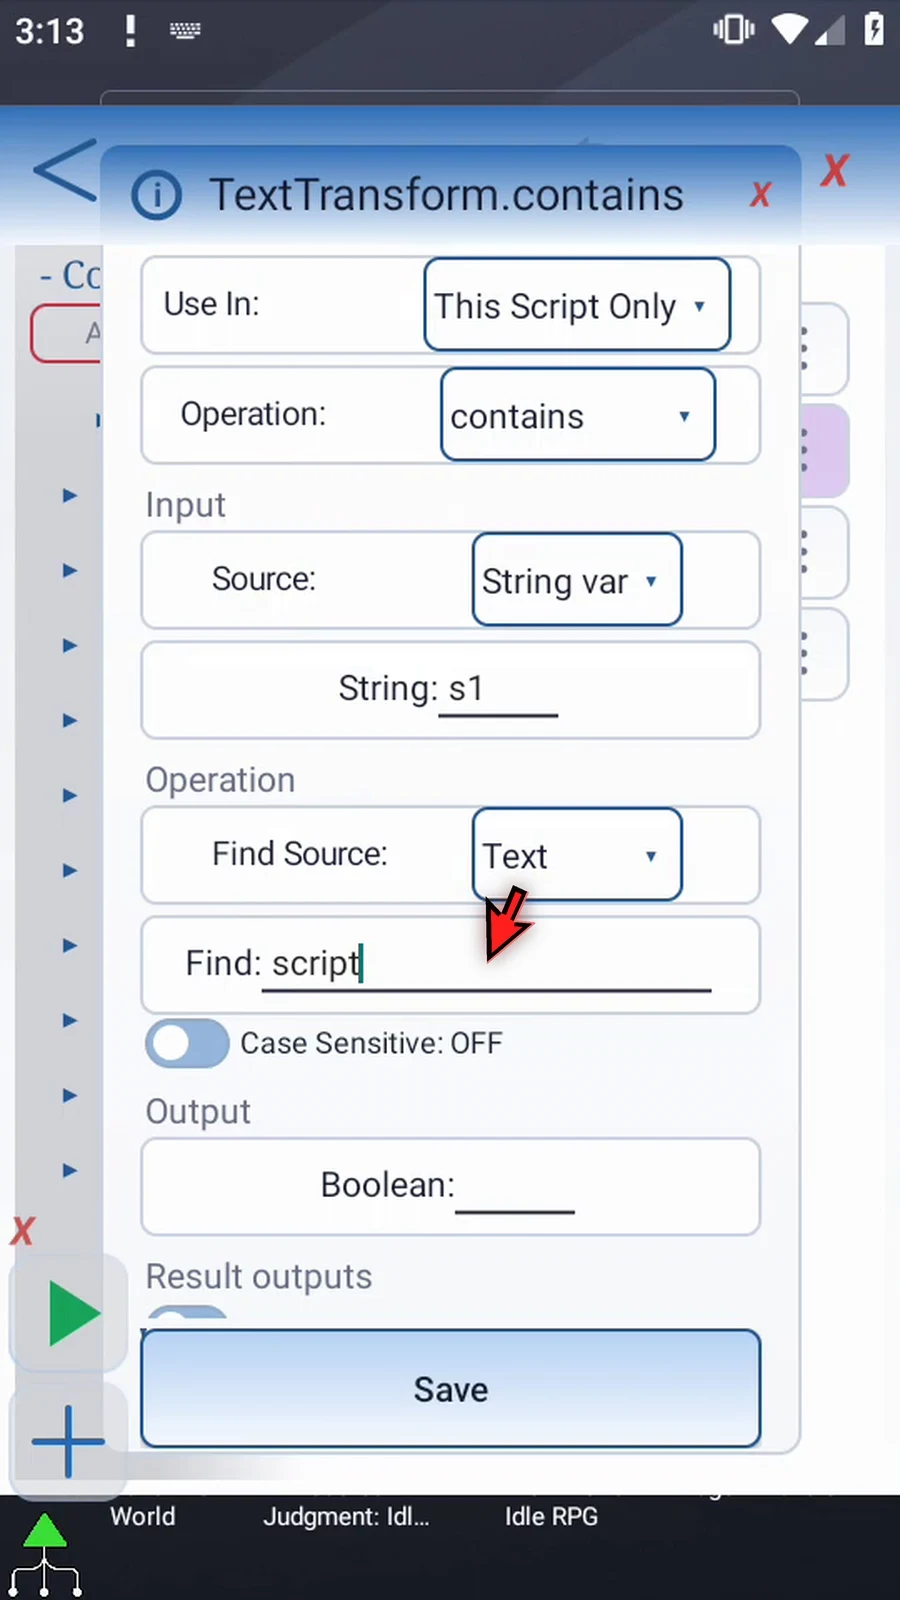
Step 06 Keep Case Sensitive off. This allows lowercase script to match the beginning of ScriptTap even though its first letter is uppercase.
Step 07 Enter b2 as the Boolean output. It will hold True when the text is present, and False when it is absent. This is the match result, not the optional Success status.
Step 08 Open the supporting Display command and change its variable from s2 to b2. Keep the same area and ten-second lifespan, then tap OK.
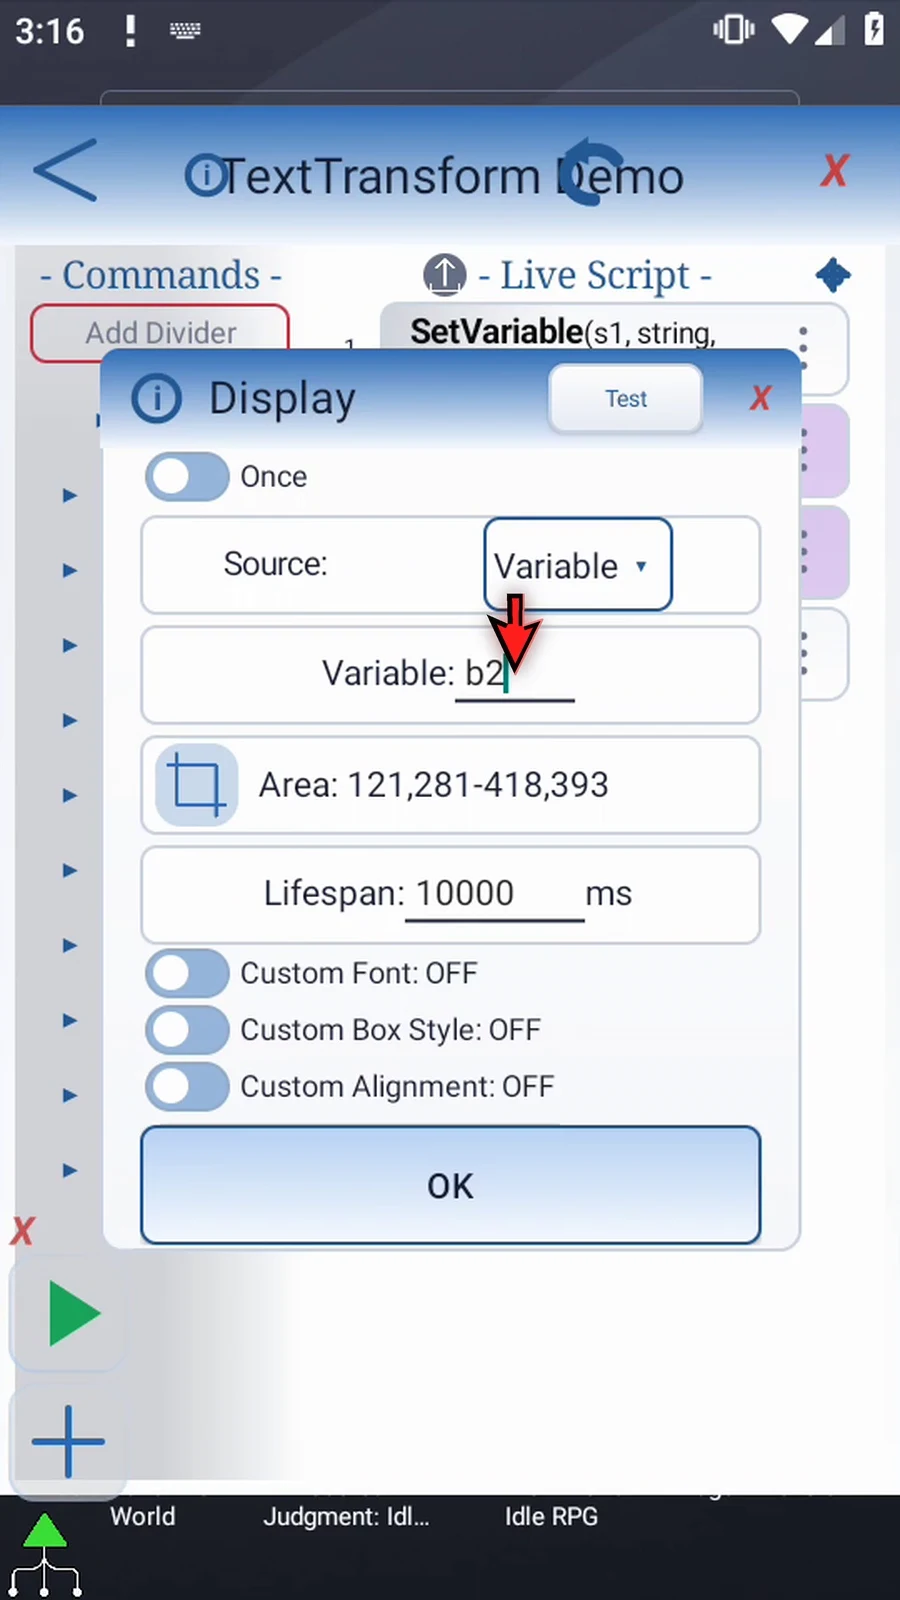
Step 09 The assignment supplies the source, Contains checks it, Display shows b2, and Prompt Me confirms completion. Close the editor for the first test.
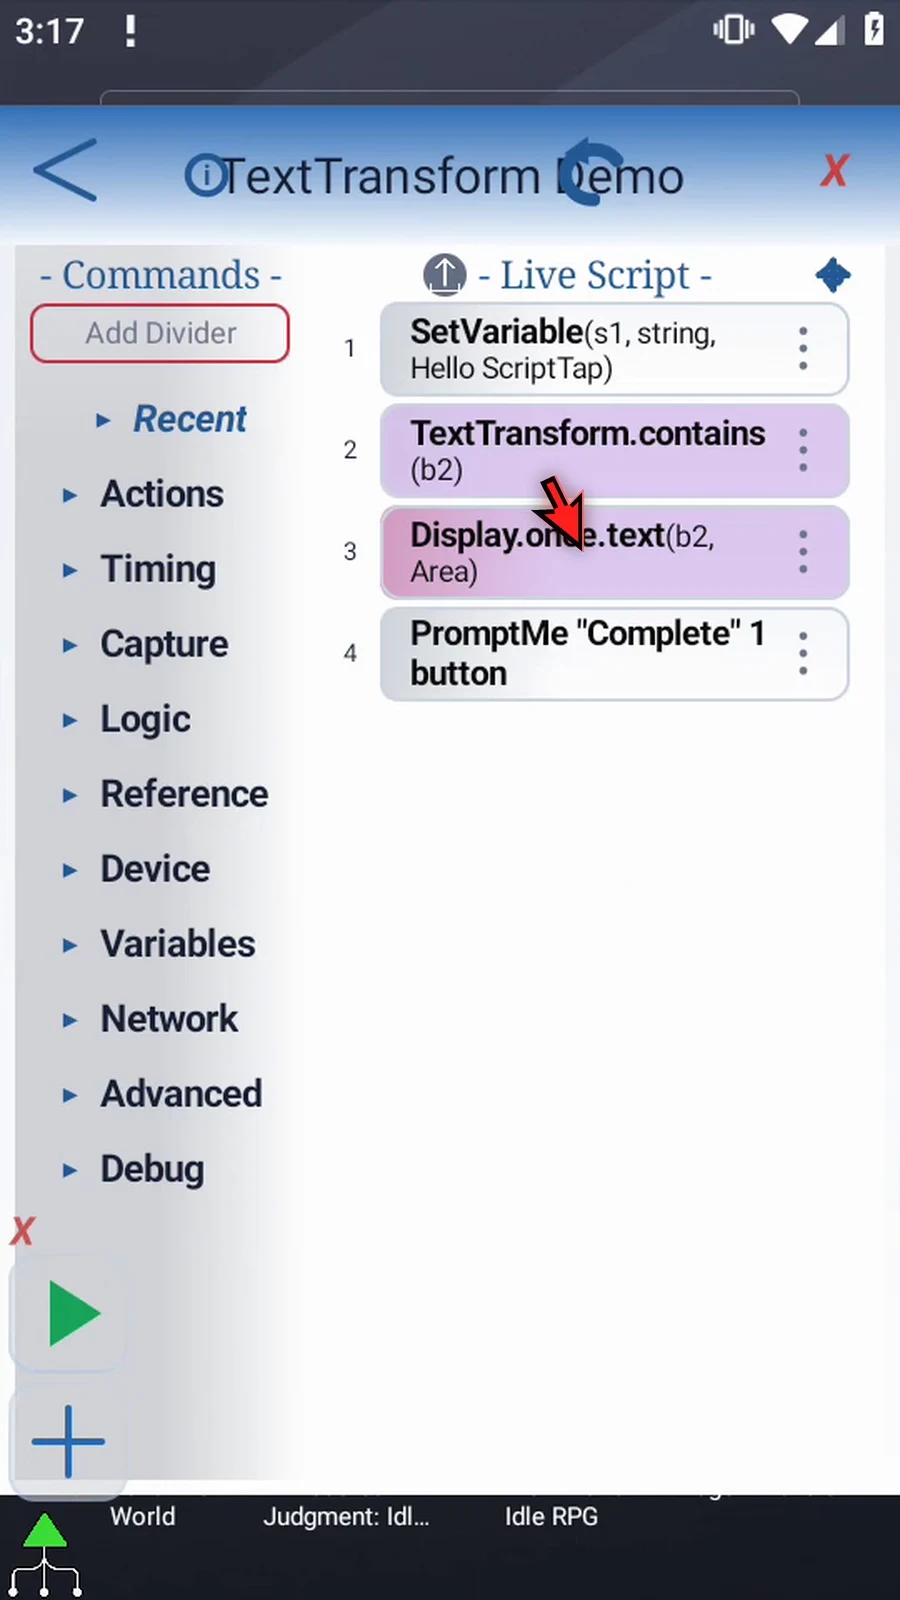
Step 10 When the script is complete, simply use the Play button in the main overlay.
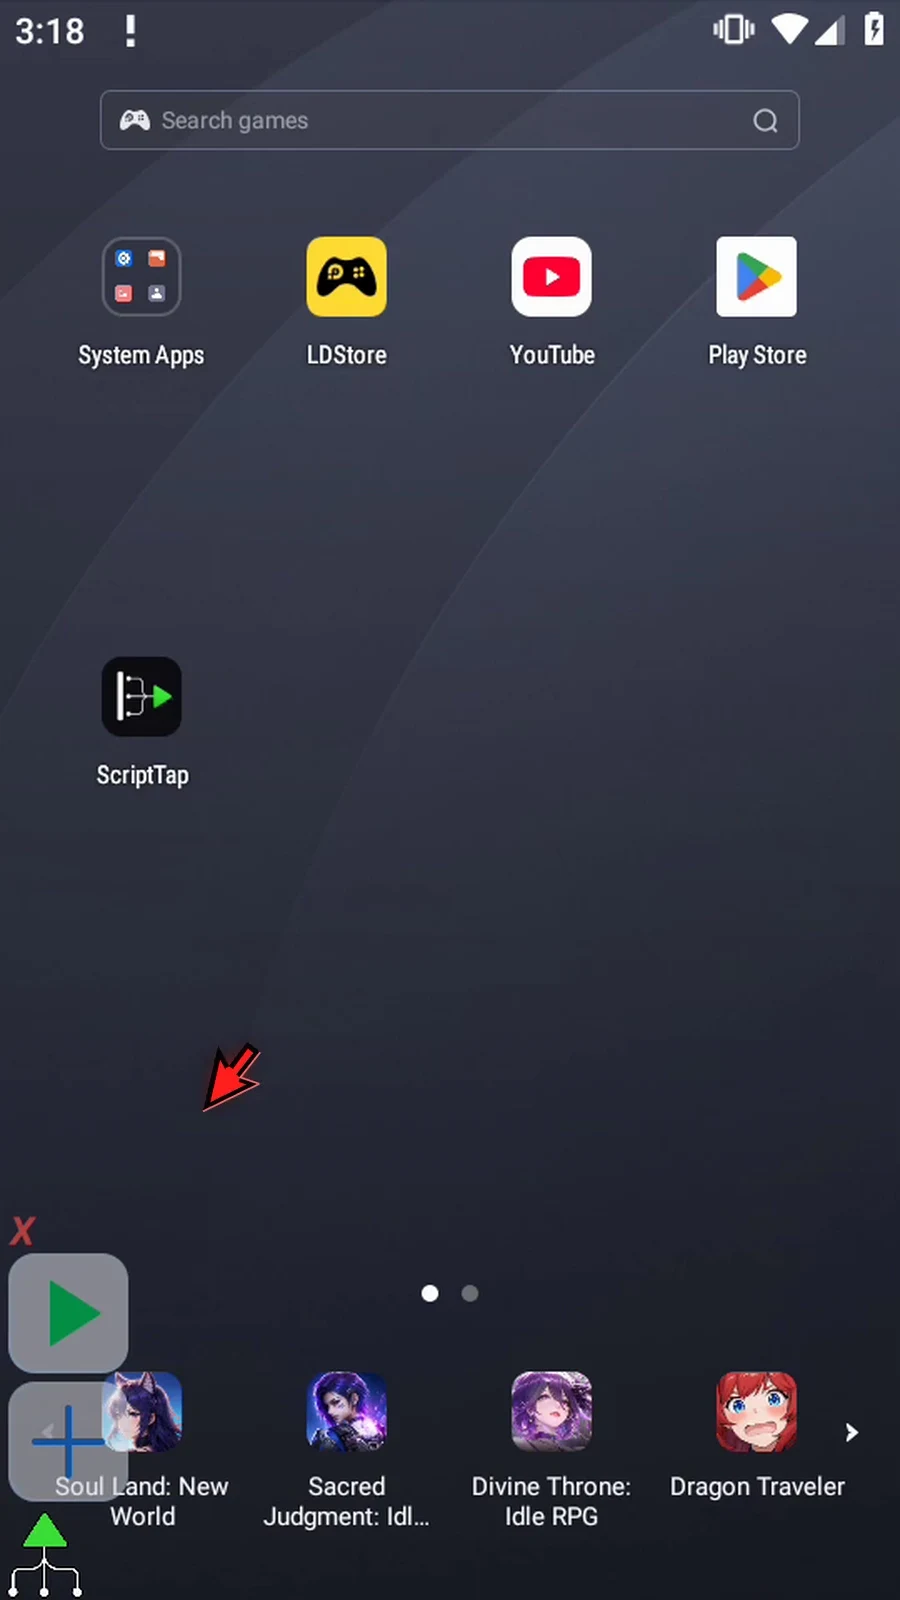
Step 11 The result is True. The lowercase search text is present when case is ignored. A later IF command can use b2 to decide what happens next.
Step 12 After ten seconds, Display closes and Complete appears.
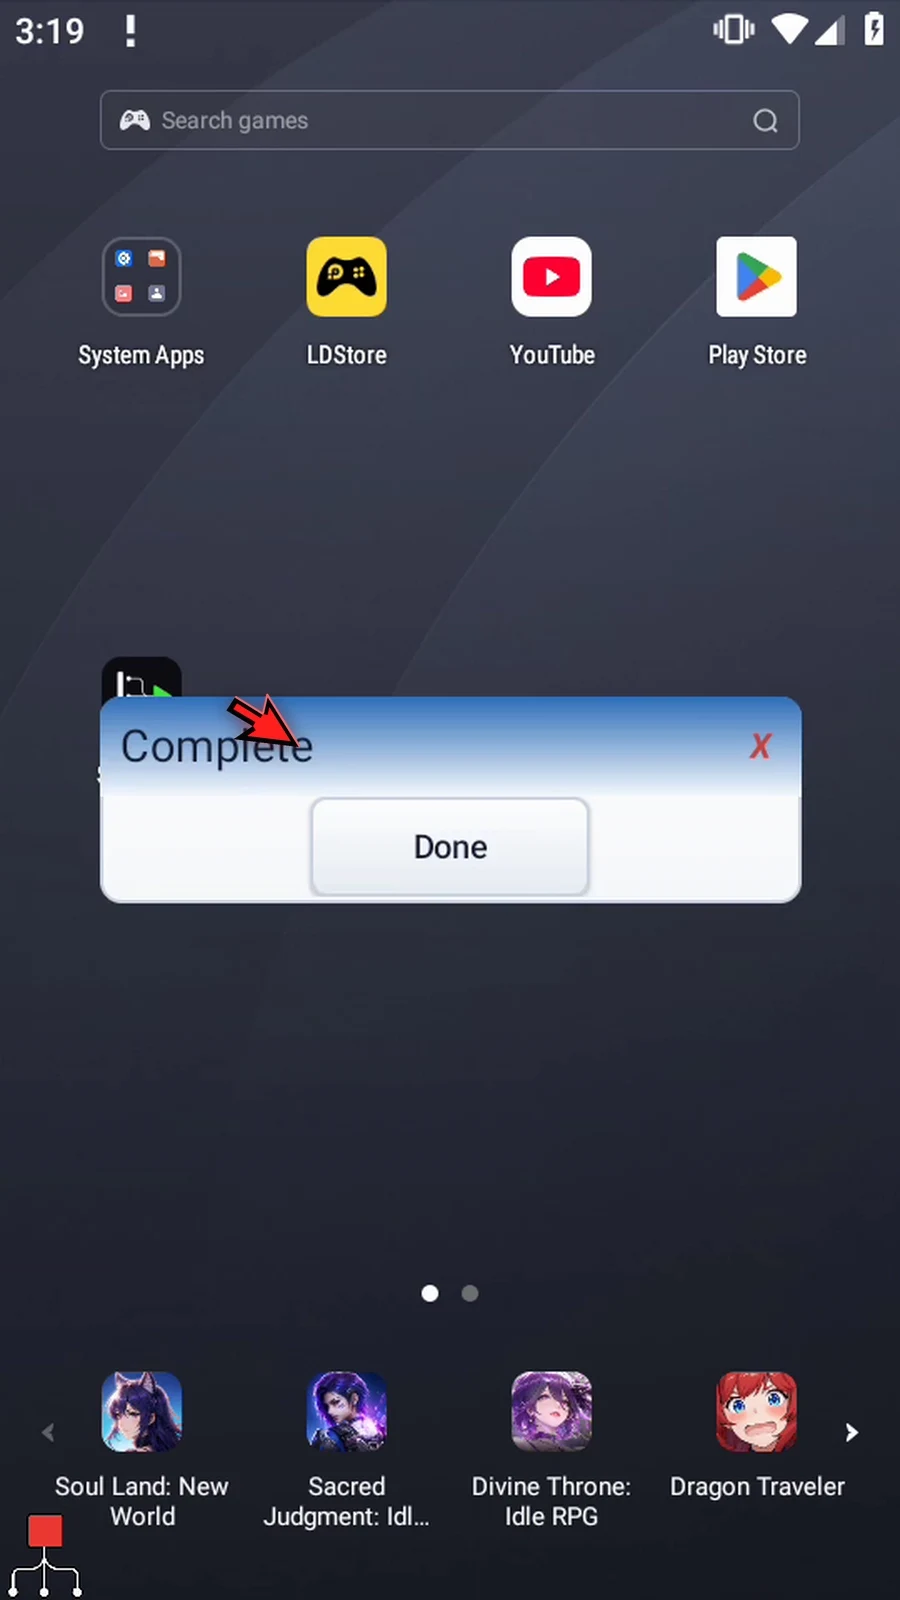
Step 13 Press Done to finish the first test.
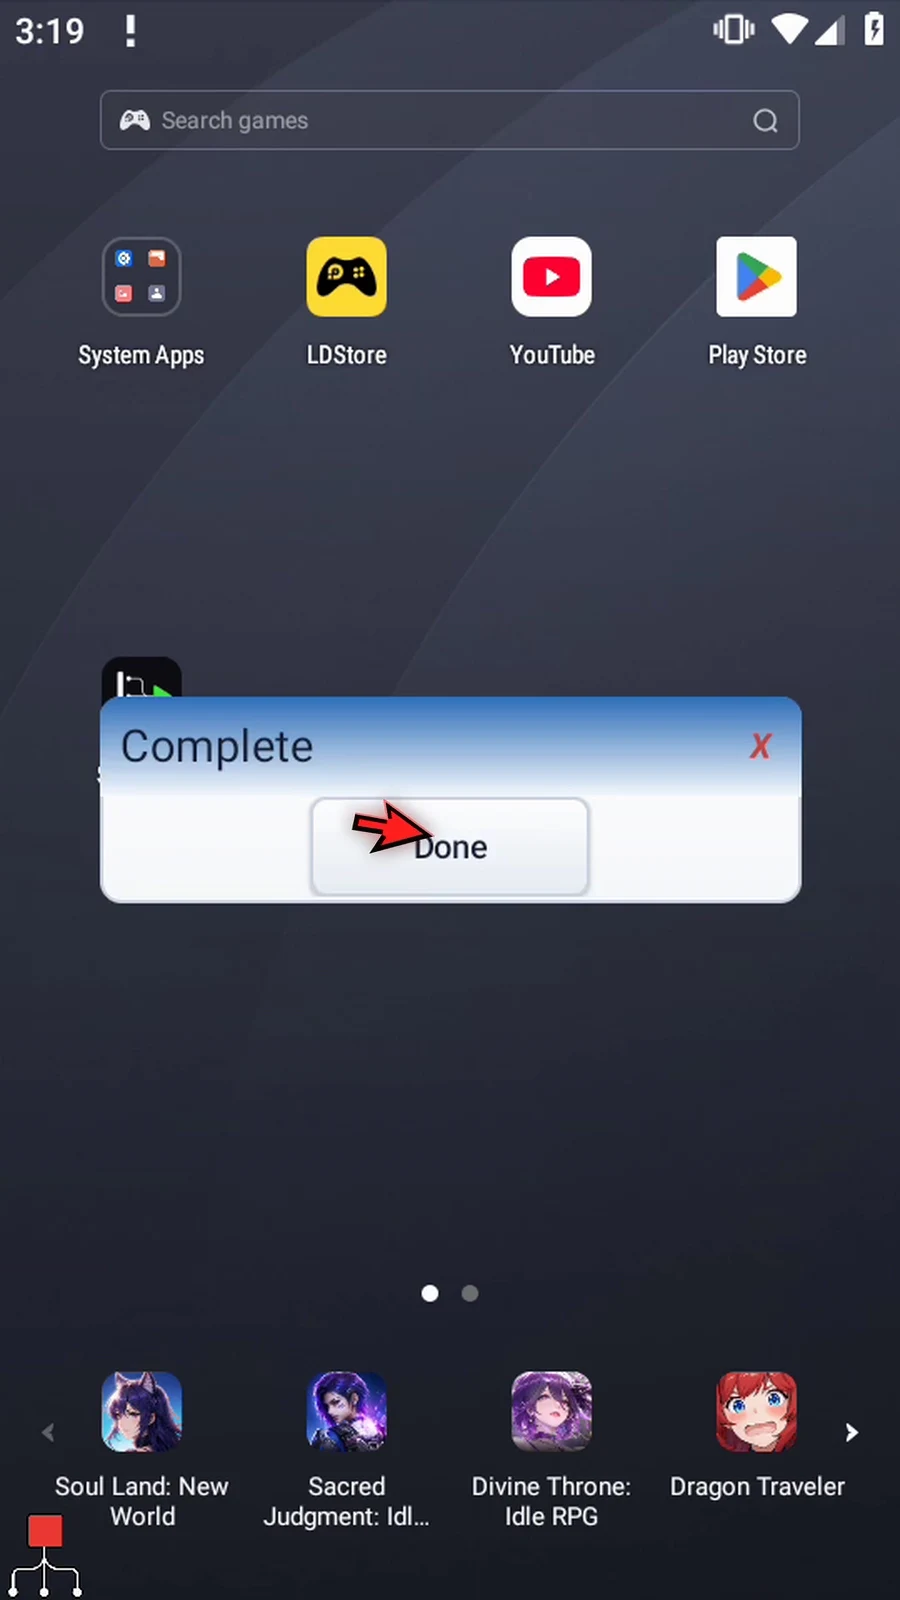
Step 14 Open the main overlay again and return to the editor.
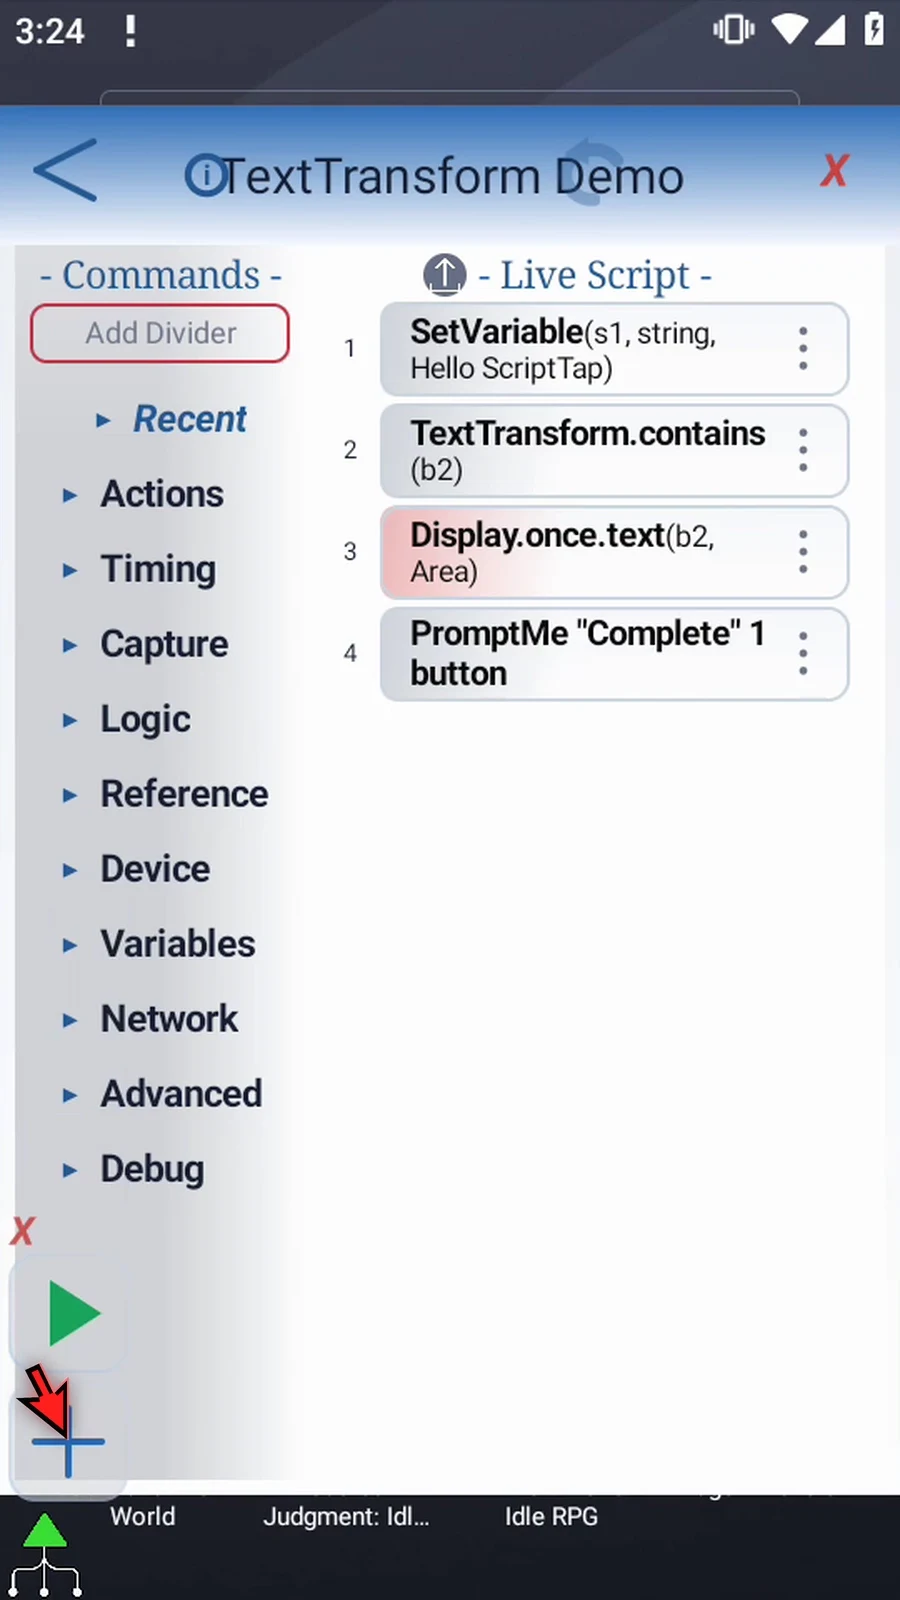
Step 15 Reopen Text Transform and turn Case Sensitive on.
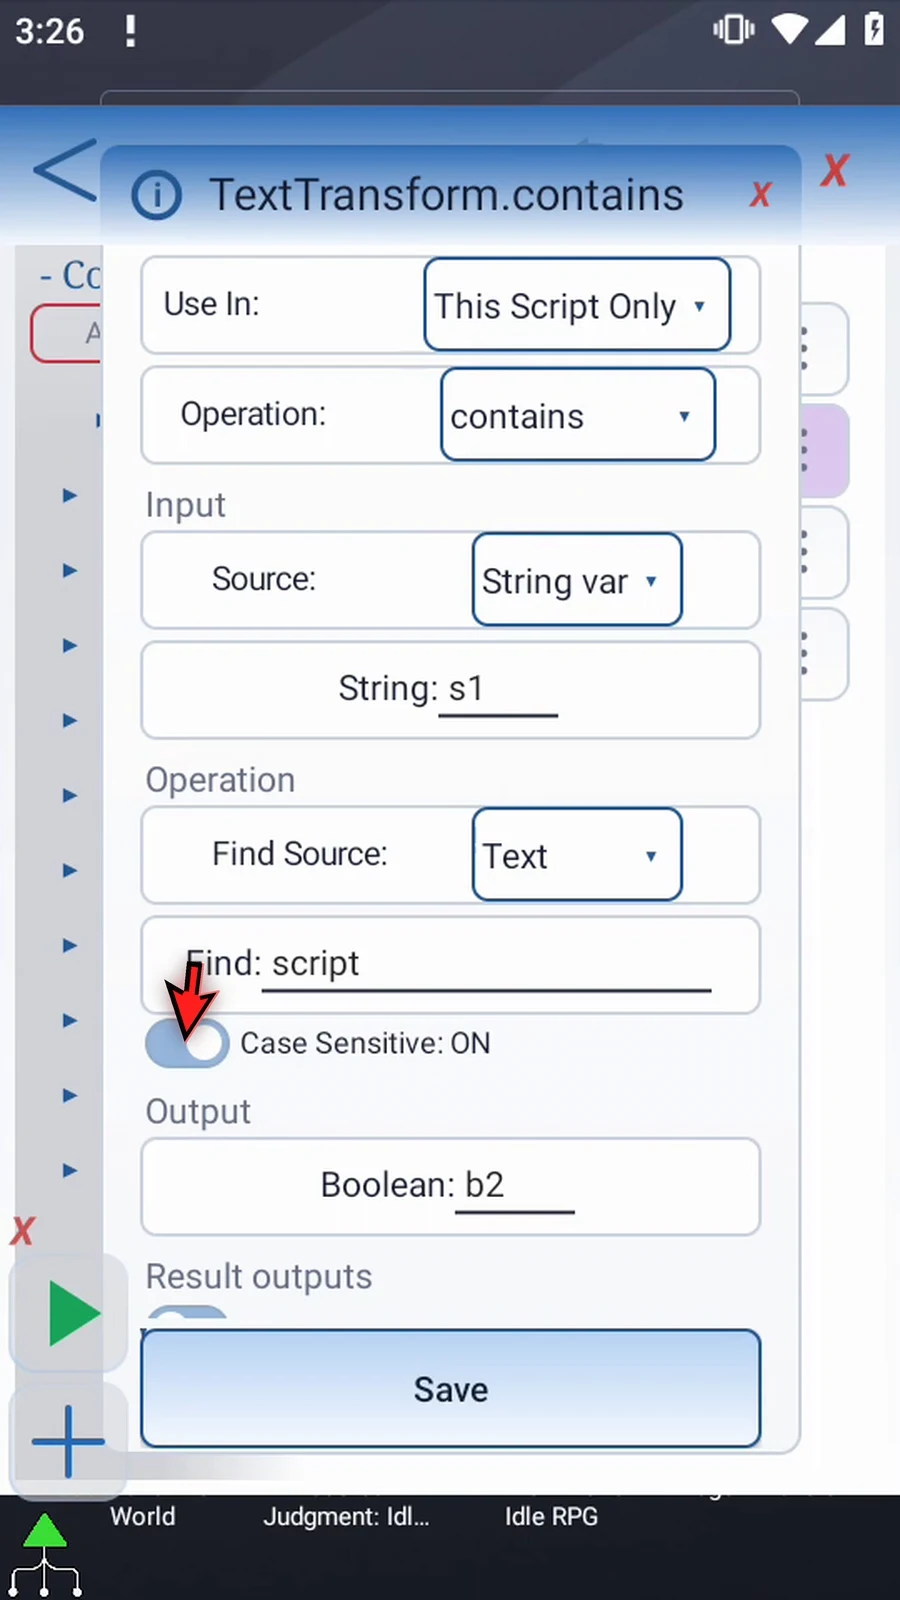
Step 16 The input is still Hello ScriptTap, but our search text is lowercase script. With Case Sensitive on, the capital S no longer matches. Keep b2 as the output and tap Save.
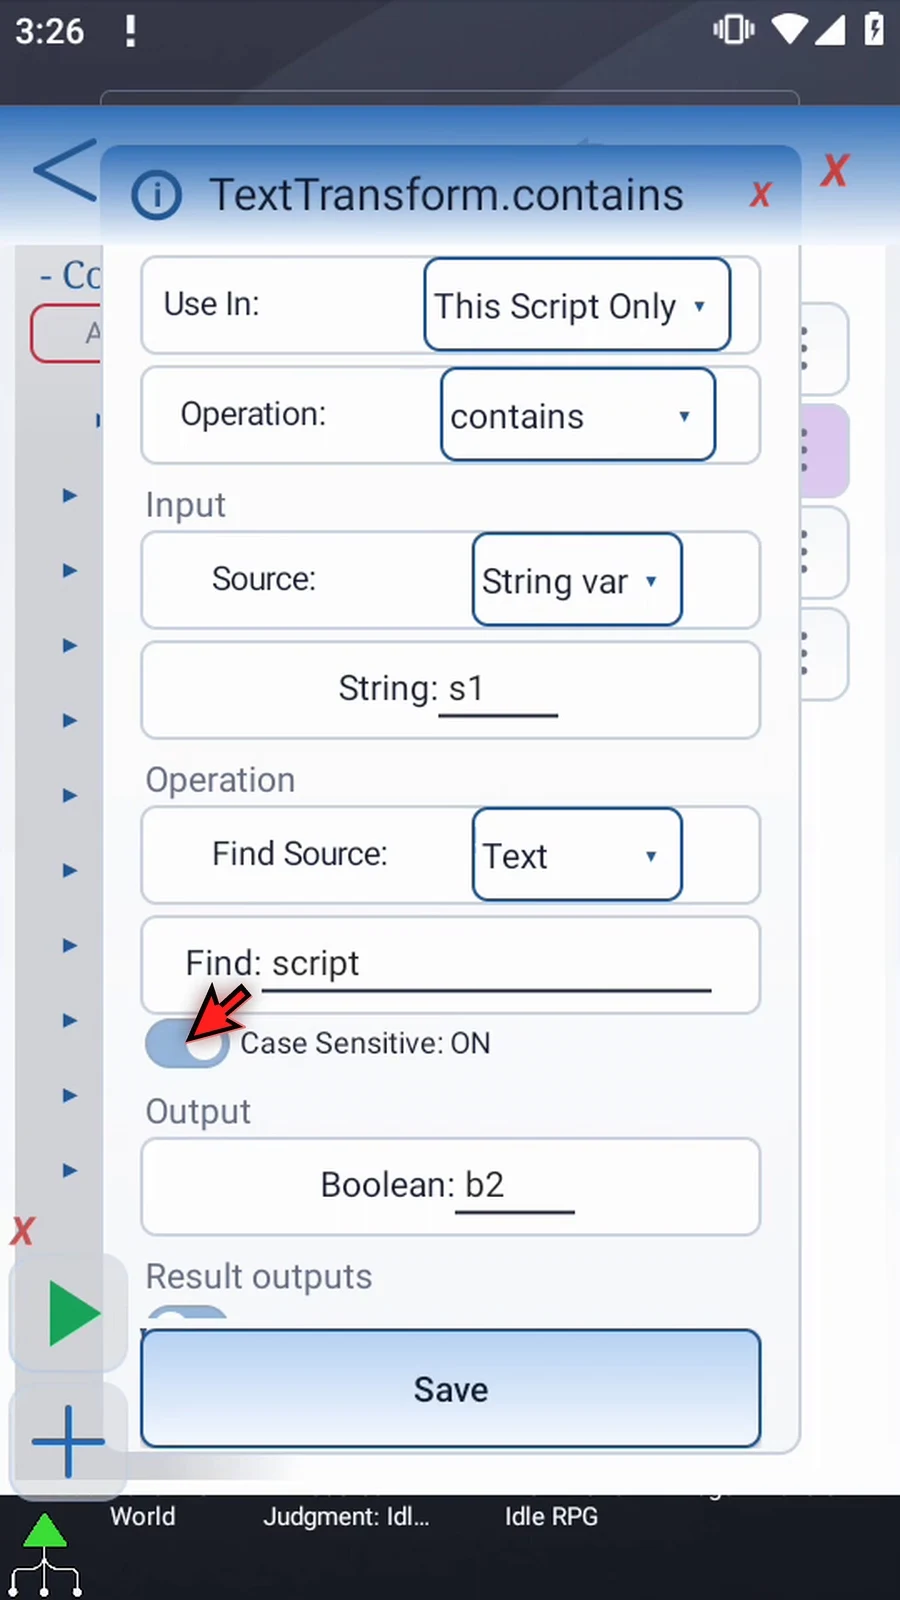
Step 17 Only the case-sensitivity setting changed. Close the editor and run the same script again.
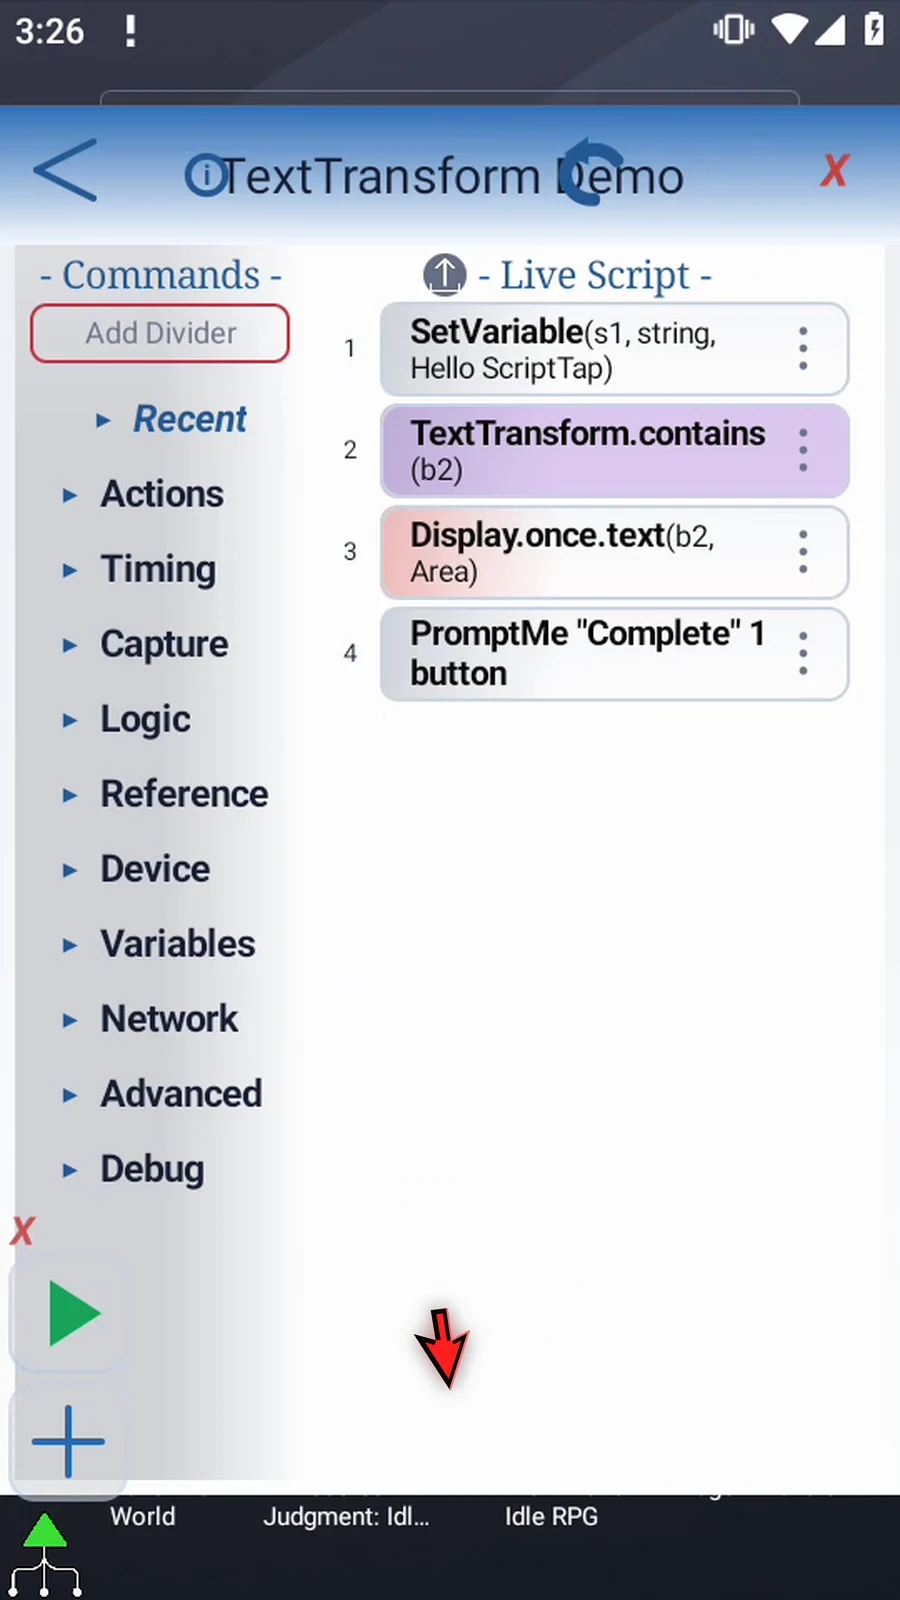
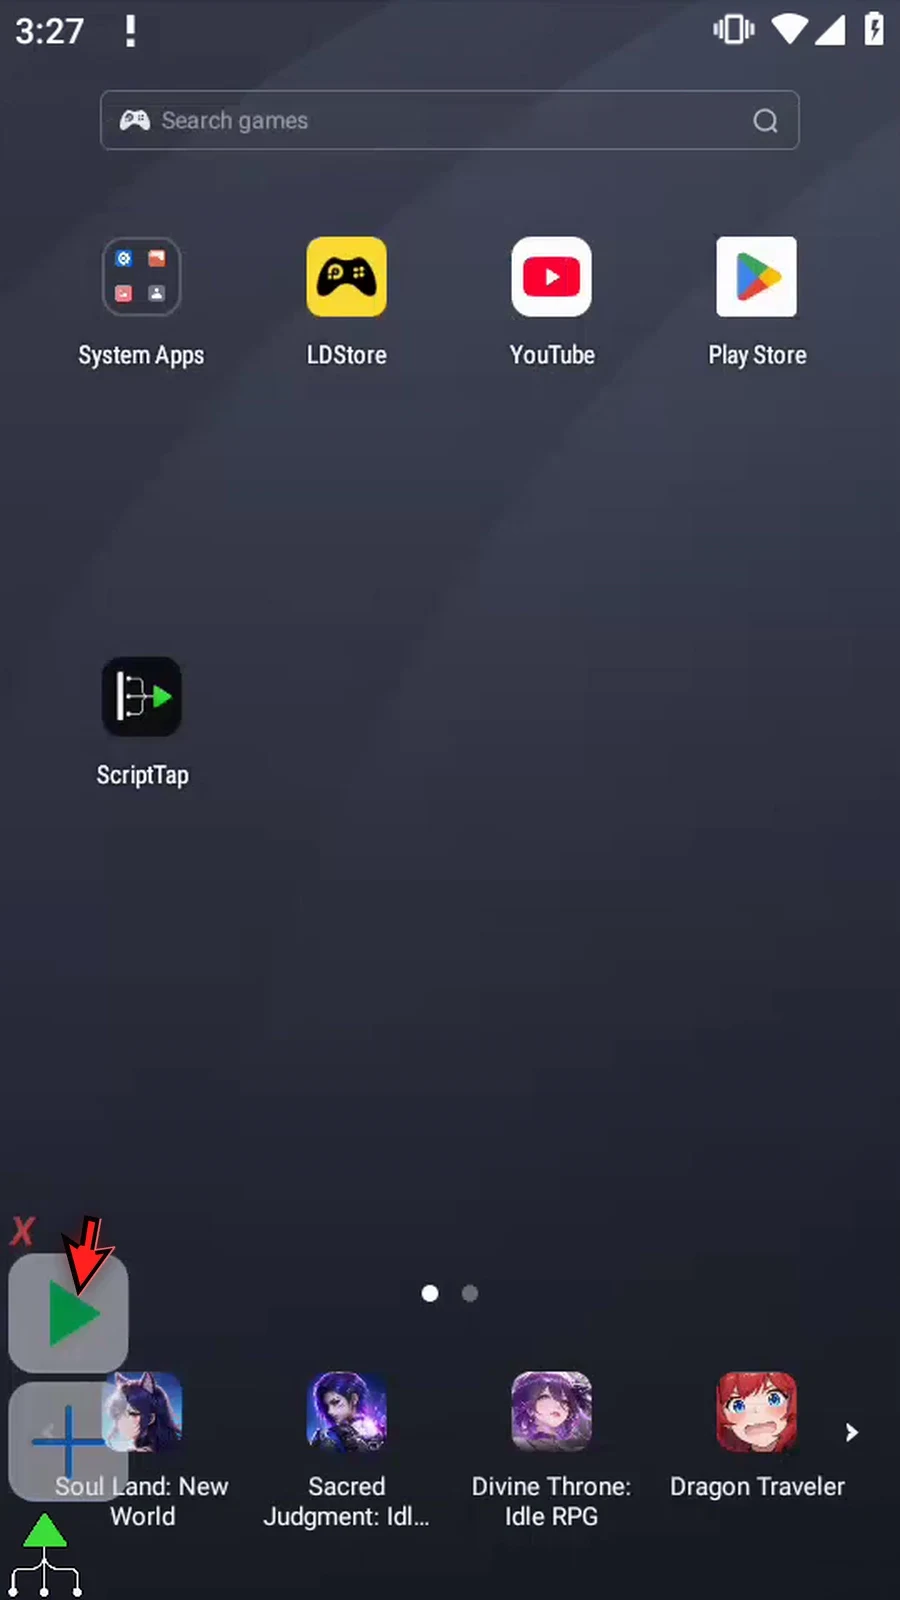
Step 18 When the script is complete, simply use the Play button in the main overlay.
Step 19 This time the result is False. The capitalization does not match. A False match result is a normal outcome; it does not mean the command failed.
Step 20 Display closes and Complete confirms that execution continued.
Step 21 Press Done. The script finishes automatically. Use Contains when later actions need to know whether text includes a particular word or substring.
Extract selects a matching part of a larger String so later commands can use just that part. It uses a Java regular expression and the first matching occurrence, not a literal substring search. Use Find All when you need multiple matches.
Reuse the four-command TextTransform Demo from Intro / Case. Its first SetVariable assigns Hello ScriptTap to String s1. Open the existing TextTransform and choose extract. Keep This Script Only and input String var → s1. The input could instead be literal Text; this example reads the earlier variable and preserves it.
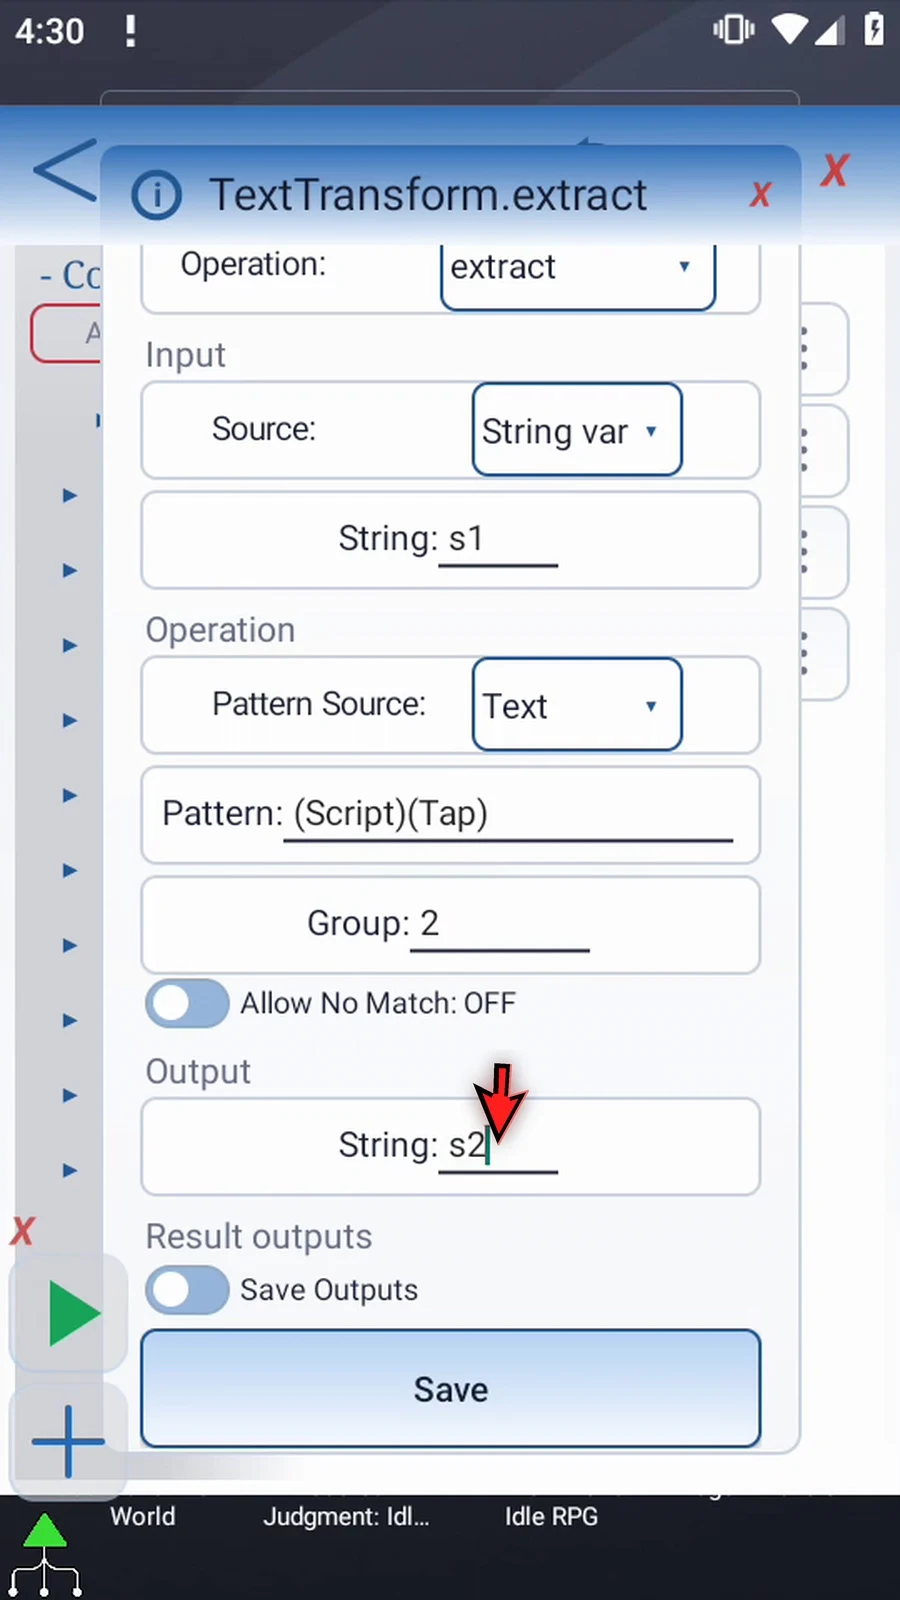
Pattern Source independently accepts literal Text or an earlier String var containing the regular expression. Keep Text and normally type (Script)(Tap). Parentheses define capture groups: Group 0 is the entire match ScriptTap, Group 1 is Script, and Group 2 is Tap. Enter 2. Group also accepts an earlier Integer variable; the resolved value must select a valid group.
Allow No Match OFF gives blank String output and failure status when no occurrence matches. Turning it ON accepts that blank result as success. It does not make invalid patterns or invalid capture groups valid. The guide genuinely shows the toggle ON, then restores it OFF for the matching example. These statuses are distinct from an automatic script-stop command.
Scroll to Output and enter String destination s2. This keeps the source in s1 and stores the extracted text separately. Leave Save Outputs OFF here; the Intro explains optional Boolean Success and String Error destinations. Tap Save.
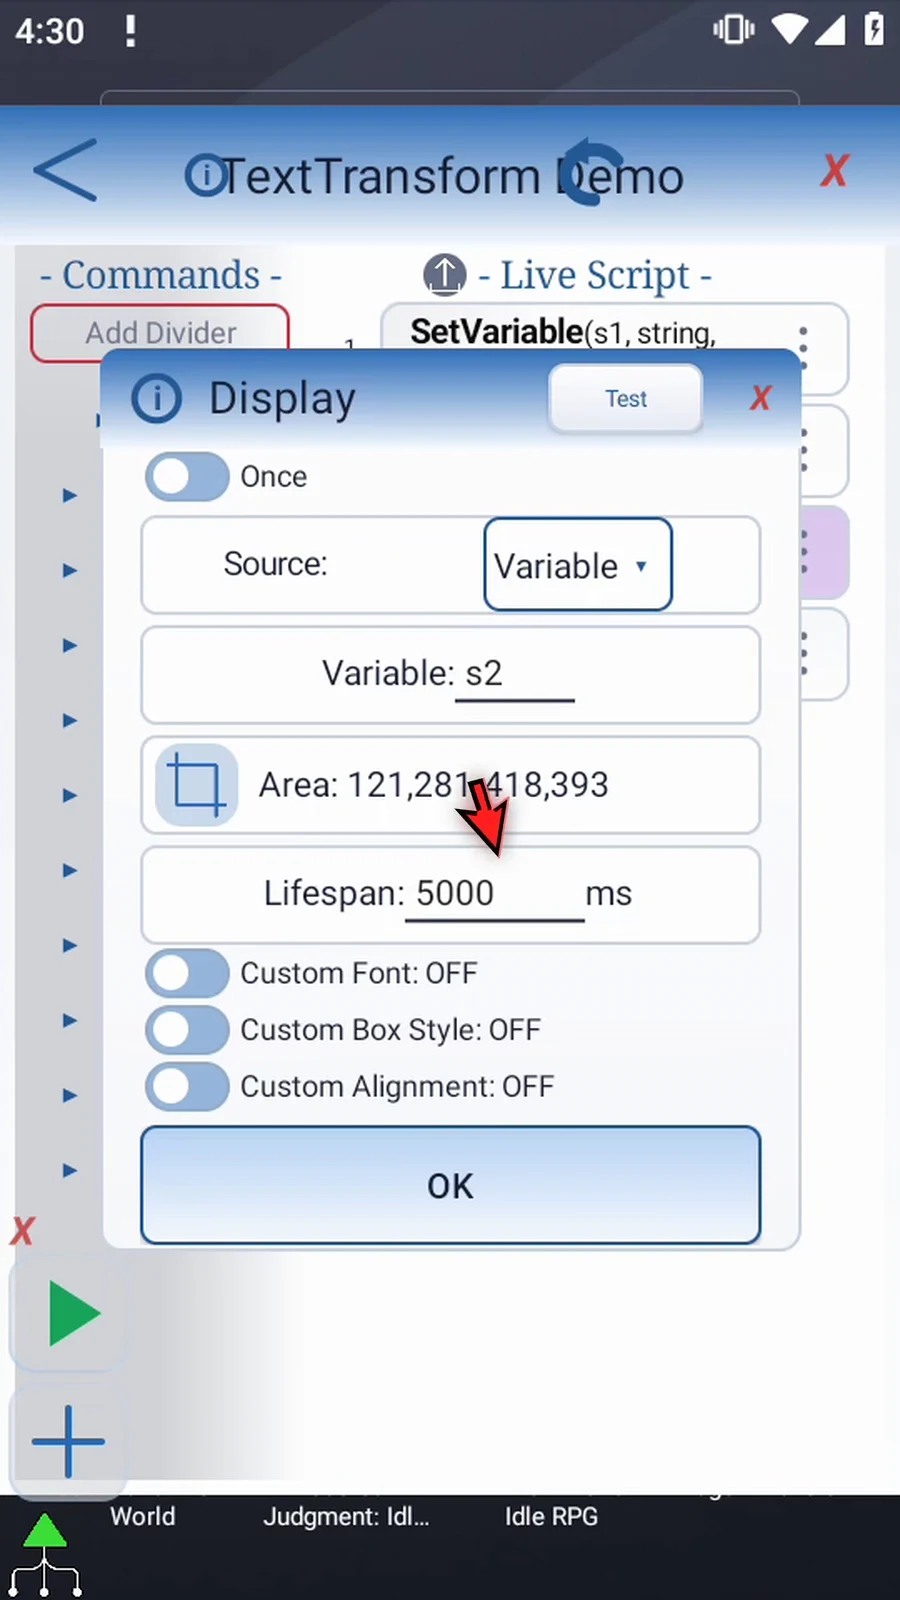
Open the existing supporting Display. It reads Variable s2, uses the same clear area and default appearance, and has lifespan 5000 ms. Keep those settings and tap OK. The final button-only PromptMe remains Complete / Done.
Close the editor and use Play. The actual result is Tap, read from s2, while s1 stays Hello ScriptTap. The complete genuine timed display and its natural transition are retained. Complete follows; press Done to finish automatically. The recorded four-command run completed with zero warnings/errors.
Extract
Step-by-step guide
Step 01 Extract pulls a matching part out of a larger piece of text, so later commands can use just that part. We will reuse the Intro script, where s1 contains Hello ScriptTap.
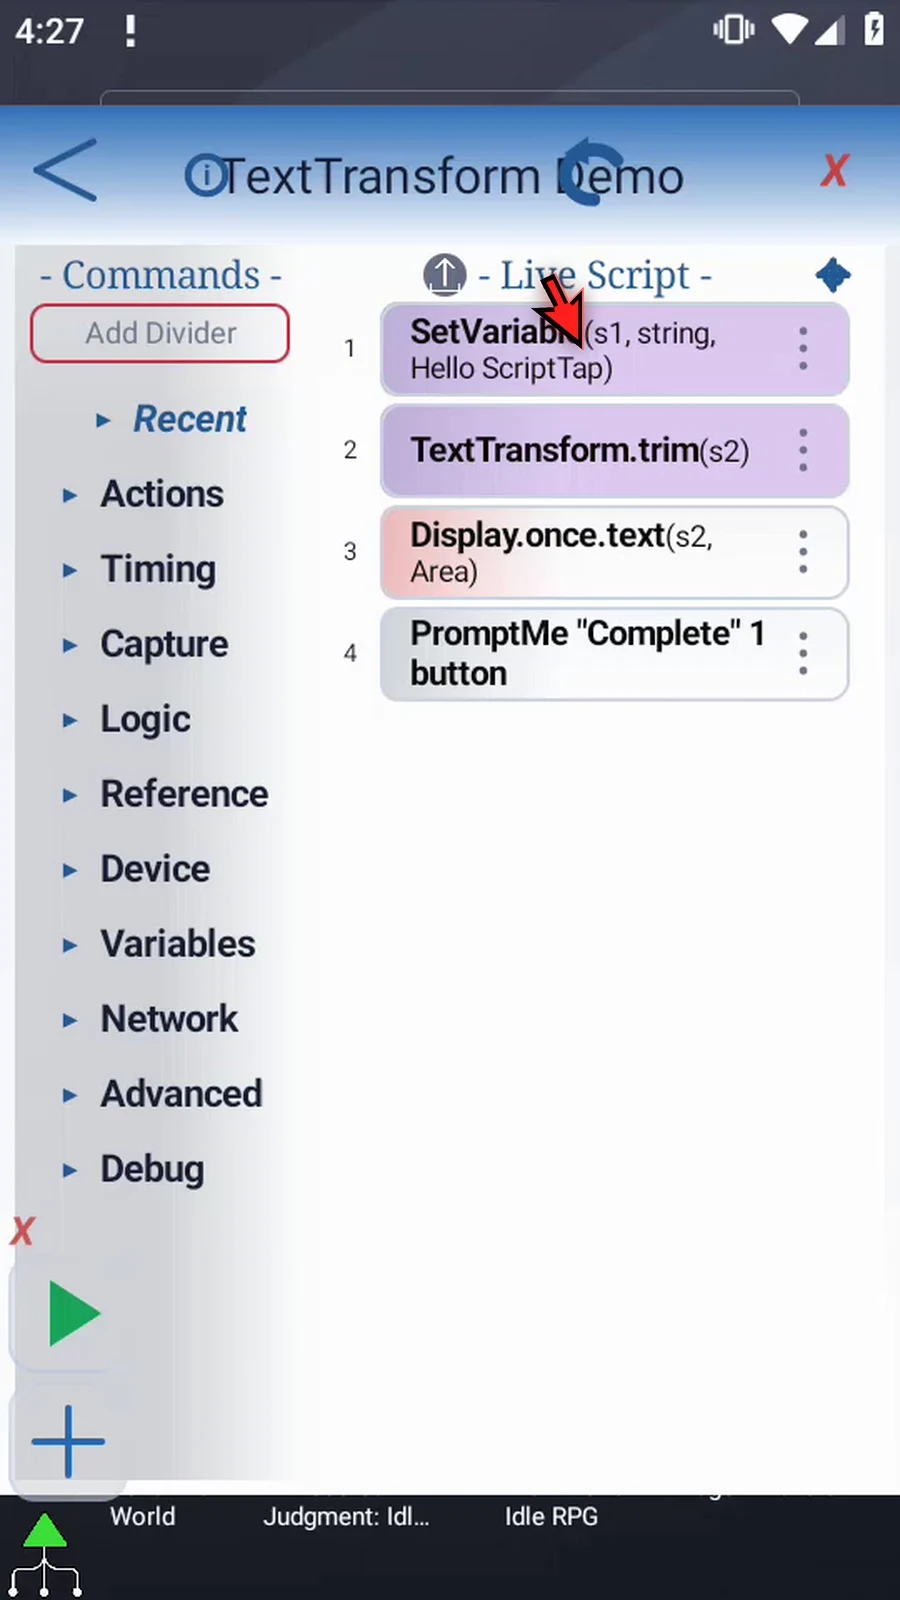
Step 02 Open Text Transform and choose Extract from the Operation menu.
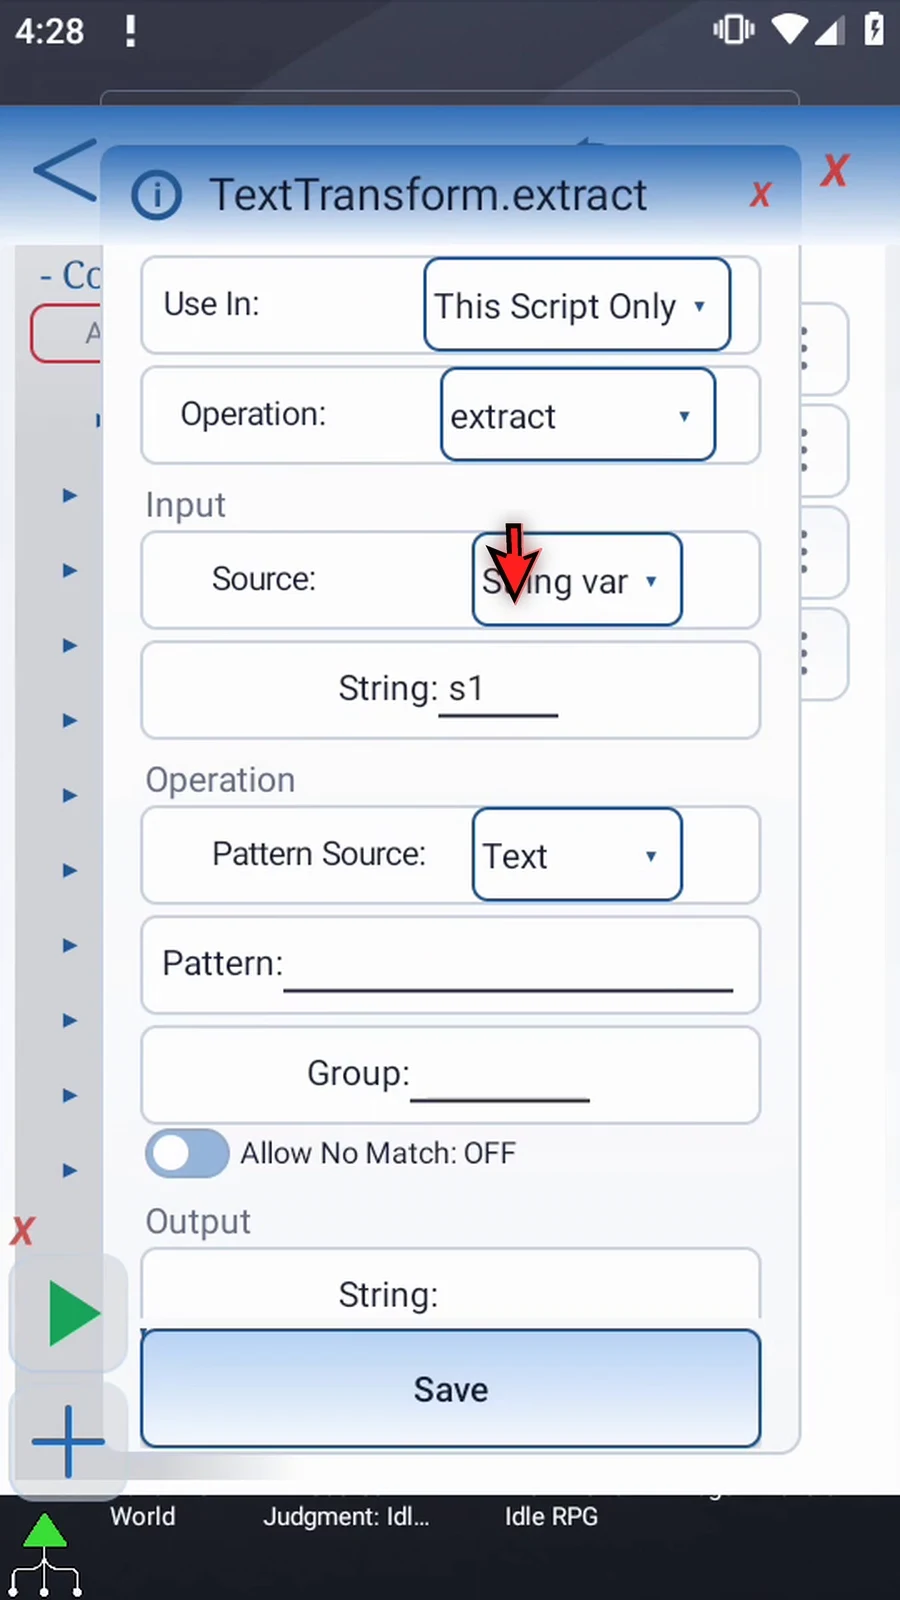
Step 03 Keep String variable s1 as the input and This Script Only as the scope. Extract searches within this value without changing the original.

Step 04 Pattern Source can be text entered here, or an earlier String variable containing the pattern. Keep Text for this example.
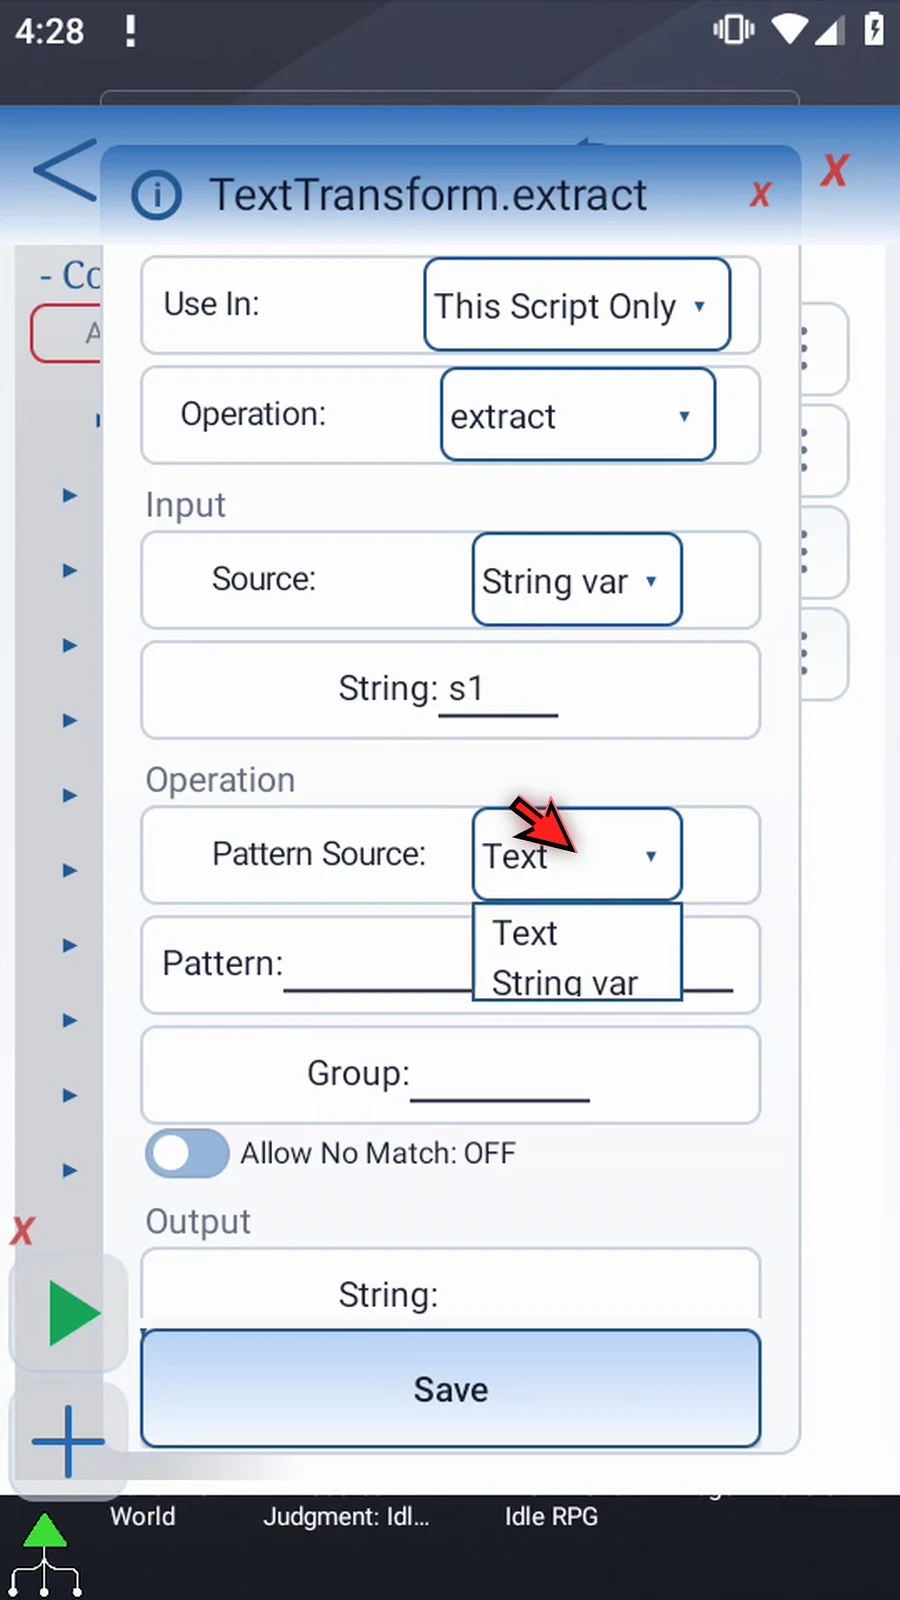
Step 05 Enter the pattern shown here: Script and Tap, each in its own pair of parentheses. These capture groups let us choose which part to keep. Extract uses a regular expression, not an ordinary text search.
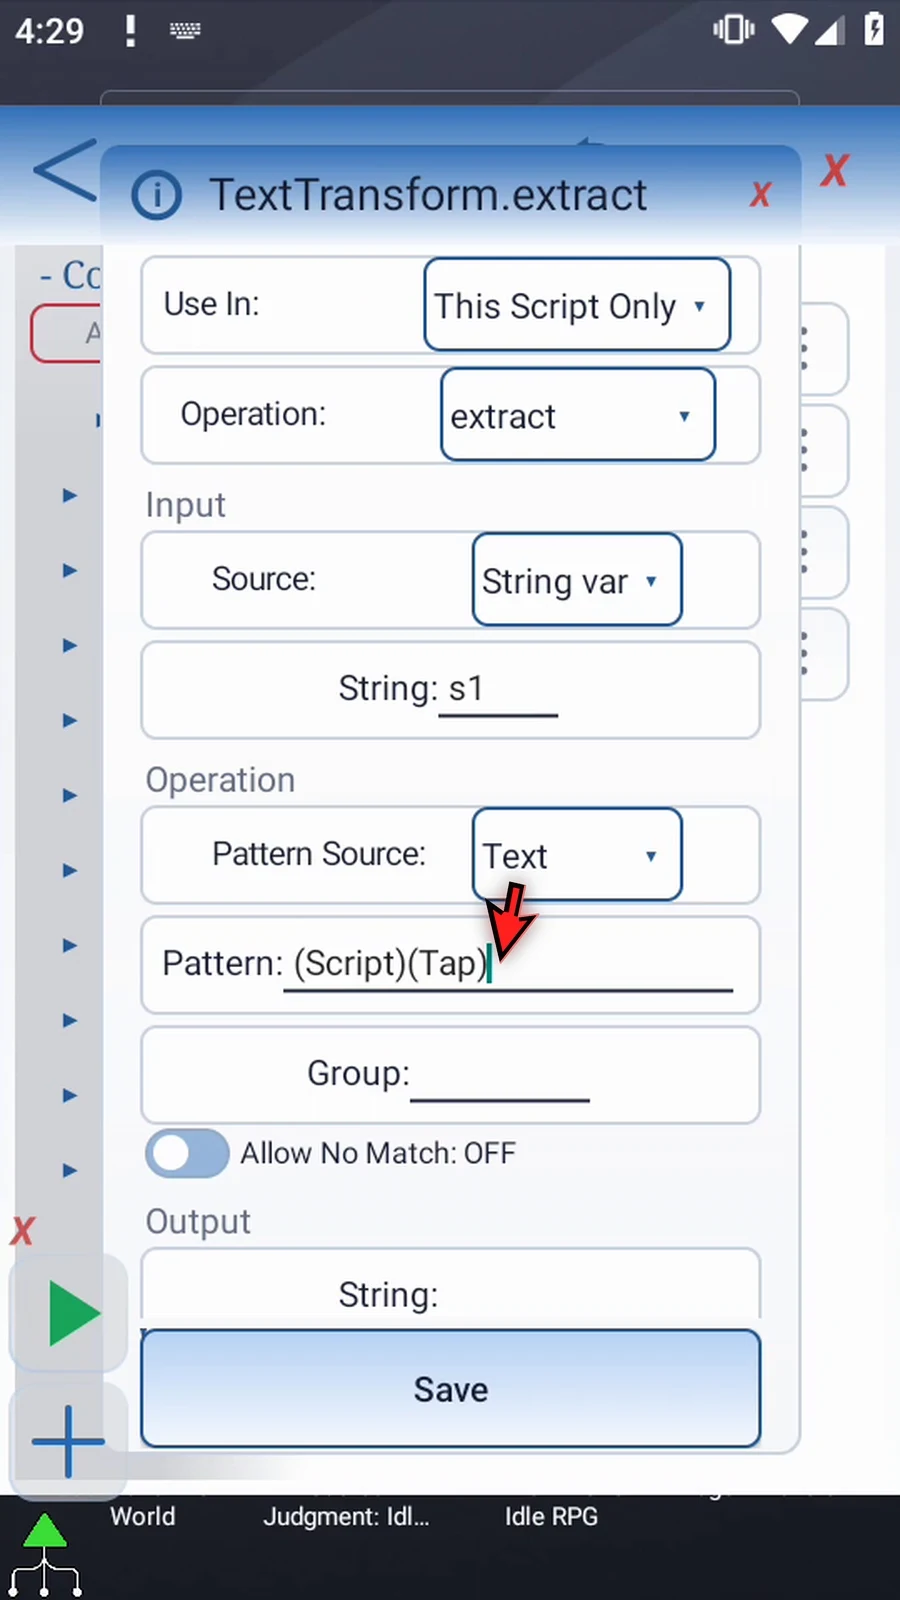
Step 06 Group zero means the whole match, ScriptTap. Group one is Script, and group two is Tap. This field also accepts an earlier Integer variable. Enter two, so this example keeps only Tap from the first match.
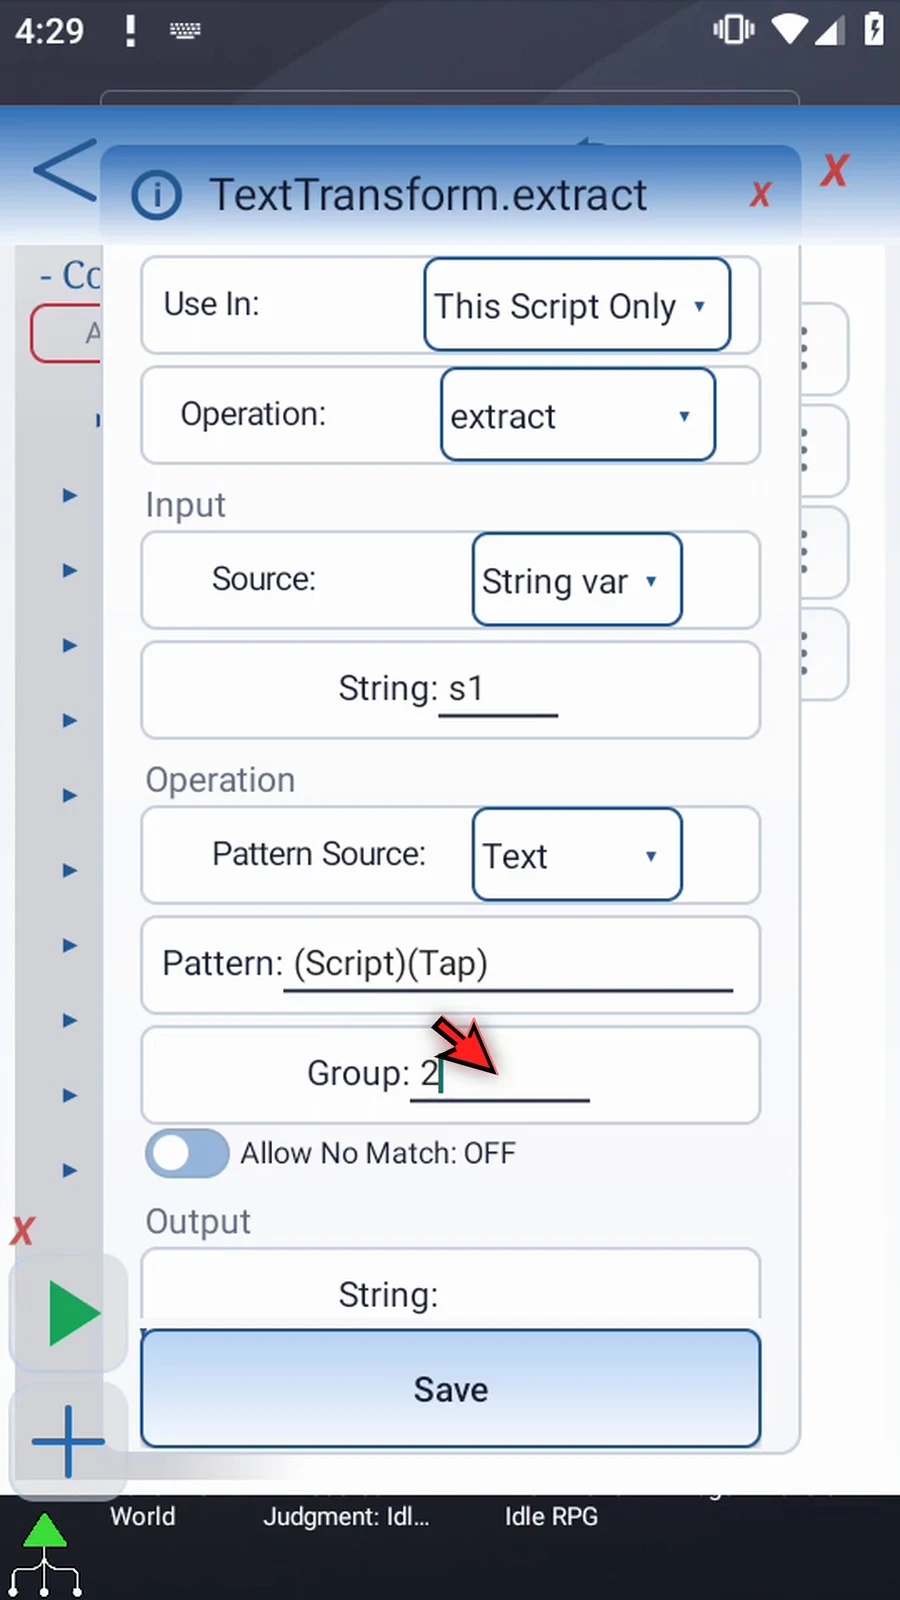
Step 07 With Allow No Match off, no match gives a blank result and reports failure. Turning it on allows a blank result as success. Invalid patterns or invalid groups are still errors. Keep it off here.
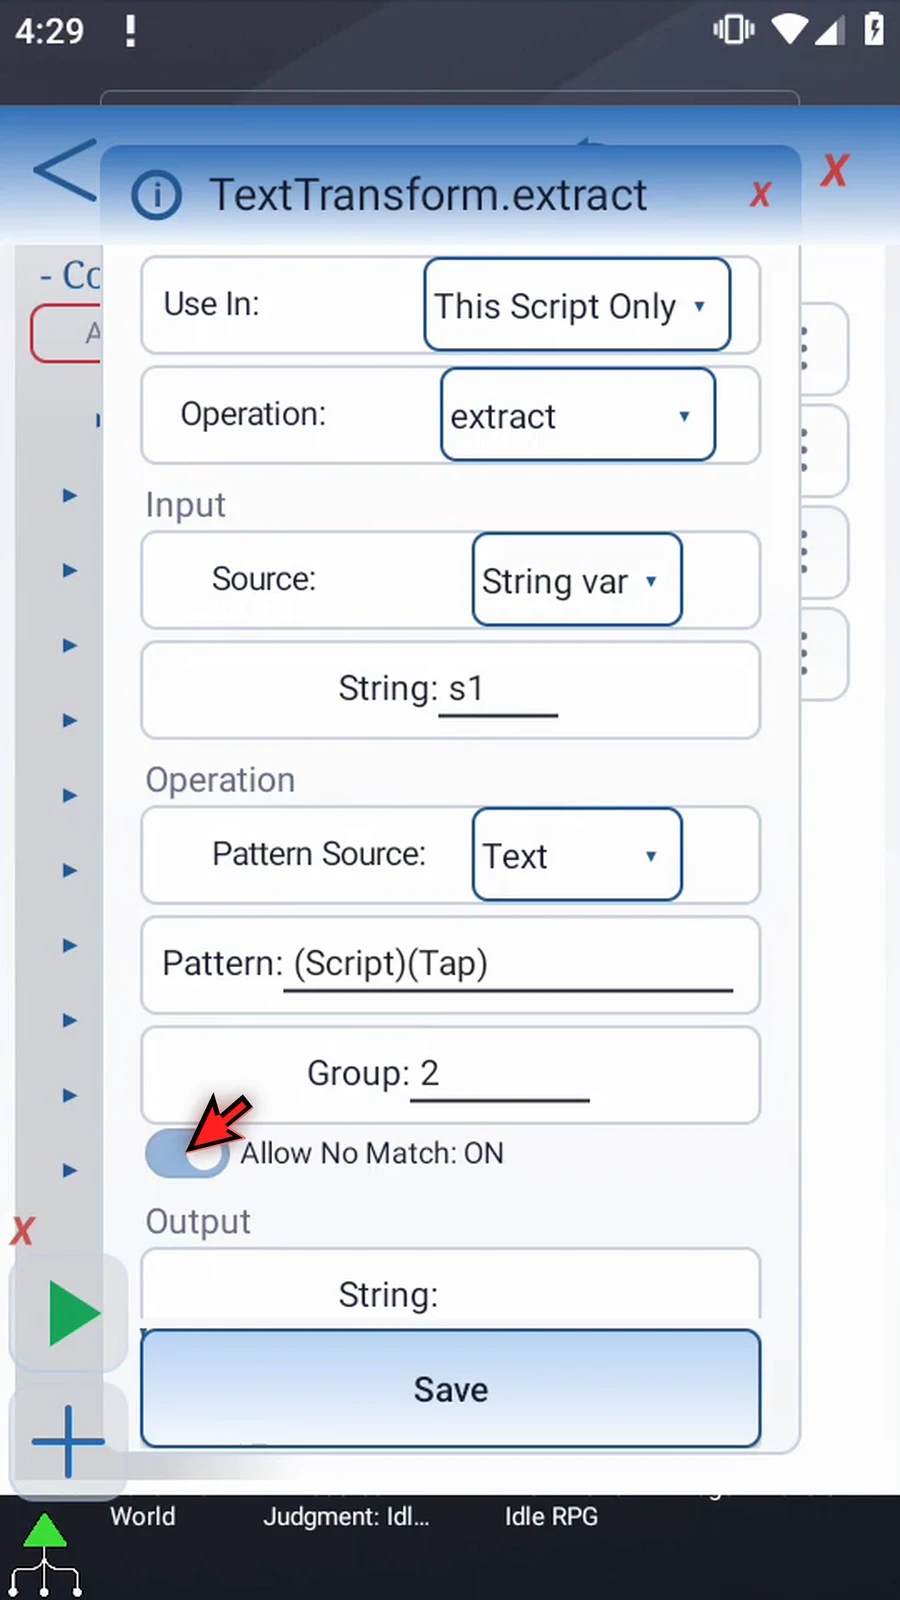
Step 08 Scroll to Output and enter s2 as the String destination. This stores the extracted text separately from s1. Leave optional Save Outputs off and tap Save.
Step 09 Open the supporting Display. It reads s2. Use a five-thousand-millisecond lifespan, giving us five seconds to see the result. Keep the existing area and appearance, then tap OK.
Step 10 The assignment supplies the text, Extract selects the capture group, Display shows the result, and Prompt Me confirms completion. Close the editor to test it.

Step 11 When the script is complete, simply use the Play button in the main overlay.
Step 12 The result is Tap, from capture group two. The original s1 stays unchanged.
Step 13 Display closes and Complete confirms that execution continued.
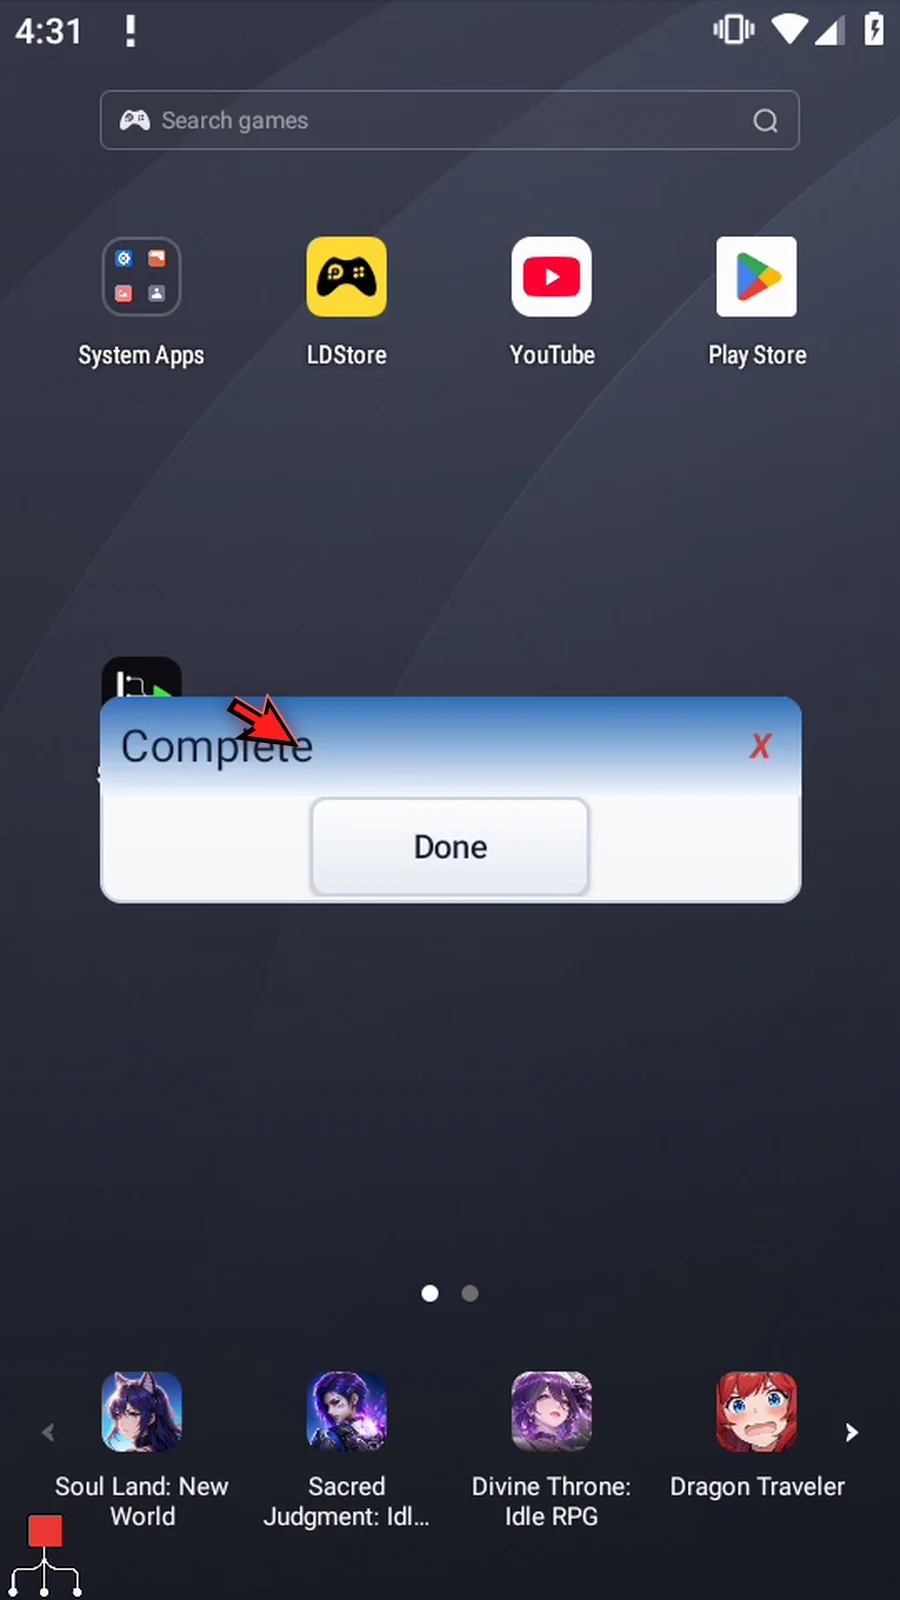
Step 14 Press Done. The script finishes automatically. Use Extract when later actions need a particular match or capture group from text.
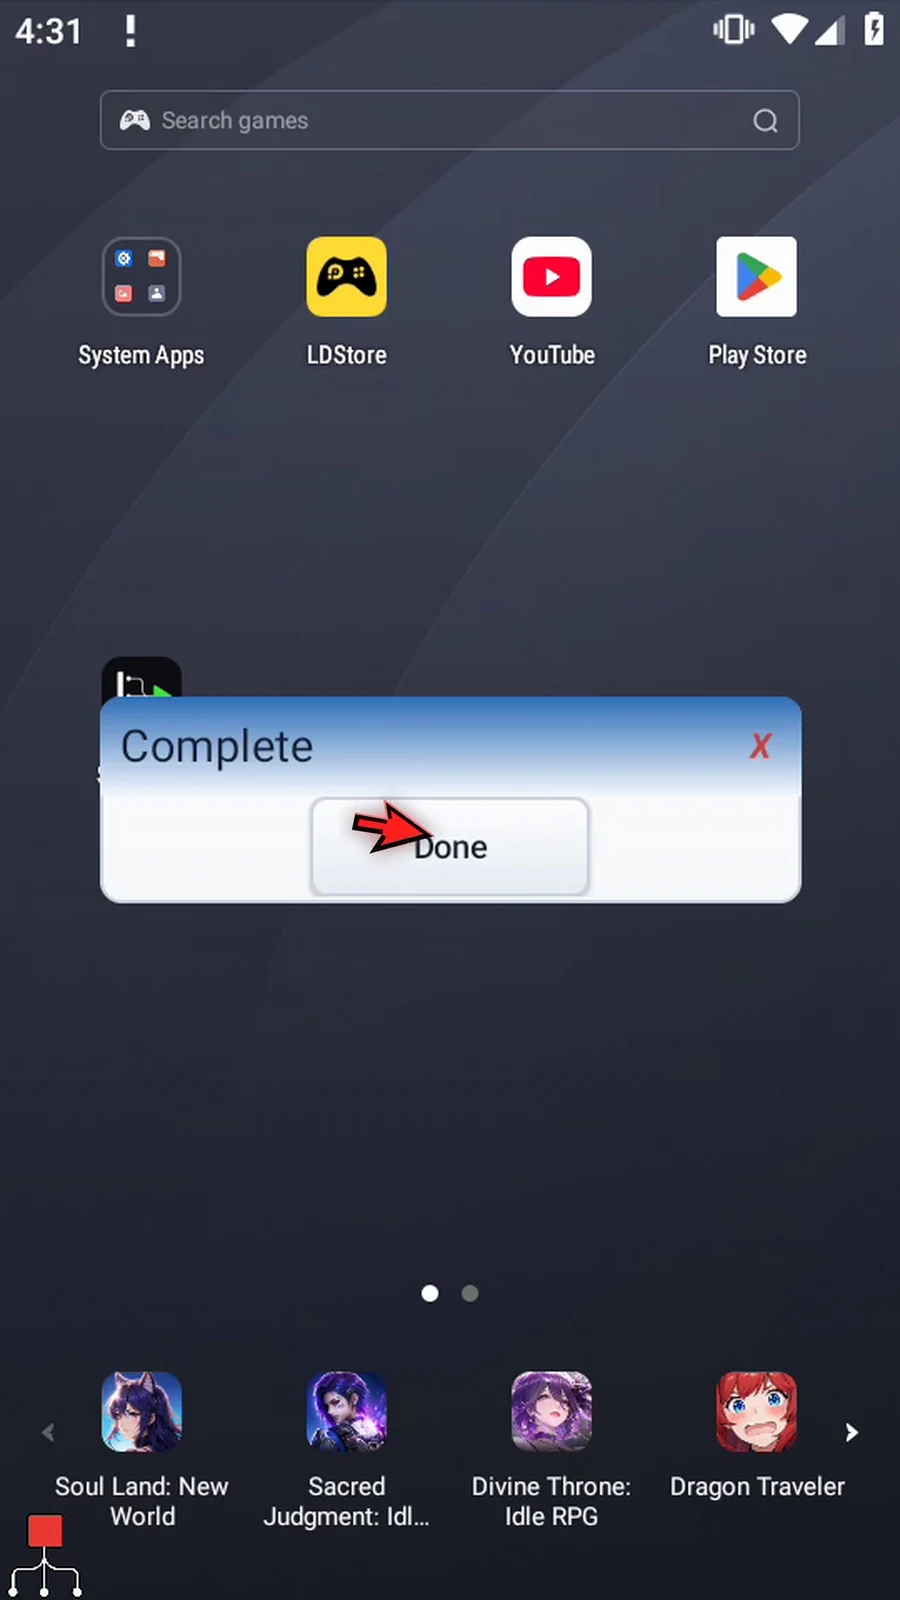
Replace edits matching text so later commands can use a cleaned or standardized String. This Literal guide compares first-only and all-occurrences replacement. The separate Regex guide explains pattern-based replacements and capture references.
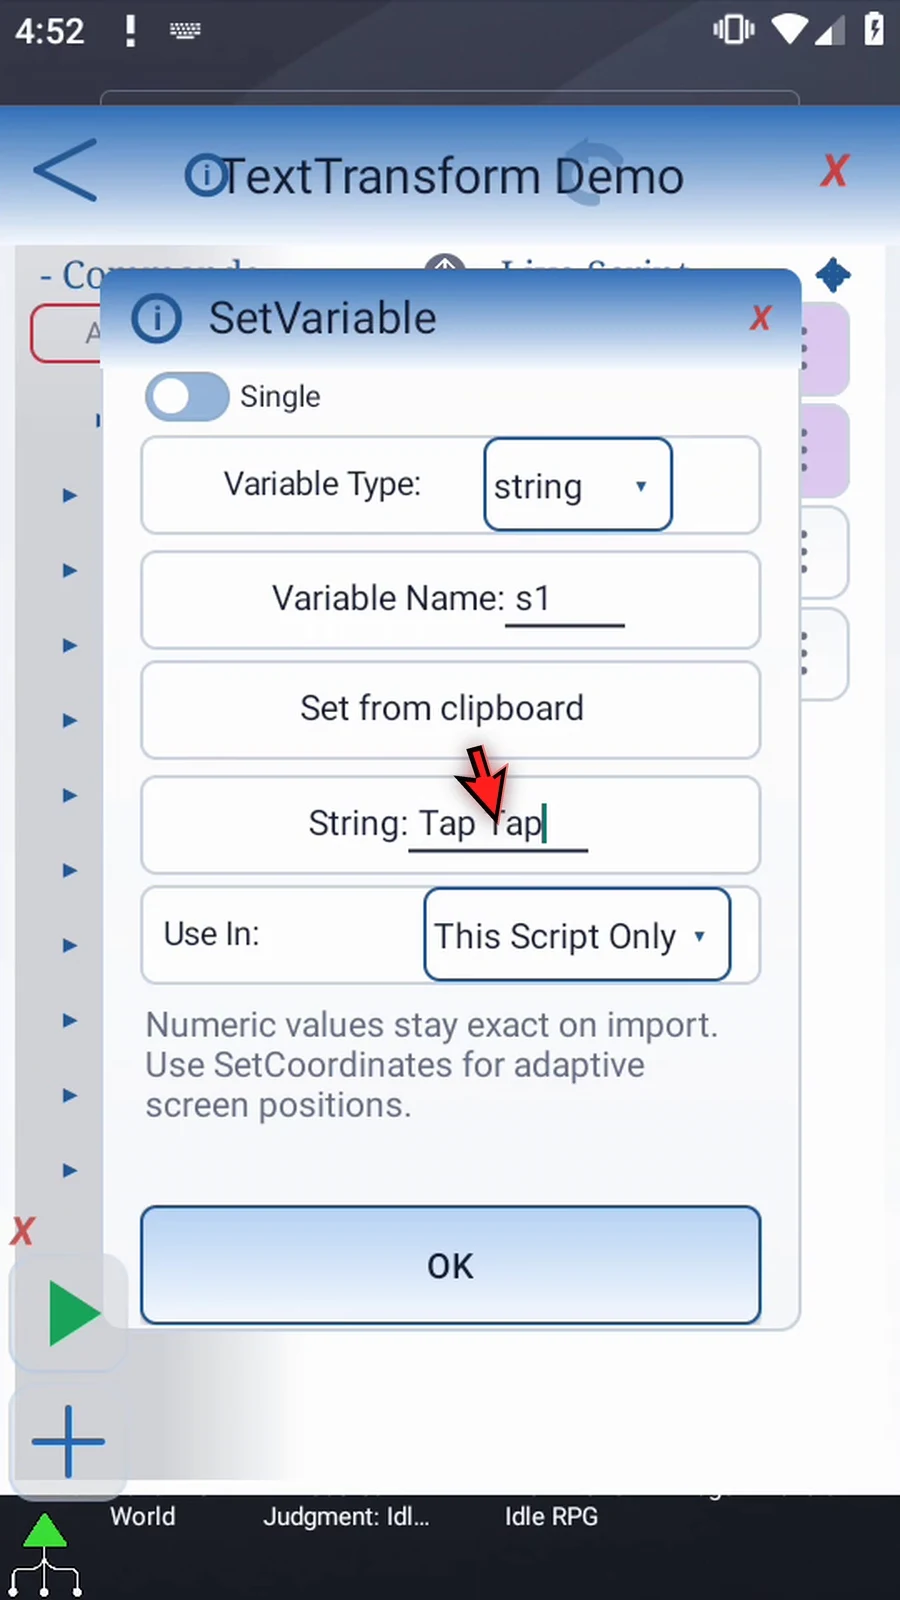
Reuse the four-command TextTransform Demo from Intro. Open its first SetVariable, keep Single/String s1 and This Script Only, and normally type Tap Tap. The space separates two occurrences. Save the assignment, then open the existing TextTransform and choose replace.
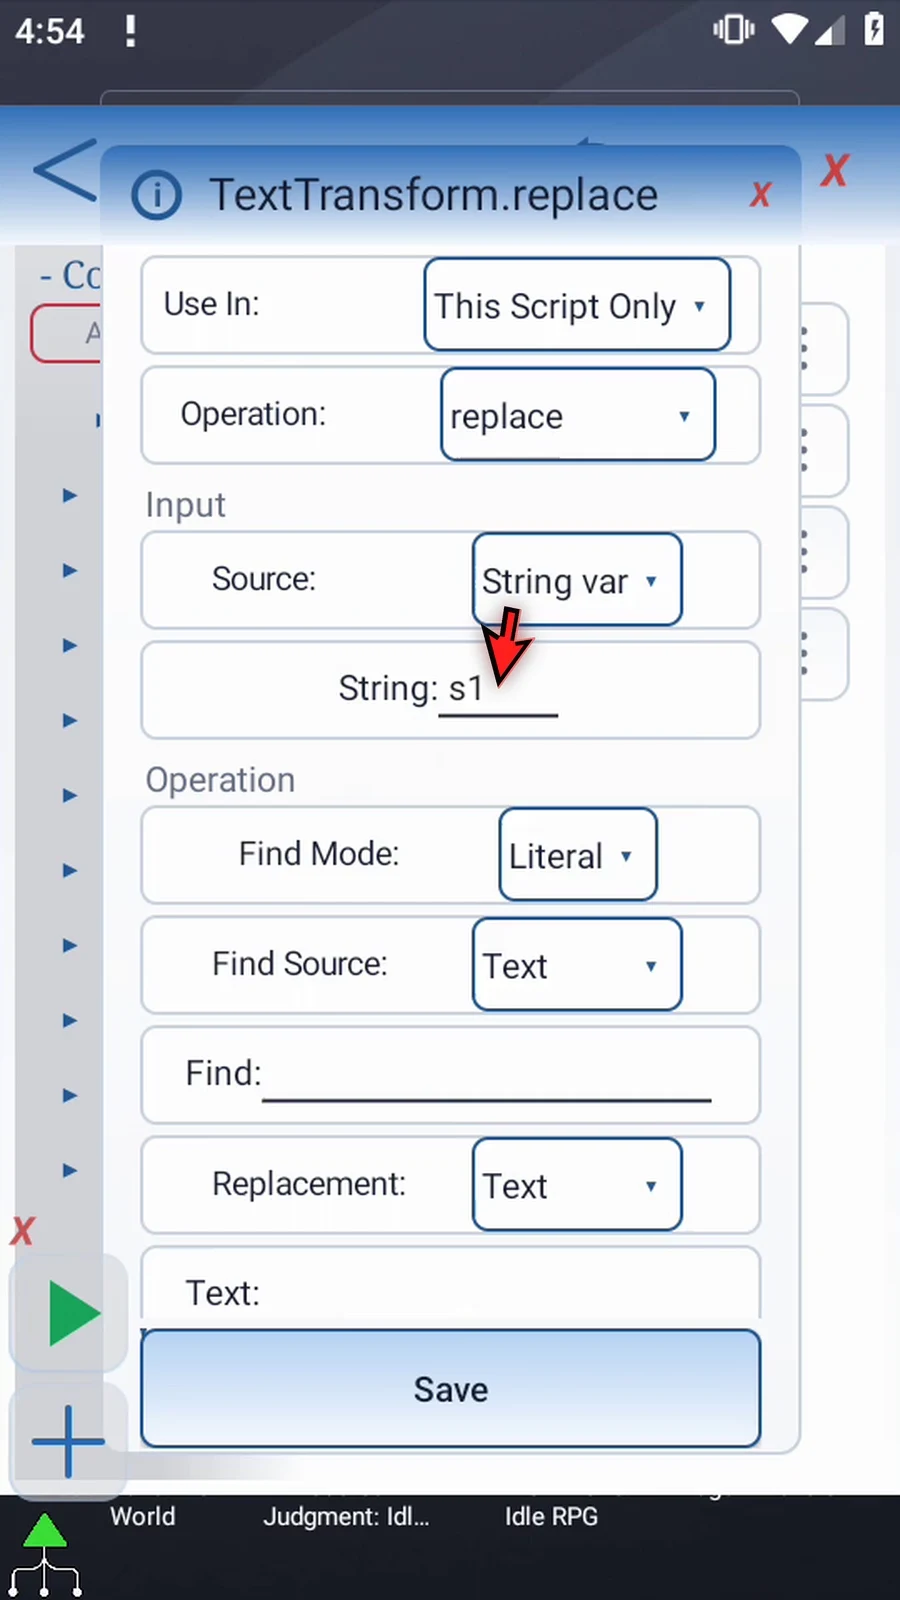
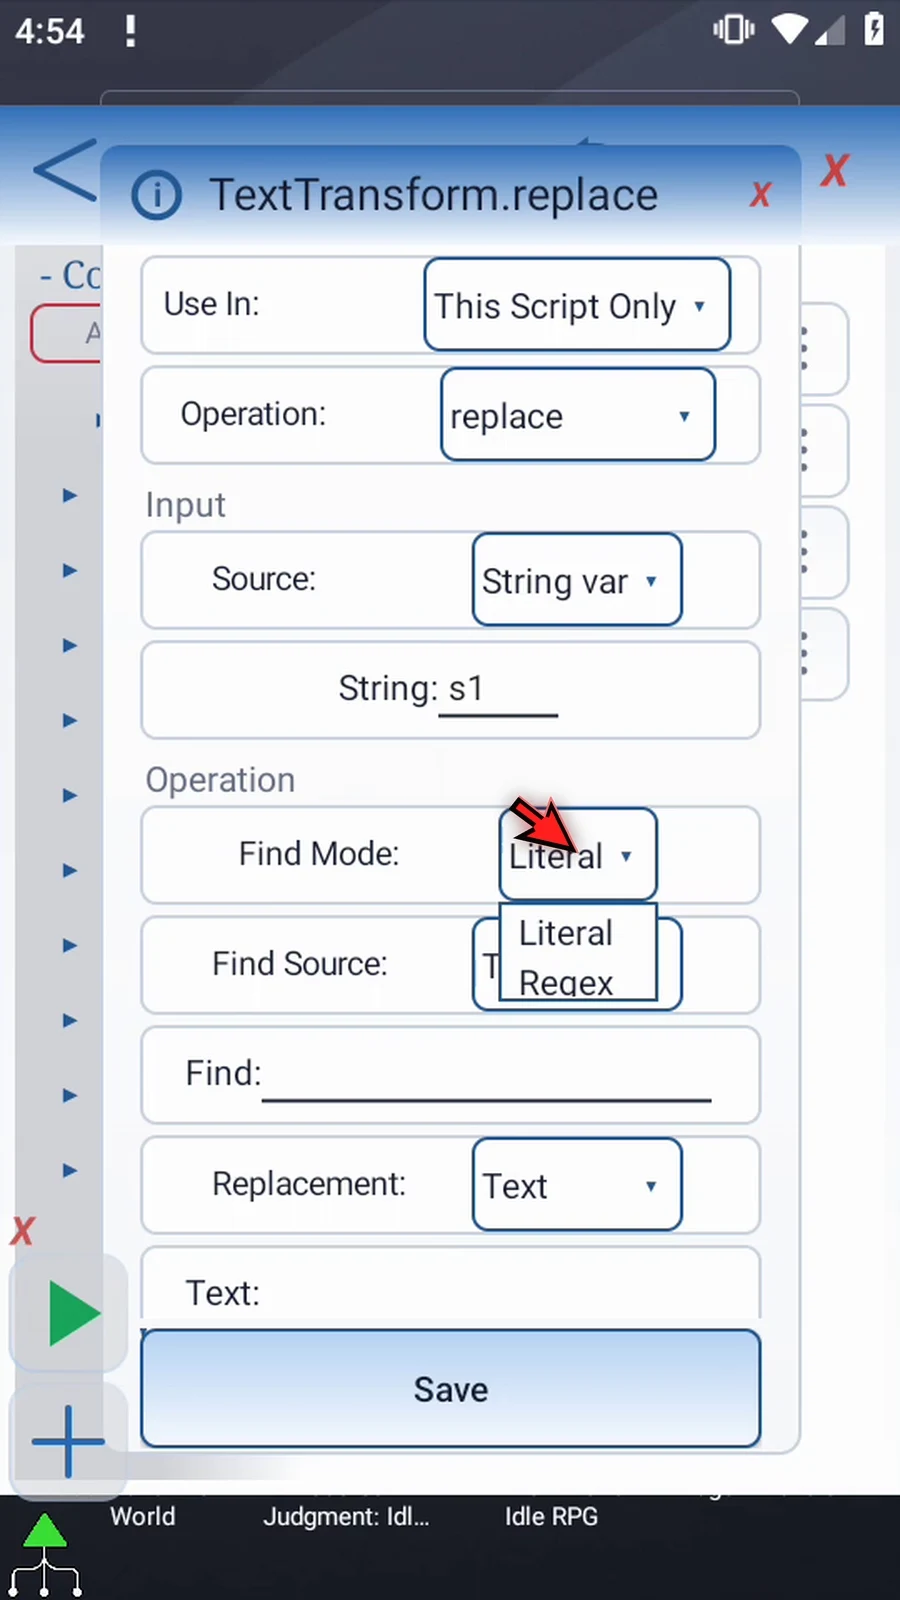
Keep String var → s1 as the input and the local scope. Input could instead be literal Text. In Find Mode, Literal matches exact characters, including capitalization; Regex interprets a Java regular expression. Keep Literal here. Find Source independently accepts Text or an earlier String variable. Choose Text and enter Tap. Literal Find cannot be empty.
Scroll to Replacement. Its Text/String var choice independently selects entered text or an earlier String value. Keep Text and normally type ScriptTap. An empty replacement removes matching text. If no occurrence matches, the result remains the original text.
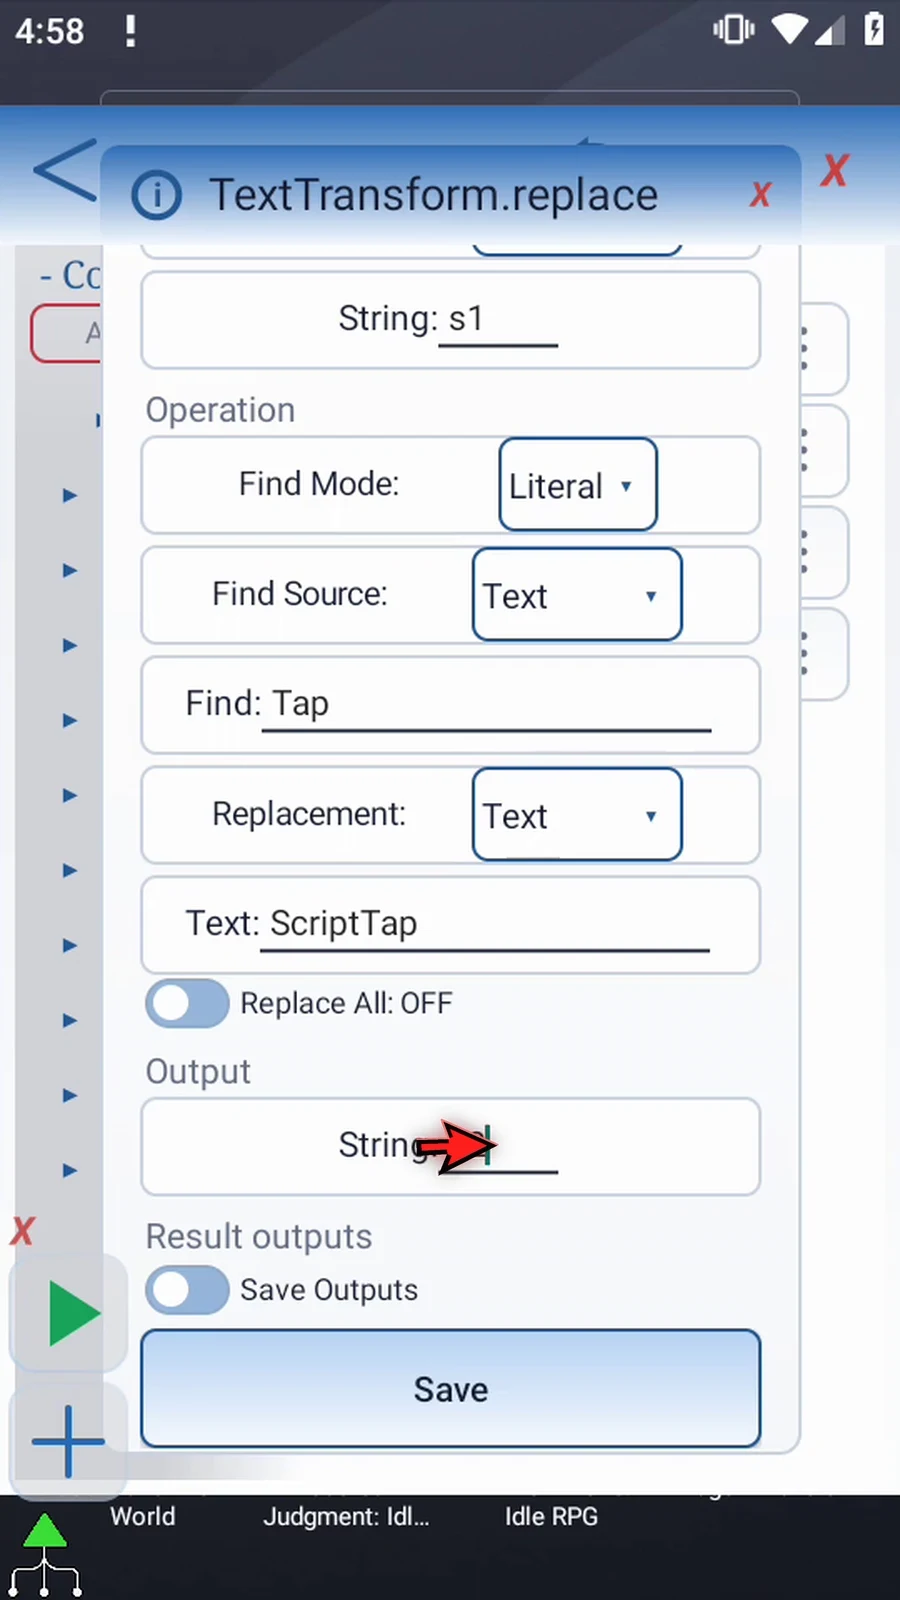
Turn Replace All OFF for the first test: only the first occurrence changes. Enter String output s2, separate from s1, and leave optional Save Outputs off. The Intro explains Boolean Success and String Error status destinations. Save.
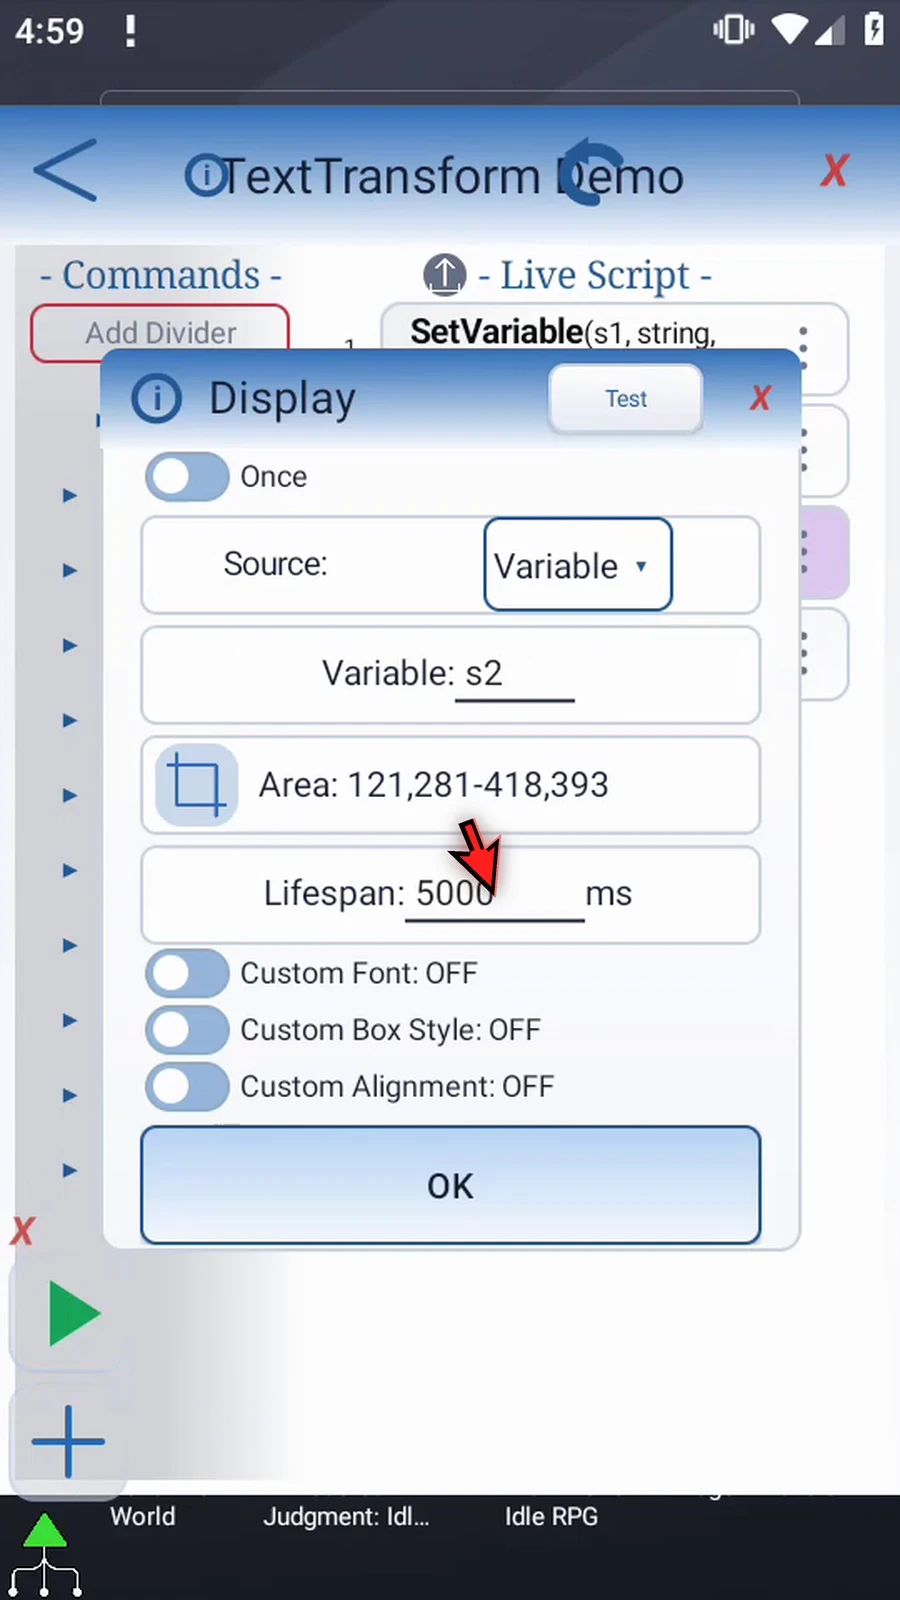
Open the existing supporting Display. Keep Variable s2, its existing clear area and default appearance, and lifespan 5000 ms. Save. The final button-only PromptMe remains Complete / Done. No new commands are needed.
Close the editor and use Play. The genuine first result is ScriptTap Tap: the first occurrence changed, the second did not. The complete actual timed display and natural completion transition are retained. Press Done.
Return through the main overlay to the same editor. Reopen TextTransform, scroll to Replace All, and turn it ON. The saved command comparison confirms this is the only changed fact; source, Find, replacement, output, scope and supporting commands remain identical. Save and close the editor.
Play again. The actual result is ScriptTap ScriptTap; both occurrences changed. The original s1 remains Tap Tap in both runs. Complete follows the full genuine five-second display; Done finishes automatically. Both recorded four-command runs completed with zero warnings/errors.
Replace / Literal
Step-by-step guide
Step 01 Replace changes matching text into another value. Use it to clean or standardize a String before later commands use it. We will compare replacing the first occurrence with replacing every occurrence.
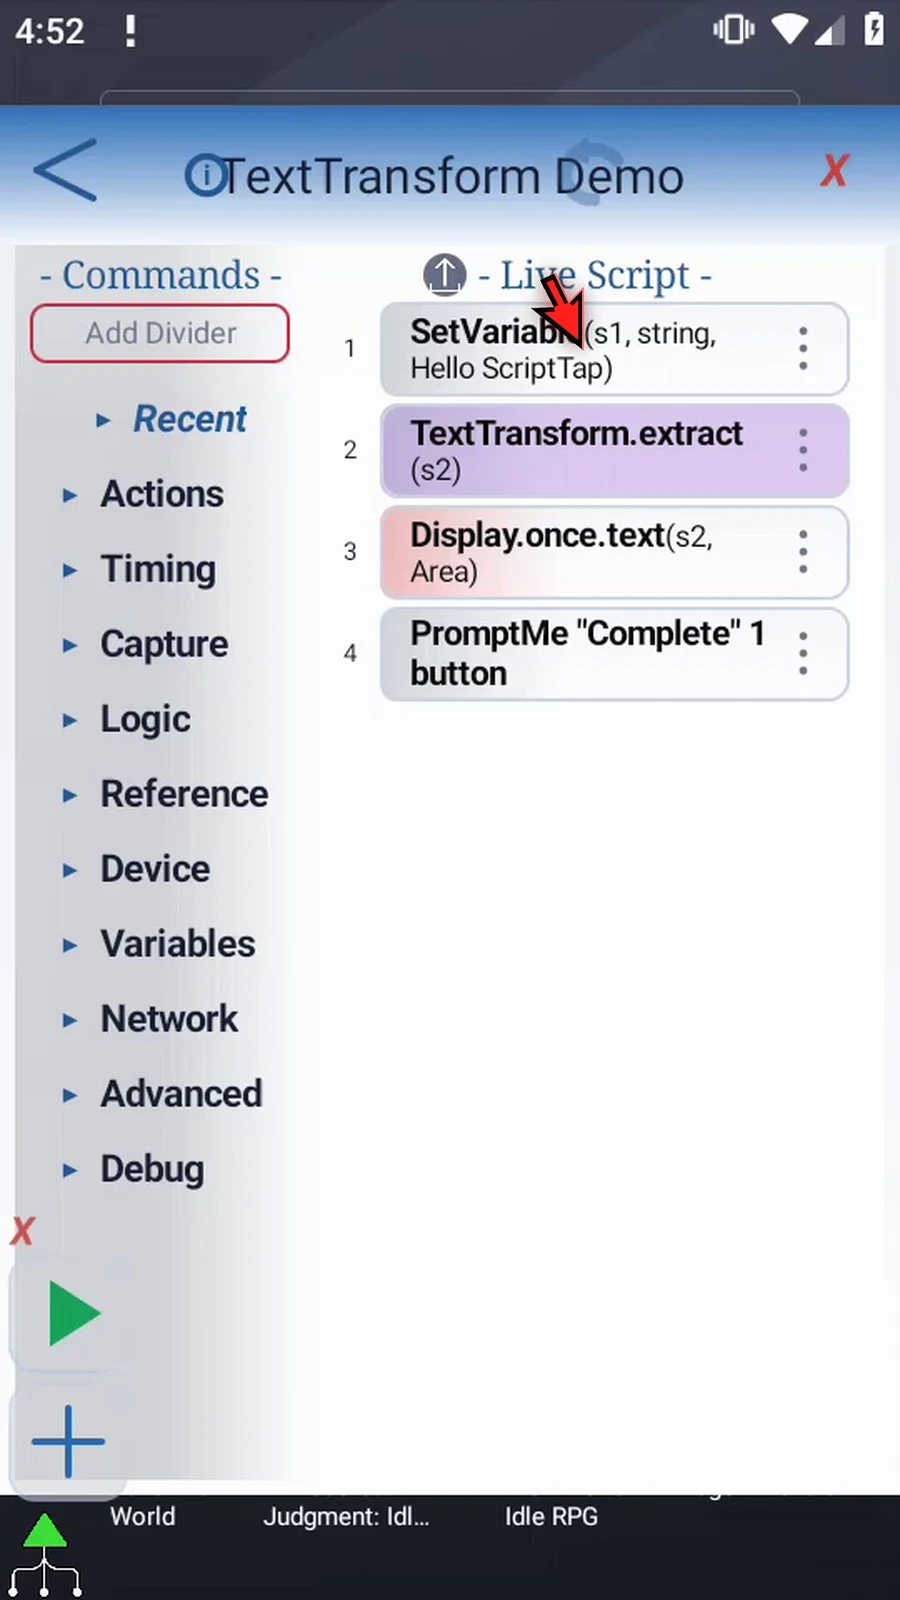
Step 02 Open the first Set Variable command. Keep String variable s1 and the local scope.
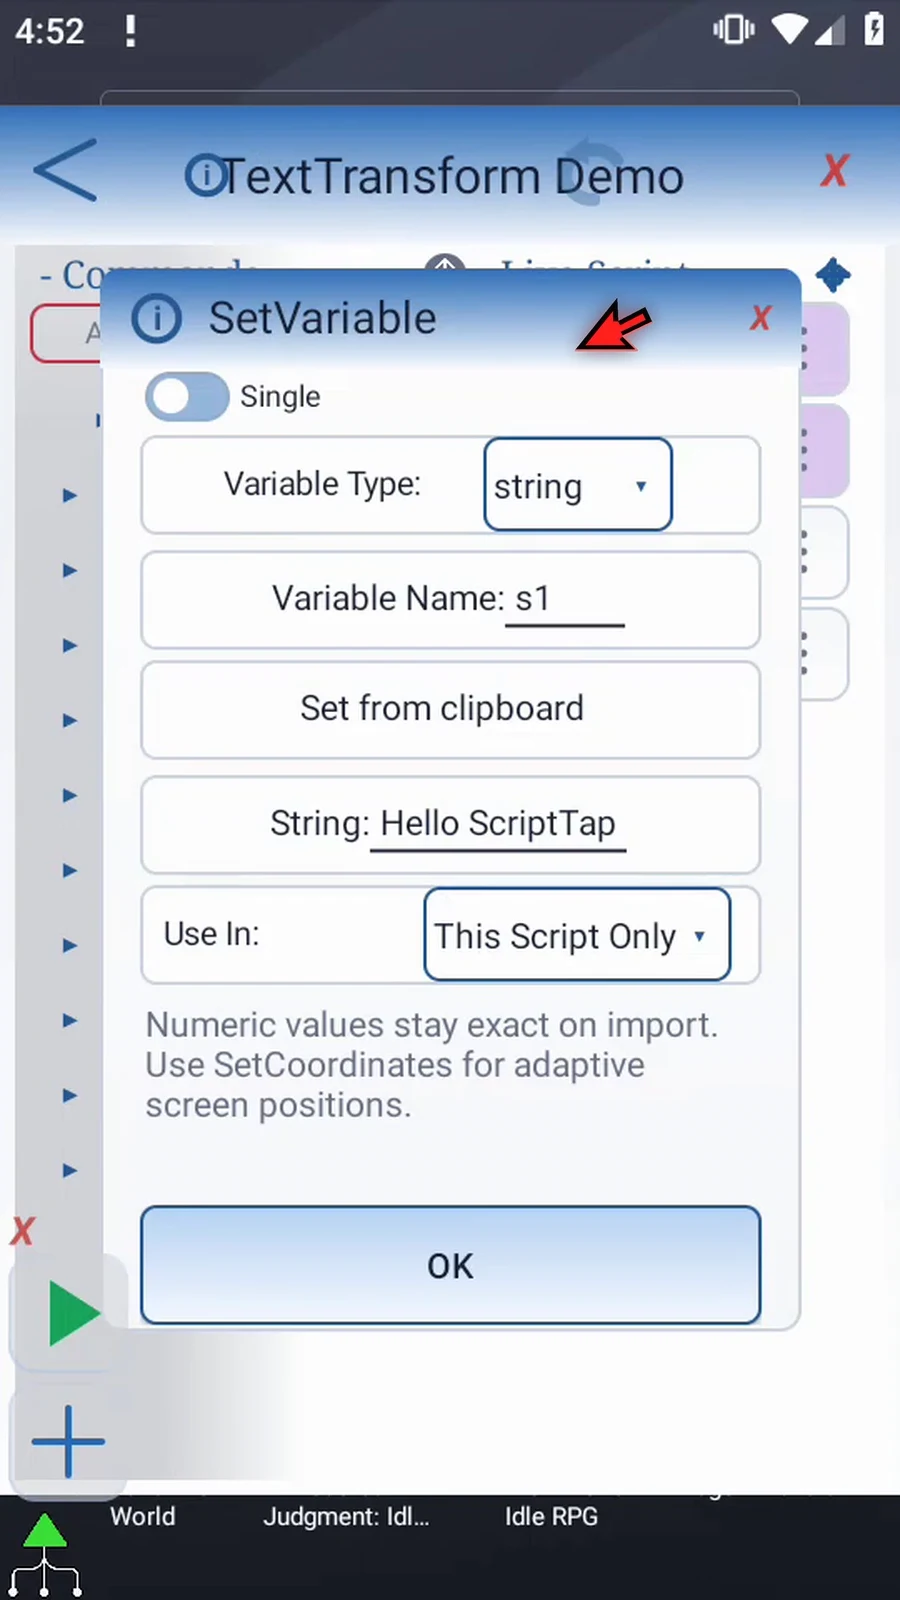
Step 03 Change the value to Tap, a space, and Tap again. This gives us two occurrences to compare. Tap OK.
Step 04 Open Text Transform and change its operation to Replace.
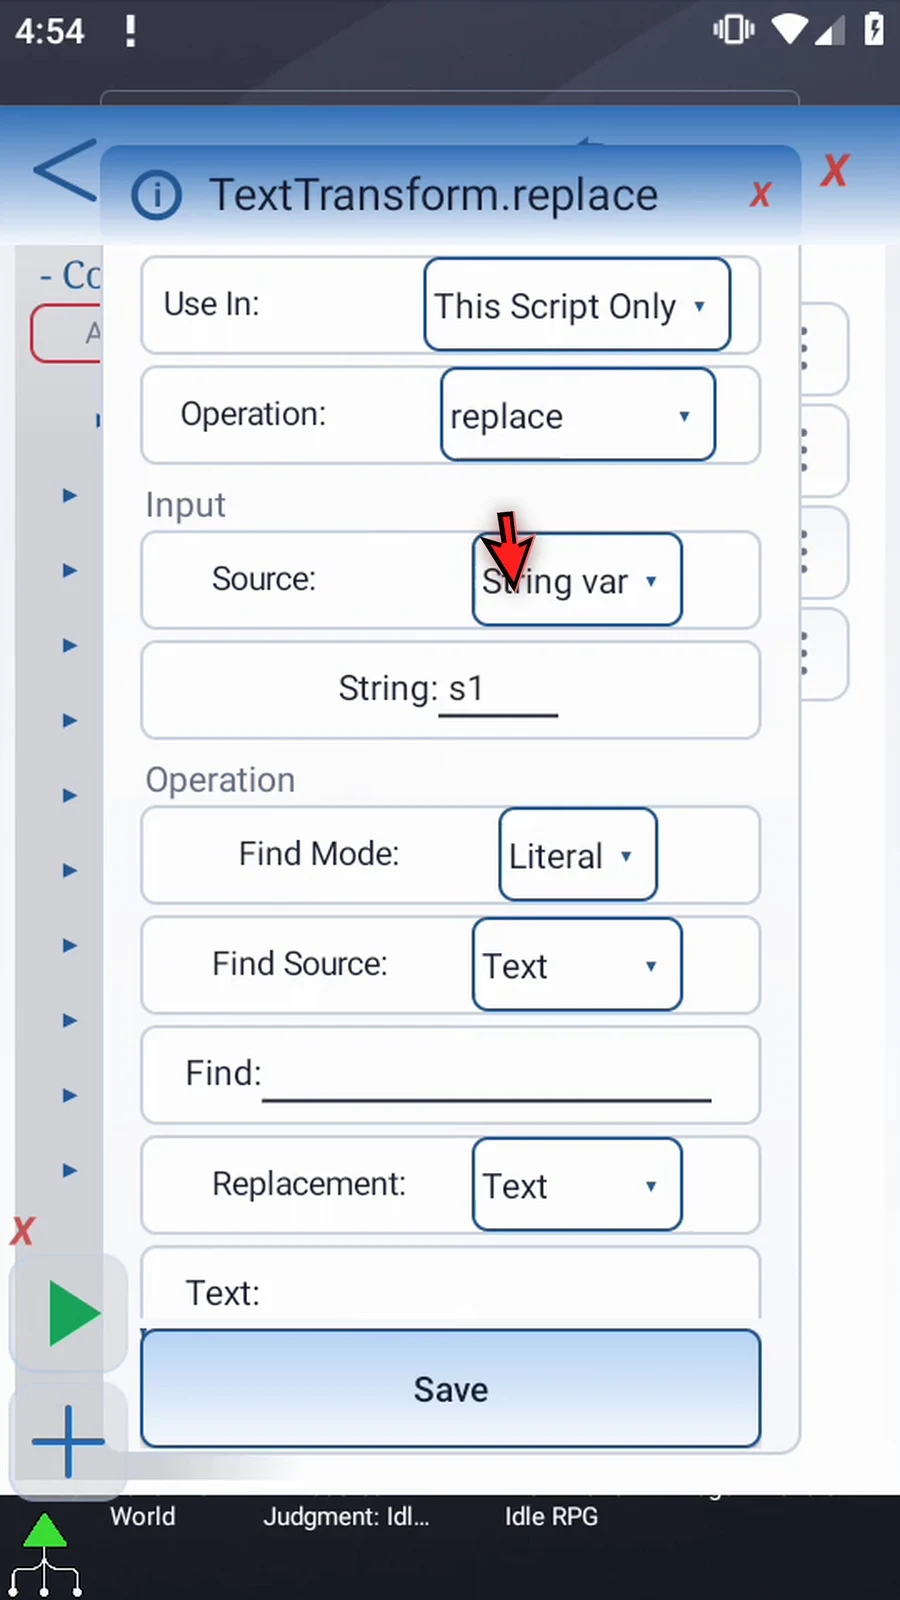
Step 05 Keep String variable s1 as the input and This Script Only as the scope. We will store the edited result separately, leaving the original unchanged.
Step 06 Find Mode offers Literal and Regex. Literal matches the exact characters, including capitalization. Regex uses a regular expression; its separate guide explains pattern-based replacements. Keep Literal here.
Step 07 Find Source can be text entered here or an earlier String variable. Keep Text for this example.
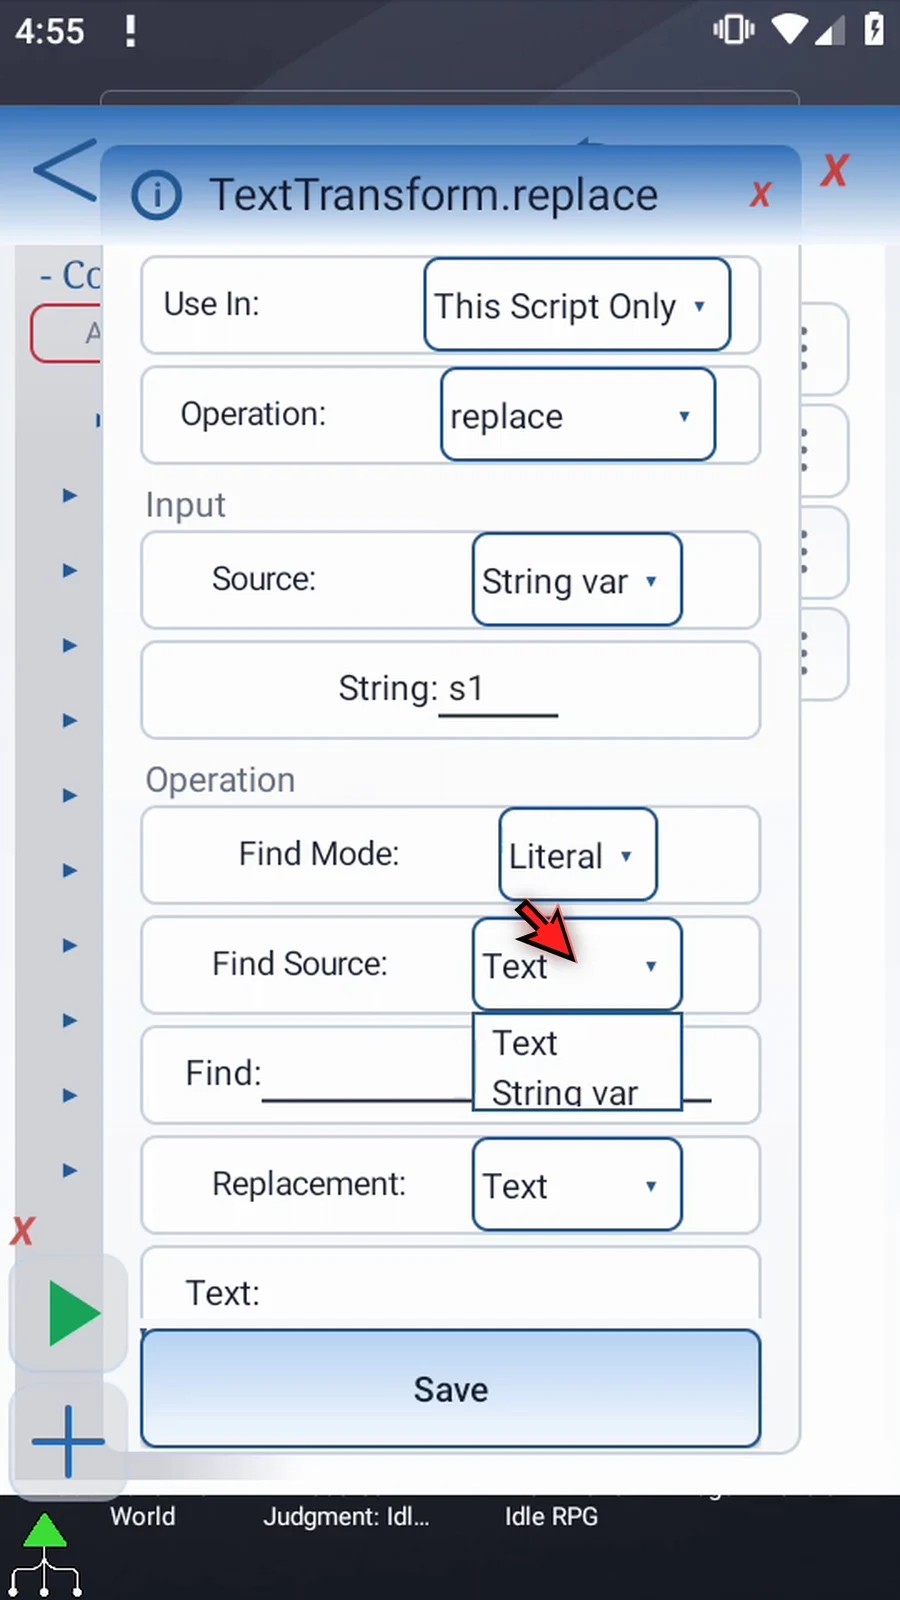
Step 08 Enter Tap with a capital T as the text to find. Literal Find cannot be empty.
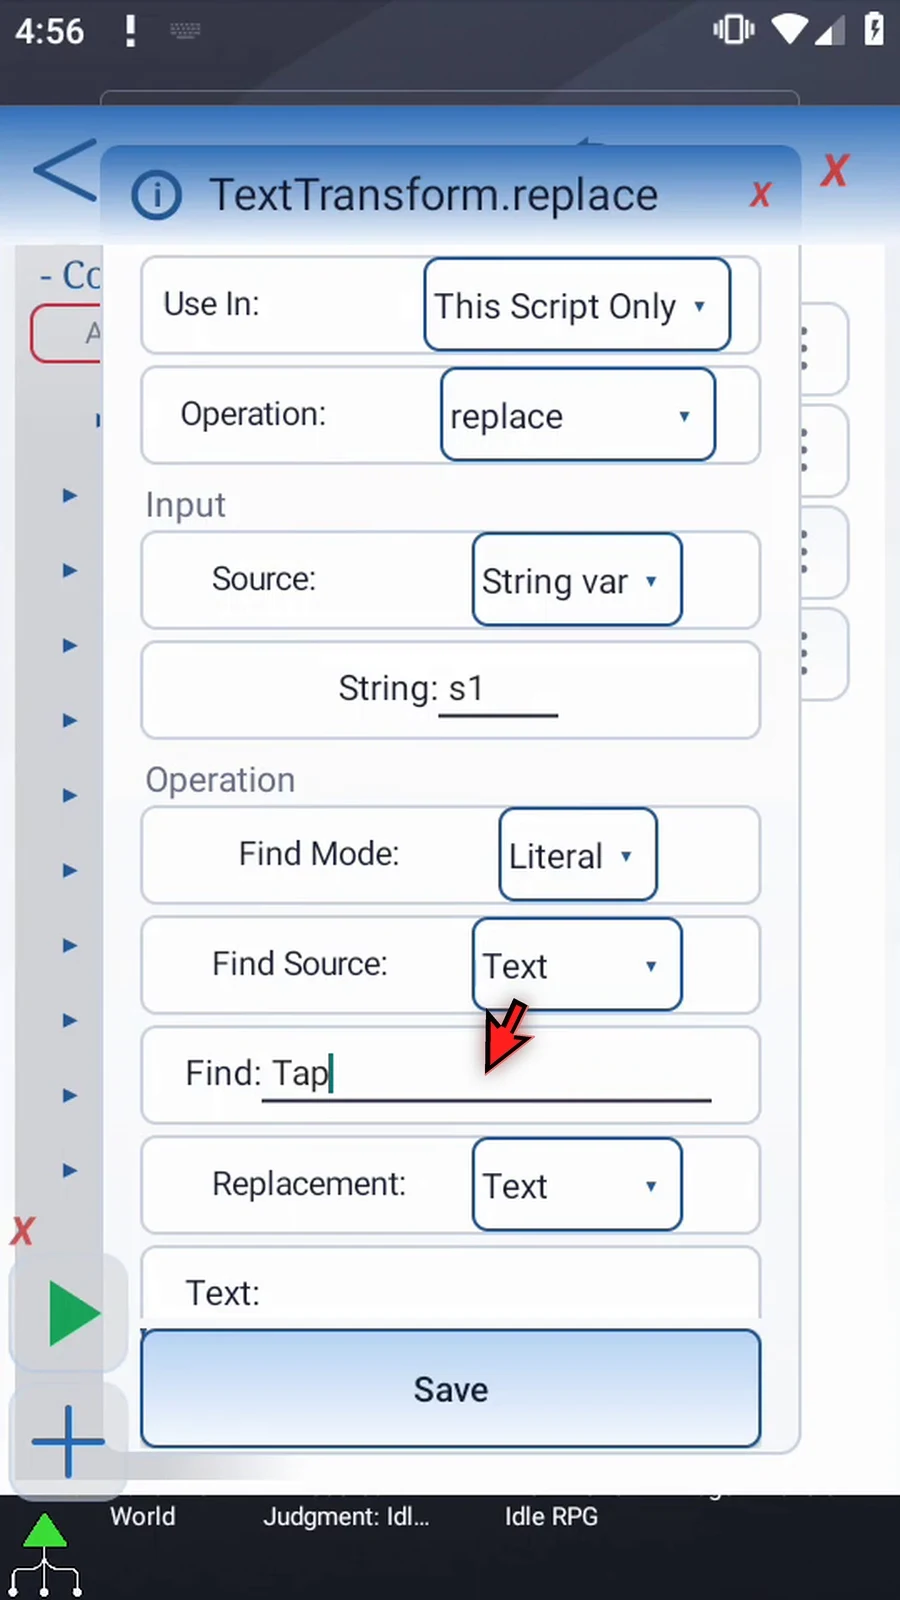
Step 09 Scroll down to the replacement settings. Replacement can also come from Text or an earlier String variable. Choose Text.
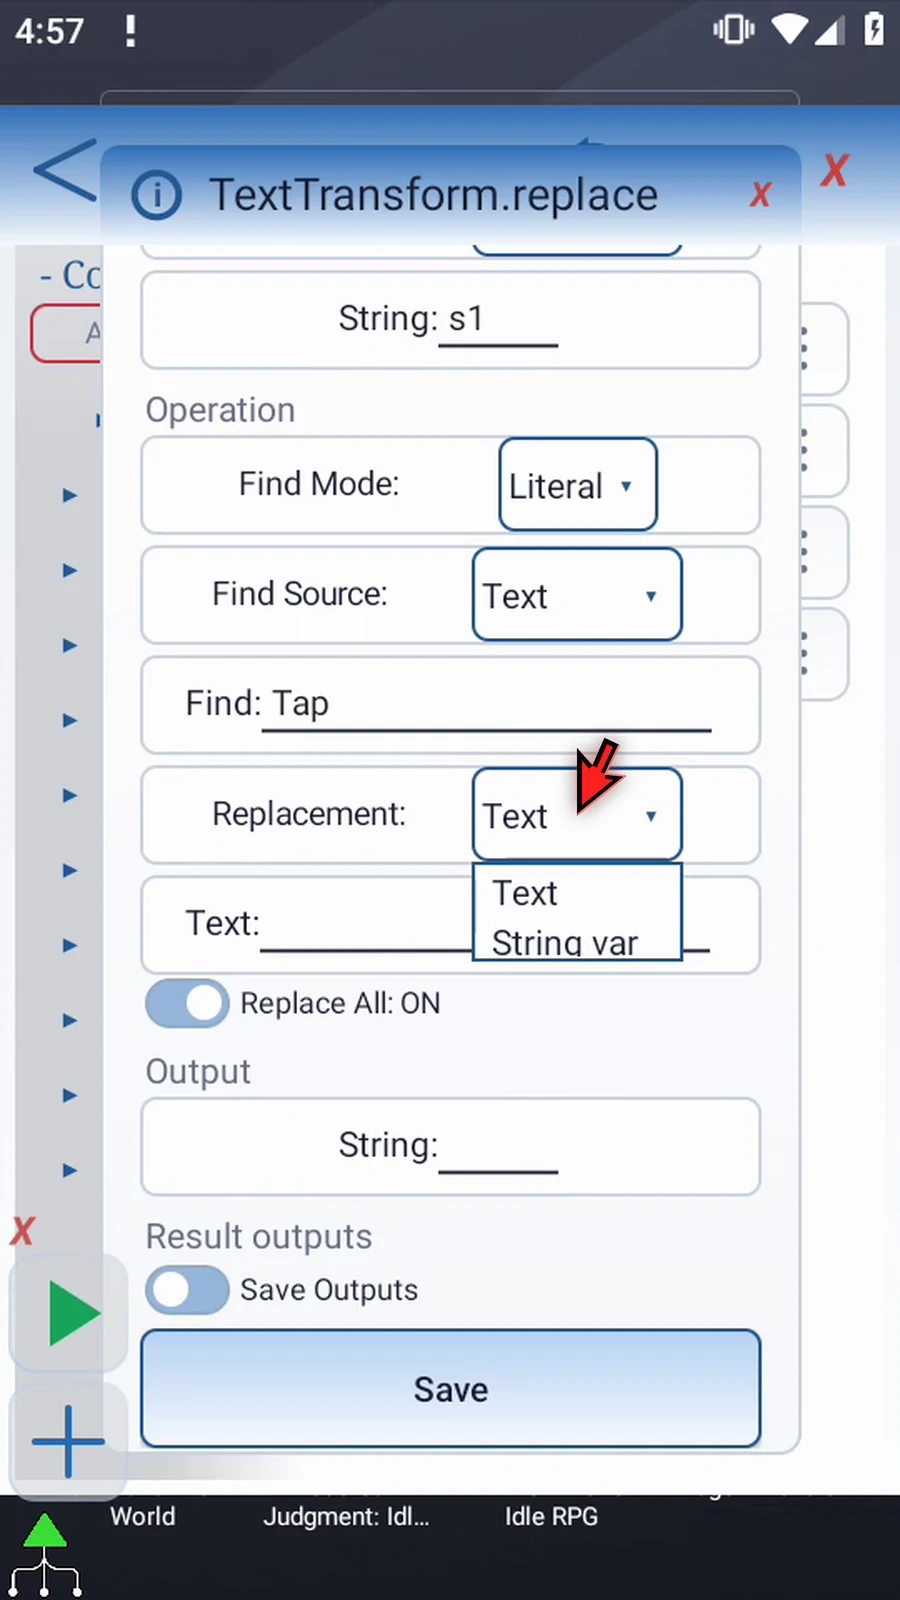
Step 10 Enter ScriptTap as the replacement. Each matched Tap will become this text. An empty replacement would remove the matched text instead.
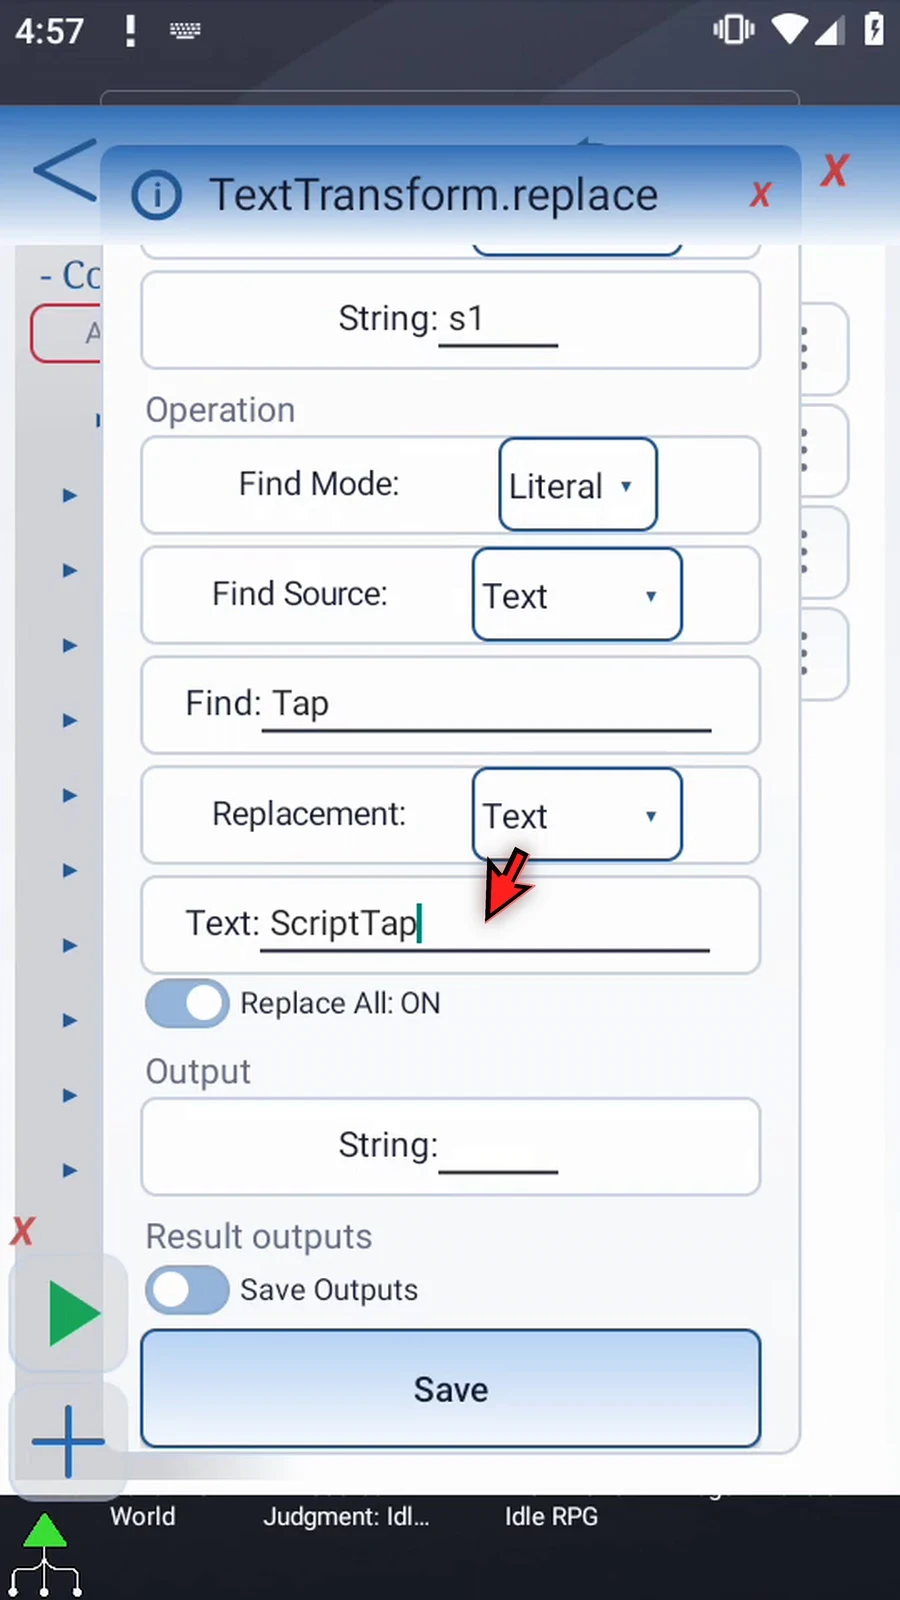
Step 11 Turn Replace All off for the first test. This replaces only the first occurrence. We will turn it on for the second test.
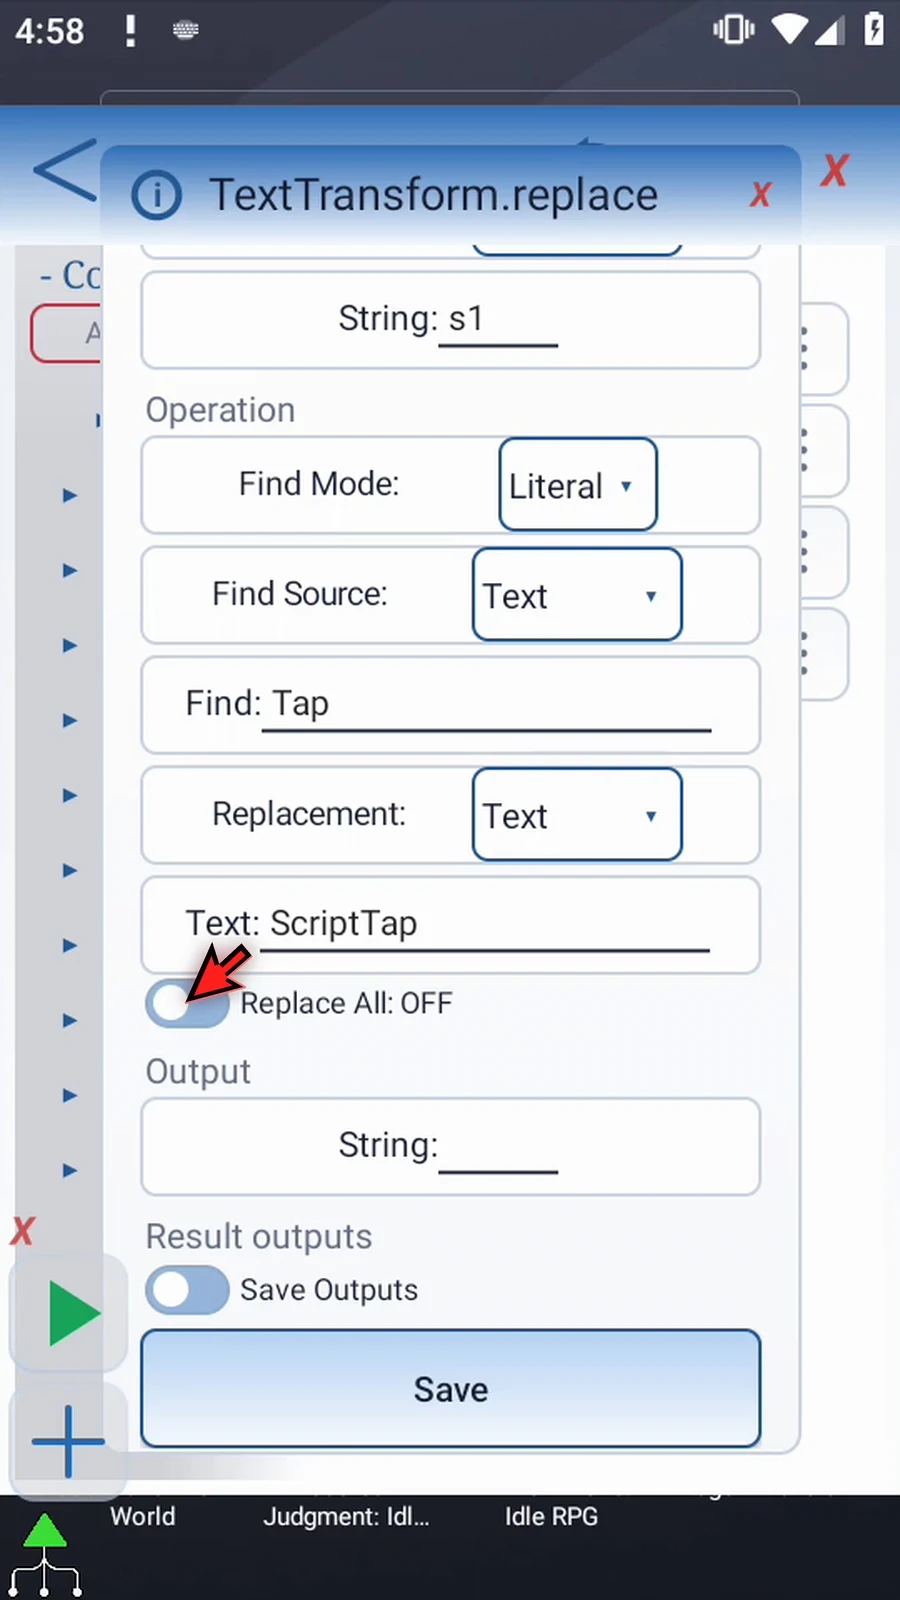
Step 12 Enter s2 as the String output. The edited text goes there, while s1 keeps Tap Tap. Leave optional Save Outputs off and tap Save.
Step 13 Open Display and check that it reads s2. Keep the existing area, default appearance, and five-thousand-millisecond lifespan. Tap OK.
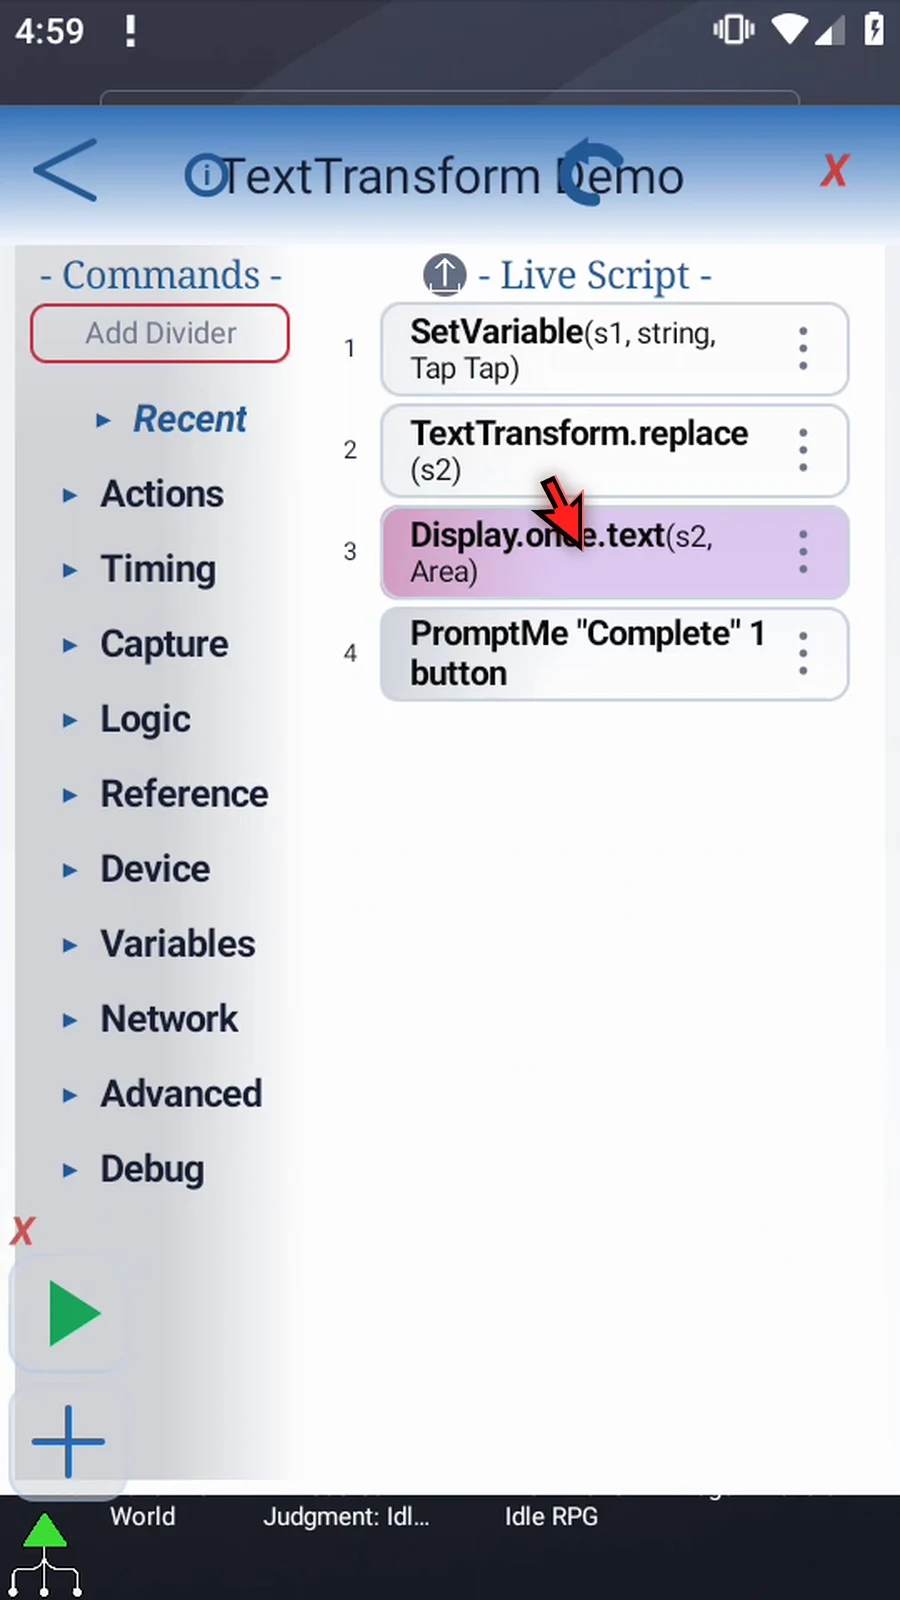
Step 14 The assignment supplies the text, Replace edits it, Display shows the result, and Prompt Me confirms completion. Close the editor.
Step 15 When the script is complete, simply use the Play button in the main overlay.
Step 16 Only the first Tap changed. The second one remains.
Step 17 Display closes and Complete appears.
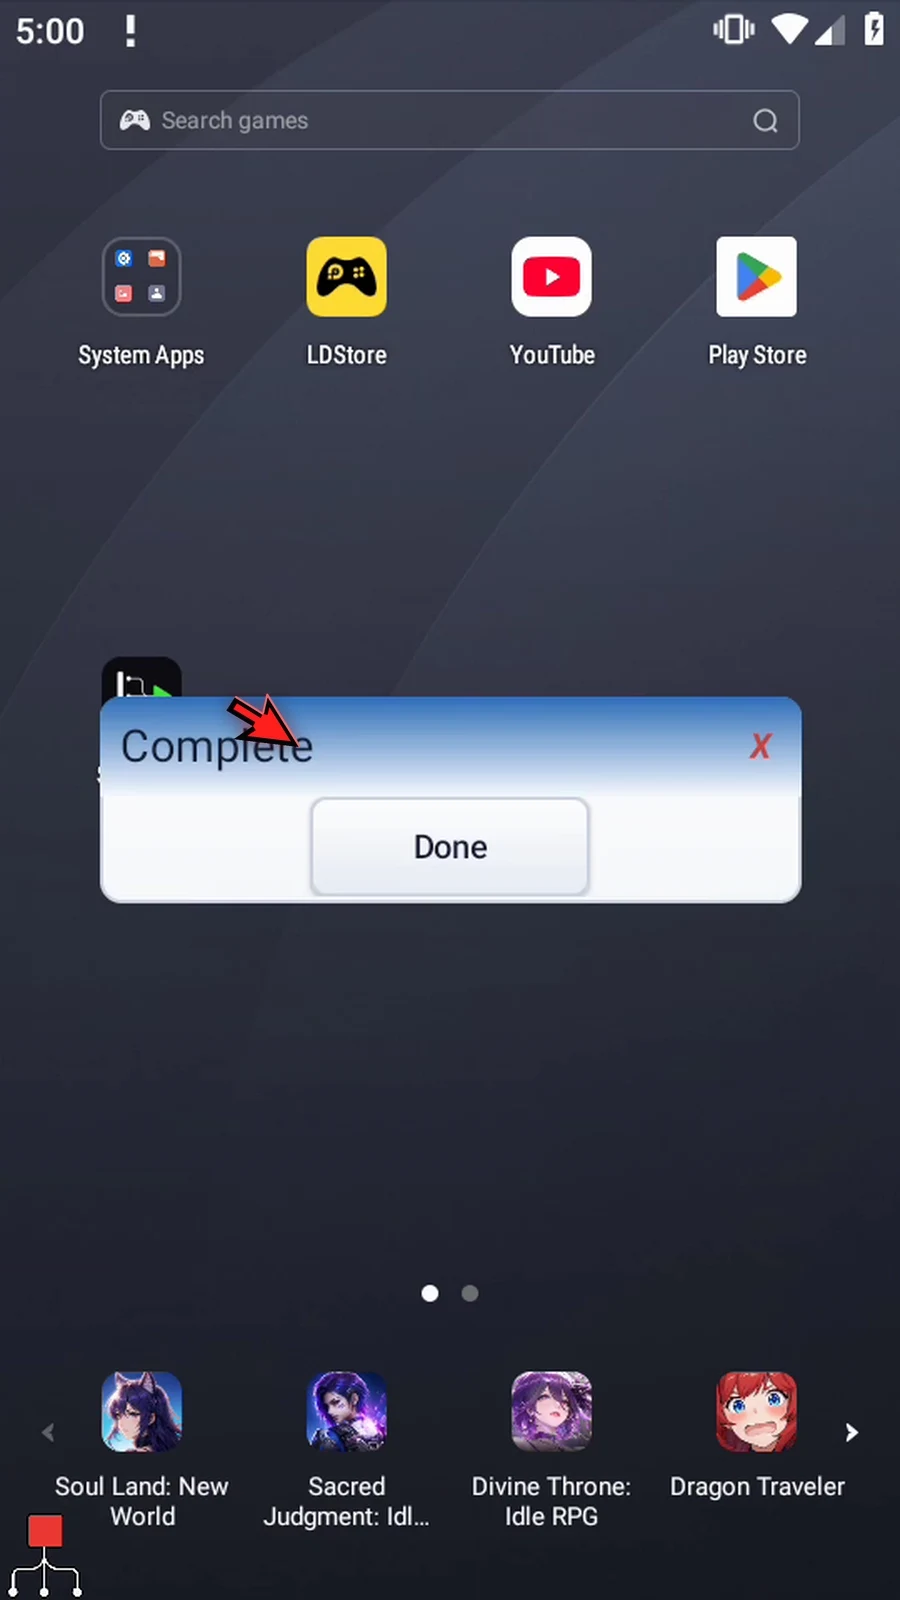
Step 18 Press Done to finish the first test.
Step 19 Open the main overlay again and return to the editor.
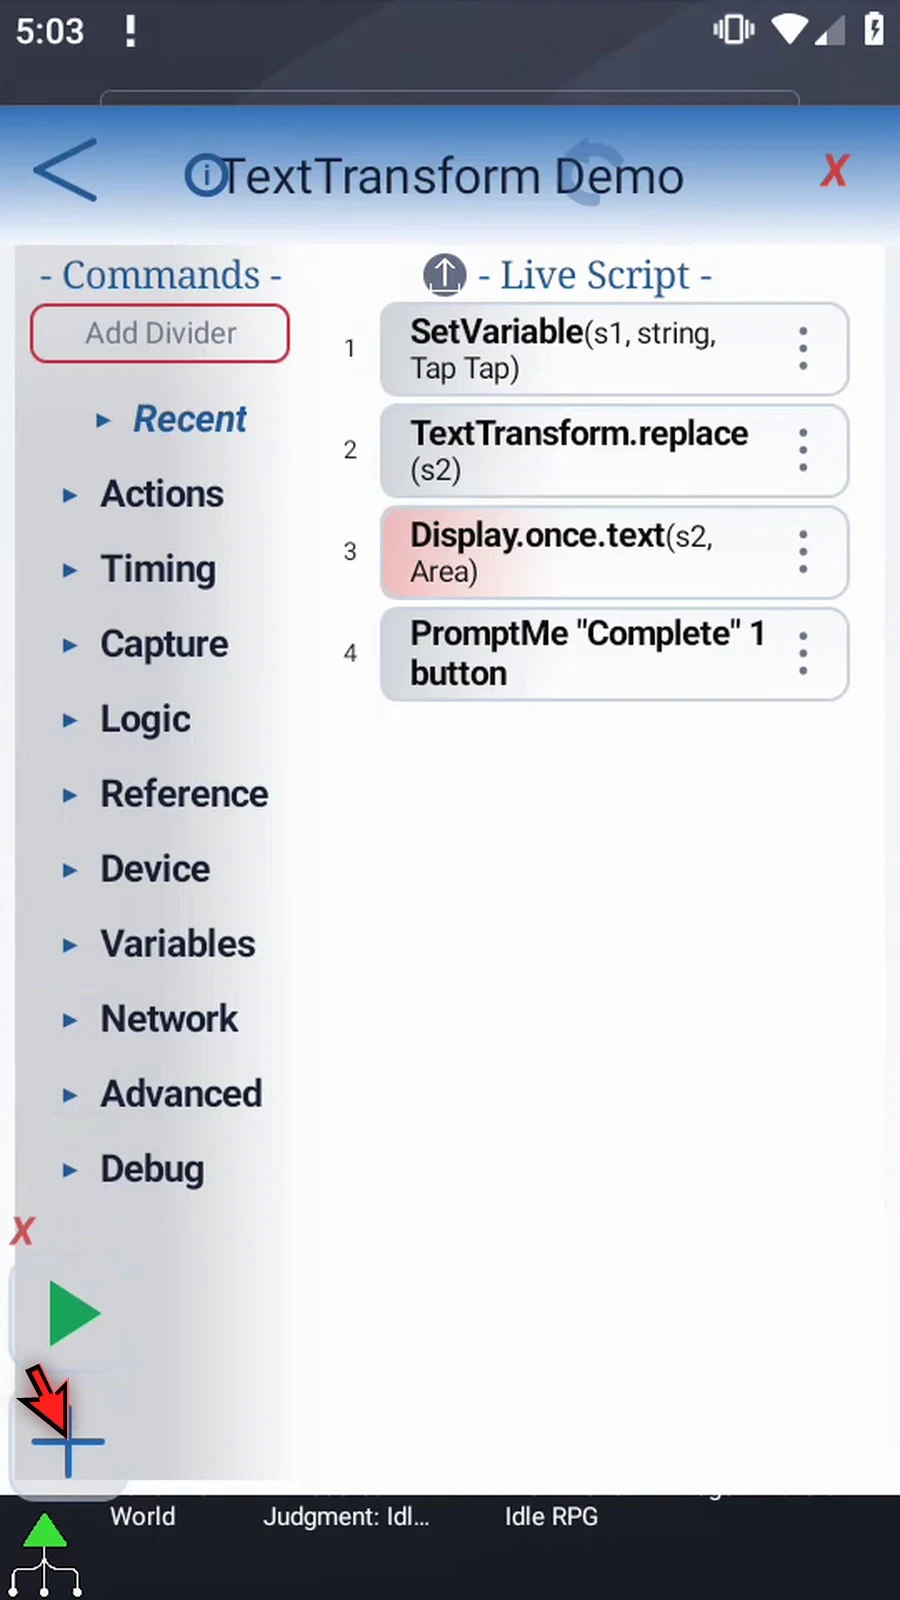
Step 20 Reopen Text Transform, scroll to Replace All, and turn it on.
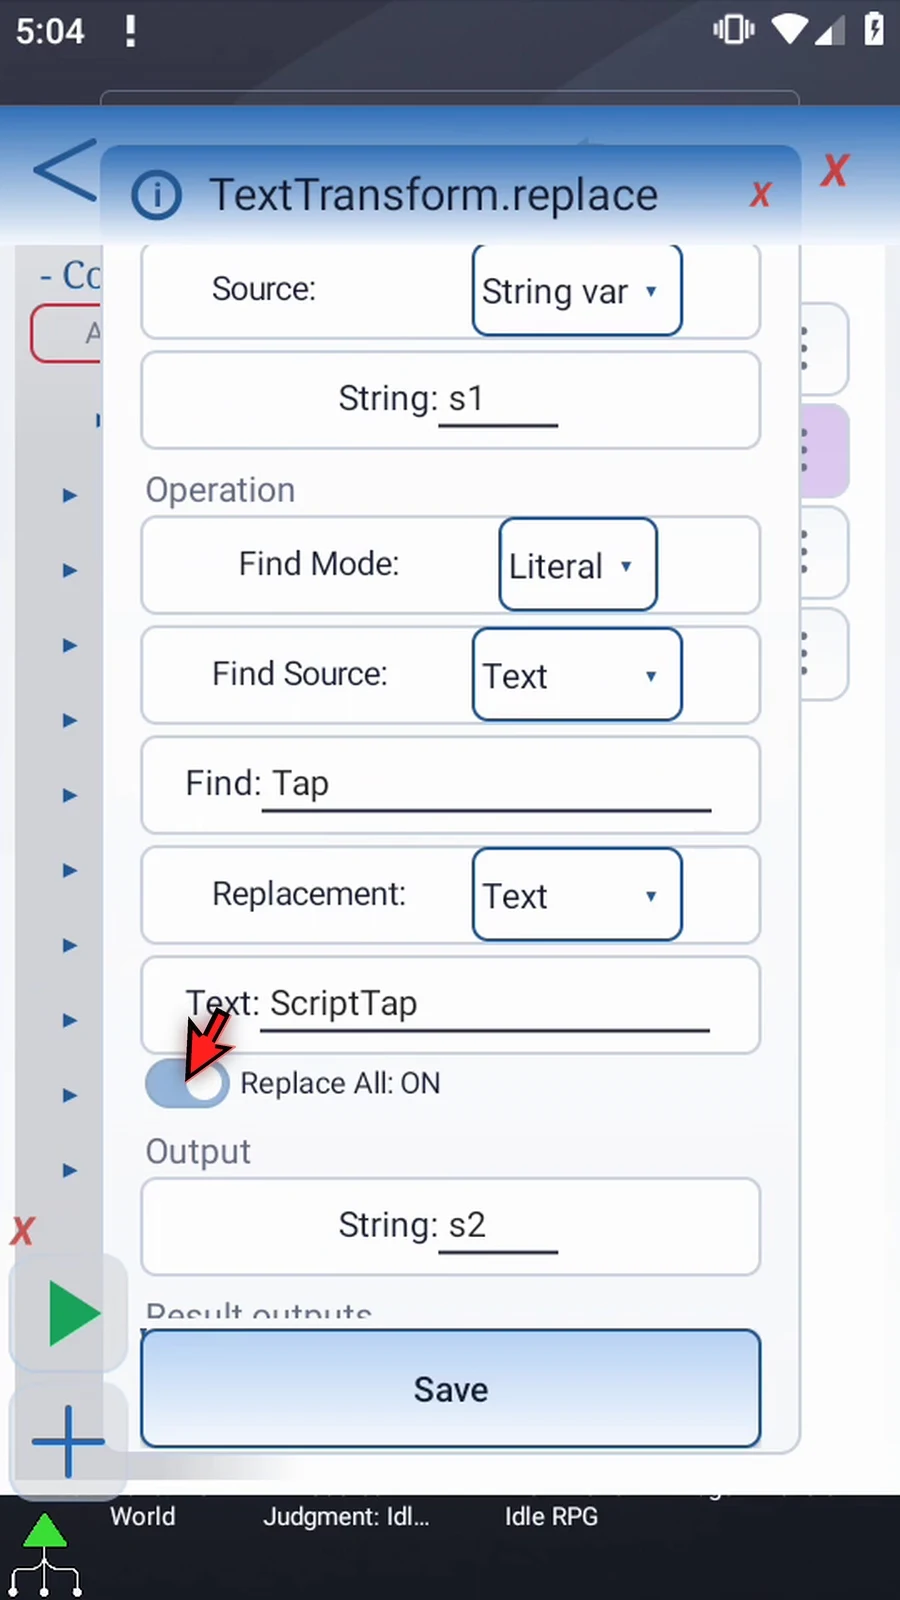
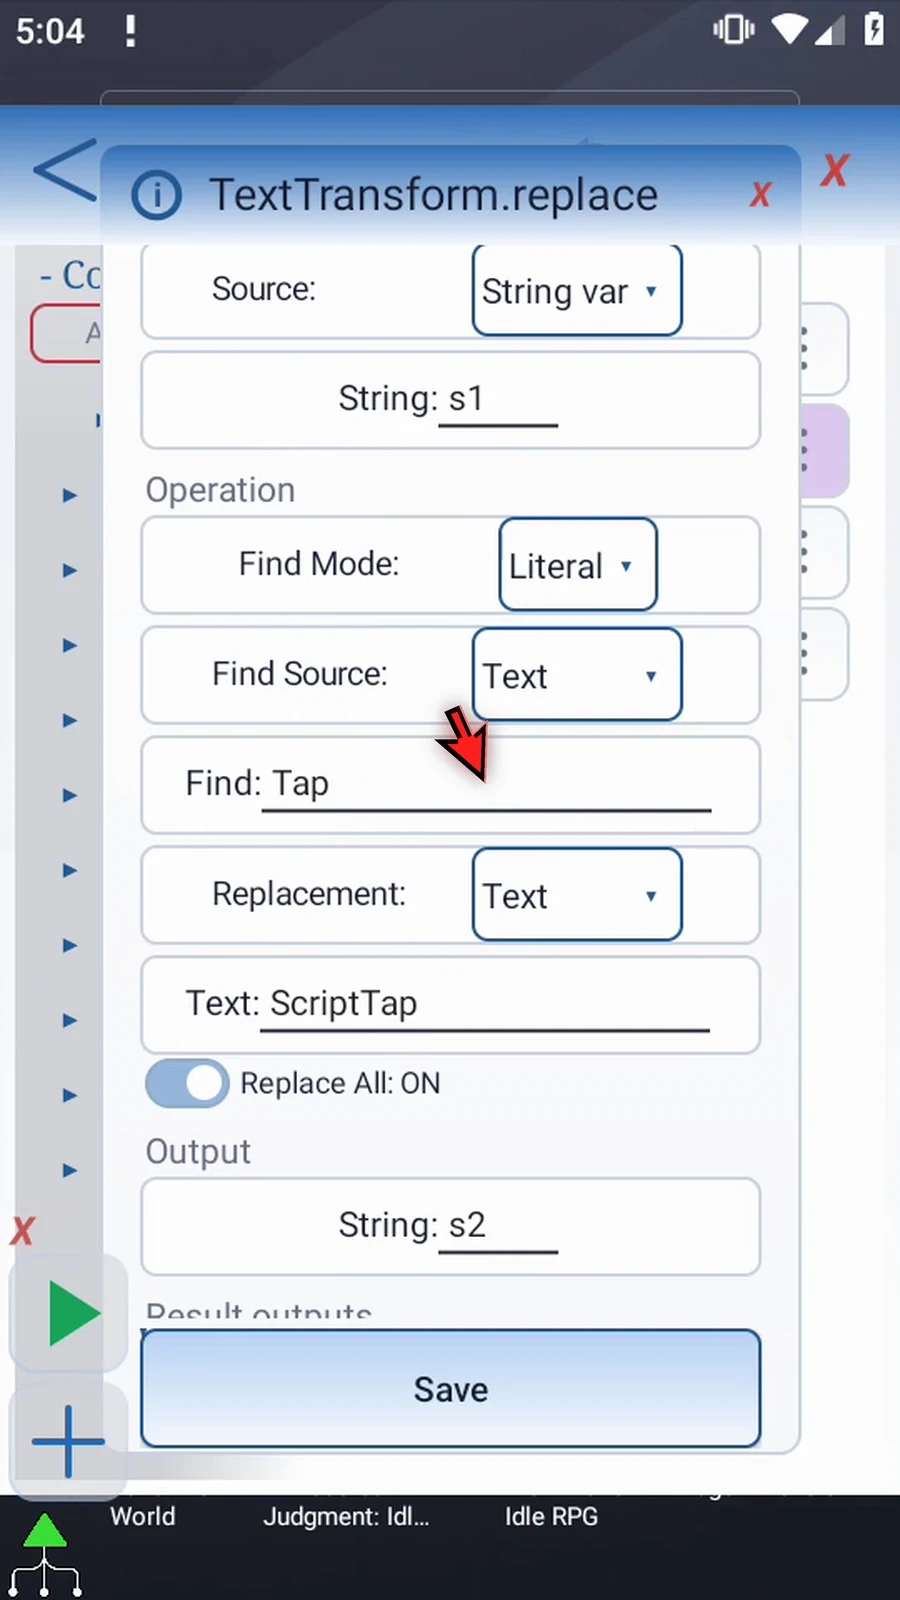
Step 21 The source, Find text, replacement, and output stay the same. Only Replace All changed. Tap Save, then close the editor.
Step 22 When the script is complete, simply use the Play button in the main overlay.
Step 23 Now both occurrences are replaced. The original source stays unchanged.
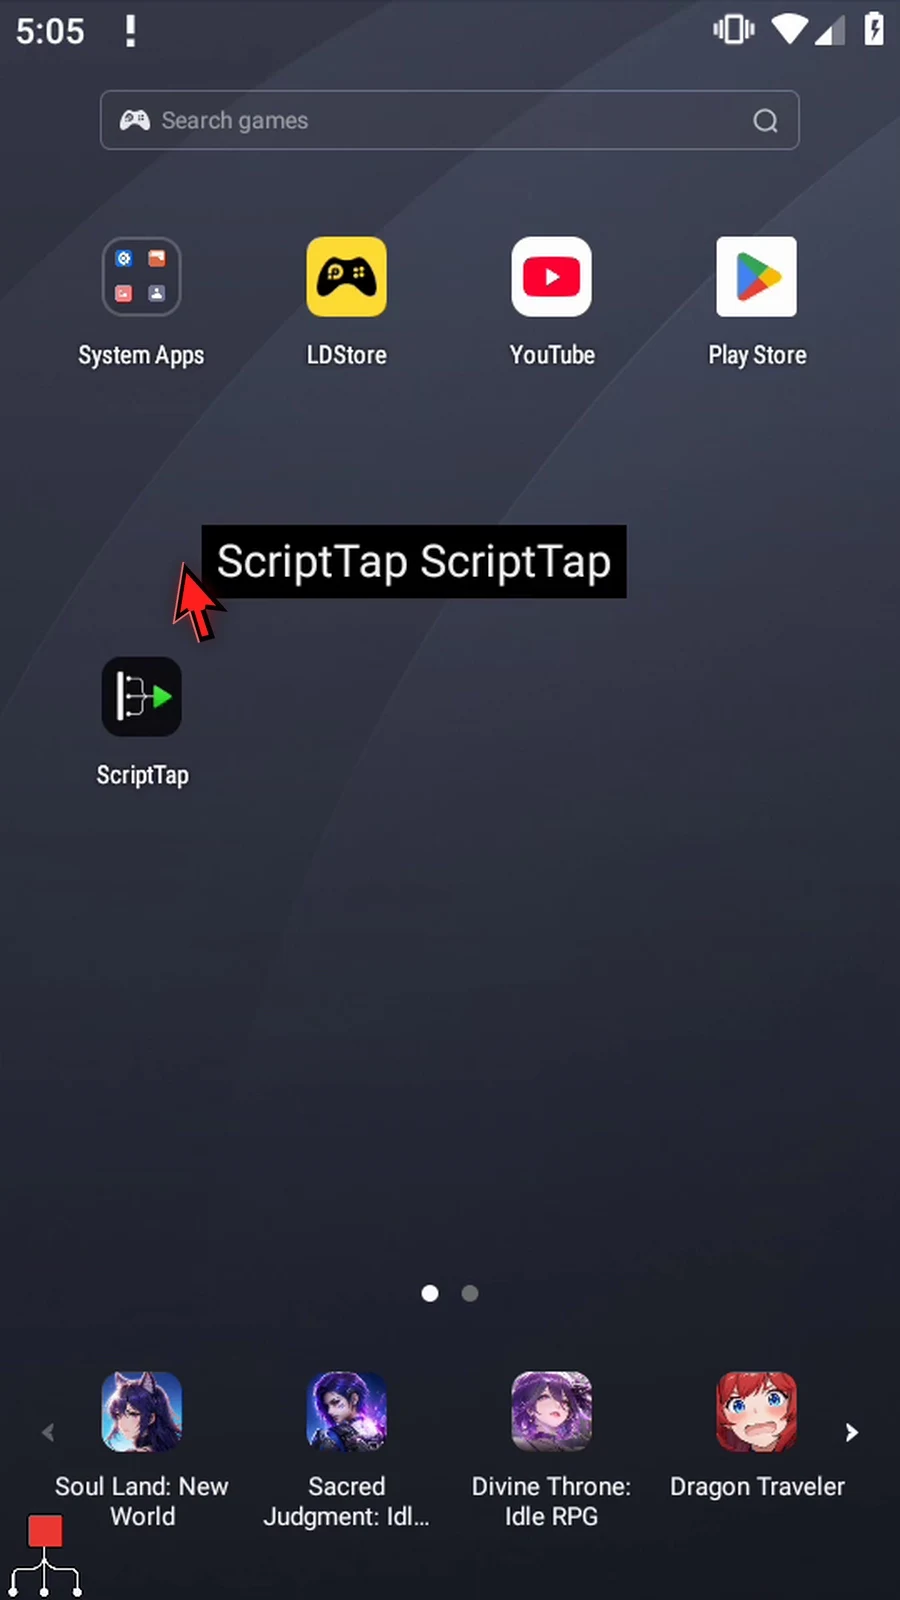
Step 24 Complete confirms that execution reached the final command.
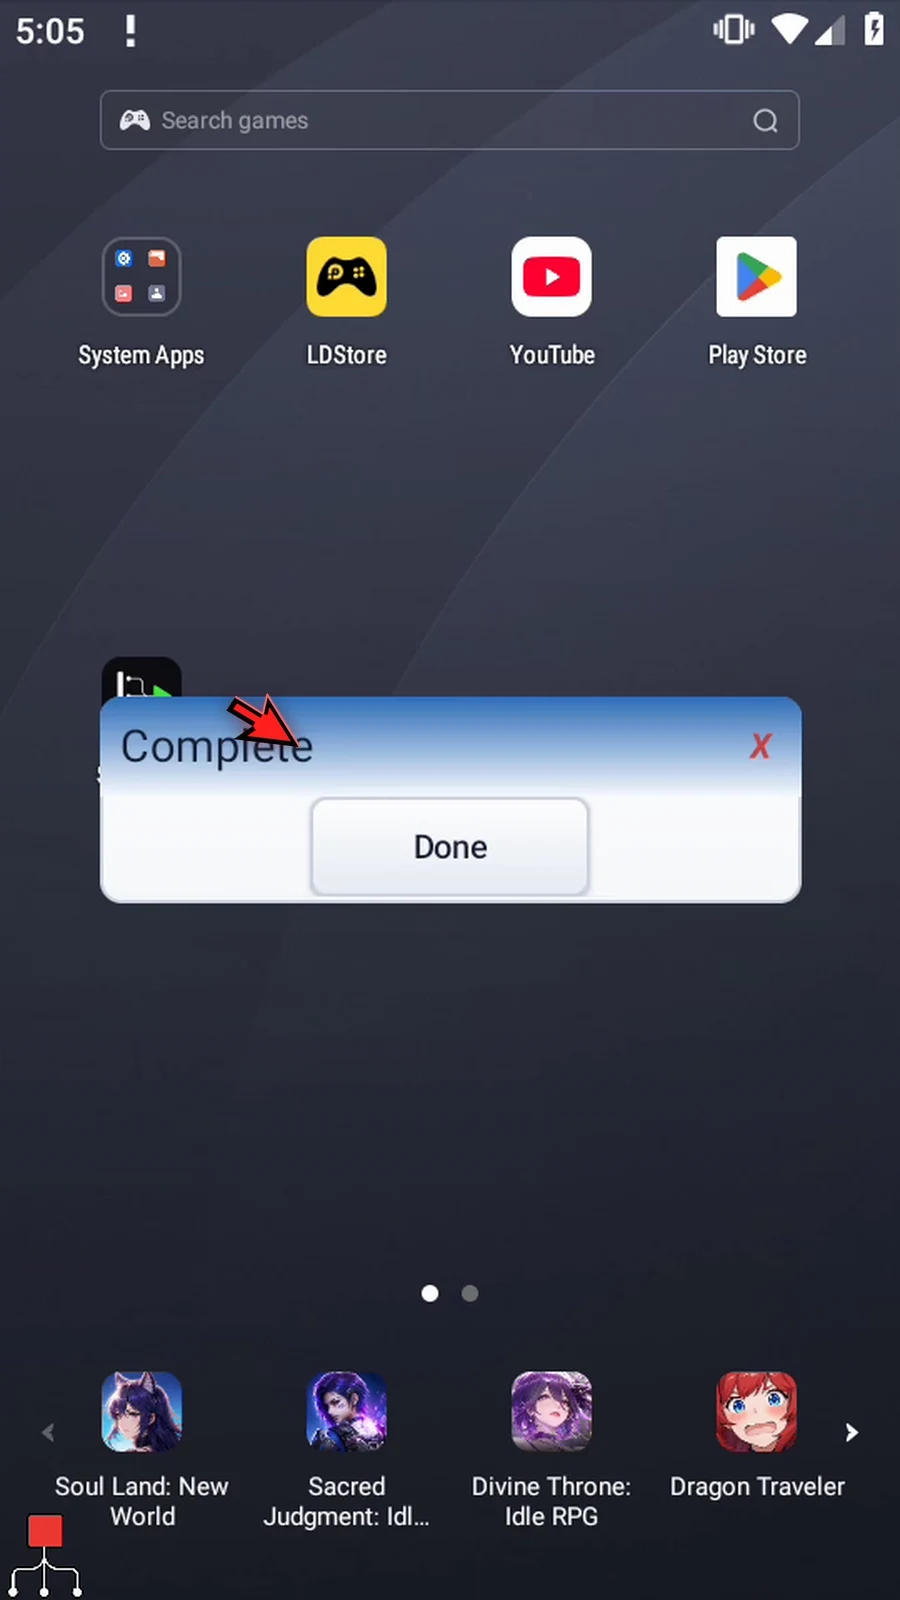
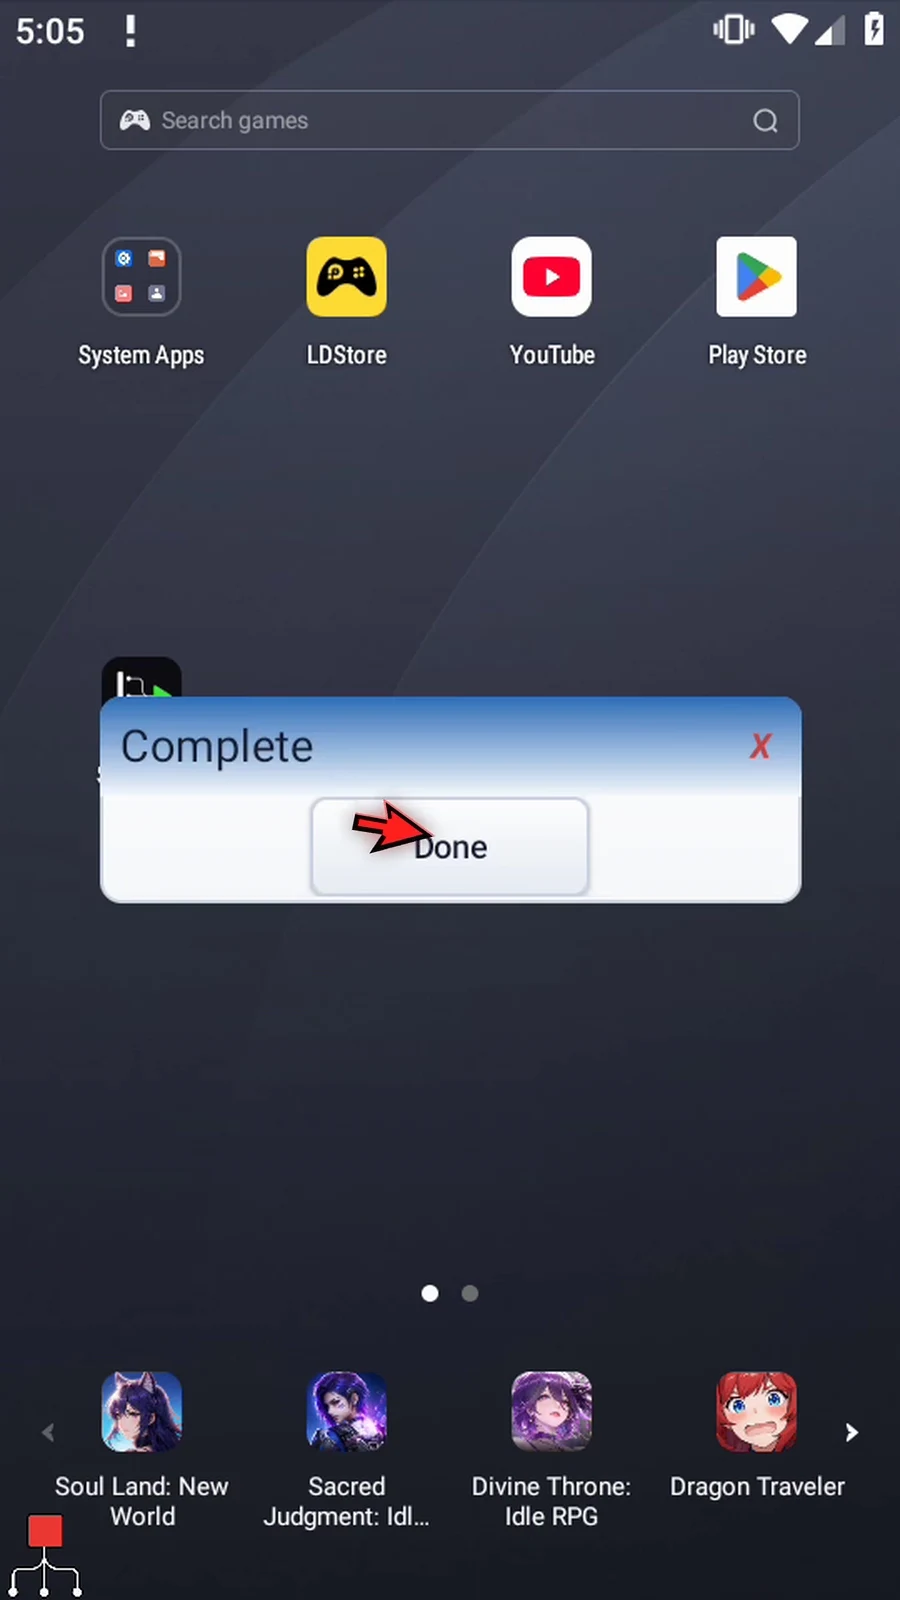
Step 25 Press Done. The script finishes automatically. Use Literal Replace when you know the exact text to change.
Regex Replace changes text identified by a pattern, even when part of that text varies. Capture references let the replacement preserve useful details. This follow-up reuses the same four-command tutorial script from Replace / Literal.
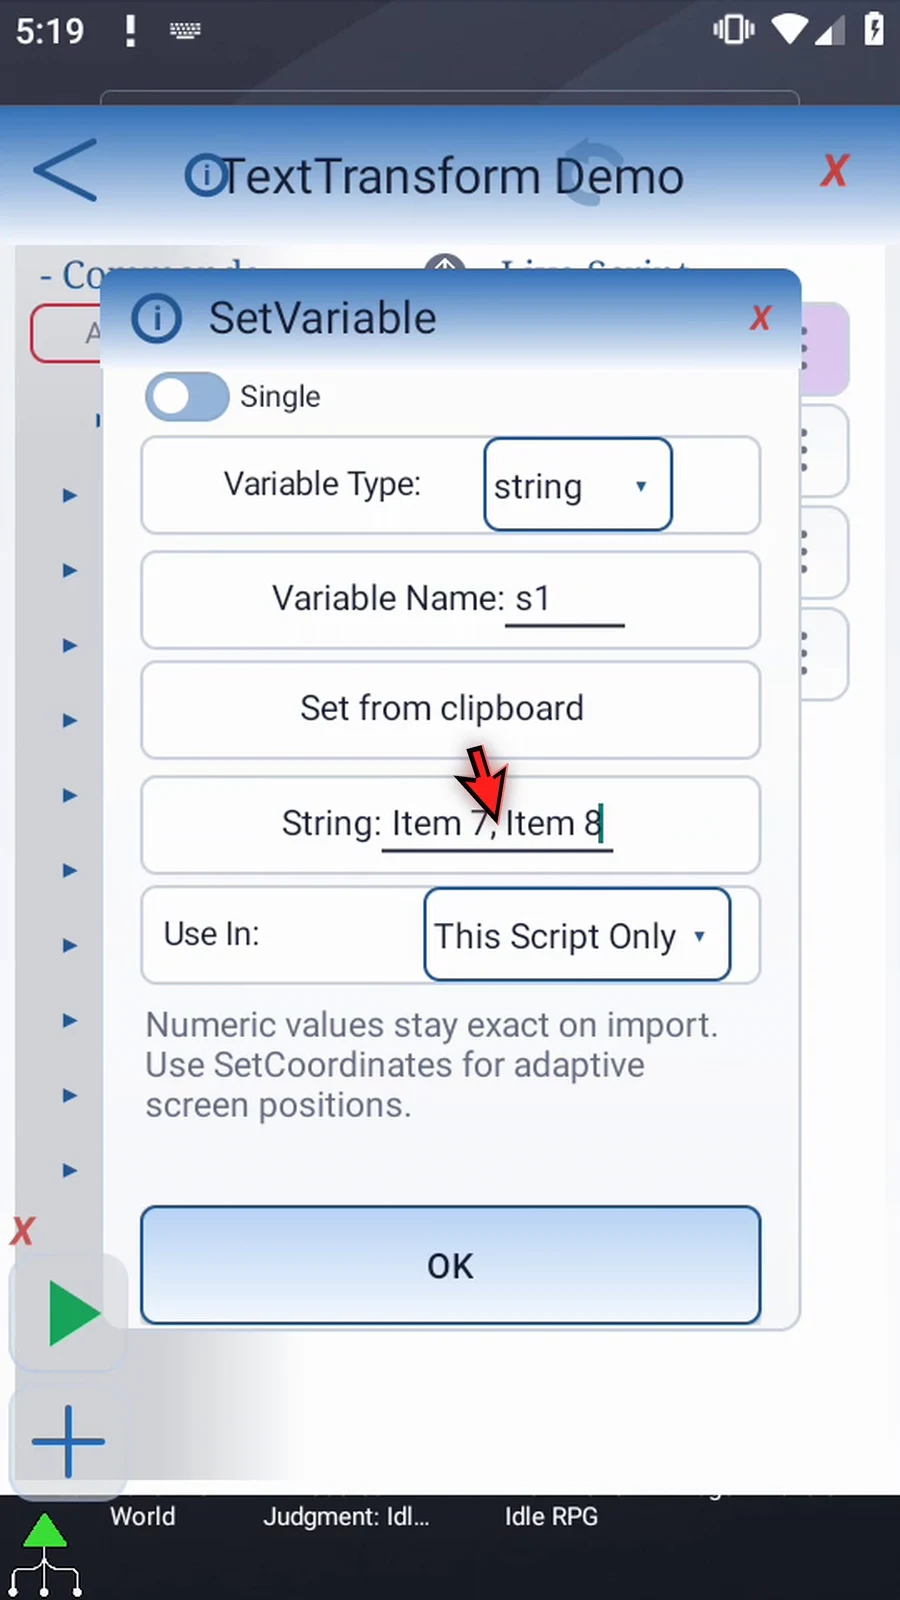
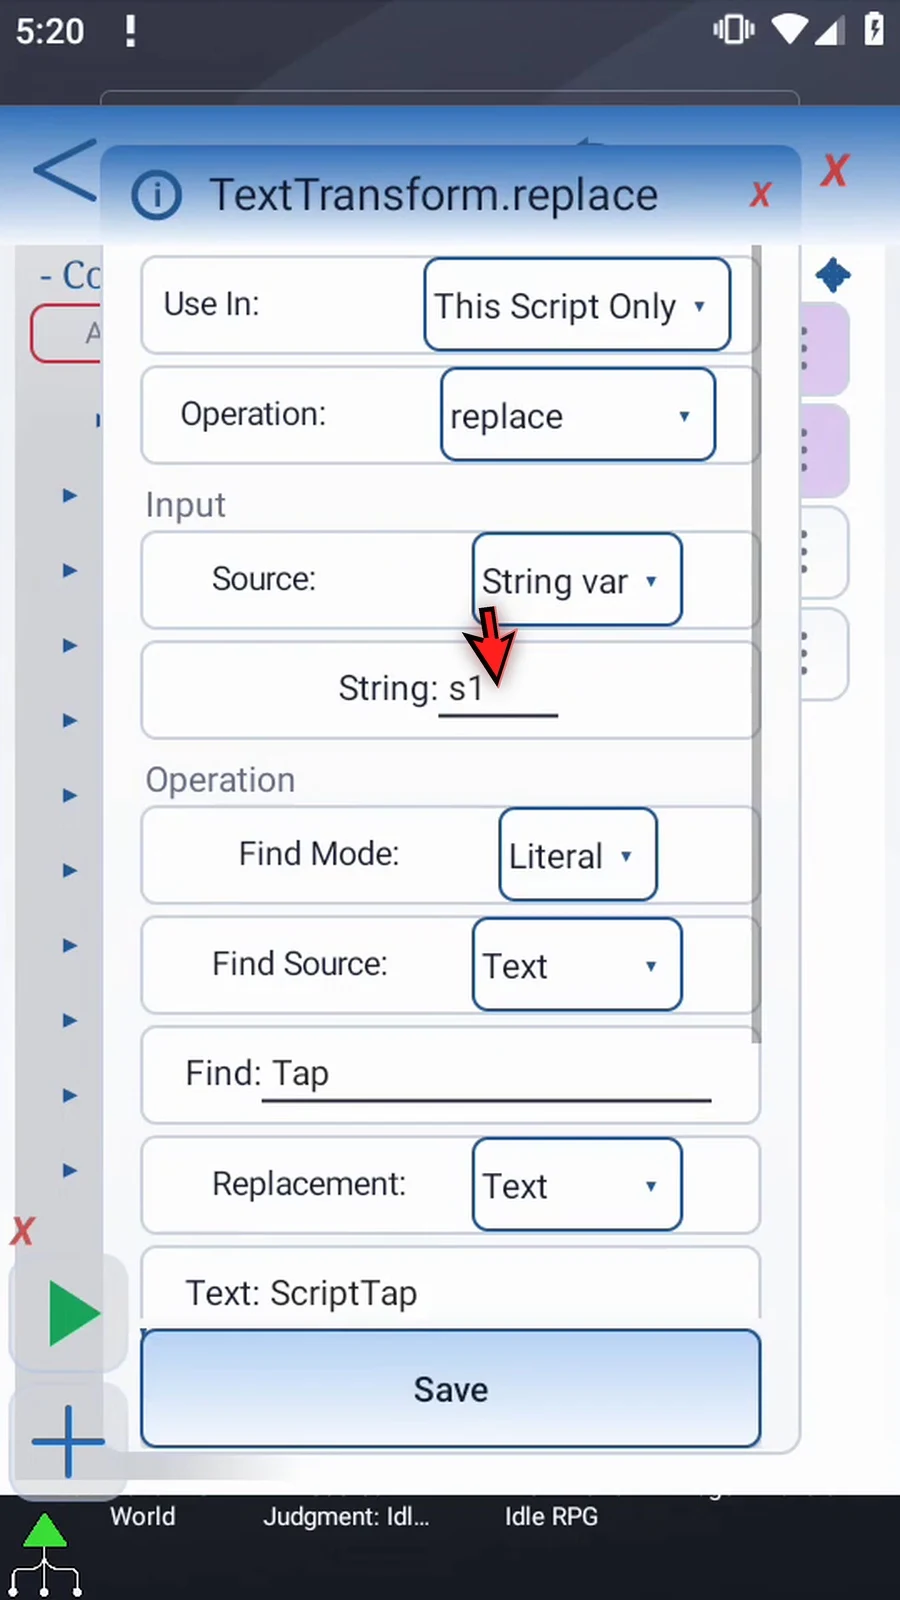
Open the first SetVariable and normally type Item 7, Item 8 into String s1, retaining This Script Only. These are numerals 7 and 8. Save, then reopen the existing TextTransform. Keep replace, input String var → s1, and local scope.
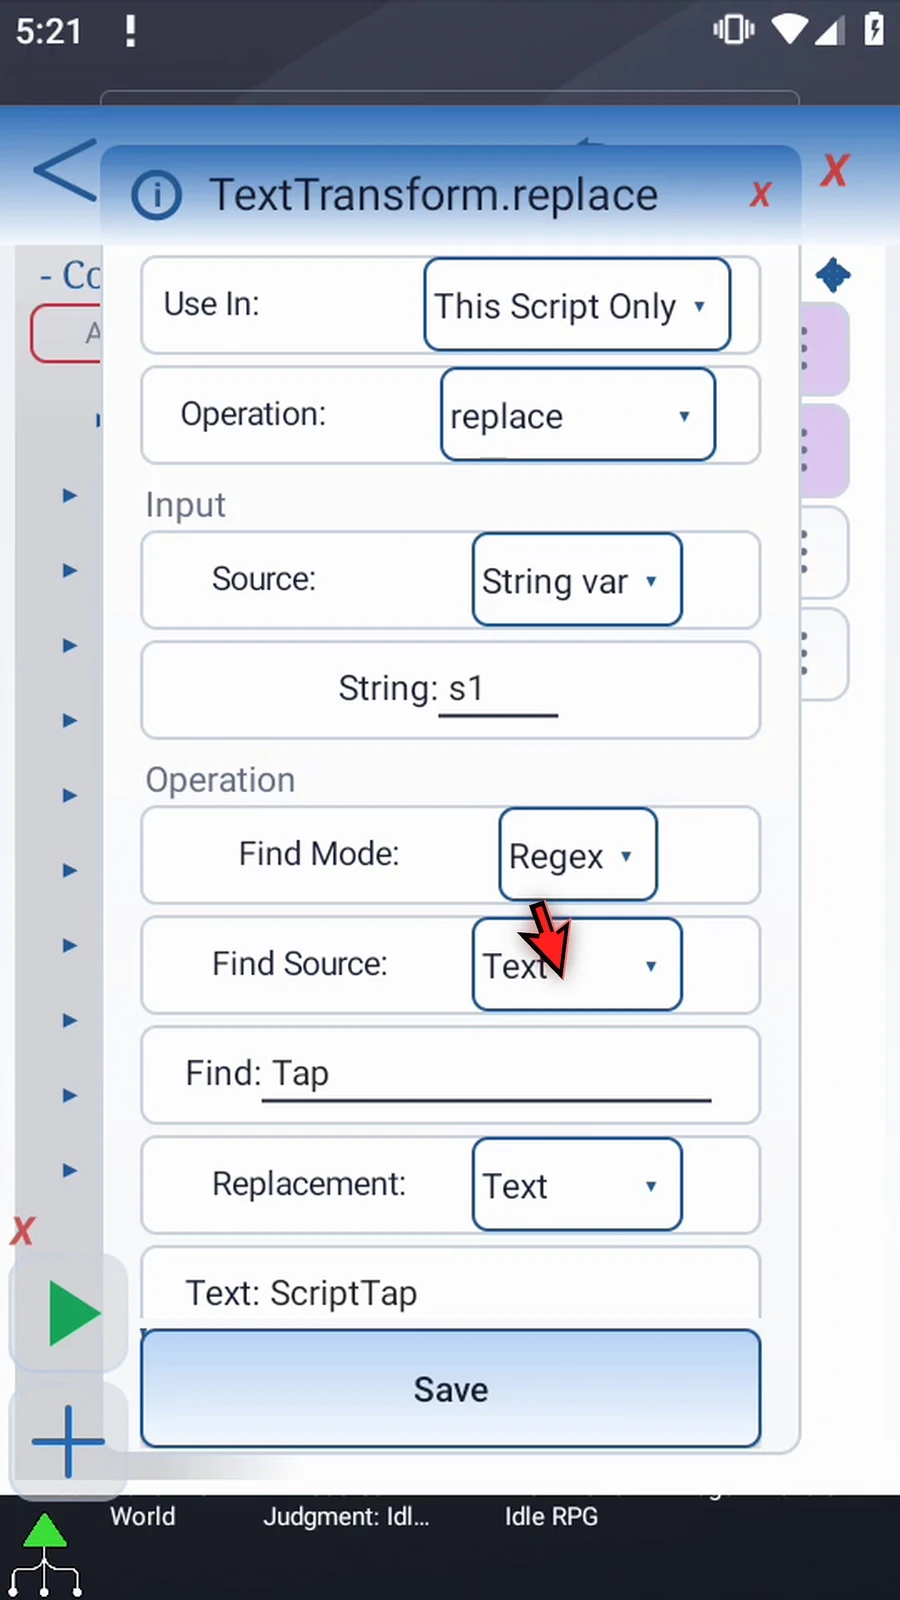
Change Find Mode from Literal to Regex. Keep Find Source as Text; an earlier String variable could also supply the pattern, as explained in the Literal guide. Normally type Item ([0-9]+). Item is fixed text including its space; [0-9] matches a digit, + allows one or more digits, and the parentheses capture the number as Group 1.
Scroll to Replacement, keep Text, and normally type ID-$1. ID- supplies the new label, and $1 inserts the text captured by Group 1. This is a Java regex replacement reference, not a ScriptTap variable name. Literal Replace does not interpret it as a capture reference. An earlier String variable could instead supply the replacement text.
Keep Replace All ON, String output s2, and optional Save Outputs OFF. Save. Invalid regex patterns and invalid replacement references report failure rather than a valid transformed result; optional Boolean Success/String Error outputs are explained in Intro.
The supporting Display still reads Variable s2 for 5000 ms in the same area and default appearance. Complete/Done PromptMe is unchanged. No new commands are inserted.
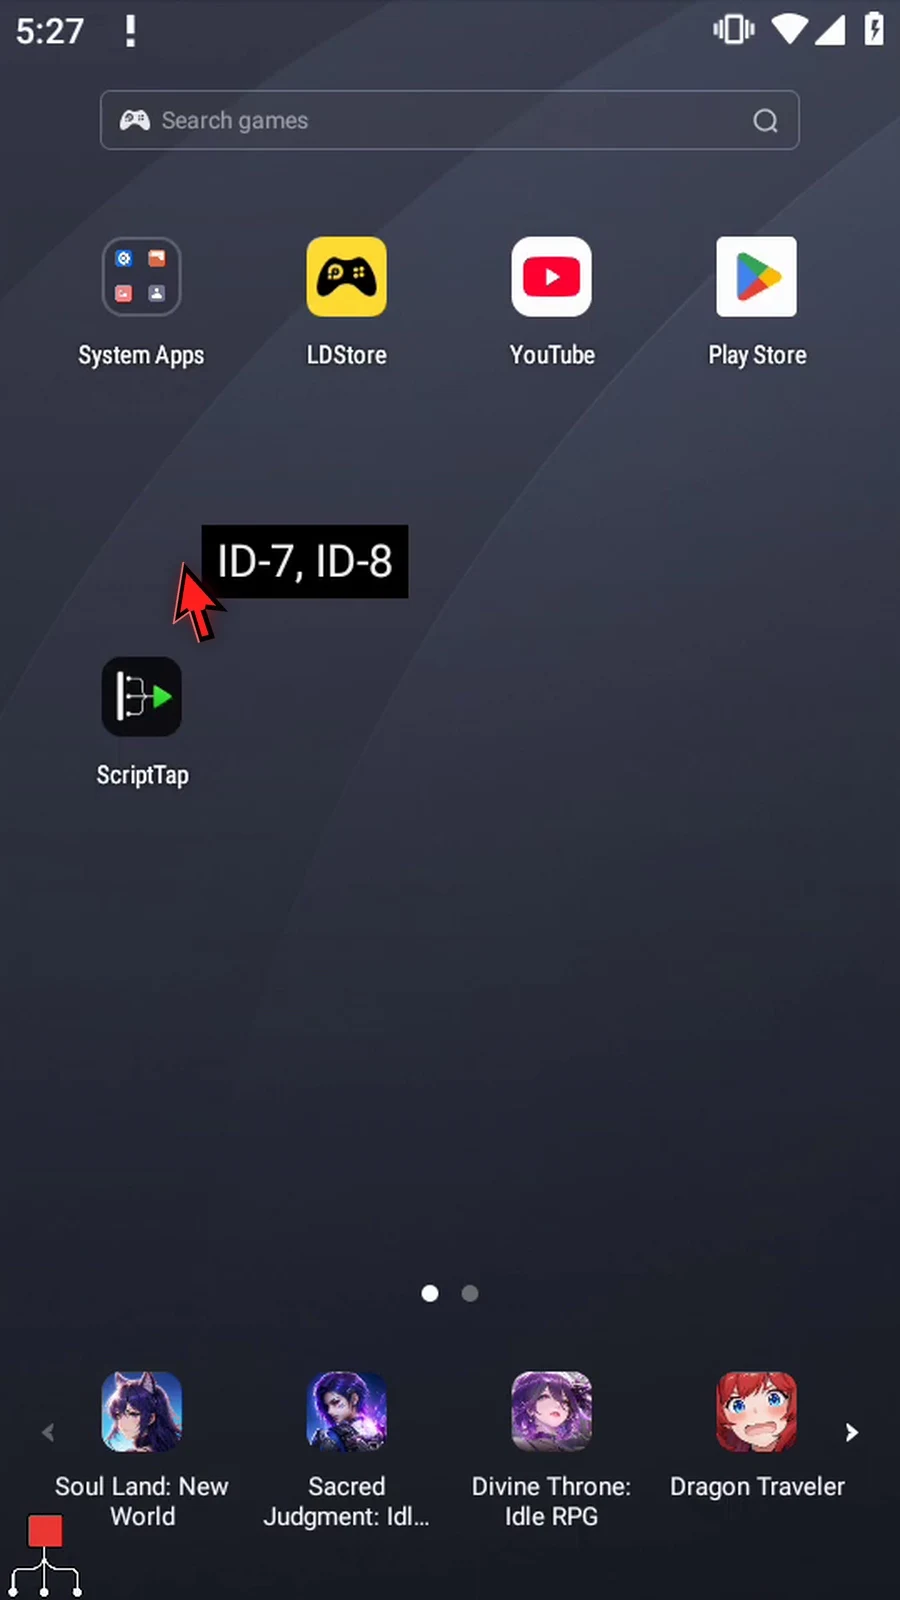
Close the editor and use Play. The actual result is ID-7, ID-8; both labels changed while their different numbers were preserved. Original s1 remains Item 7, Item 8. The full genuine timed display and natural completion transition are retained. Press Done to finish automatically. The recorded four-command run completed with zero warnings/errors.
Replace / Regex
Step-by-step guide
Step 01 Regex Replace changes text that follows a pattern, even when part of that text varies. Capture groups let the replacement keep useful details. We will turn two numbered Item labels into shorter IDs.
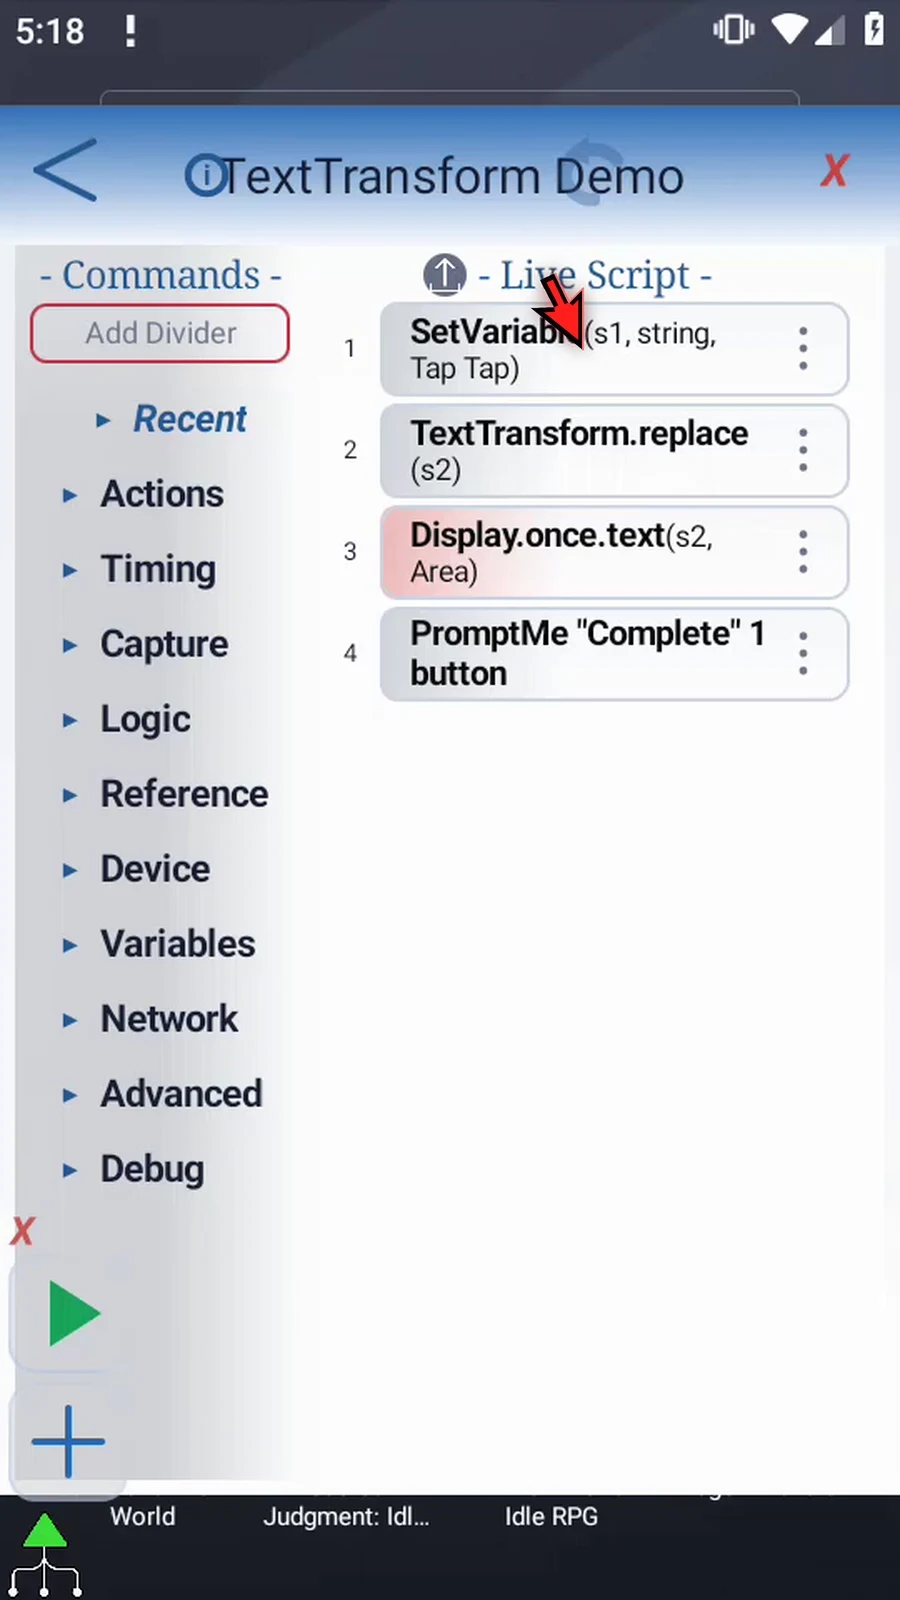
Step 02 Open Set Variable. Keep String variable s1 and the local scope.
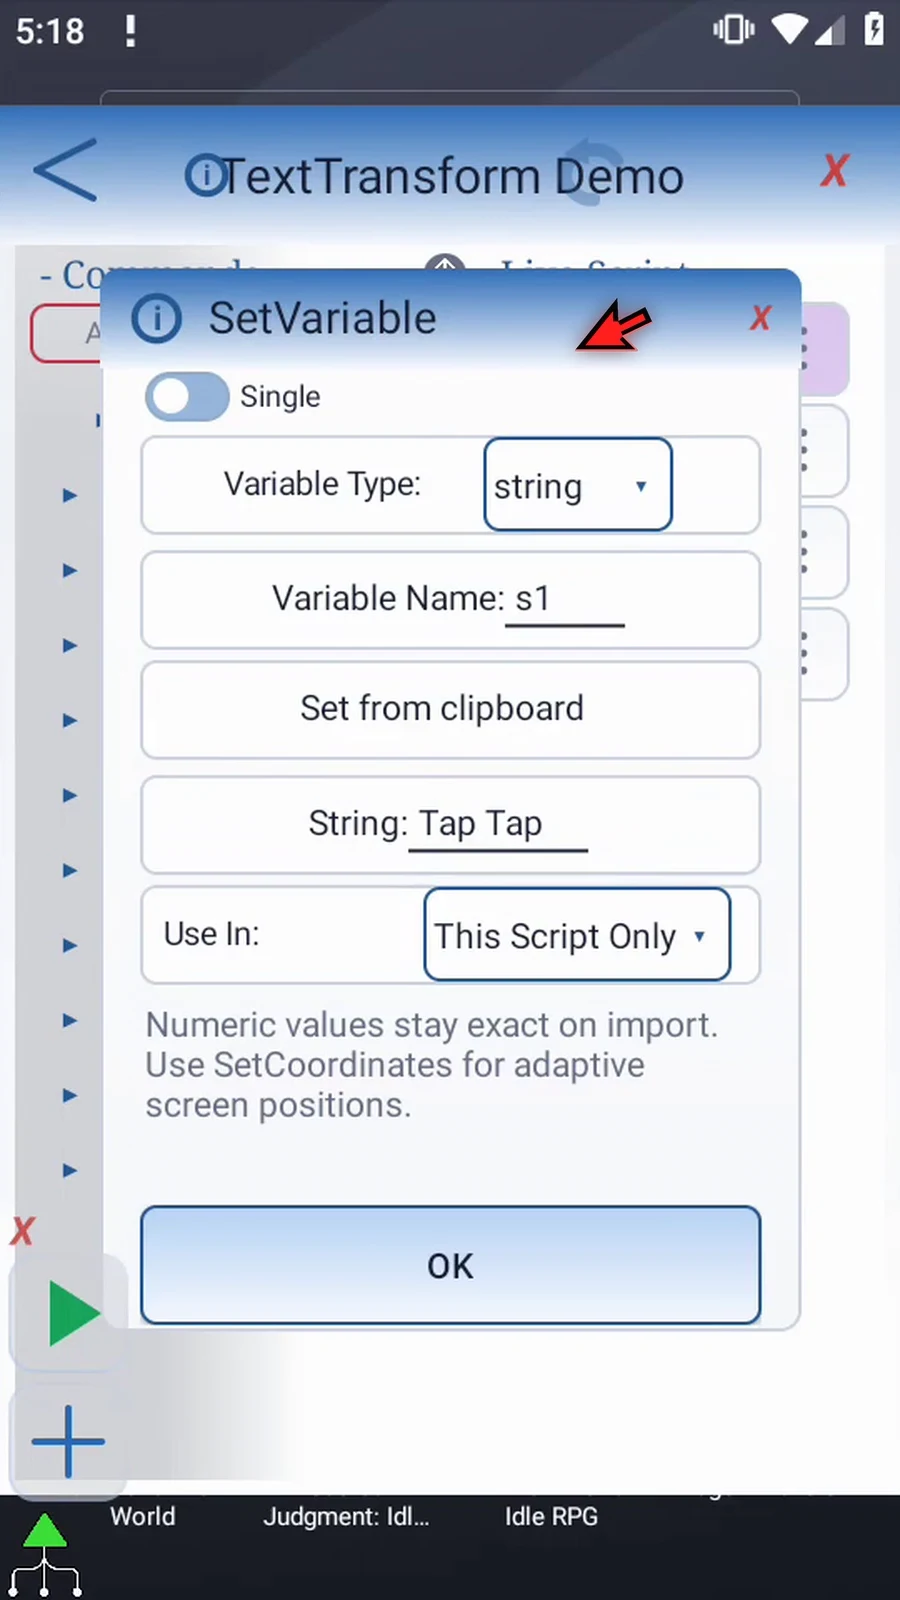
Step 03 Enter Item seven, a comma and a space, then Item eight, exactly as shown. Tap OK. These different numbers make the pattern useful.
Step 04 Open Text Transform. Keep Replace, String input s1, and This Script Only.
Step 05 Open Find Mode and choose Regex. Find will now be interpreted as a regular expression, not as literal characters.
Step 06 Keep Find Source as Text and enter the pattern shown here. Item and a space are fixed text. Zero through nine in square brackets matches a digit, and the plus sign allows one or more digits. Parentheses capture the number as group one.
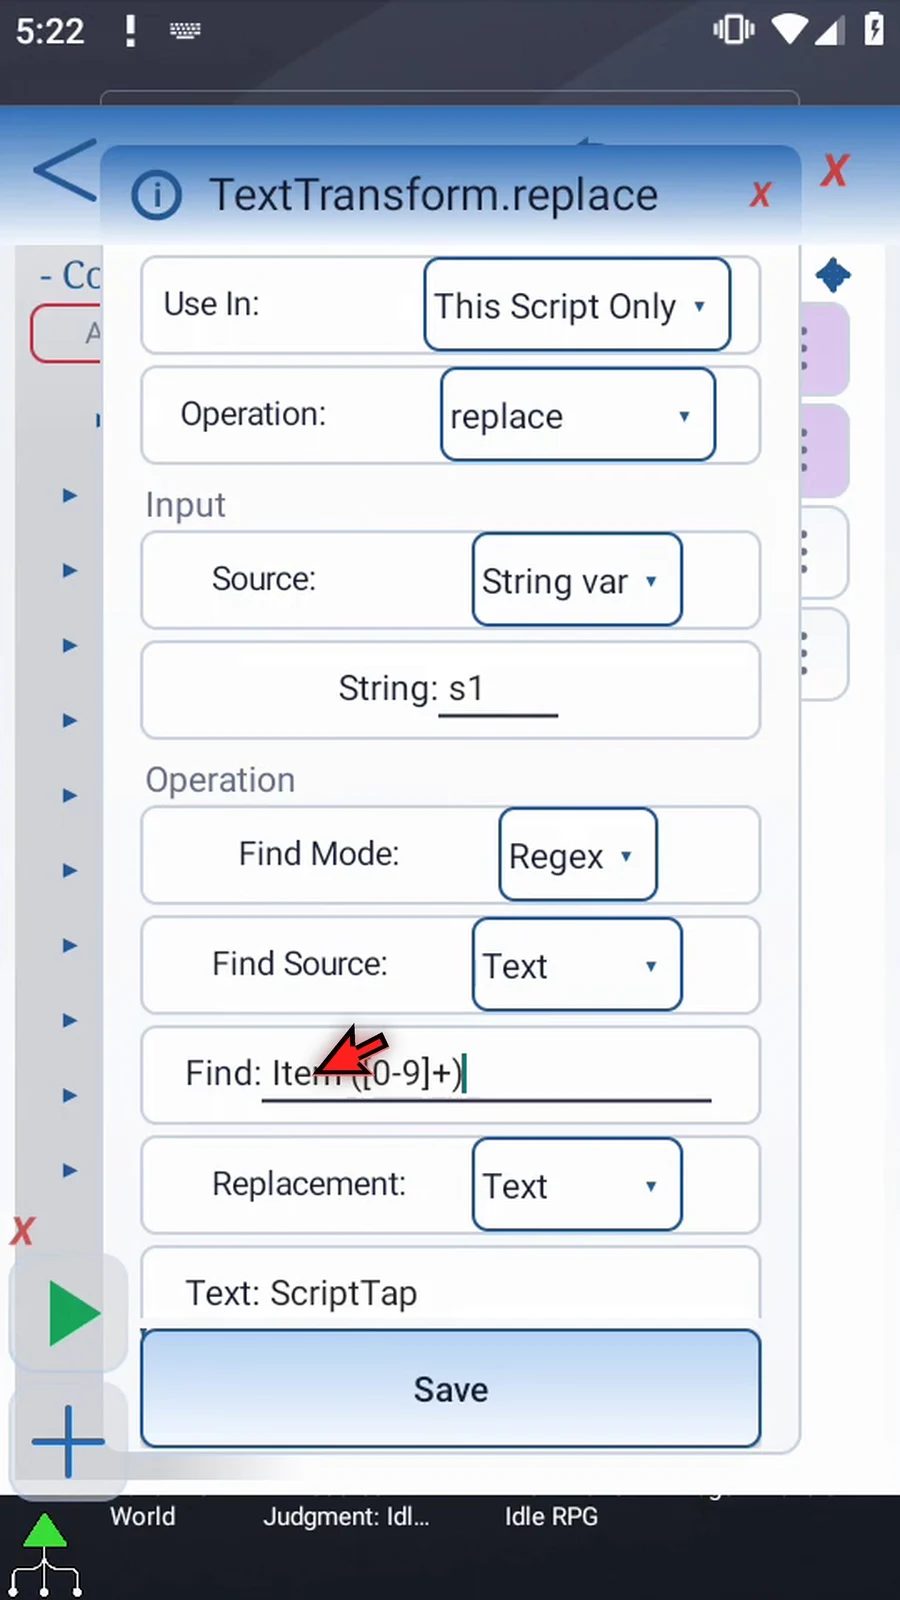
Step 07 Scroll down. Keep Replacement as Text and enter ID, a hyphen, then dollar sign one. Dollar sign one inserts the number captured by group one. The replacement changes the label while keeping its number.
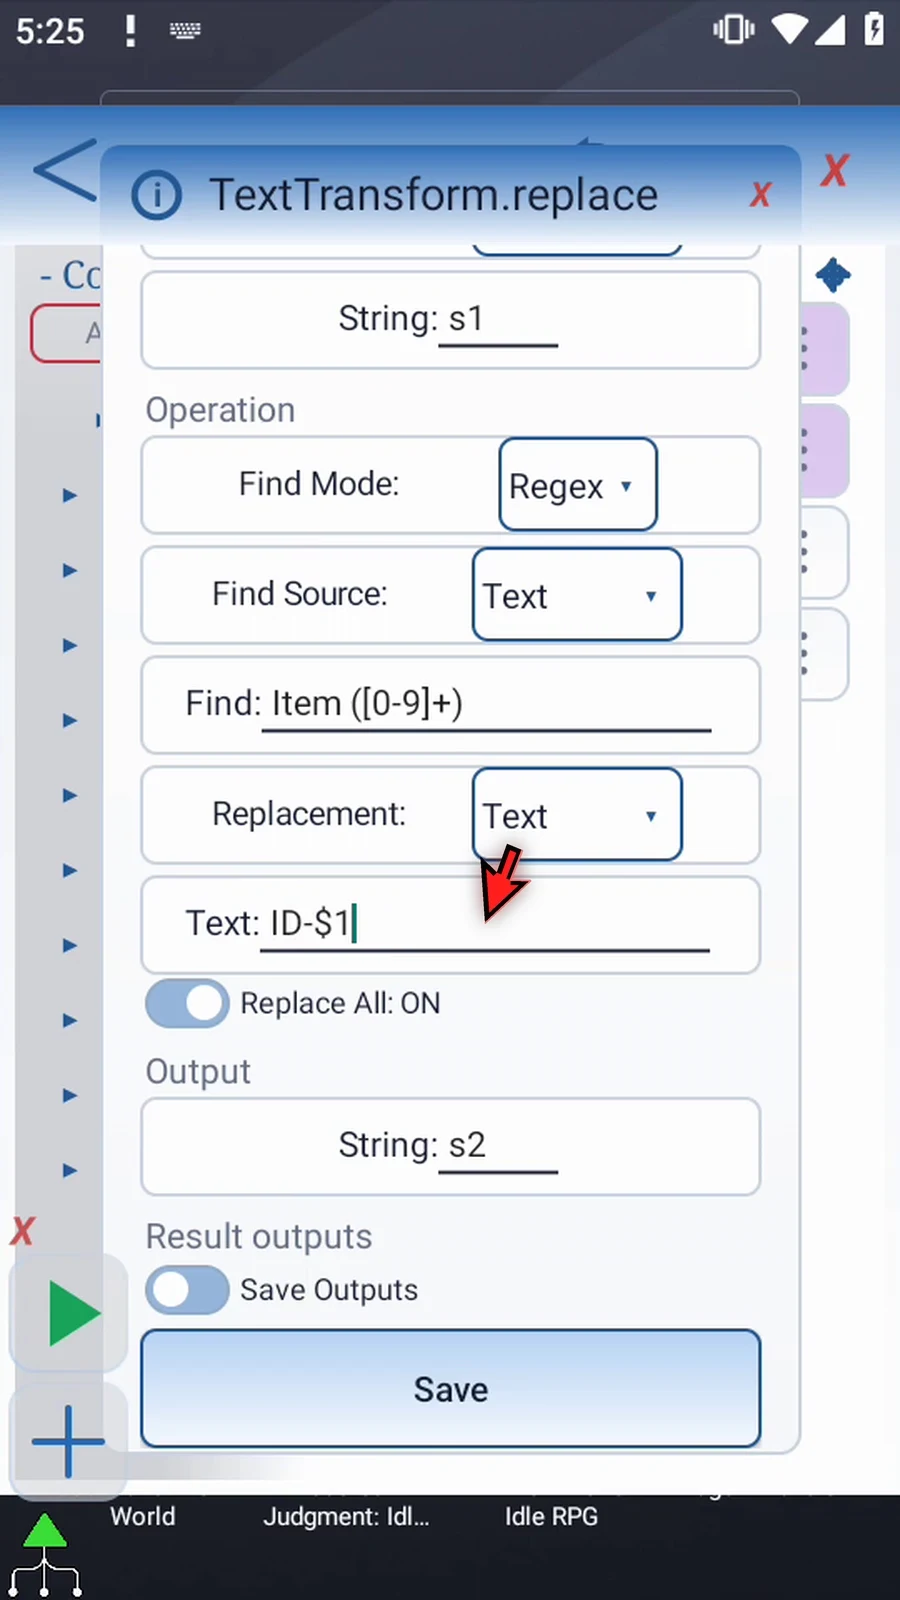
Step 08 Keep Replace All on, so both labels are changed. Keep s2 as the output and optional Save Outputs off, then tap Save. Invalid patterns or replacement references report an error instead of a valid result.
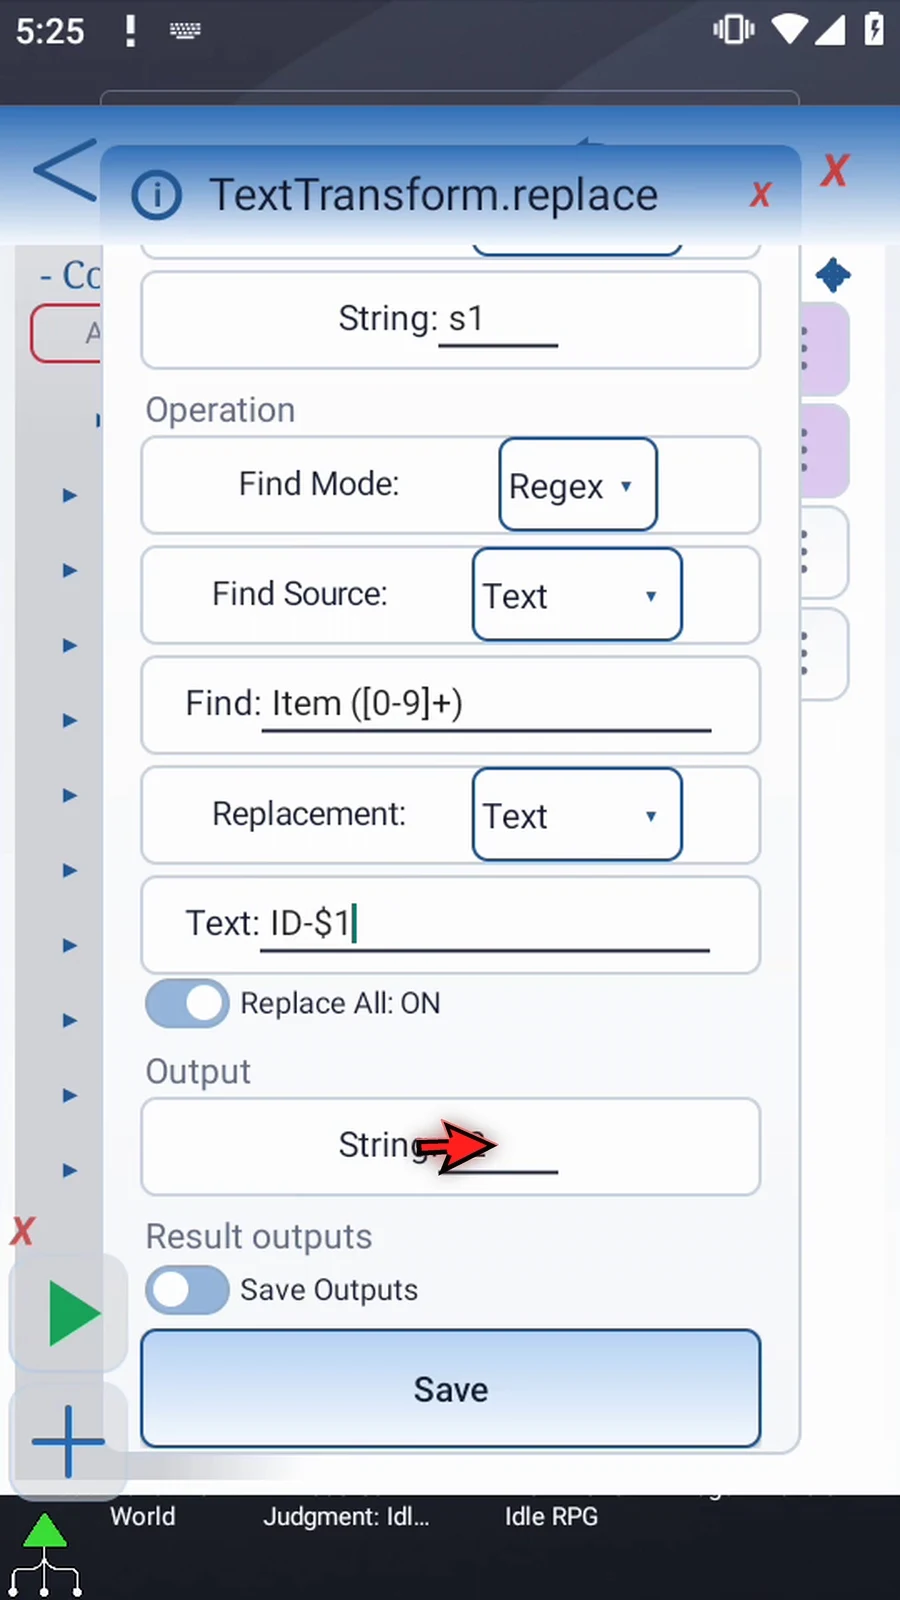
Step 09 Display still reads s2 for five seconds, and Prompt Me confirms completion. The source stays in s1. Close the editor to test the pattern.
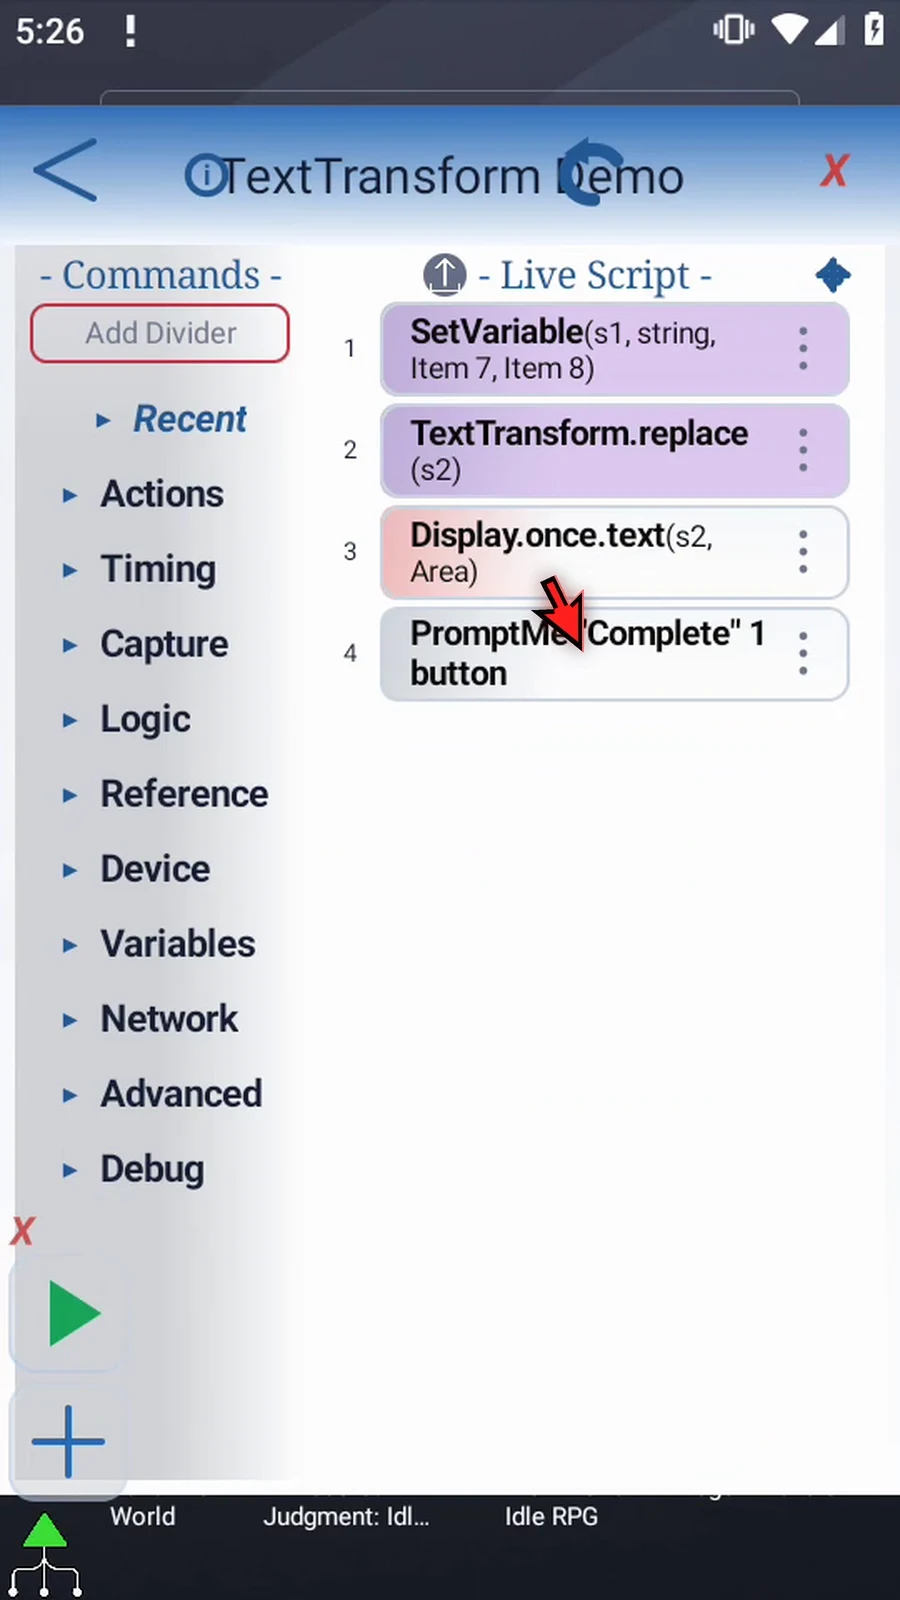
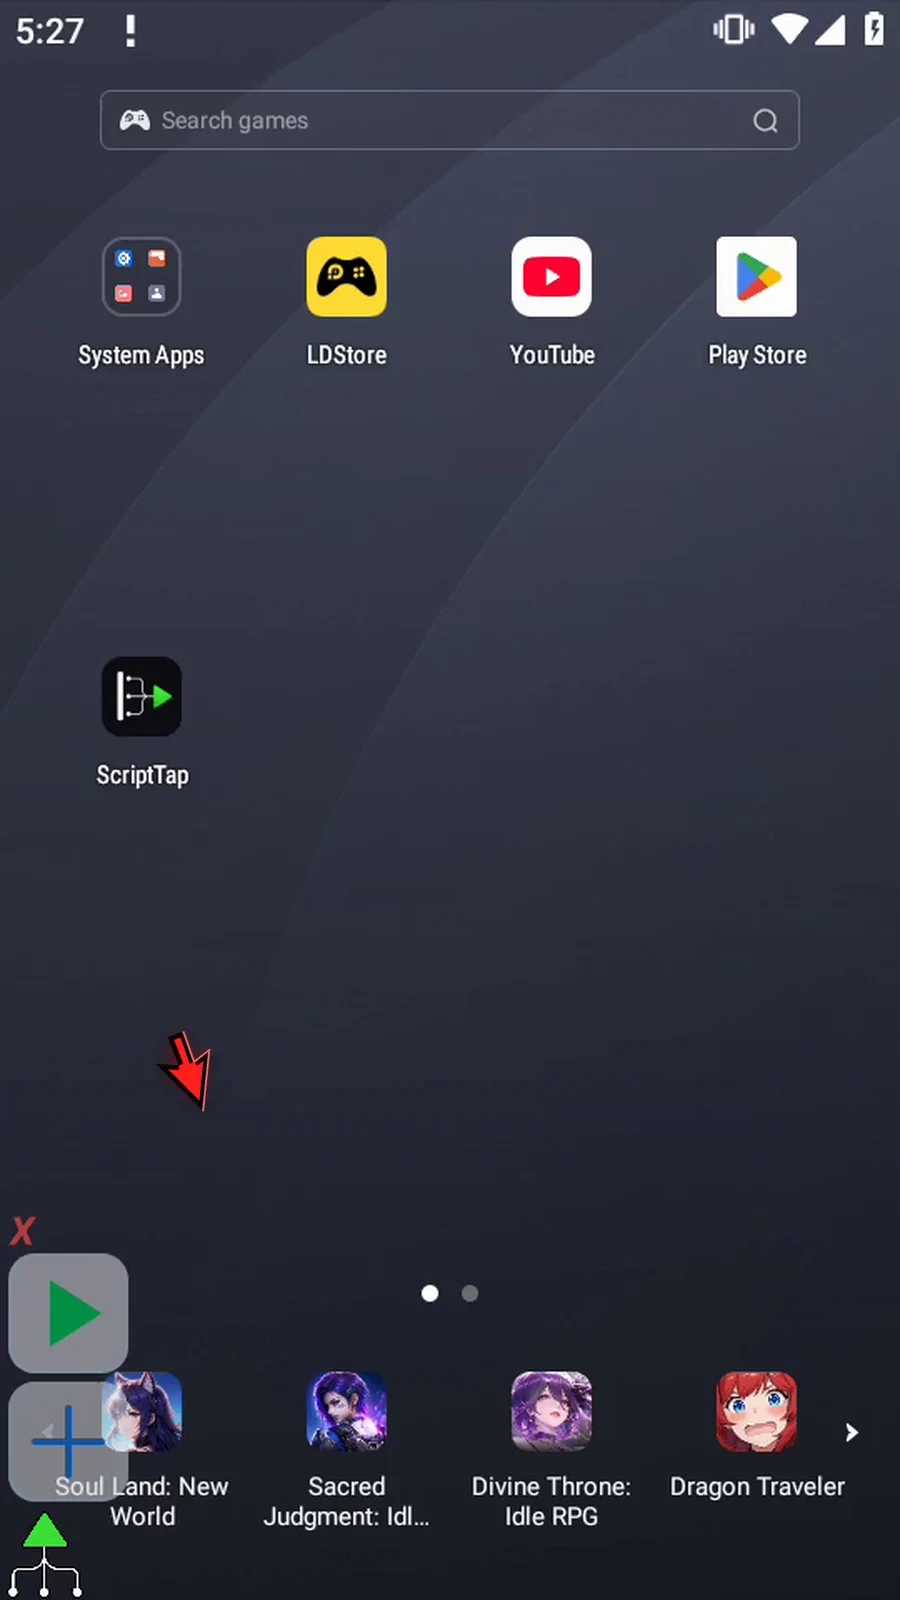
Step 10 When the script is complete, simply use the Play button in the main overlay.
Step 11 Both labels become IDs, while their different numbers are preserved.
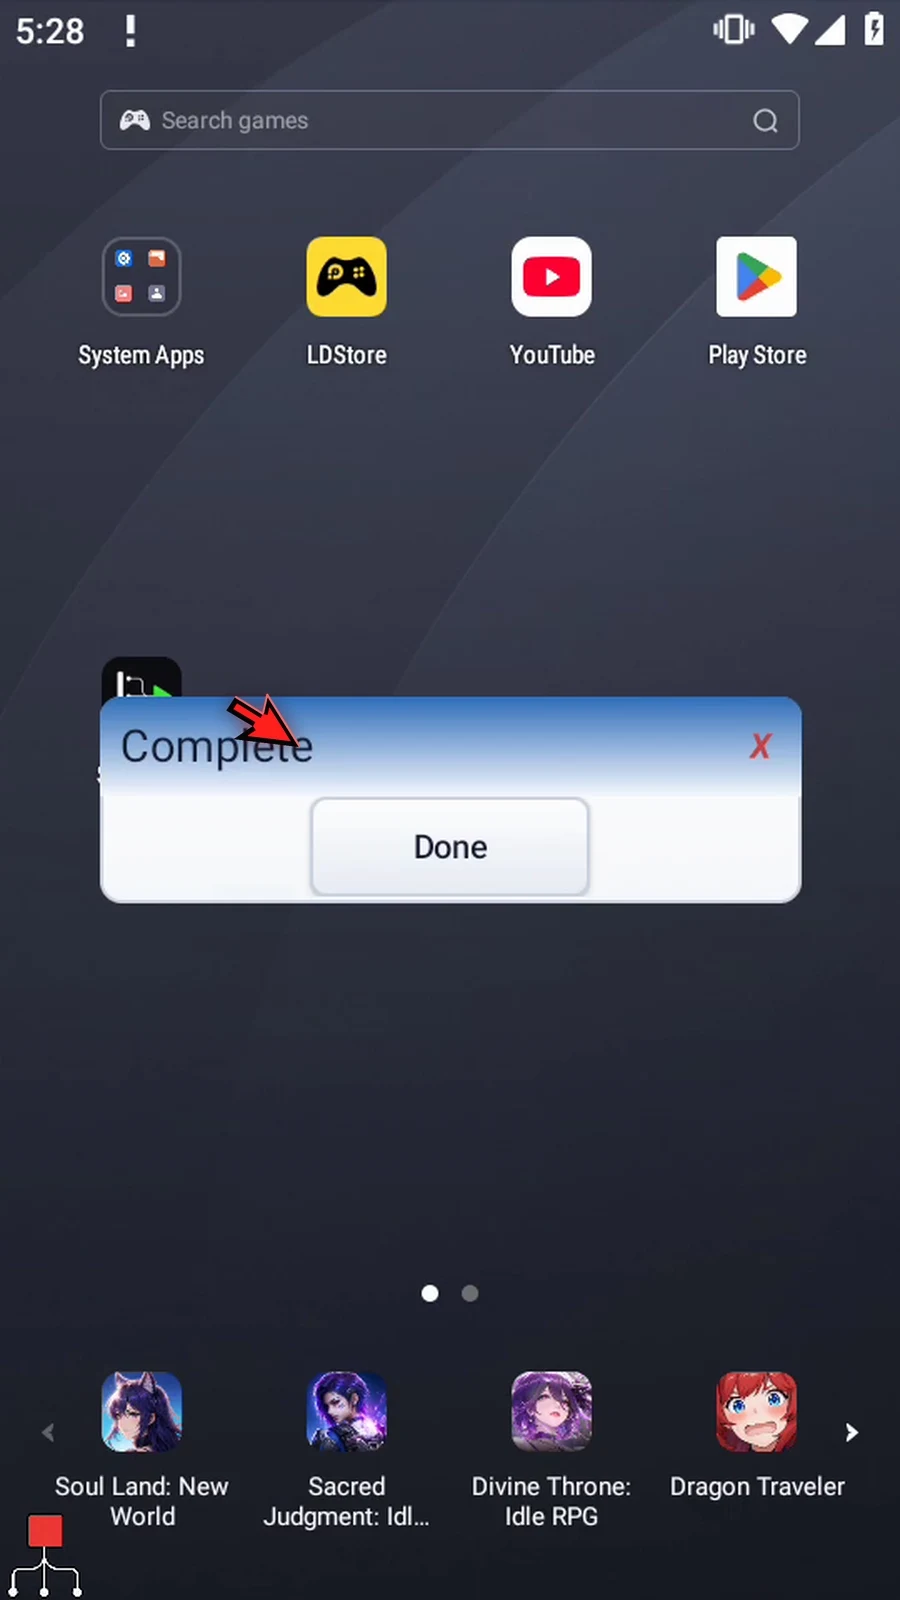
Step 12 Complete confirms that the script continued after the result.
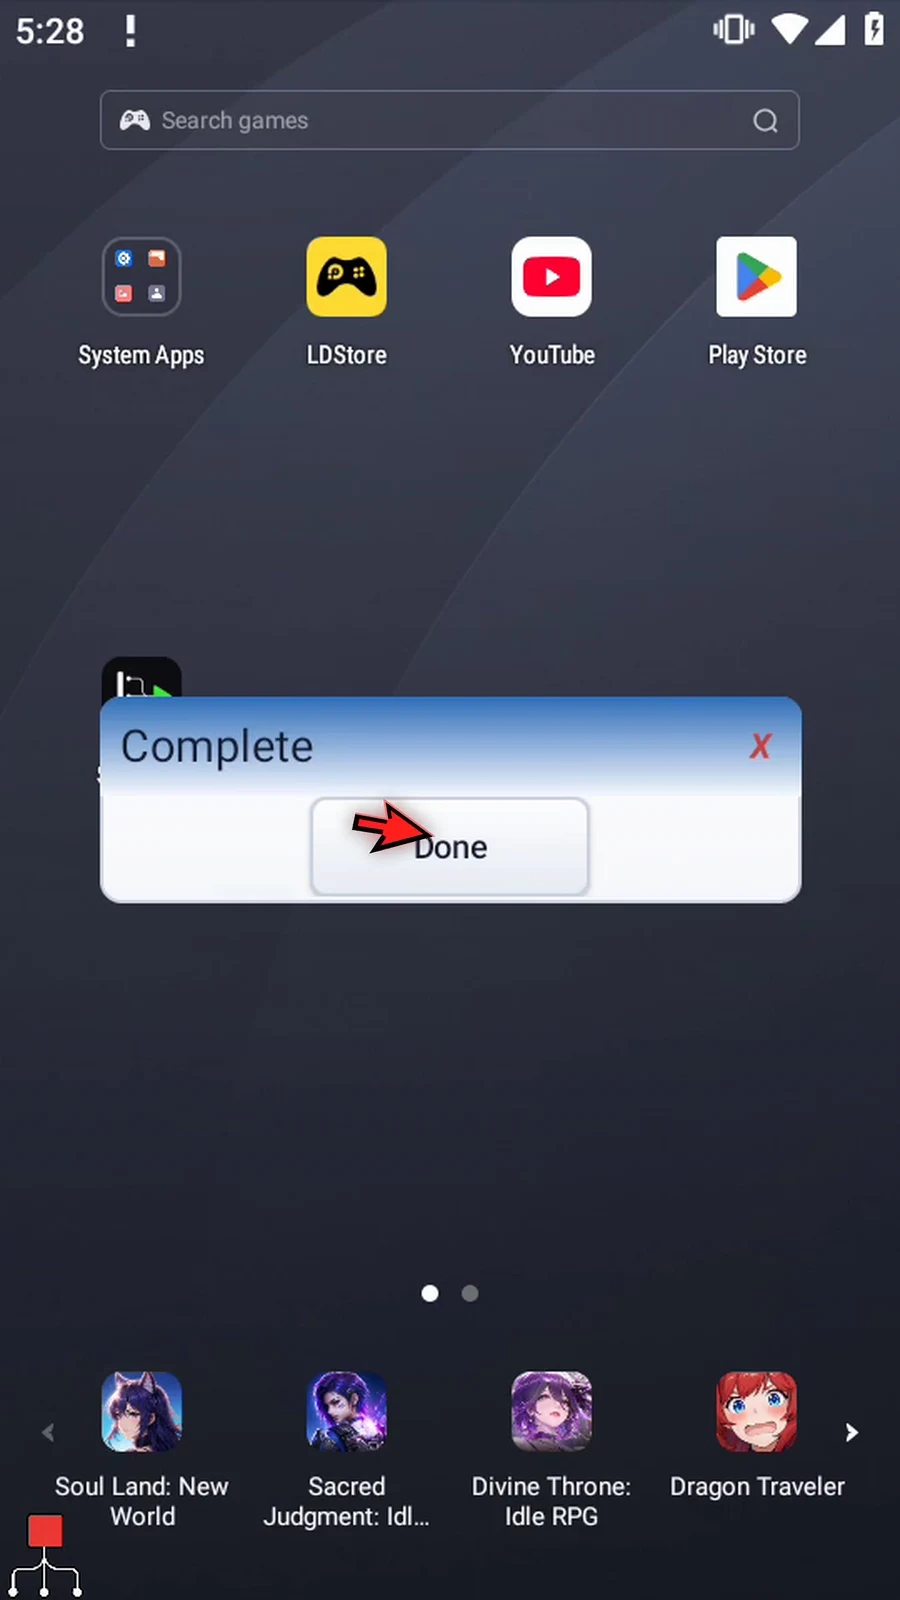
Step 13 Press Done. The script finishes automatically. Use Regex Replace when a pattern identifies what to change and capture groups supply details to keep.
Parse Integer converts numeric text into an Integer variable for later math, comparisons and other number-based commands. This follow-up reuses the four-command tutorial script built in Intro / Case.
Open SetVariable, keep String s1 and This Script Only, and normally replace the source with FF: two capital F characters, without a prefix. Save. Reopen the same TextTransform and select the native parseInt operation. Keep input String var → s1 and local scope. Literal Text input is also available, as explained in Intro.
Set Base to 16 for hexadecimal. Base 10 is ordinary decimal notation; supported bases are 2..36. An earlier Integer variable can supply the base instead of a literal.
Default reveals a fallback Value. The video briefly enables it and types 0, then switches it OFF for the valid example. A configured Integer literal or earlier Integer variable is written only if conversion fails. With Default OFF, failed conversion leaves the Integer output unchanged. If optional status outputs are enabled, using a valid fallback reports Success true with Error parse_default_used; ordinary successful conversion has a blank Error. The optional Boolean Success and String Error controls are explained in Intro.
Set Integer output i1. Integer results must be whole numbers within signed32-bit bounds, -2147483648..2147483647. Fractional or out-of-range input does not parse; use Parse Decimal for fractional values. Keep optional Save Outputs OFF and Save.
Open the existing Display and change only its Variable from s2 to i1. Keep the same selected area, 5000ms lifespan and default appearance. Complete/Done PromptMe is unchanged. No new commands are inserted.
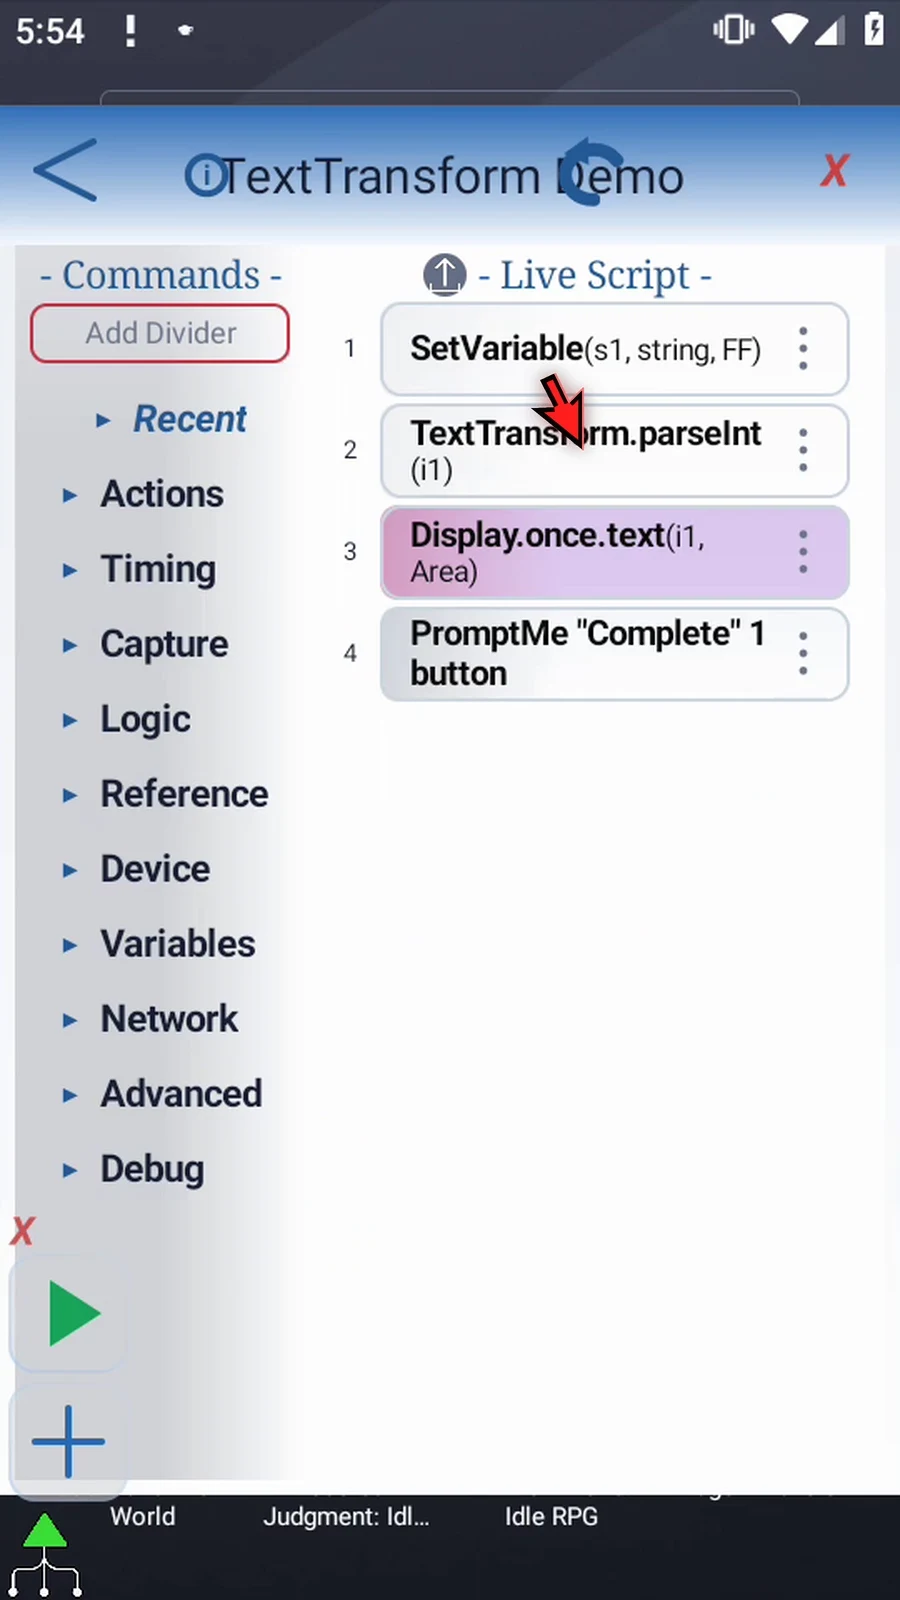
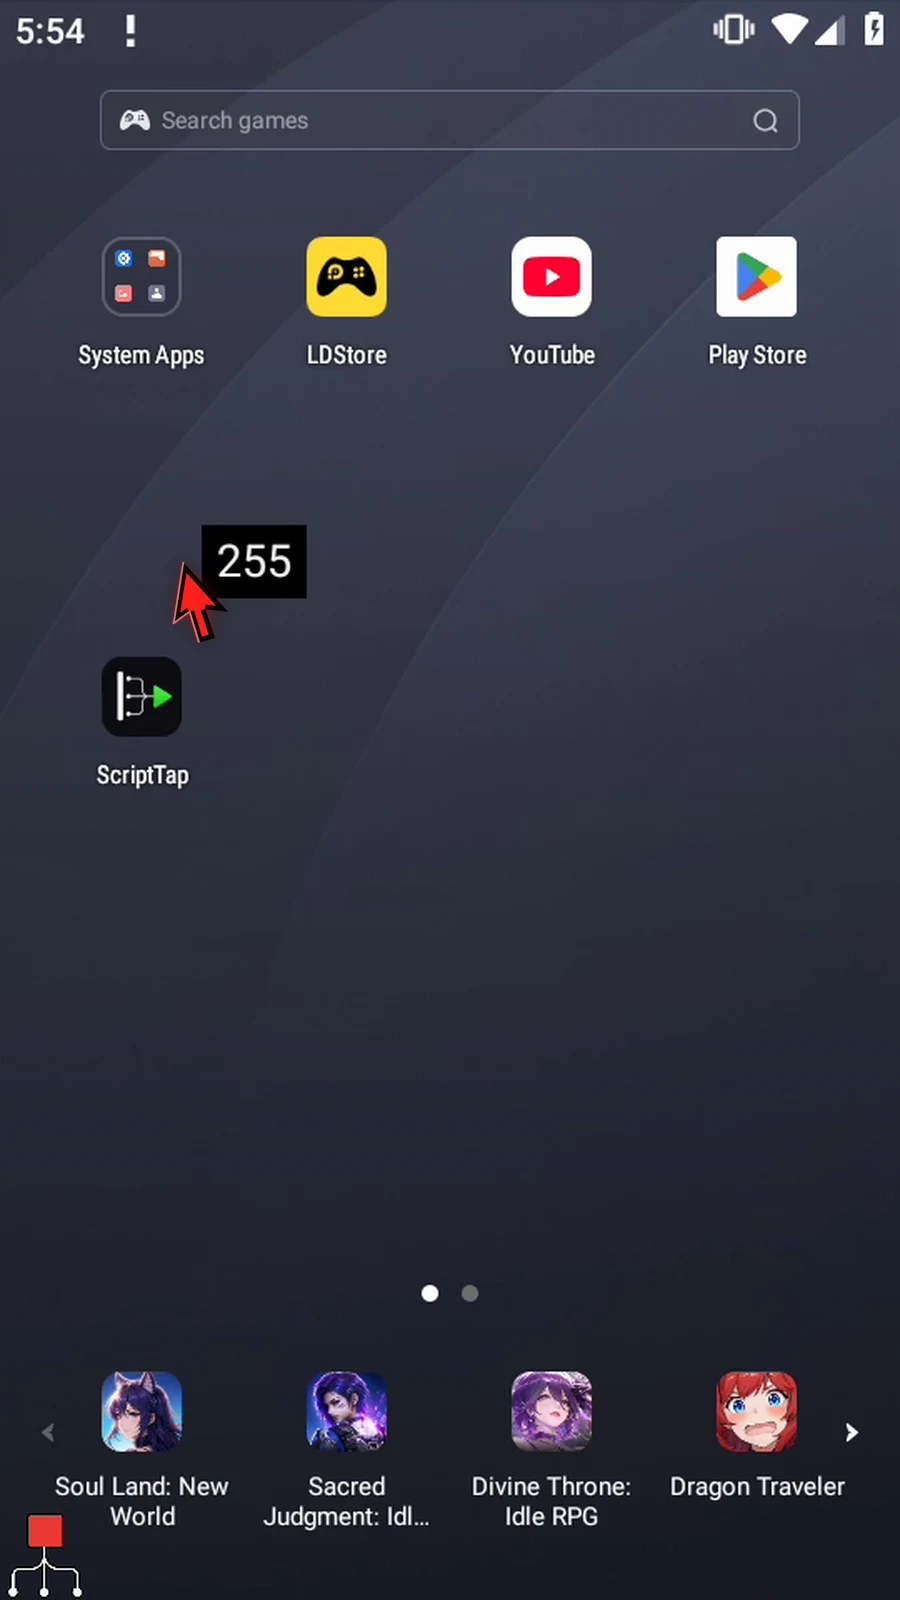
Close the editor and use Play. The actual Display shows 255, the decimal value of hexadecimal FF; original String s1 remains FF. The full genuine timed result and natural PromptMe transition are retained. Press Done to finish automatically. The recorded run completed all four commands with zero warnings/errors and final Integer i1=255.
Parse Integer
Step-by-step guide
Step 01 Parse Integer turns numeric text into an Integer variable that later math and conditions can use. We will convert hexadecimal text into the number two hundred fifty-five, using the same short script from Intro.
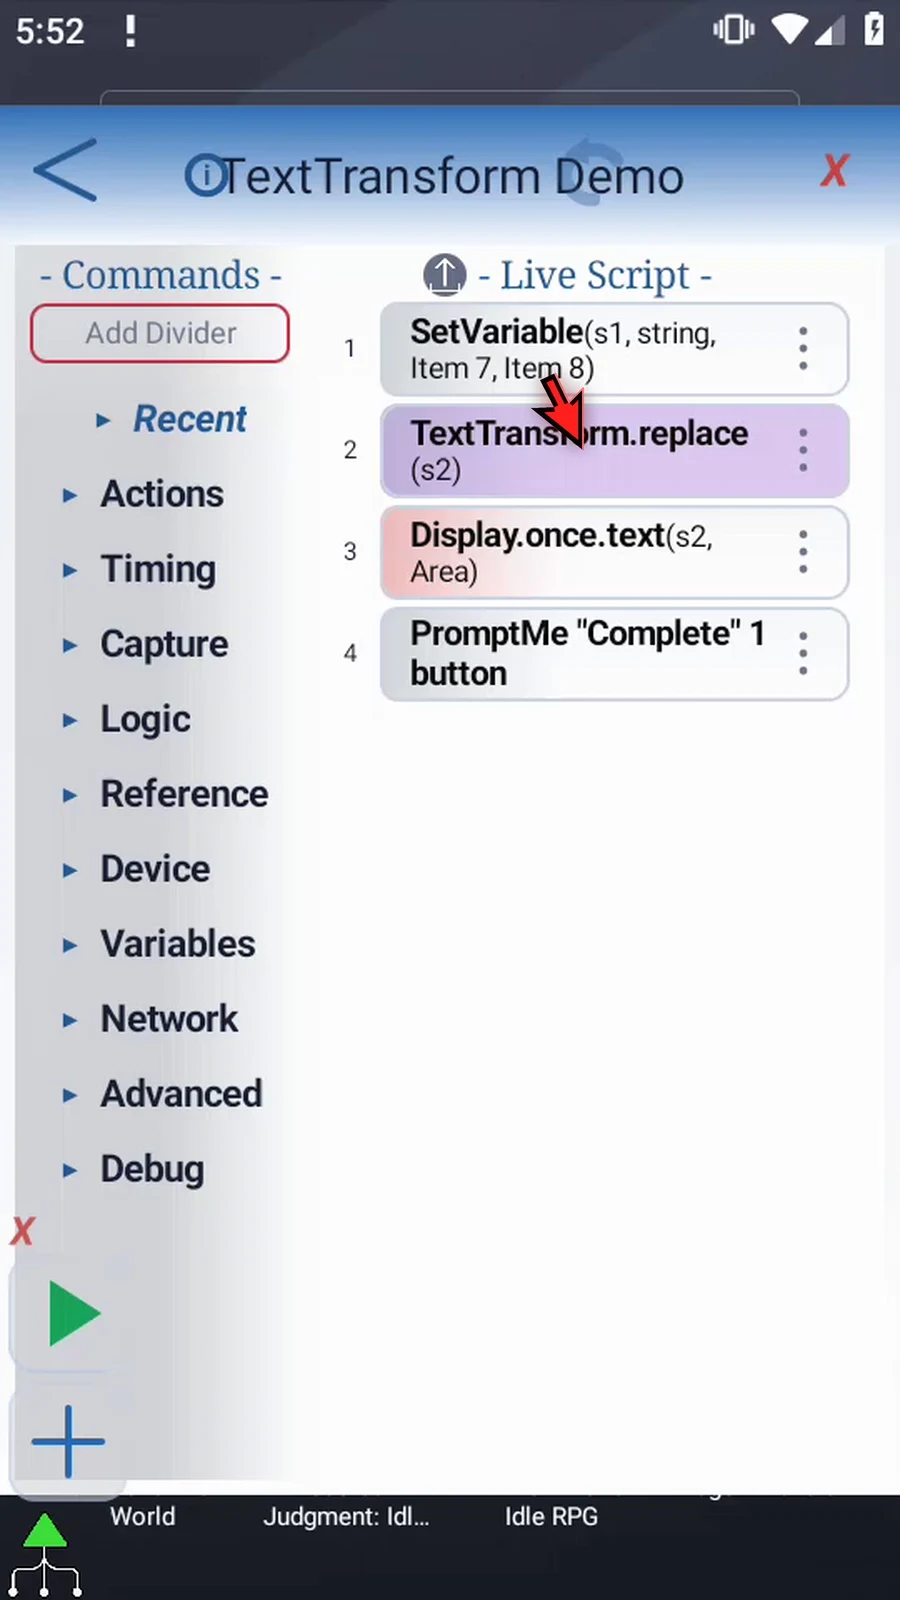
Step 02 Open Set Variable. Keep String variable s1 and This Script Only.
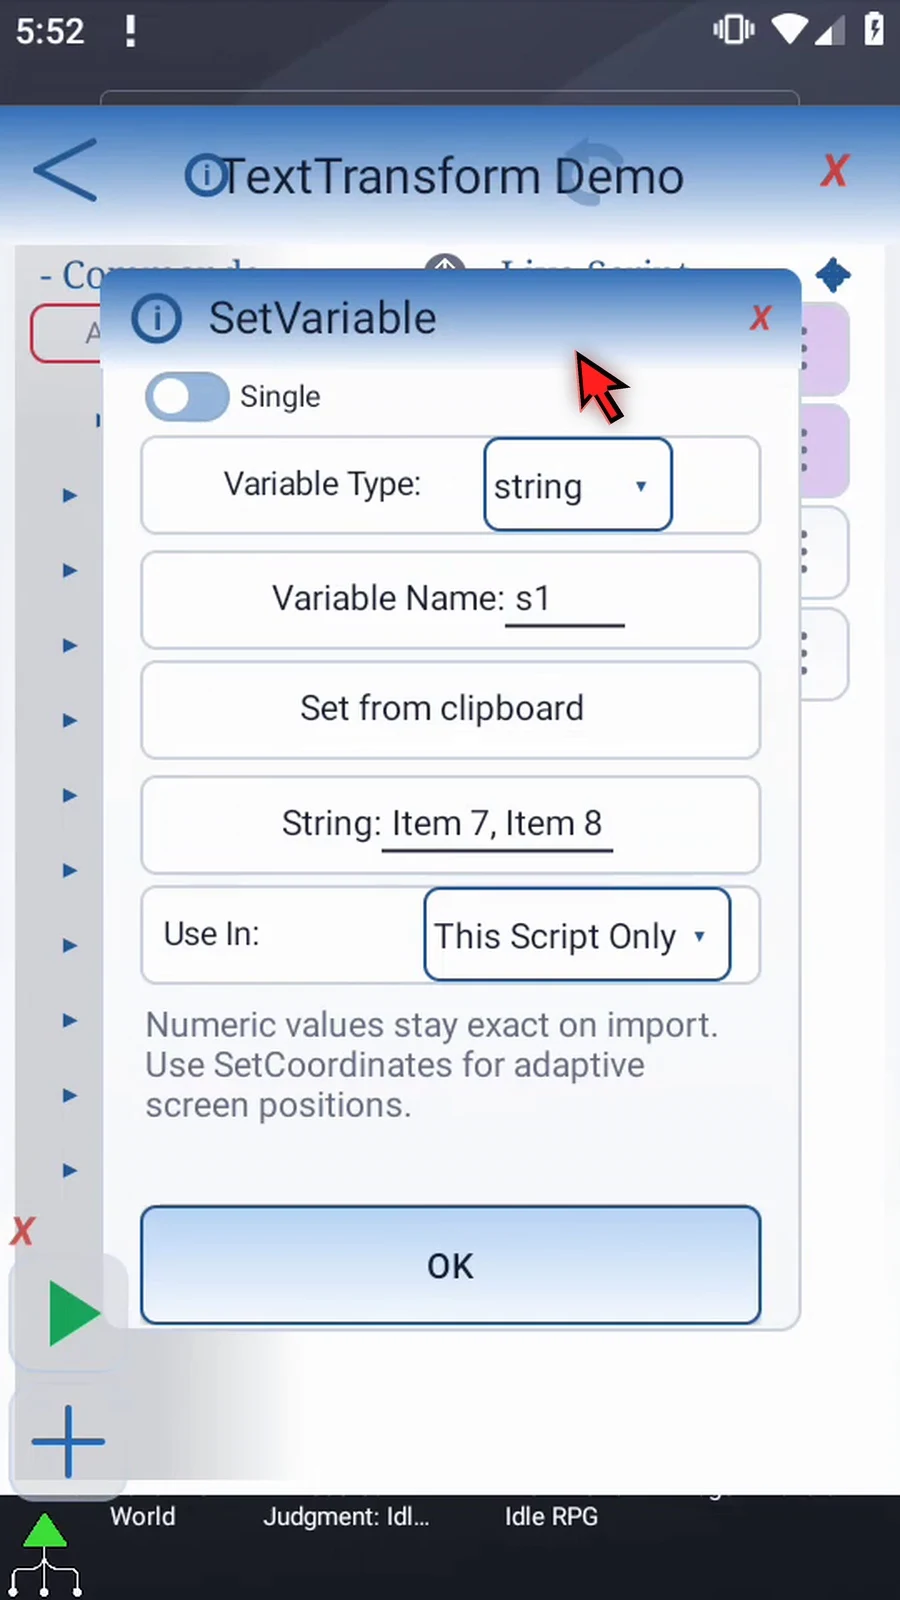
Step 03 Replace the source text with two capital F characters, and tap OK. Keeping this value as a String lets Parse Integer perform the conversion.
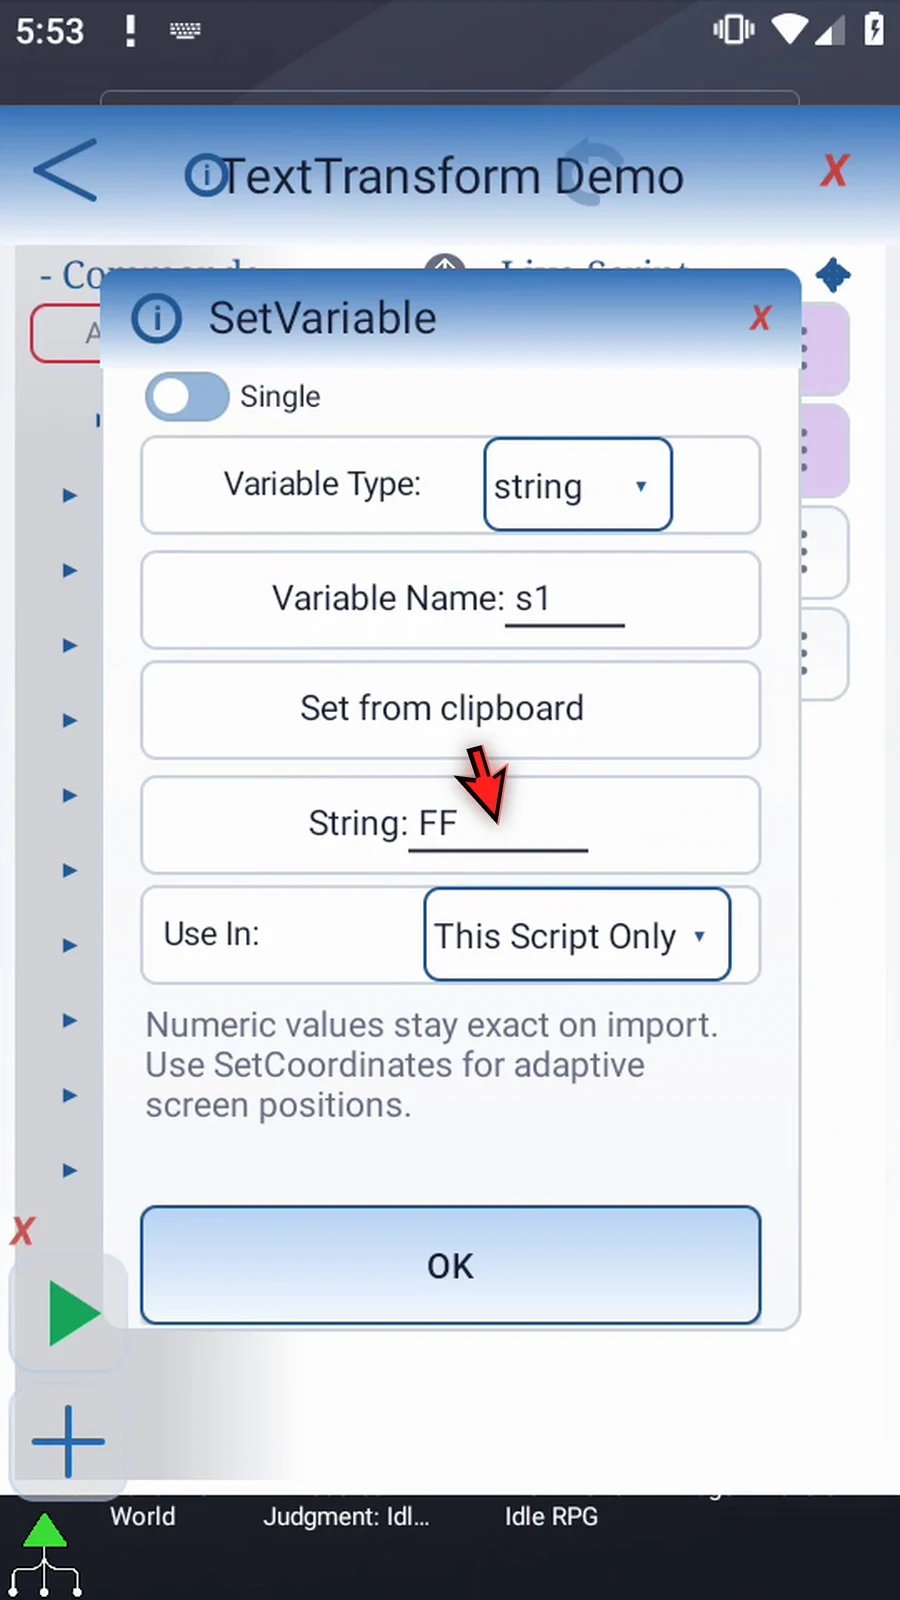
Step 04 Open Text Transform, then open the Operation menu.

Step 05 Choose Parse Integer. Keep String input s1 and the local scope. You could also supply literal text through the Source menu, as explained in Intro.
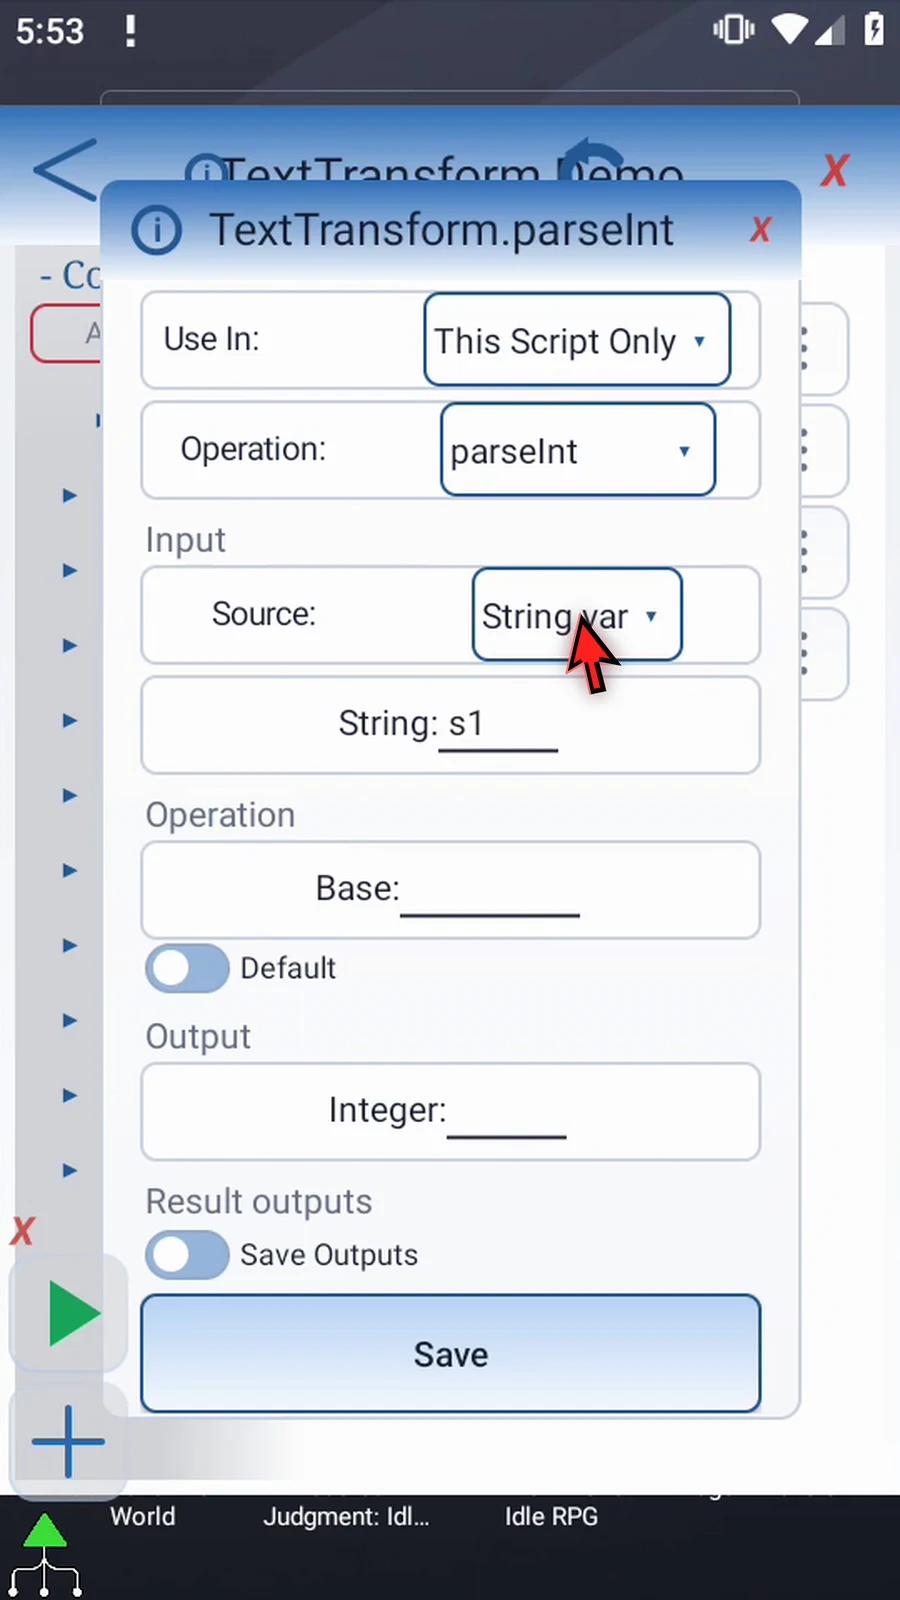
Step 06 Set Base to sixteen for hexadecimal. Base ten is ordinary decimal notation; supported bases run from two through thirty-six. Base can also come from an earlier Integer variable.
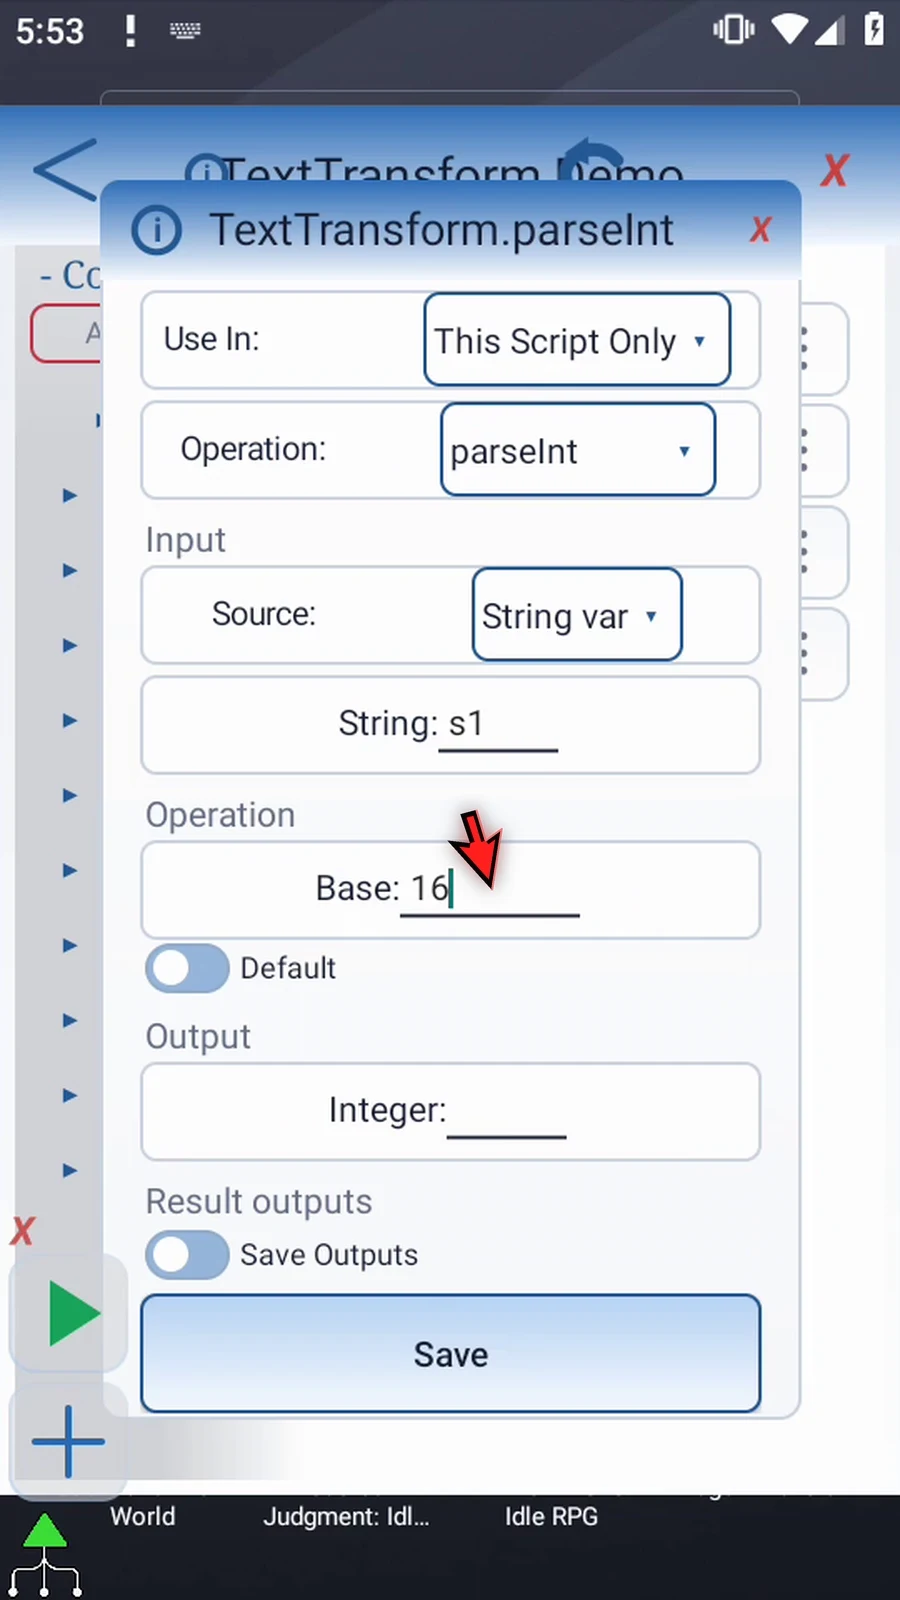
Step 07 Turn Default on to reveal its fallback Value. If the text cannot be converted, this value is written instead. It can be an Integer literal or an earlier Integer variable.

Step 08 Turn Default off for this valid example. Without a fallback, a failed conversion leaves the output unchanged.
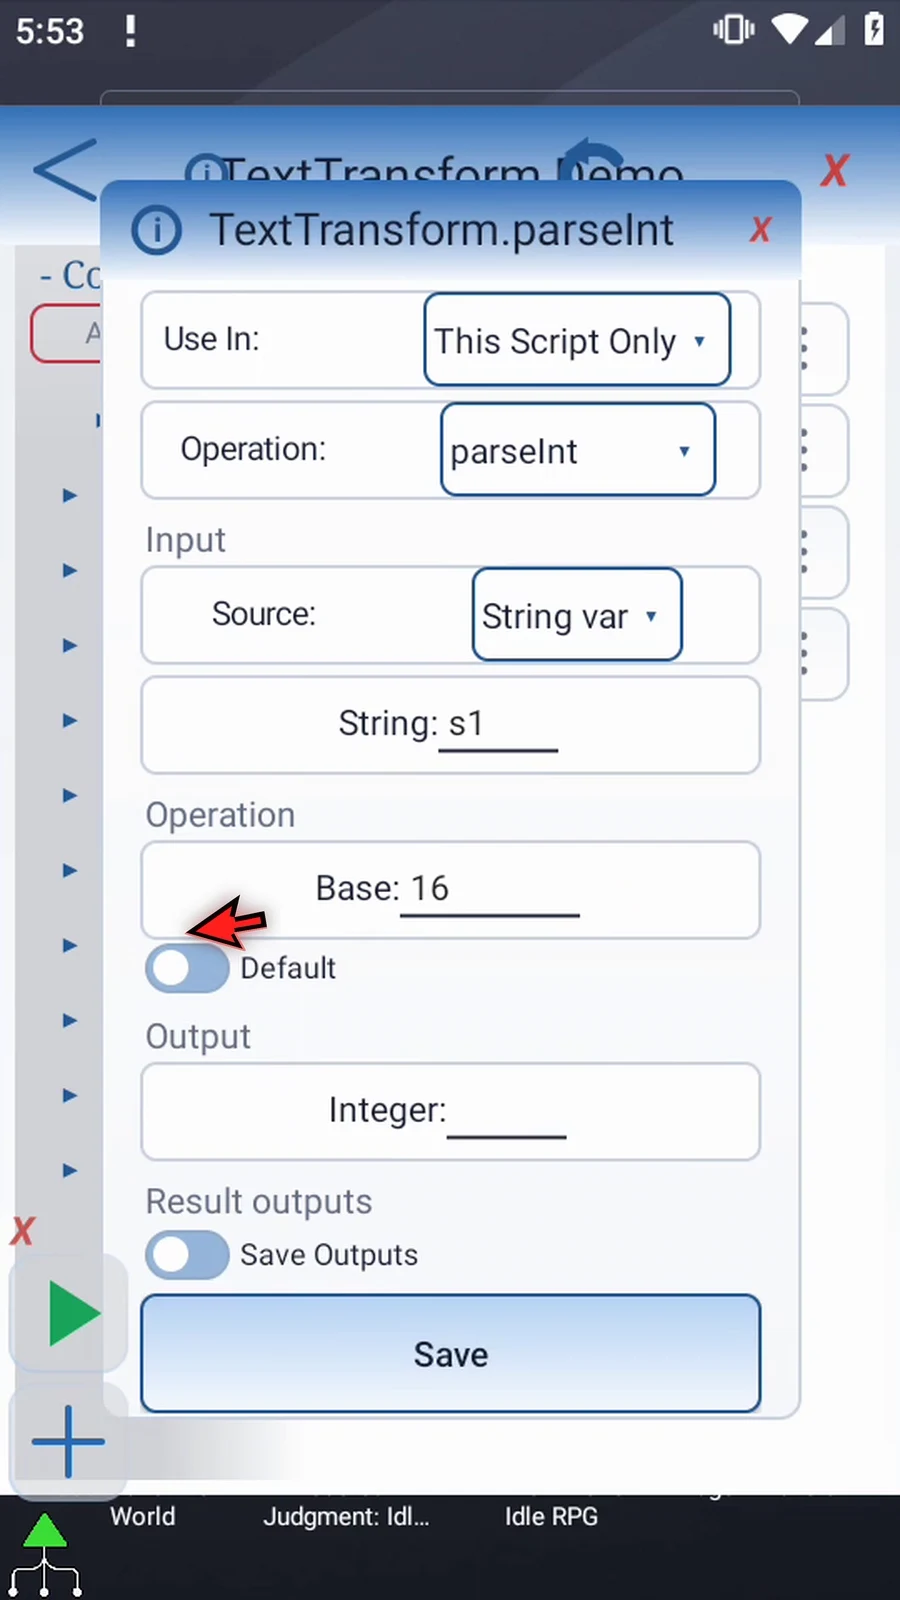
Step 09 Set the Integer output to i1. Integers are signed thirty-two-bit whole numbers; fractional or out-of-range text cannot be converted. Use Parse Decimal for fractional values.
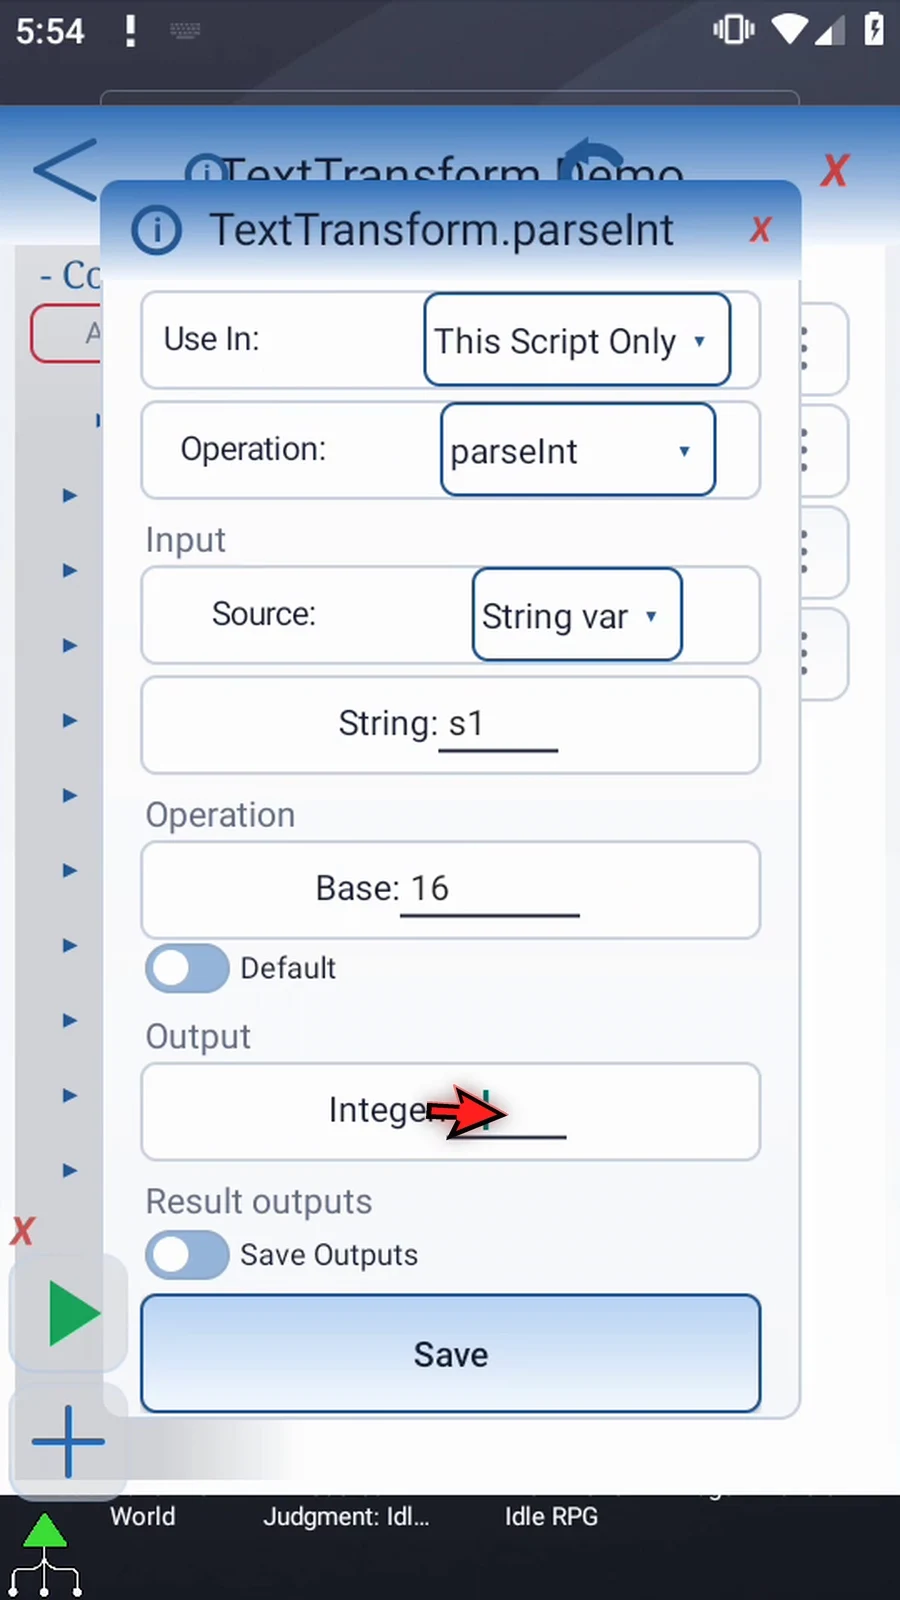
Step 10 Keep optional Save Outputs off and tap Save. Intro explains the optional Boolean Success and String Error outputs if your script needs to check the result.
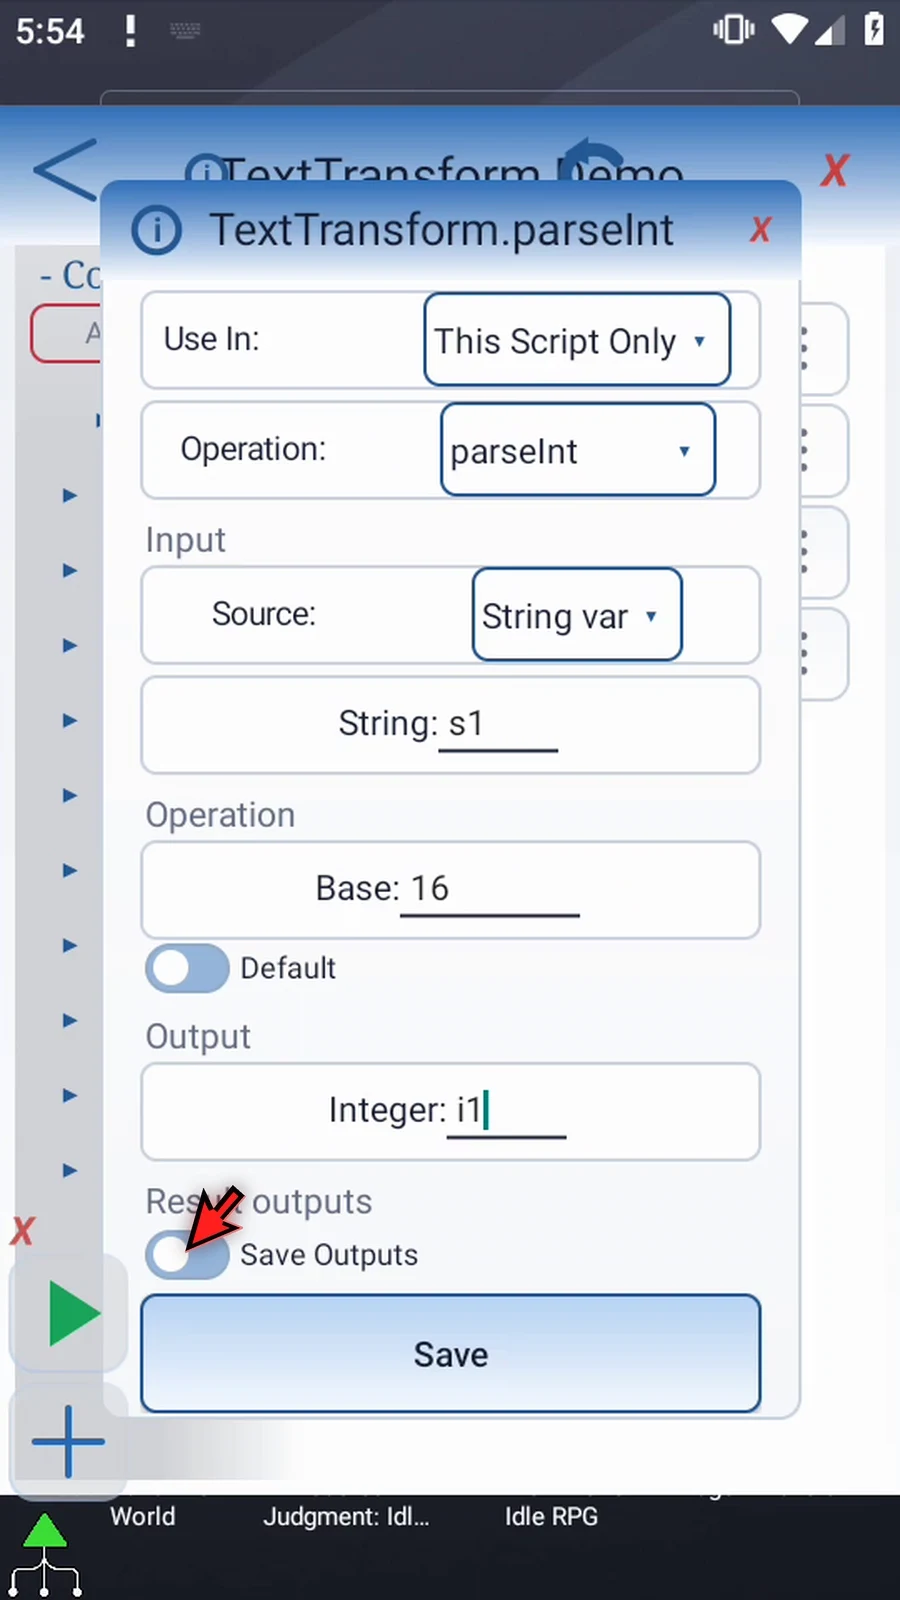
Step 11 Open Display so the converted number will be visible.
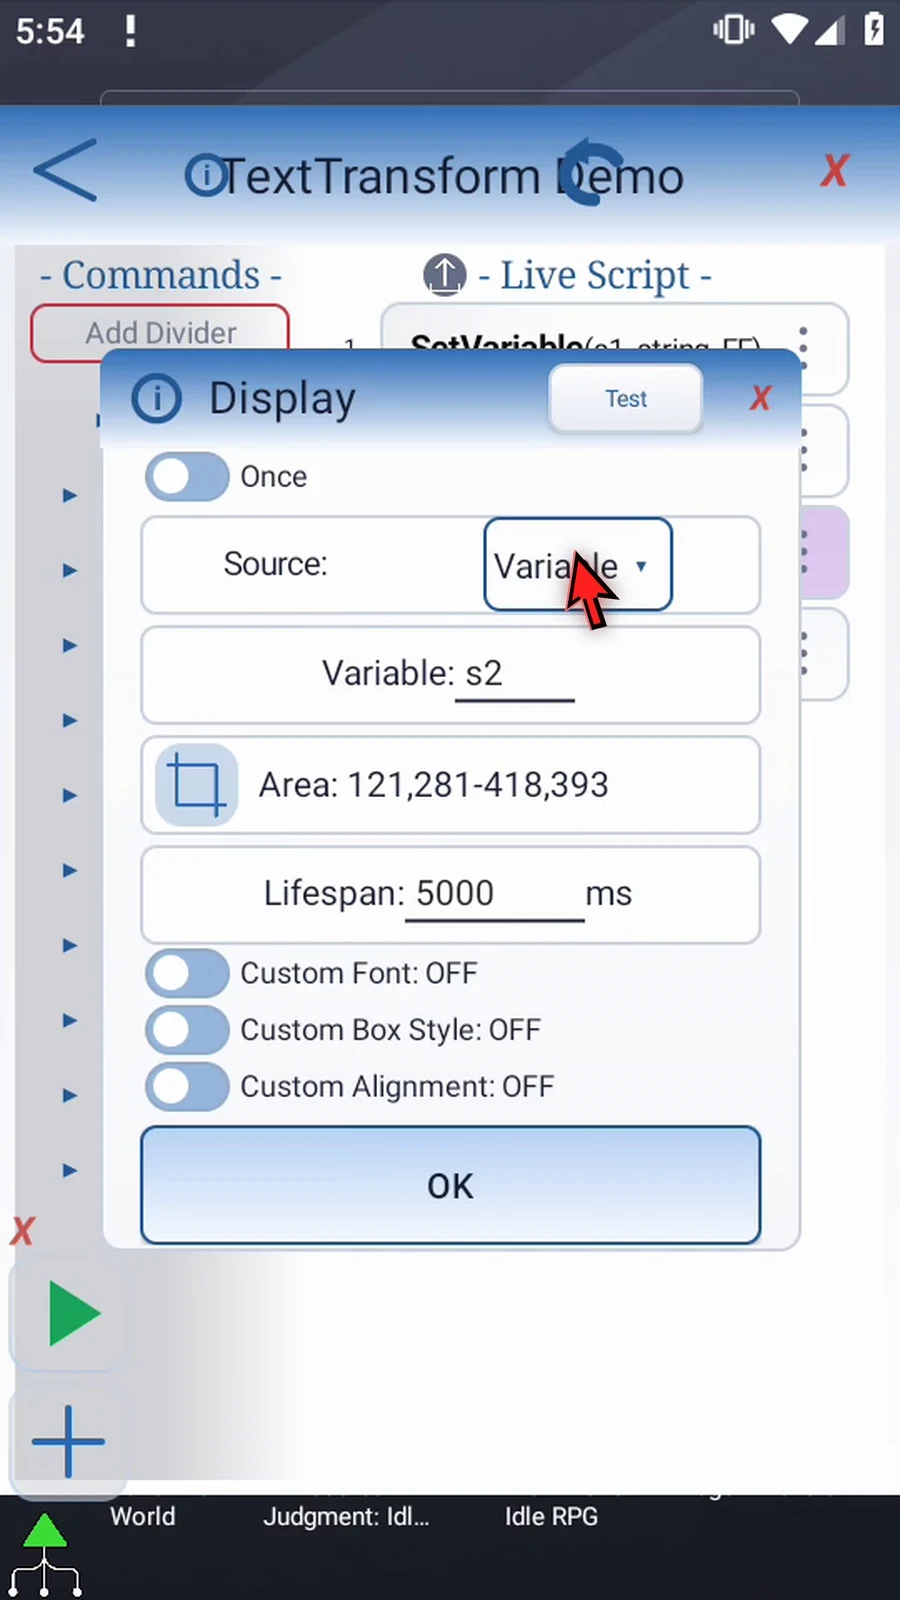
Step 12 Keep Variable as the text source and change its variable to i1. Keep the same area and five-second lifespan, then tap OK.
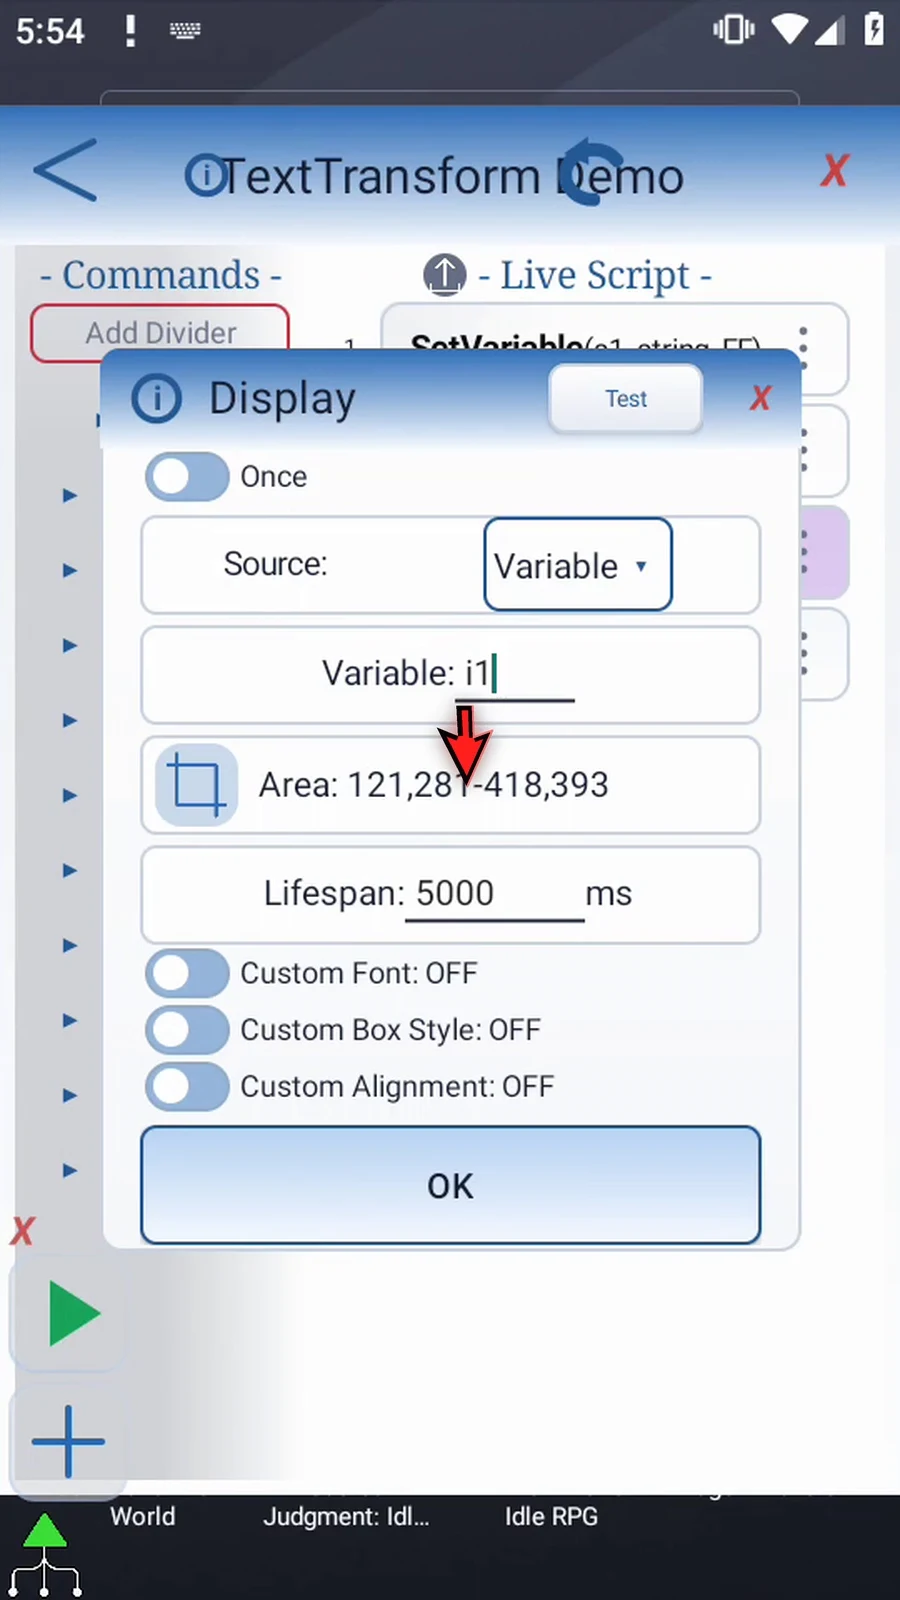
Step 13 Set Variable supplies the text, Parse Integer converts it, and Display shows the number. Prompt Me then confirms completion. Close the editor to try it.
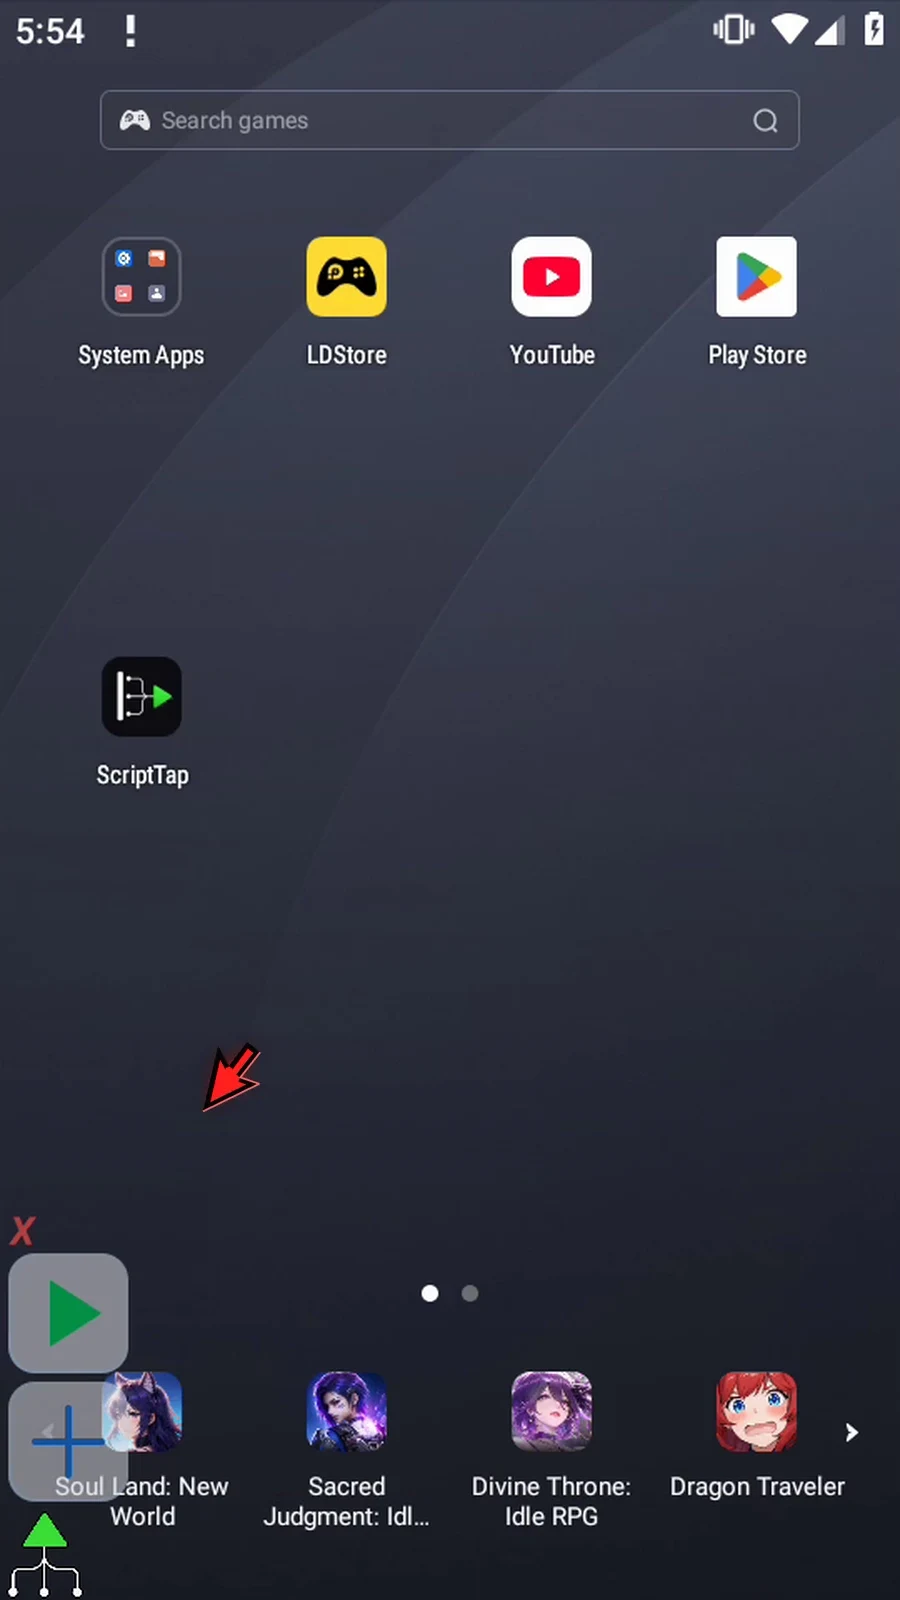
Step 14 When the script is complete, simply use the Play button in the main overlay.
Step 15 Hexadecimal F F becomes the Integer two hundred fifty-five.
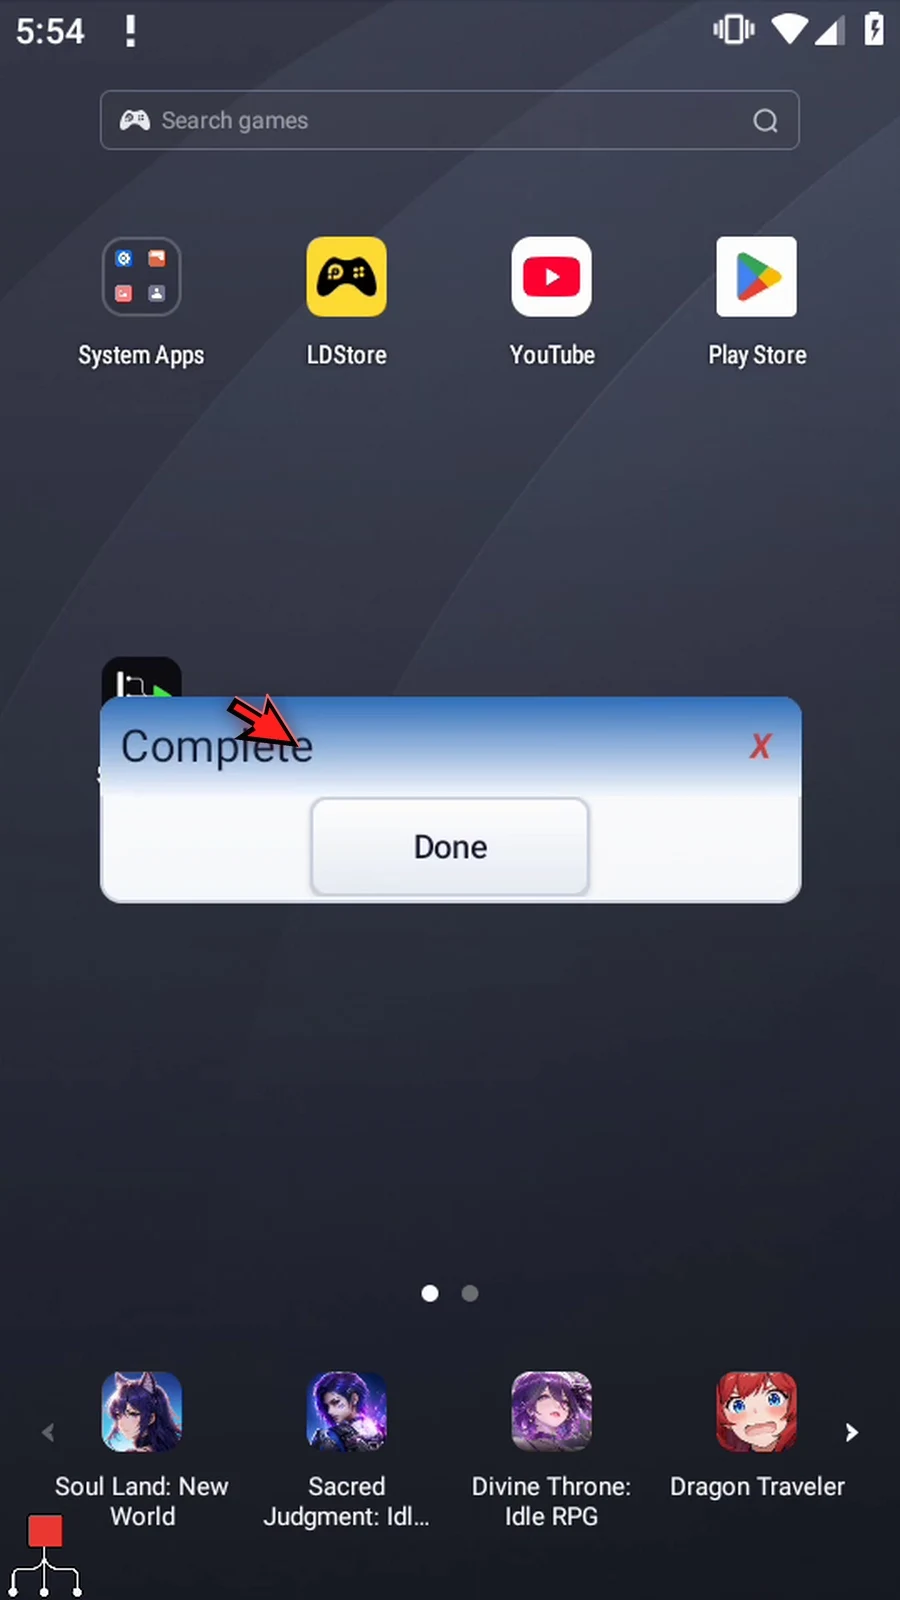
Step 16 Complete confirms that the script continued after the conversion.
Step 17 Press Done. The script finishes automatically. Use Parse Integer when text needs to become a whole number for later commands.
Parse Decimal converts numeric text into a Decimal variable for later fractional math, comparisons and other number-based commands. This follow-up reuses the four-command tutorial script from Intro / Case.
Open SetVariable, keep String s1 and This Script Only, and normally replace the source with 12.50. Save. Reopen the same TextTransform and choose native parseDecimal. Keep input String var → s1 and local scope; literal Text input is also available, as explained in Intro.
Set Decimal output d1. This operation has no Base or Default setting. Numeric text uses a decimal point, with optional sign and exponent notation such as 1.25E1. Currency symbols, comma/thousands separators, Infinity and NaN are invalid input.
Results use ScriptTap's finite,15-significant-digit Decimal precision. Extra significant digits are rounded; unnecessary trailing zeroes are removed. Very large numeric values clamp to the finite range and sufficiently small values become zero. Invalid numeric text leaves the existing Decimal output unchanged. Optional Boolean Success and String Error outputs are explained in Intro; keep Save Outputs OFF and Save for this example.
The old Display still reads i1, so its temporary incomplete warning is expected after changing the producing command. Open Display and change only its Variable to d1; keep the same area,5000ms lifespan and default appearance. Save to reconnect it. Complete/Done PromptMe is unchanged. No new commands are inserted.
Close the editor and use Play. The actual Display shows 12.5, while original String s1 remains 12.50. The full genuine timed result and natural PromptMe transition are retained. Press Done to finish automatically. The recorded run completed all four commands with zero warnings/errors and final Decimal d1=12.5.
Parse Decimal
Step-by-step guide
Step 01 Parse Decimal turns numeric text into a Decimal variable, so later math and conditions can use fractional values. We will convert text containing a decimal point and display the resulting number, using our existing tutorial script.
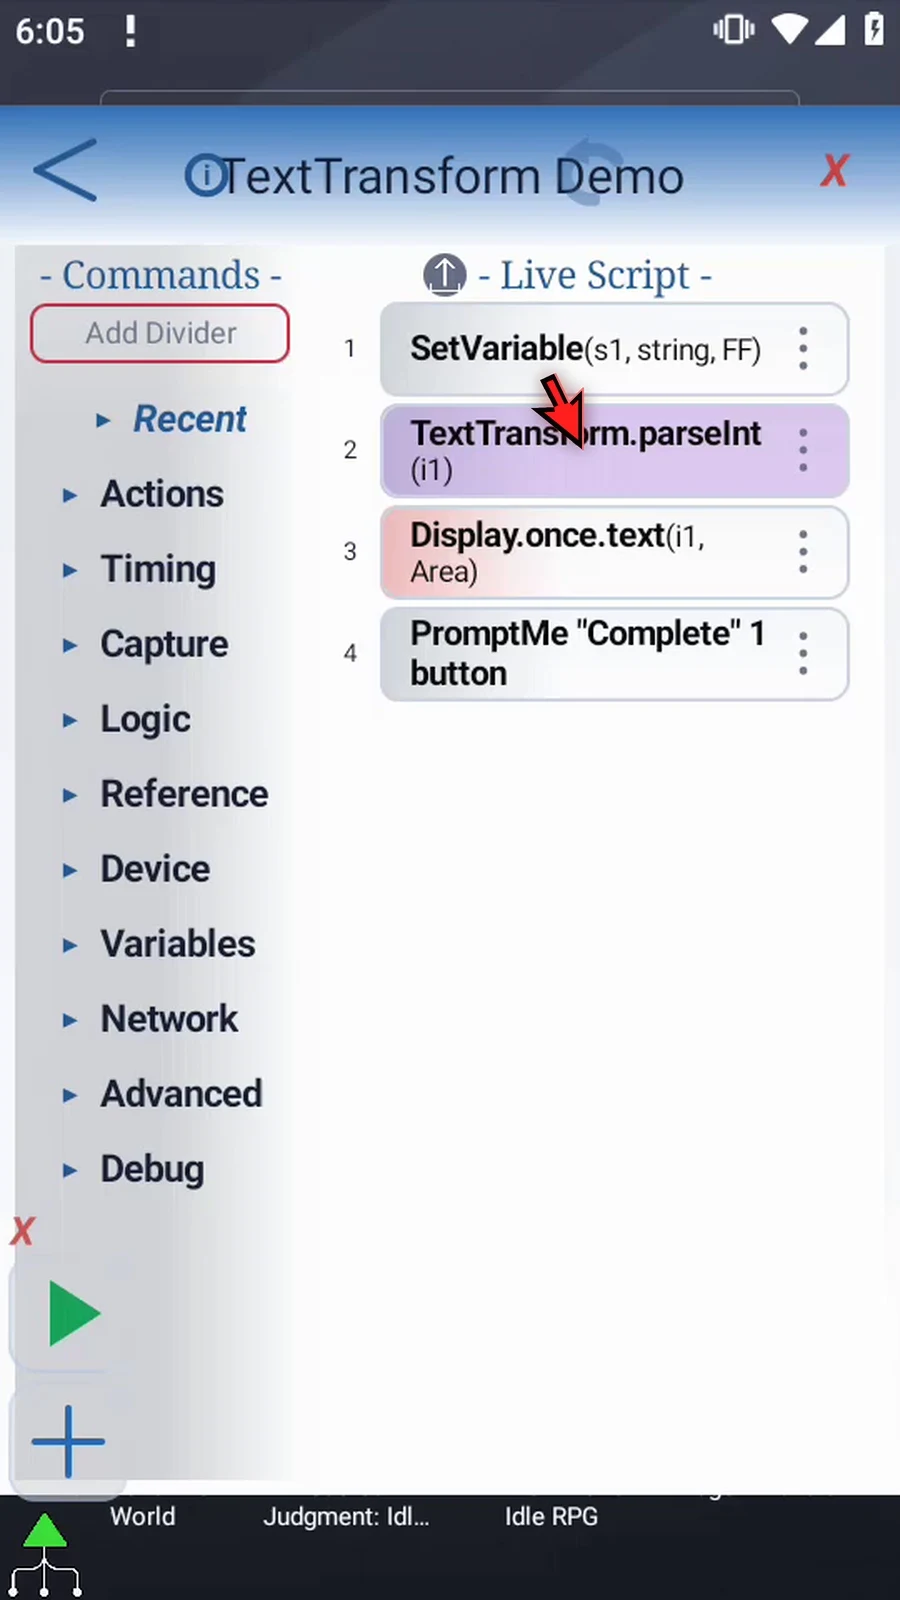
Step 02 Open Set Variable. Keep String variable s1 and This Script Only.
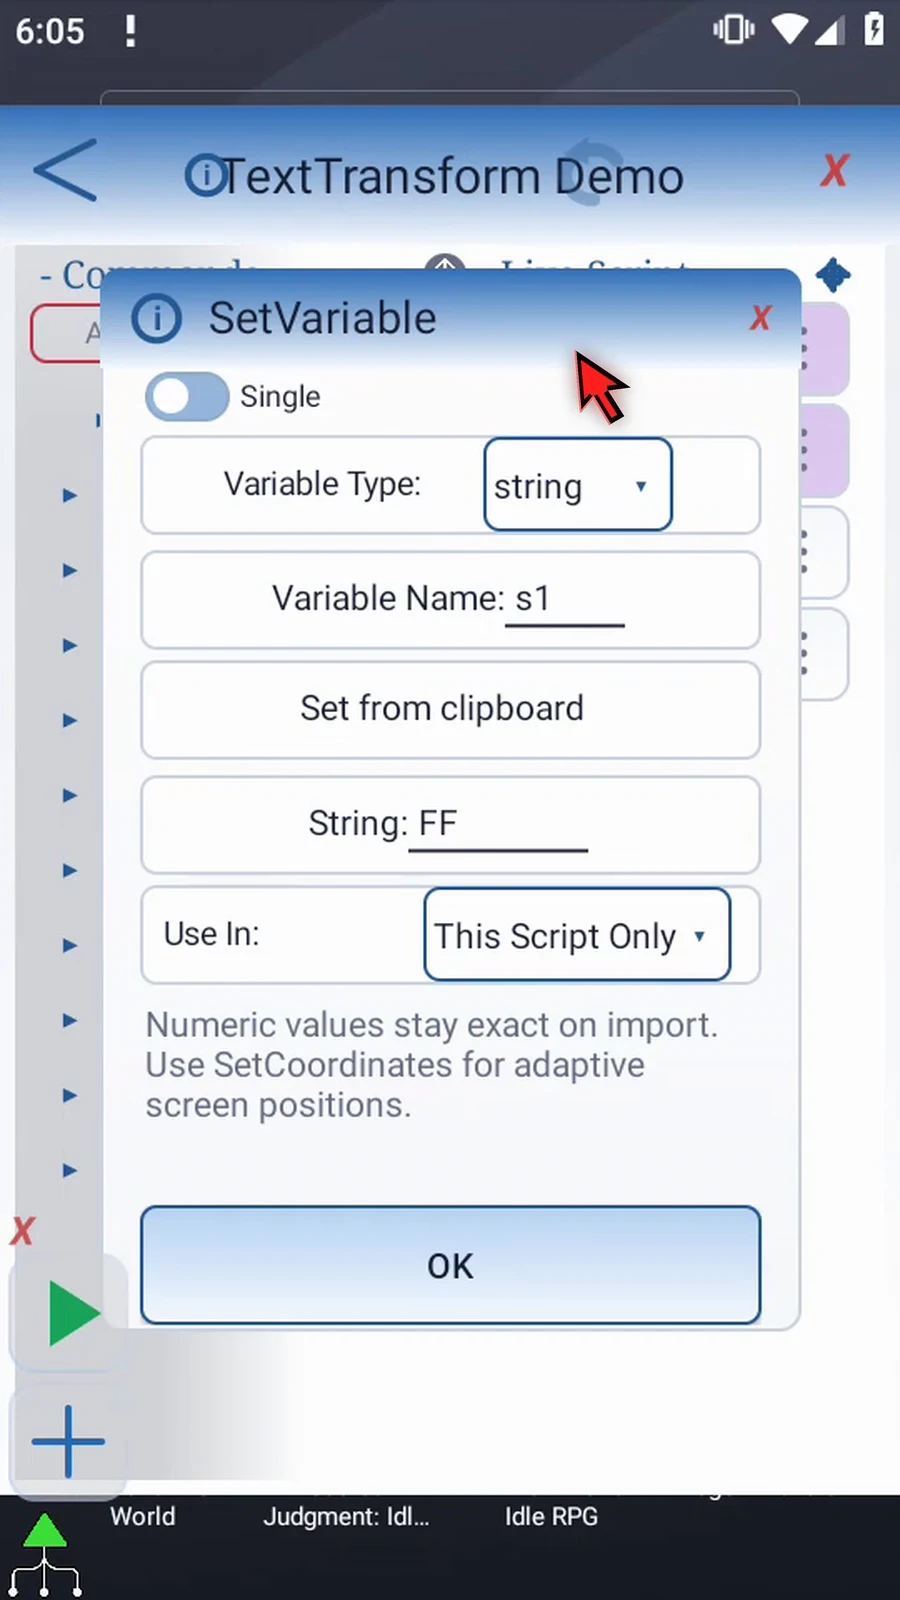
Step 03 Replace the source with twelve point five zero, exactly as shown, and tap OK. This is still text until Parse Decimal converts it.
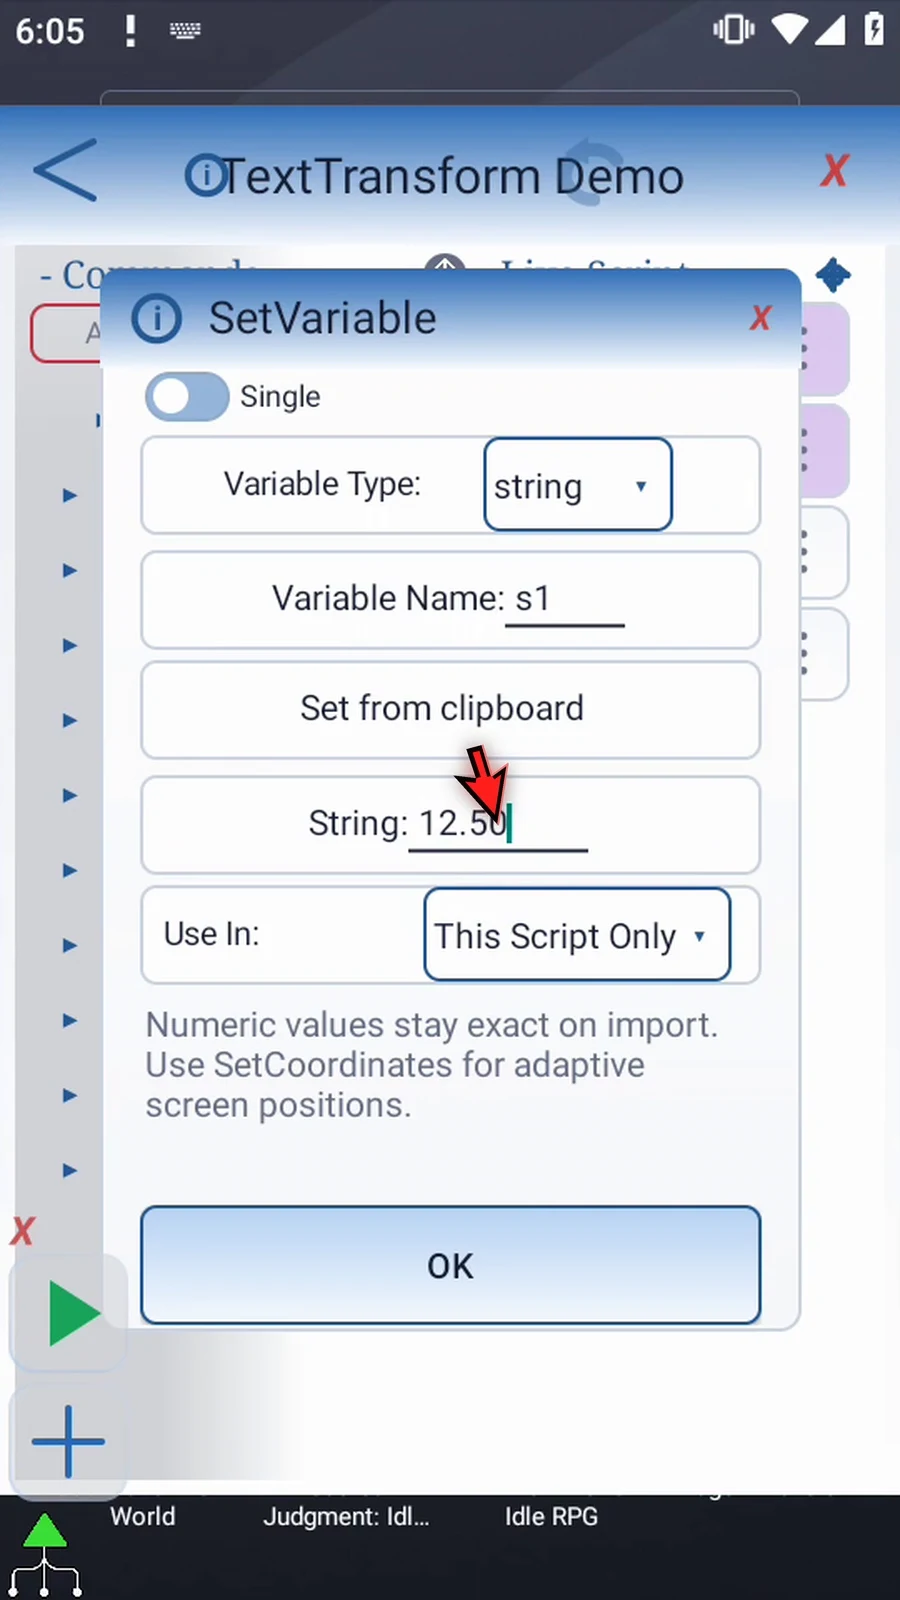
Step 04 Open Text Transform, then open the Operation menu.
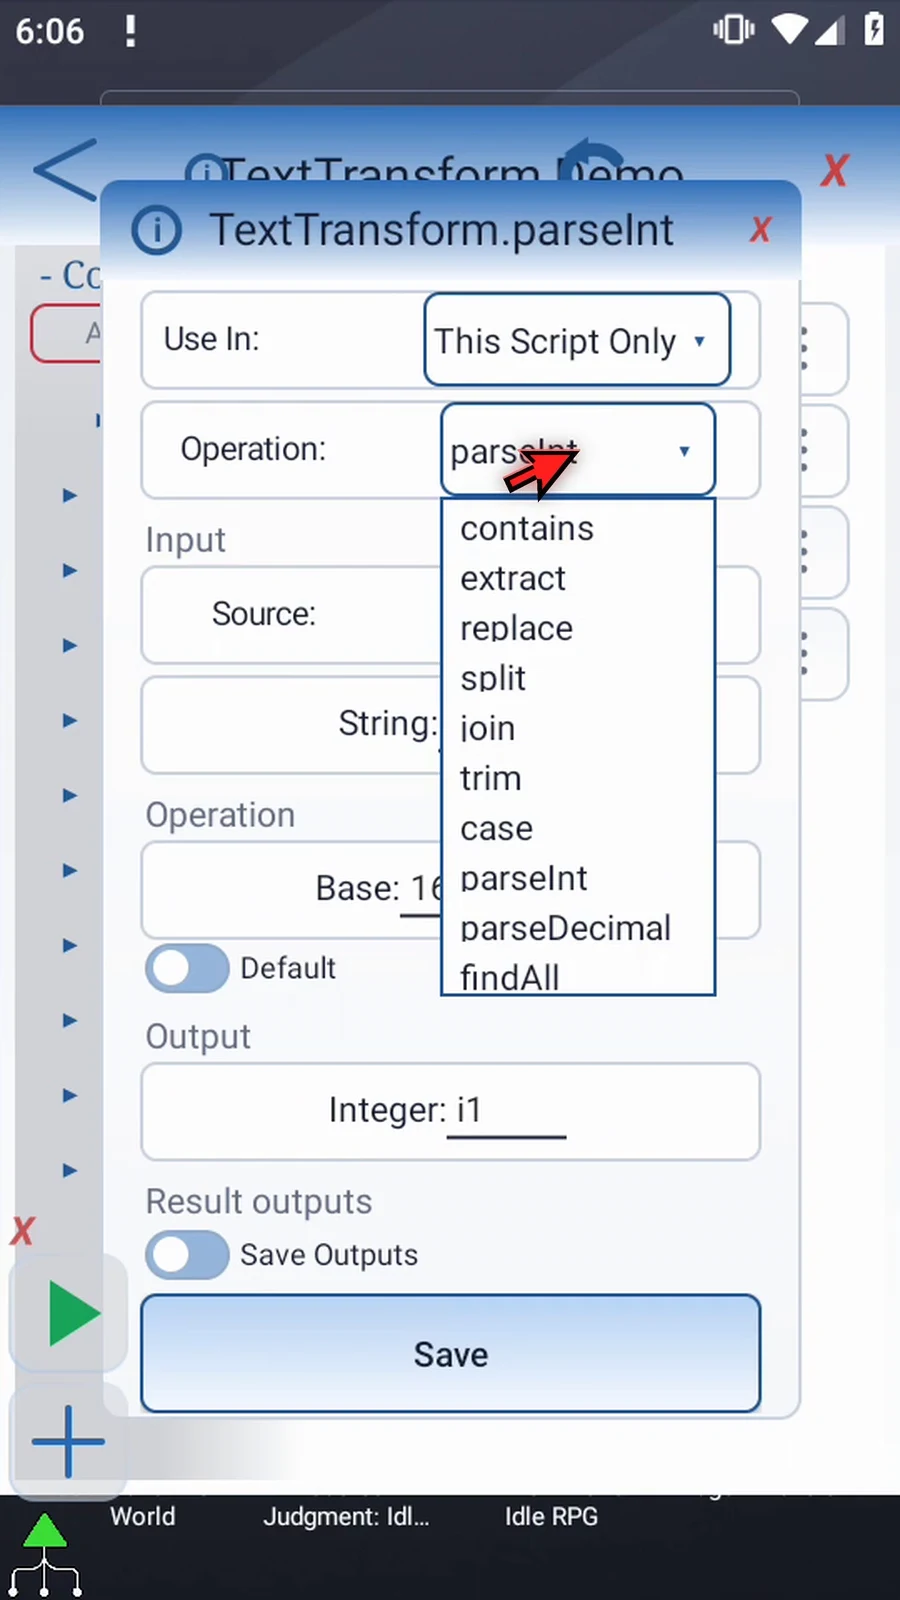
Step 05 Choose Parse Decimal. Keep String input s1 and the local scope. Literal Text input is also available, as explained in Intro.
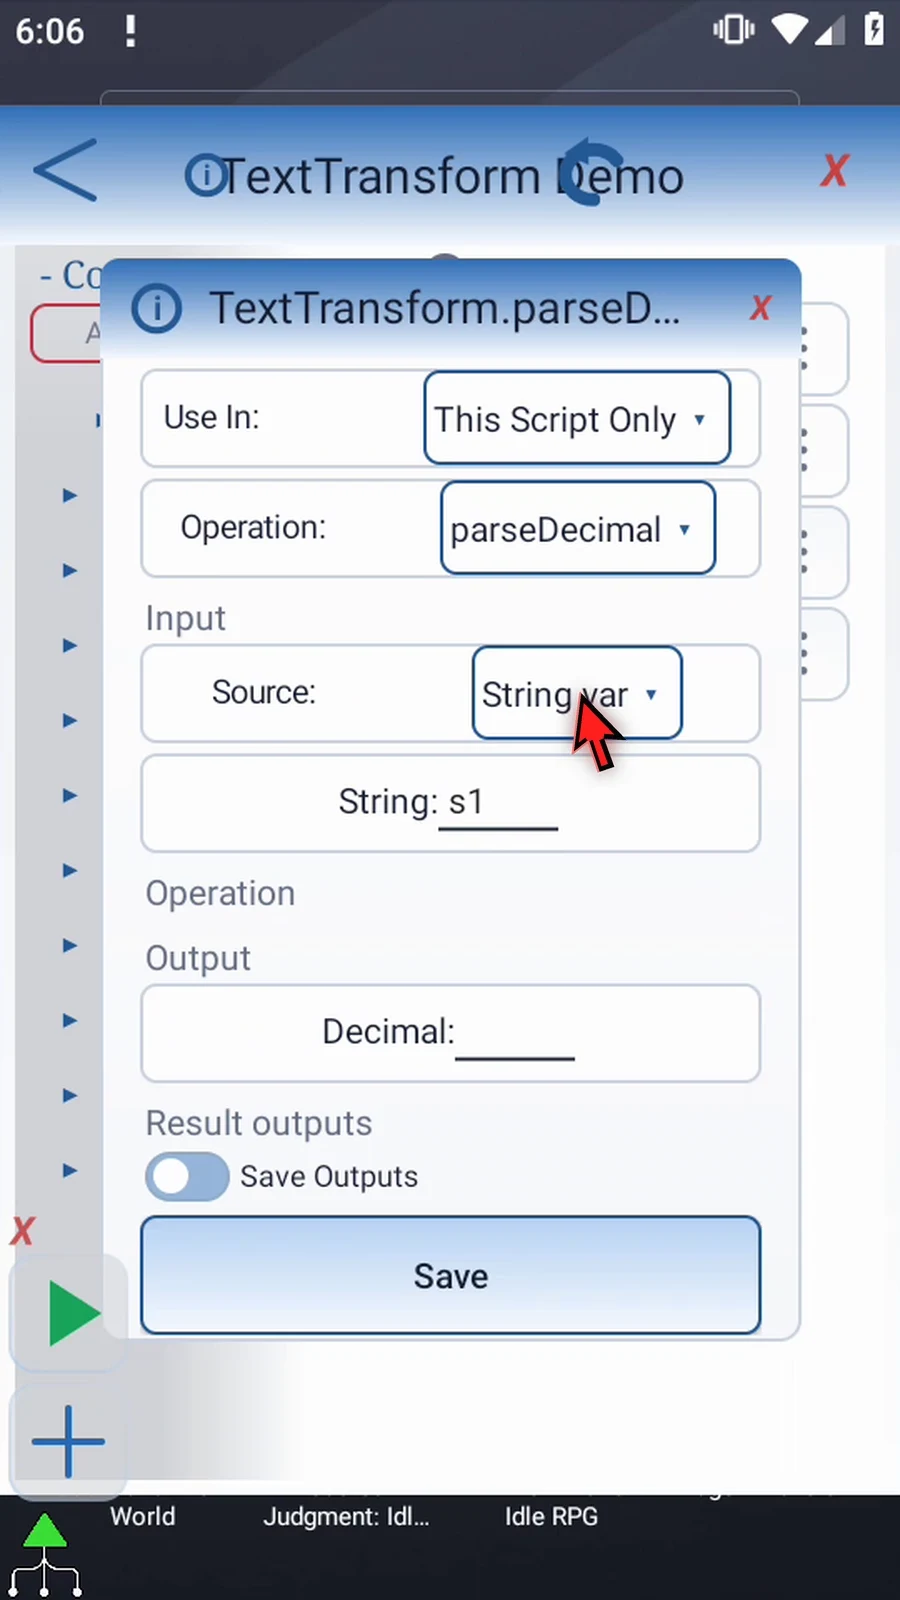
Step 06 Set the Decimal output to d1. Unlike Parse Integer, this mode has no Base or Default setting.
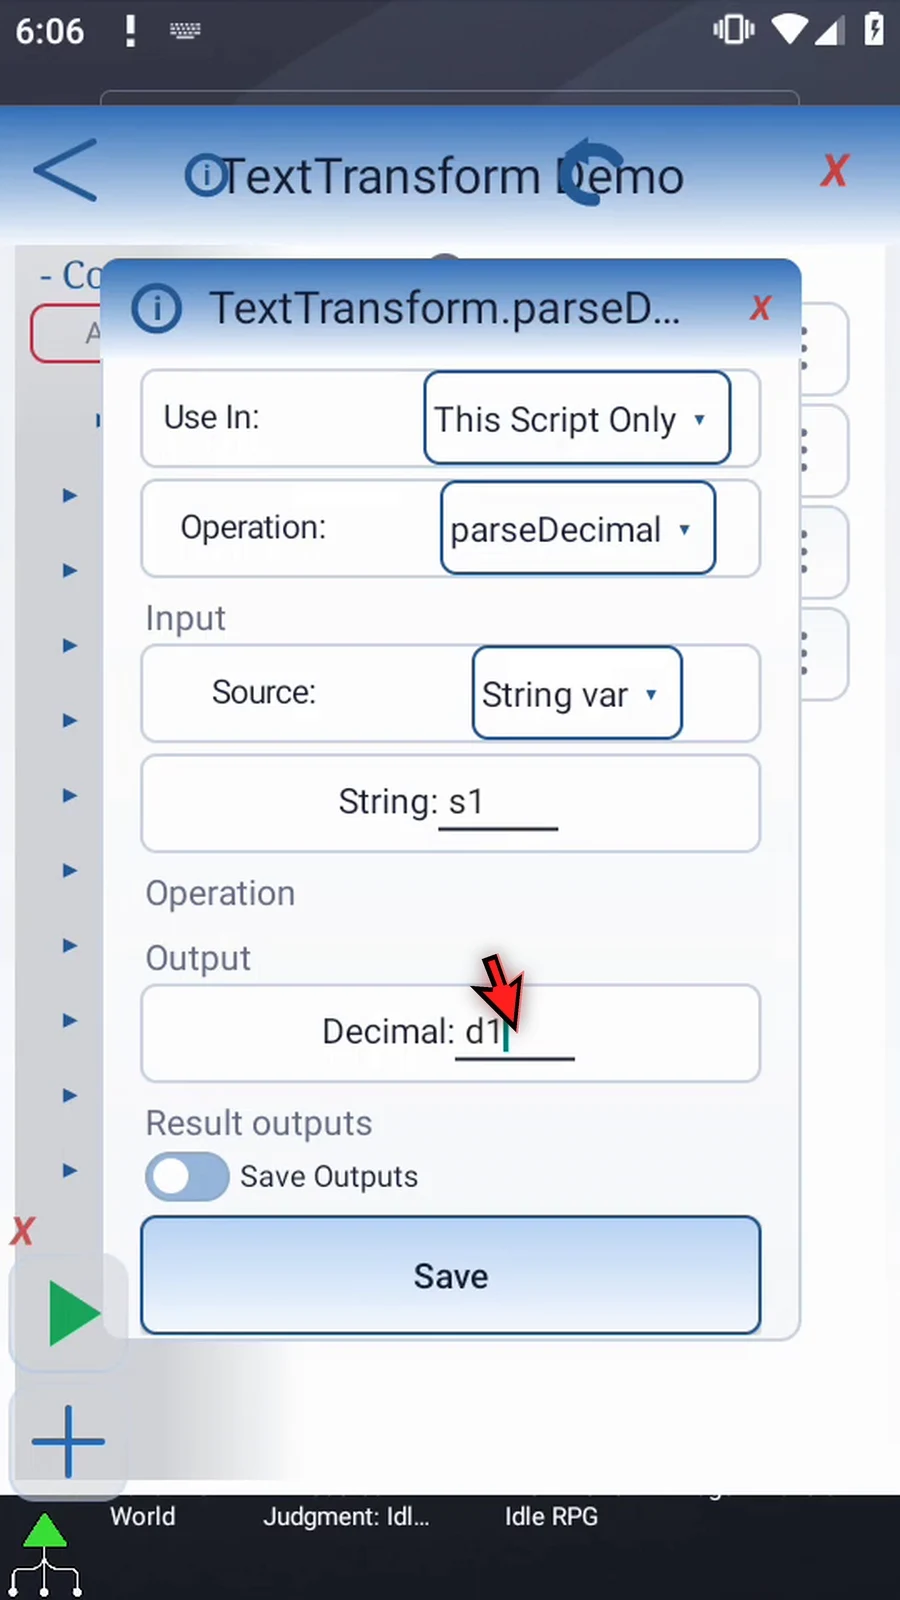
Step 07 Use a decimal point, not a comma. Signs and exponent notation are supported, but currency symbols, thousands separators, infinity and not-a-number values are not valid numeric text.
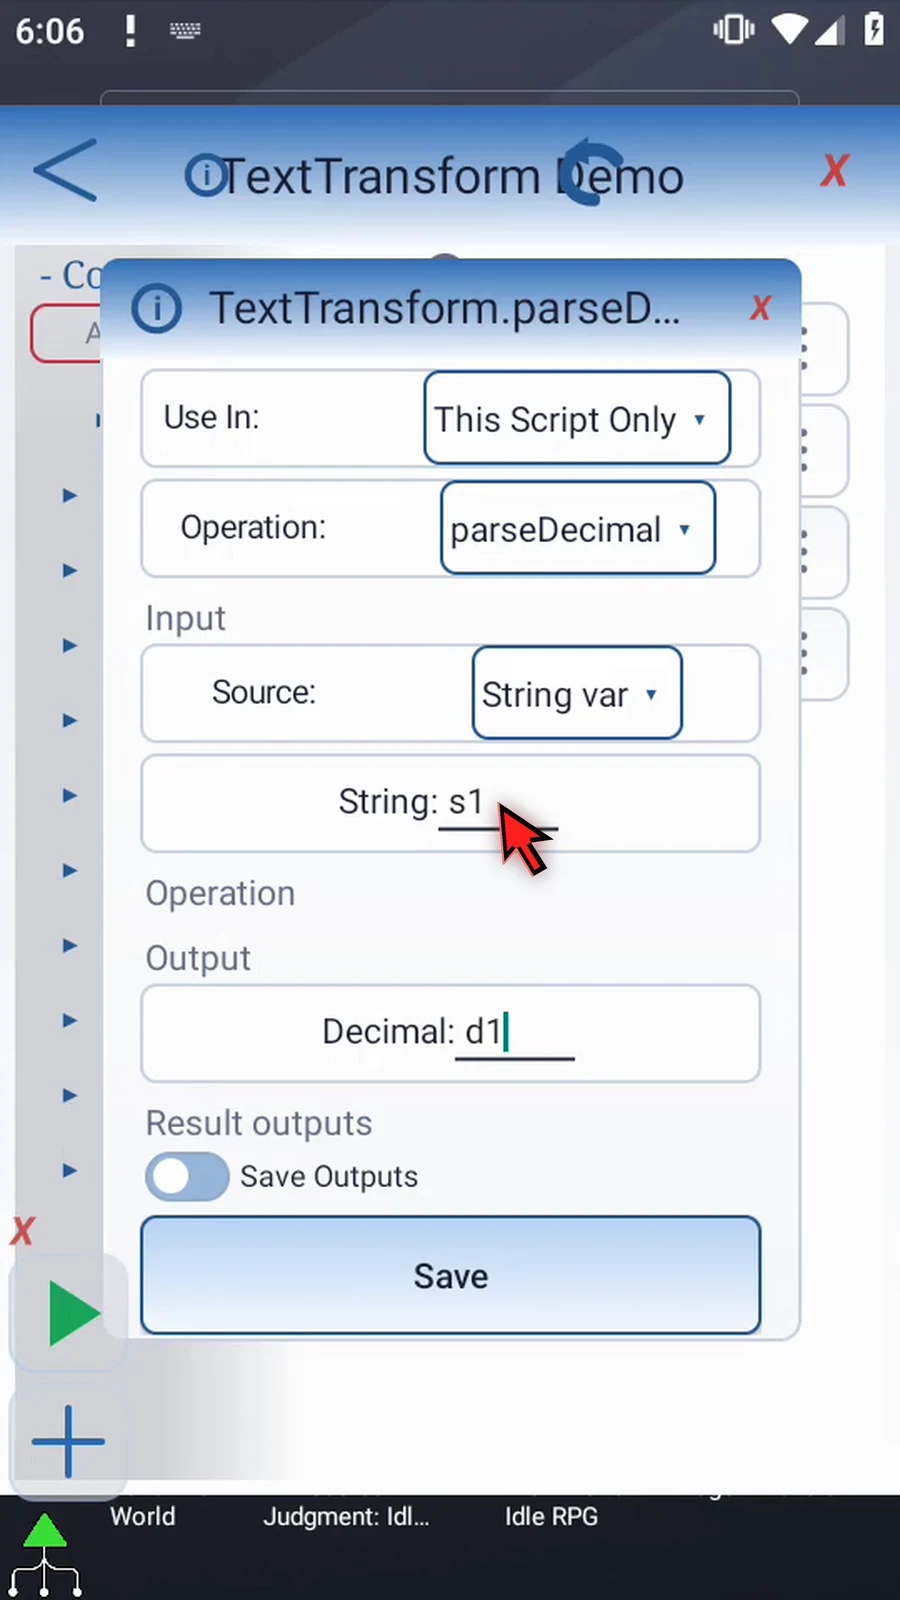
Step 08 Decimal results use fifteen significant digits of finite precision. Invalid text leaves the output unchanged. Keep optional Save Outputs off and tap Save; Intro explains those status outputs.
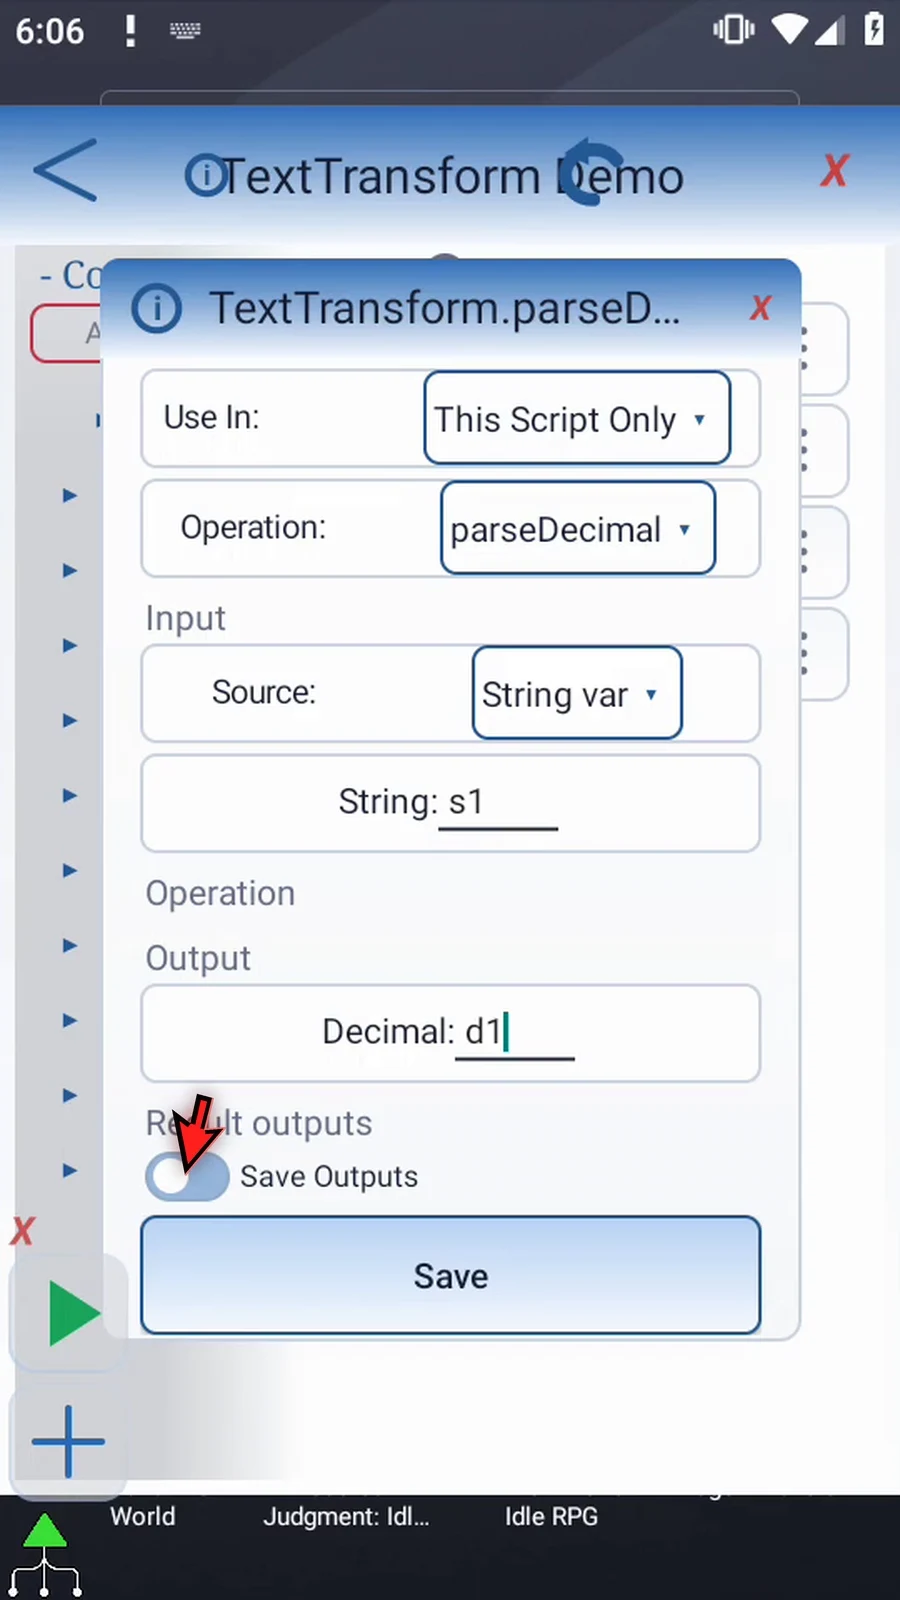
Step 09 Open Display so the converted Decimal will be visible.
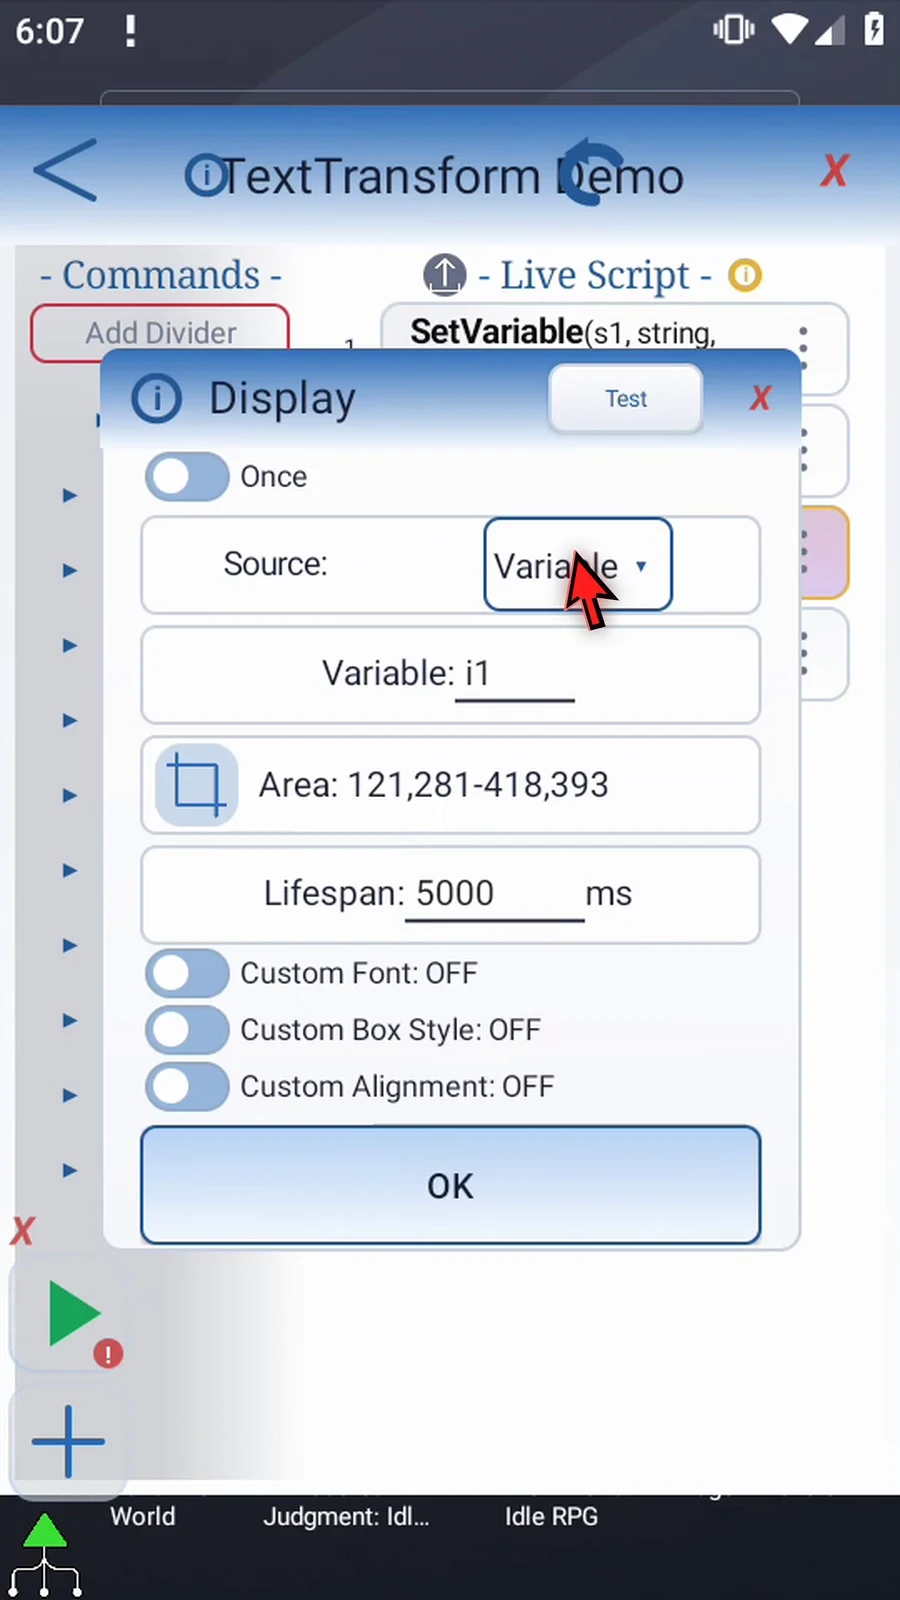
Step 10 Change its Variable to d1. Keep the same area and five-second lifespan, then tap OK.
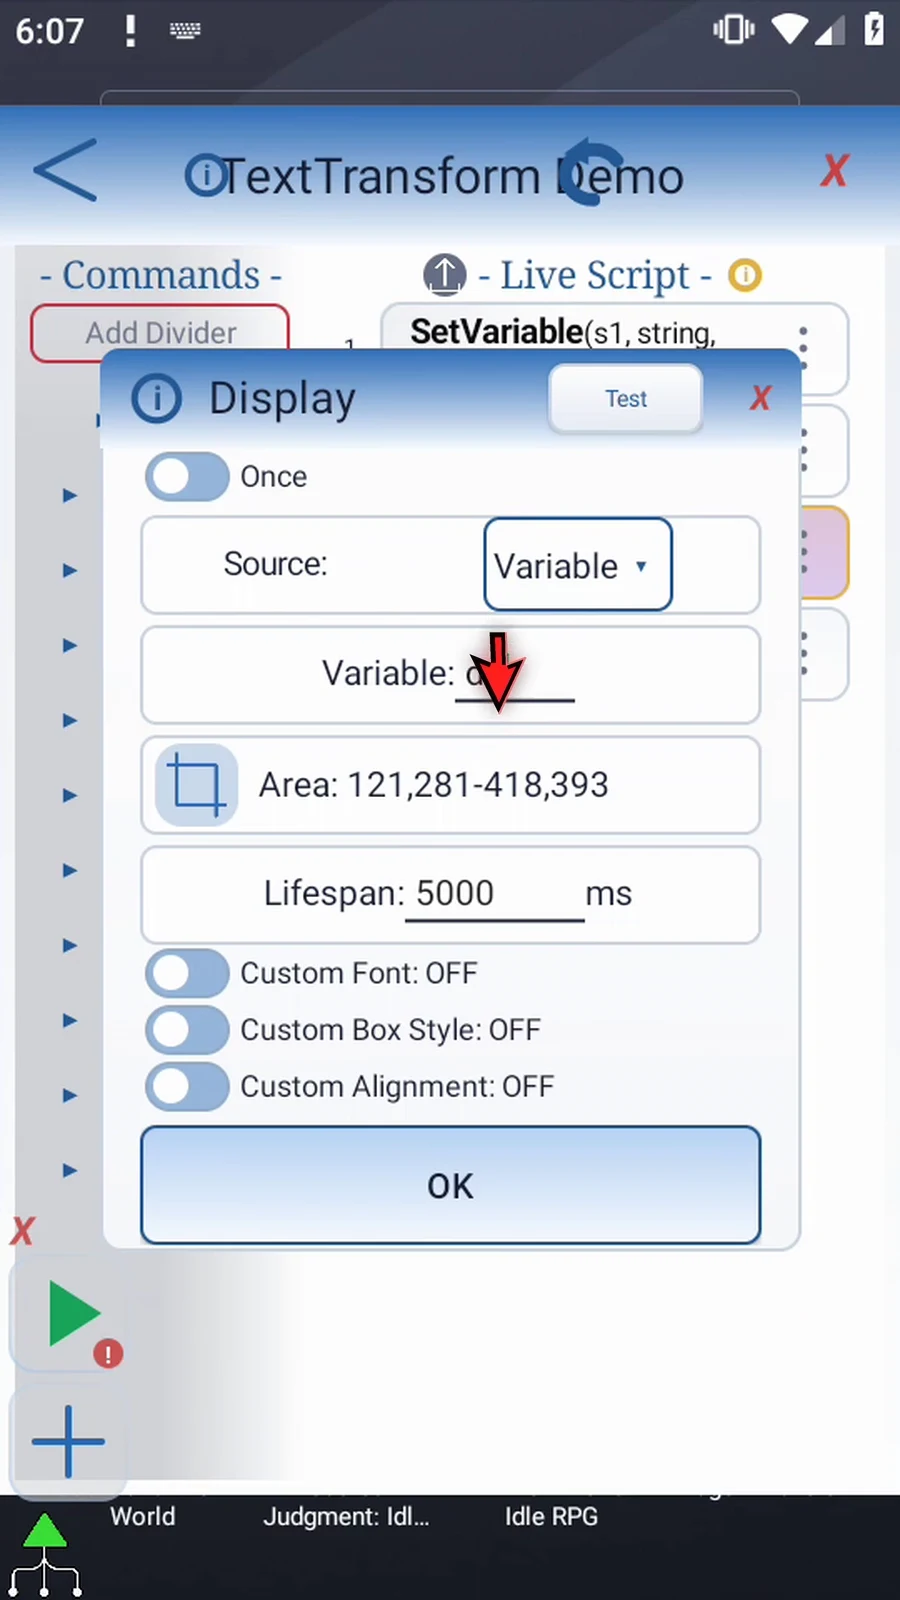
Step 11 Set Variable supplies the text, Parse Decimal converts it, and Display shows the number. Prompt Me confirms completion. Close the editor to test it.
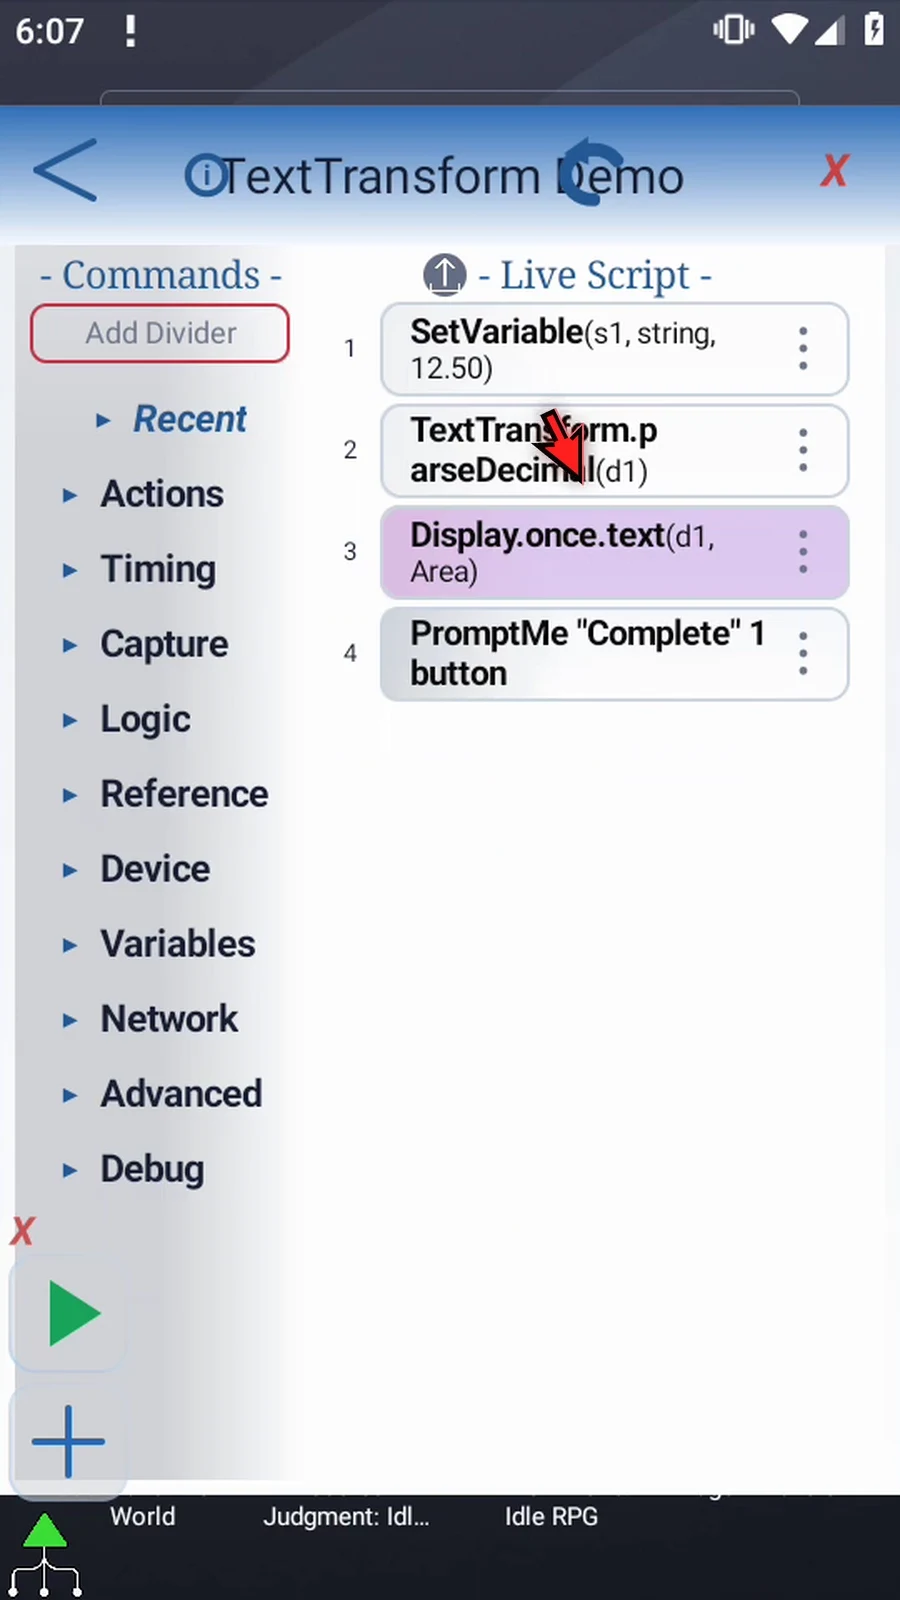
Step 12 When the script is complete, simply use the Play button in the main overlay.
Step 13 The converted Decimal is twelve point five, with no unnecessary trailing zero.
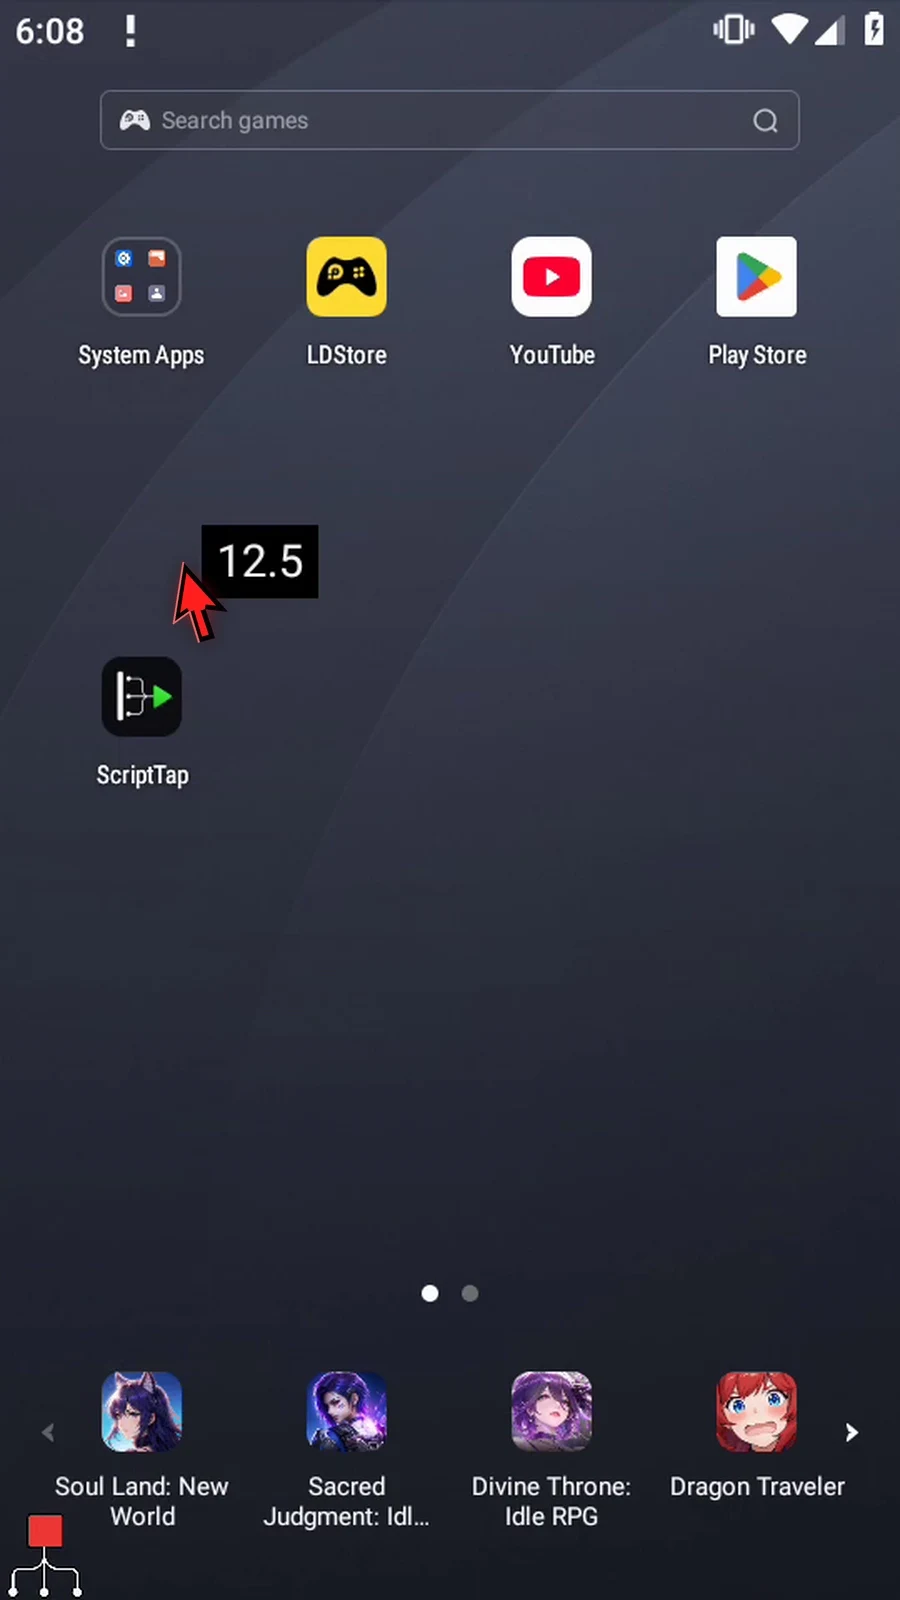
Step 14 Complete confirms that the script continued after the conversion.
Step 15 Press Done. The script finishes automatically. Use Parse Decimal when numeric text needs to become a fractional number for later commands.
Find All / Capture Group keeps a selected parenthesized part of every regex match, storing the results in successive String slots for later commands. This independent guide reuses the four-command script built in Intro / Case.
Normally set String s1 to Item 7, Item 8, retaining This Script Only. In the existing TextTransform choose findAll, input String var → s1, local scope, and Find Mode Regex. Literal Text input is also available. Exact compares the whole input and Contains searches literal occurrences; those modes use Whole match rather than Capture group.
Normally type Pattern Item ([0-9]+). The fixed prefix includes a space; the digit pattern matches each number and parentheses capture it. Choose Result Capture group and Group 1. Whole match would return the entire matching label; Capture group keeps only the chosen parenthesized part. Capture-group indexes begin at1 and must exist in the pattern; a prior Integer can supply the index.
Set Max Matches 2. This setting accepts an Integer literal or prior Integer variable from 0..4096; zero produces no match entries. Invalid/empty patterns, invalid group setup and invalid typed destinations are not valid successful results. Optional Success/Error controls are explained in Intro.
Scroll to output Array s, Start 2. The first SetVariable already provides String family s; this means slots s1,s2,and so on. Starting at2 keeps the source intact and writes these matches to s2/s3. Start accepts a positive Integer literal or prior Integer, within the supported1..4096 slot range. Keep the complete destination range in bounds.
Enable Save Count and set Integer i1. Use the count for a later loop through this run's results: older unused slots are not cleared. No matches produce count0 rather than replacing old match entries. Keep optional Save Outputs OFF and Save.
The existing Display reads Variable s2 for 5000ms in the same area and default appearance; Complete/Done PromptMe is unchanged. Use Play: the actual first captured String is 7. After Done, reopen the editor and change only Display's variable to s3; Play again shows 8. Both actual four-command runs completed with zero warnings/errors,i1=2,and unchanged source s1. No new commands are inserted.
Both complete timed displays and their natural completion transitions are retained. Press Done to finish automatically. The captured numbers are still Strings; use the Parse Integer guide when later commands need whole-number math.
Find All / Capture Group
Step-by-step guide
Step 01 Find All with Capture Group collects a selected part of every pattern match into successive String slots. We will keep the numbers from two Item labels, using the short script built in Intro.
Step 02 Open Set Variable. Keep String variable s1 and This Script Only.
Step 03 Enter Item seven, a comma and a space, then Item eight, exactly as shown. Tap OK. The pattern will find both labels and keep their numbers.
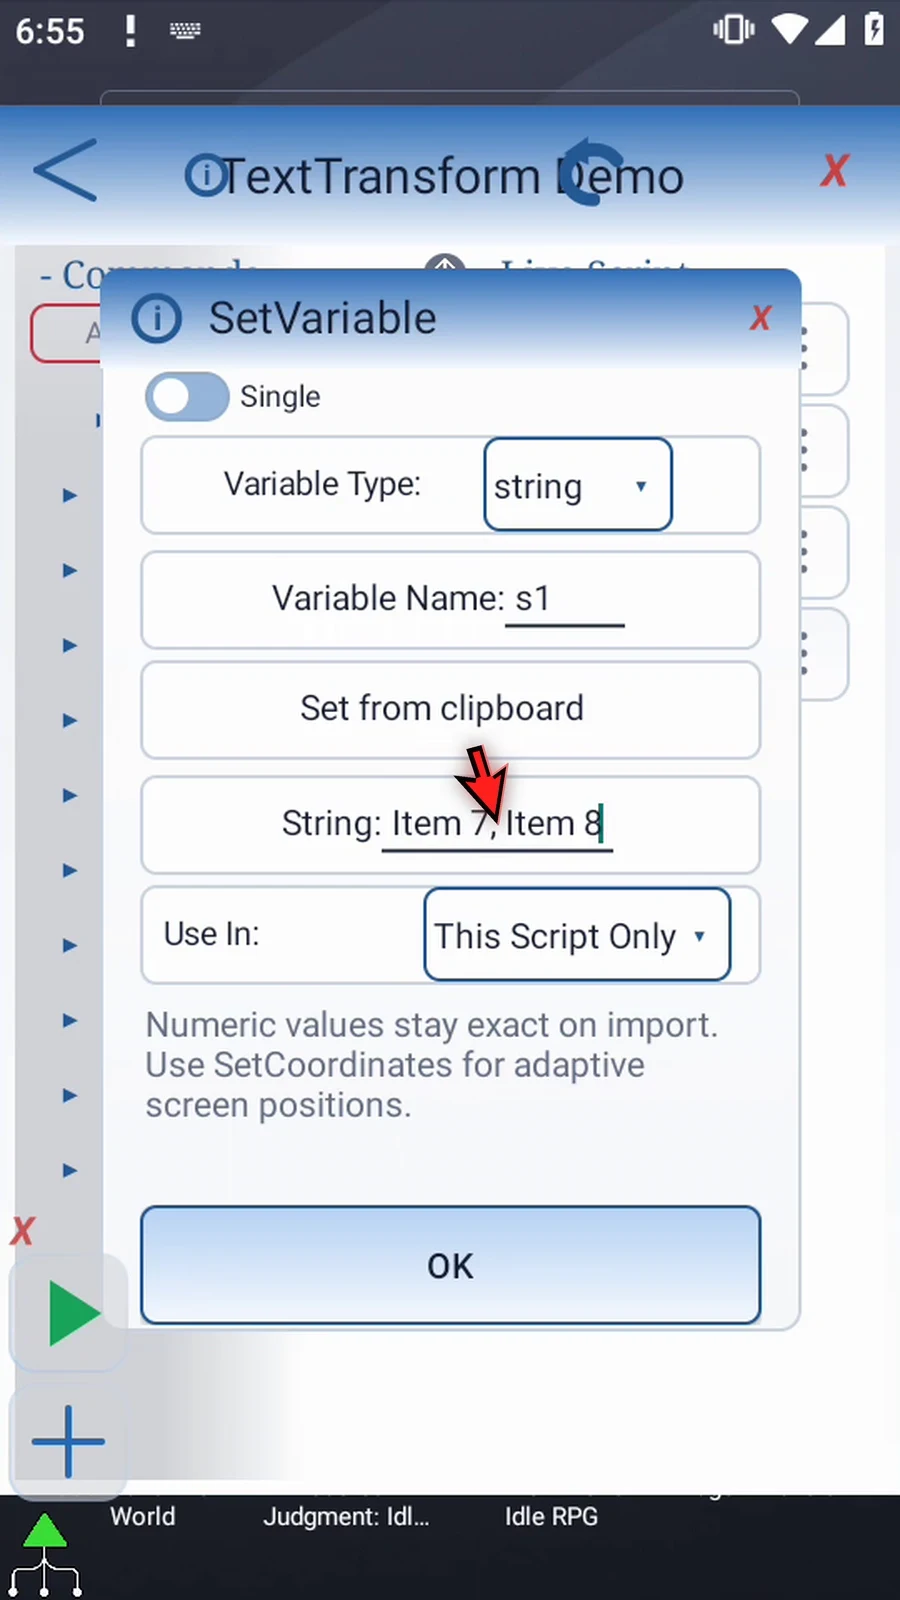
Step 04 Open Text Transform, then open the Operation menu.
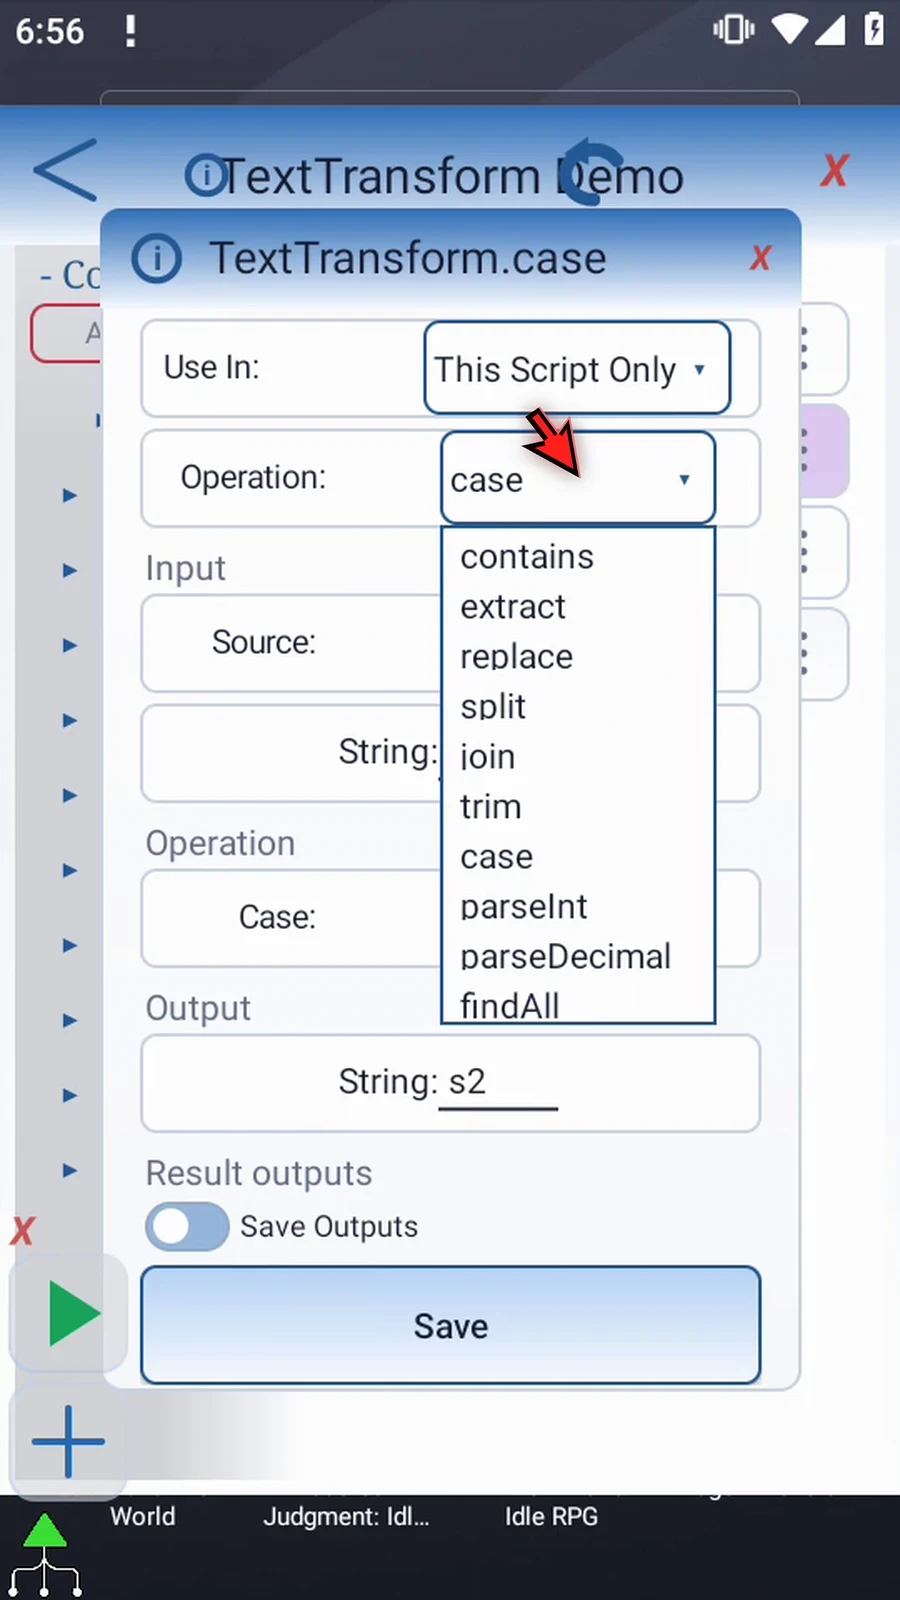
Step 05 Choose Find All. Keep String input s1 and the local scope. Literal Text input is also available, as explained in Intro.
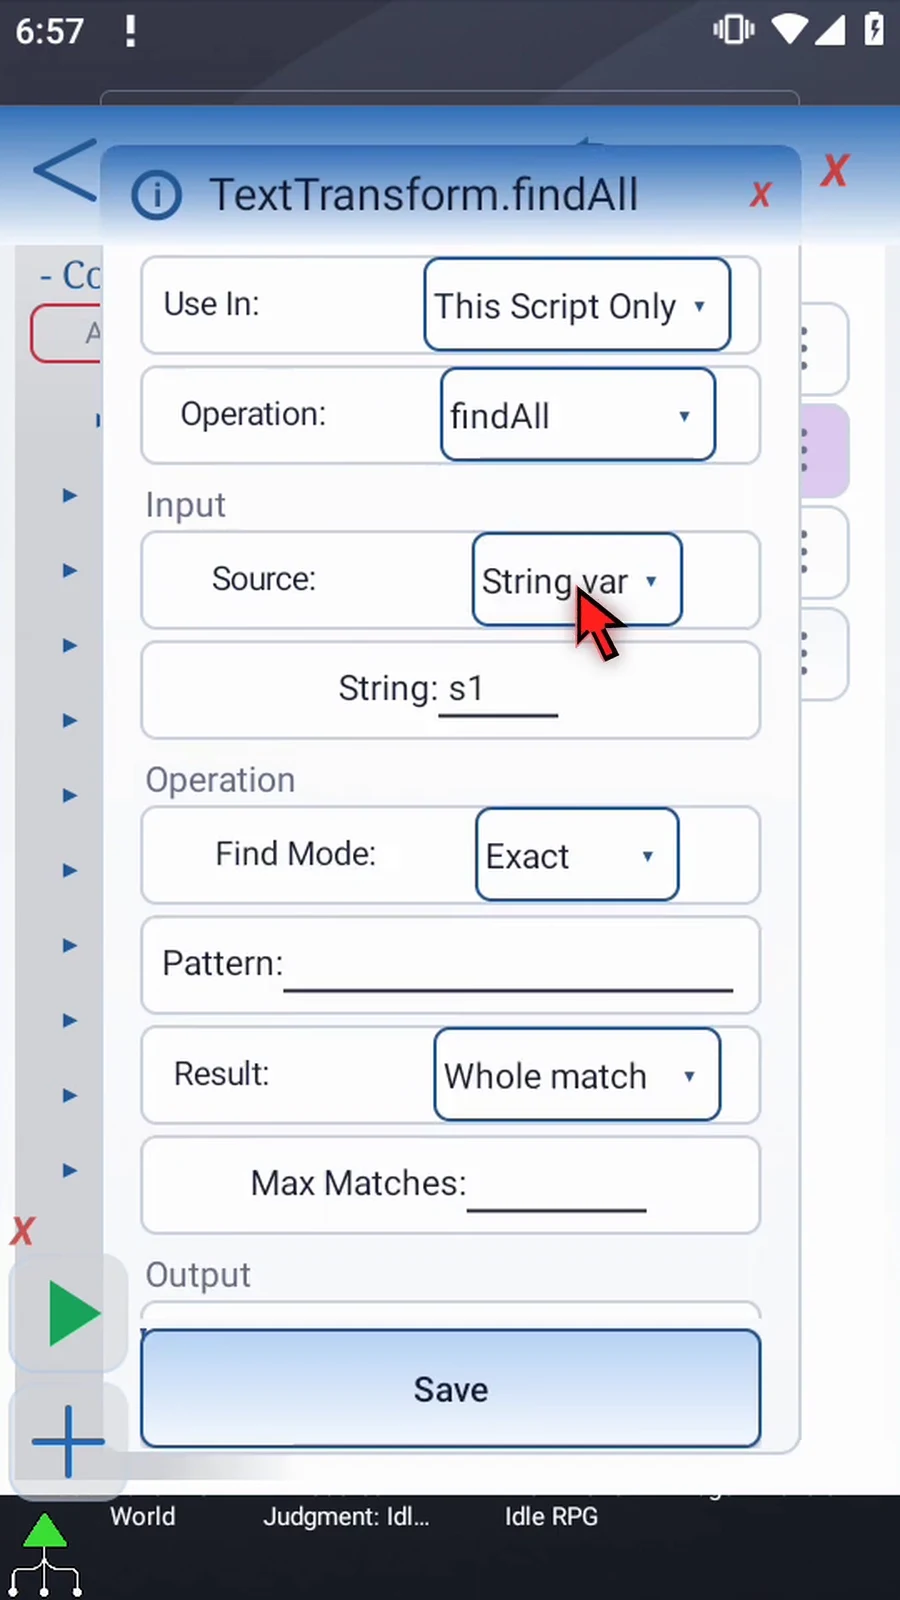
Step 06 Open Find Mode and choose Regex. Capture Group requires a regular expression; Exact and Contains use Whole match instead.
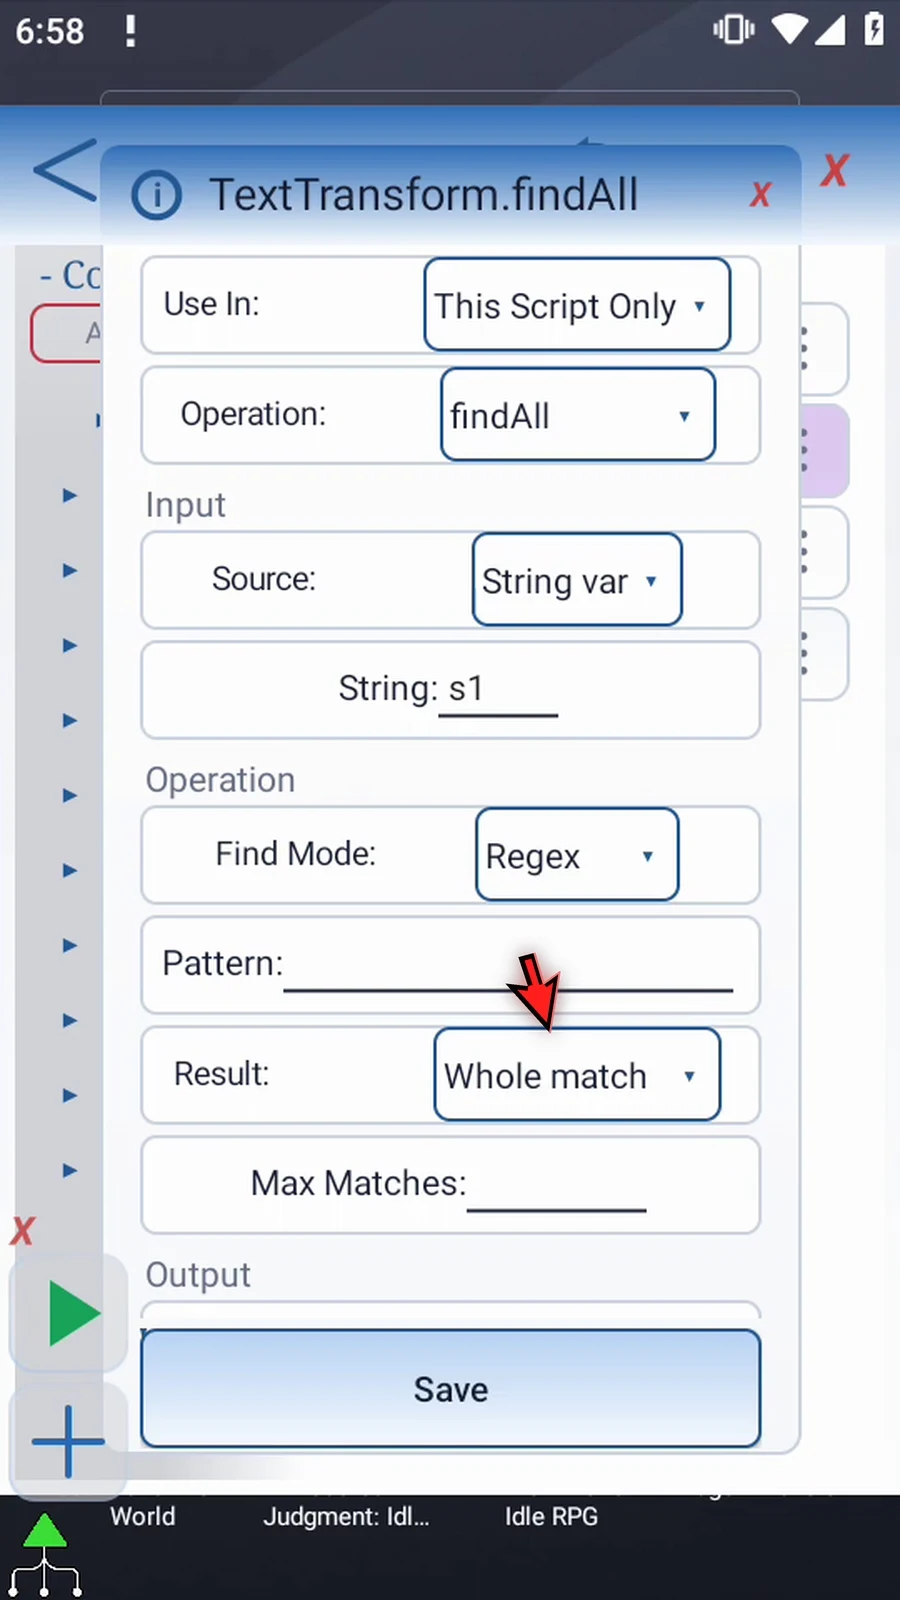
Step 07 Enter the pattern shown here. Item and a space identify the label; the digit pattern matches its number. The parentheses capture that number as group one.
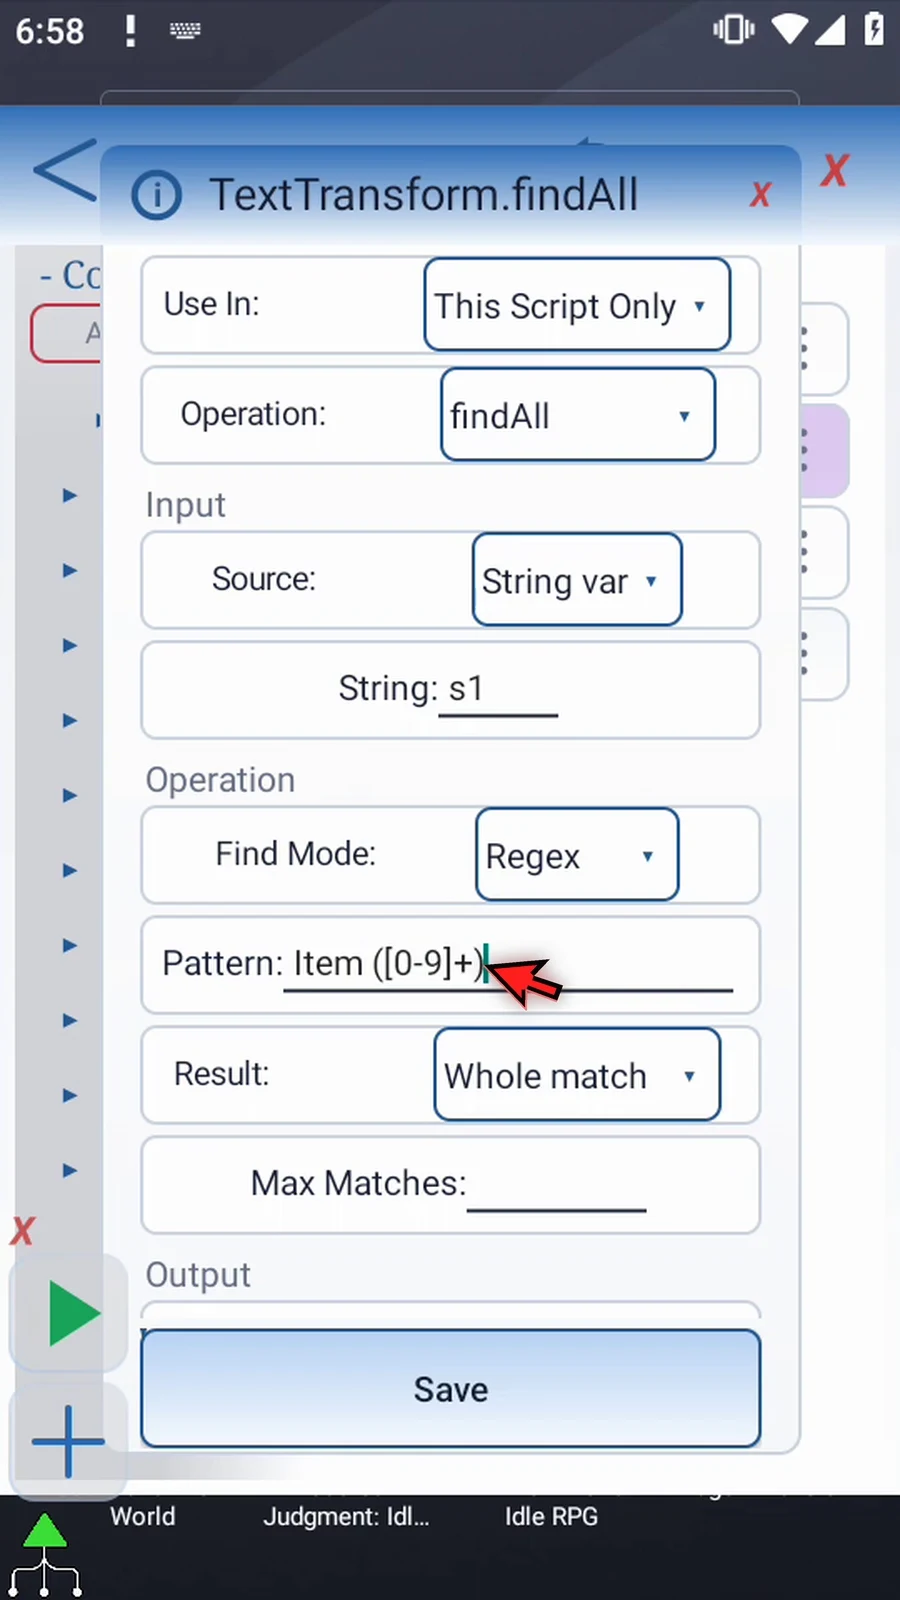
Step 08 Choose Capture group as the Result. Unlike Whole match, this returns only a selected parenthesized part of each match. A Group setting appears.
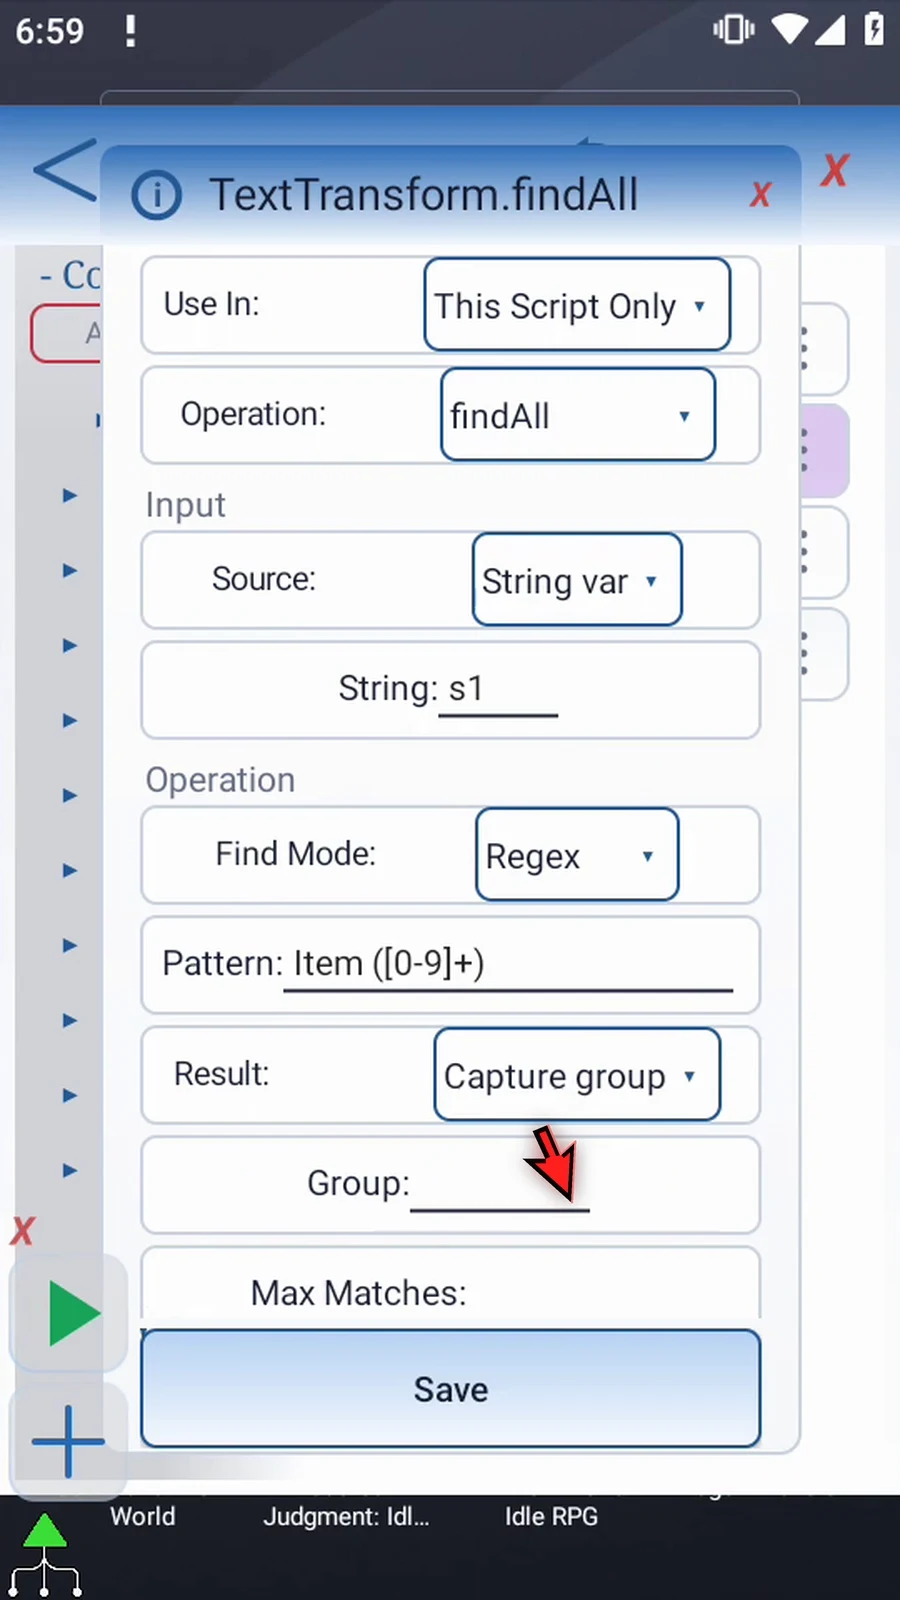
Step 09 Set Group to one for our first pair of parentheses. Capture-group numbers start at one; an earlier Integer variable can also supply this setting.
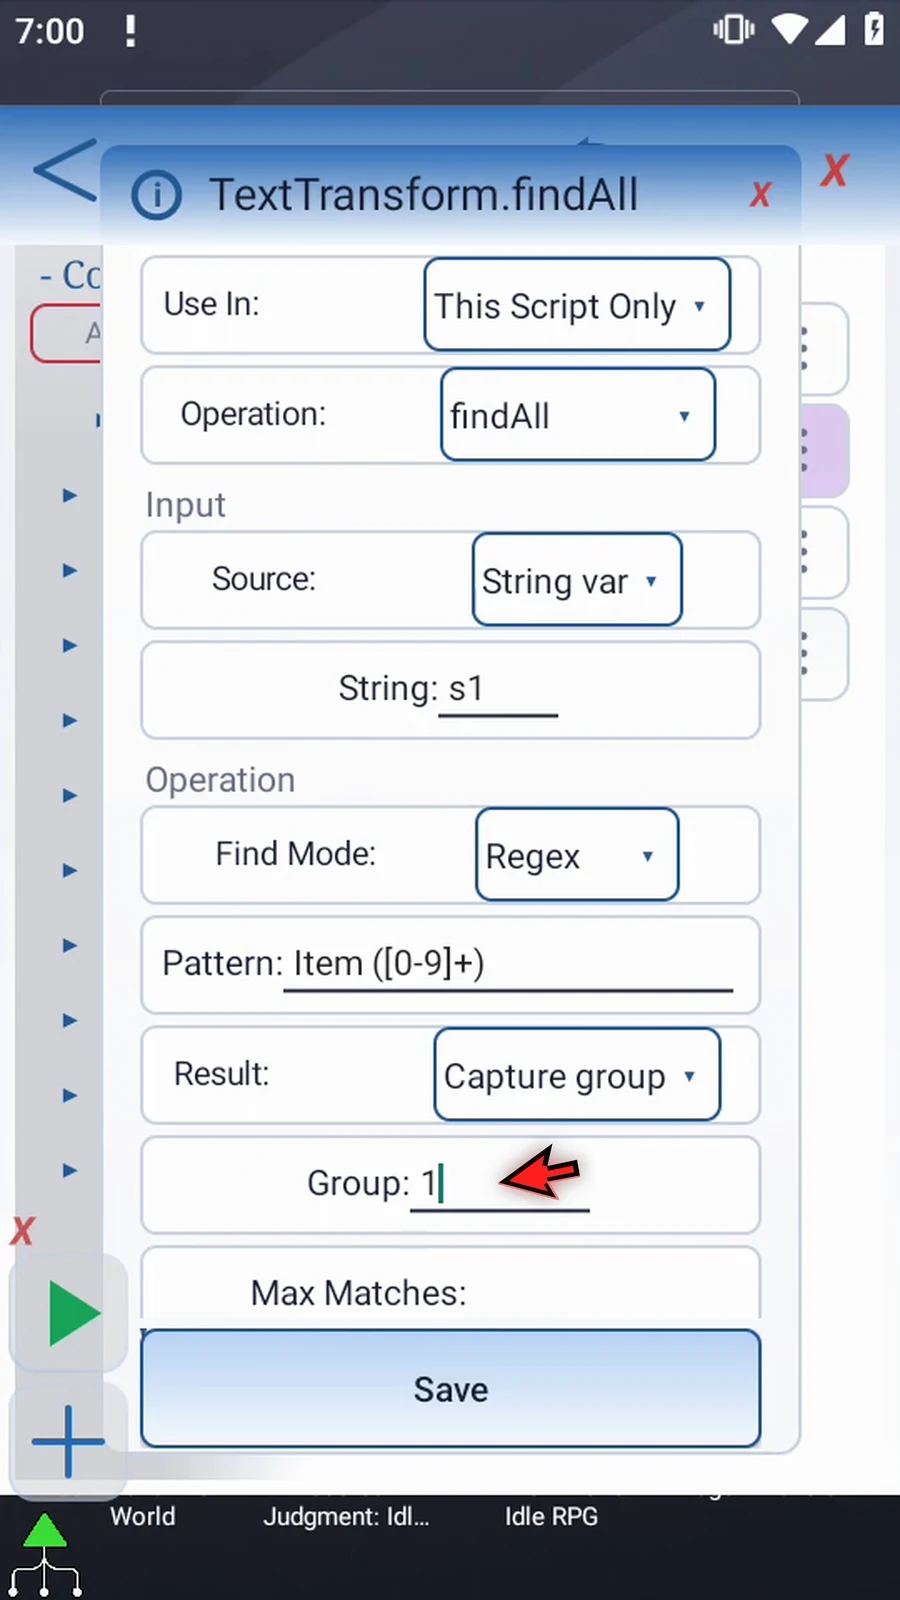
Step 10 Set Max Matches to two. This limit can be an Integer literal or an earlier Integer variable, from zero through four thousand ninety-six. Zero writes no matches.
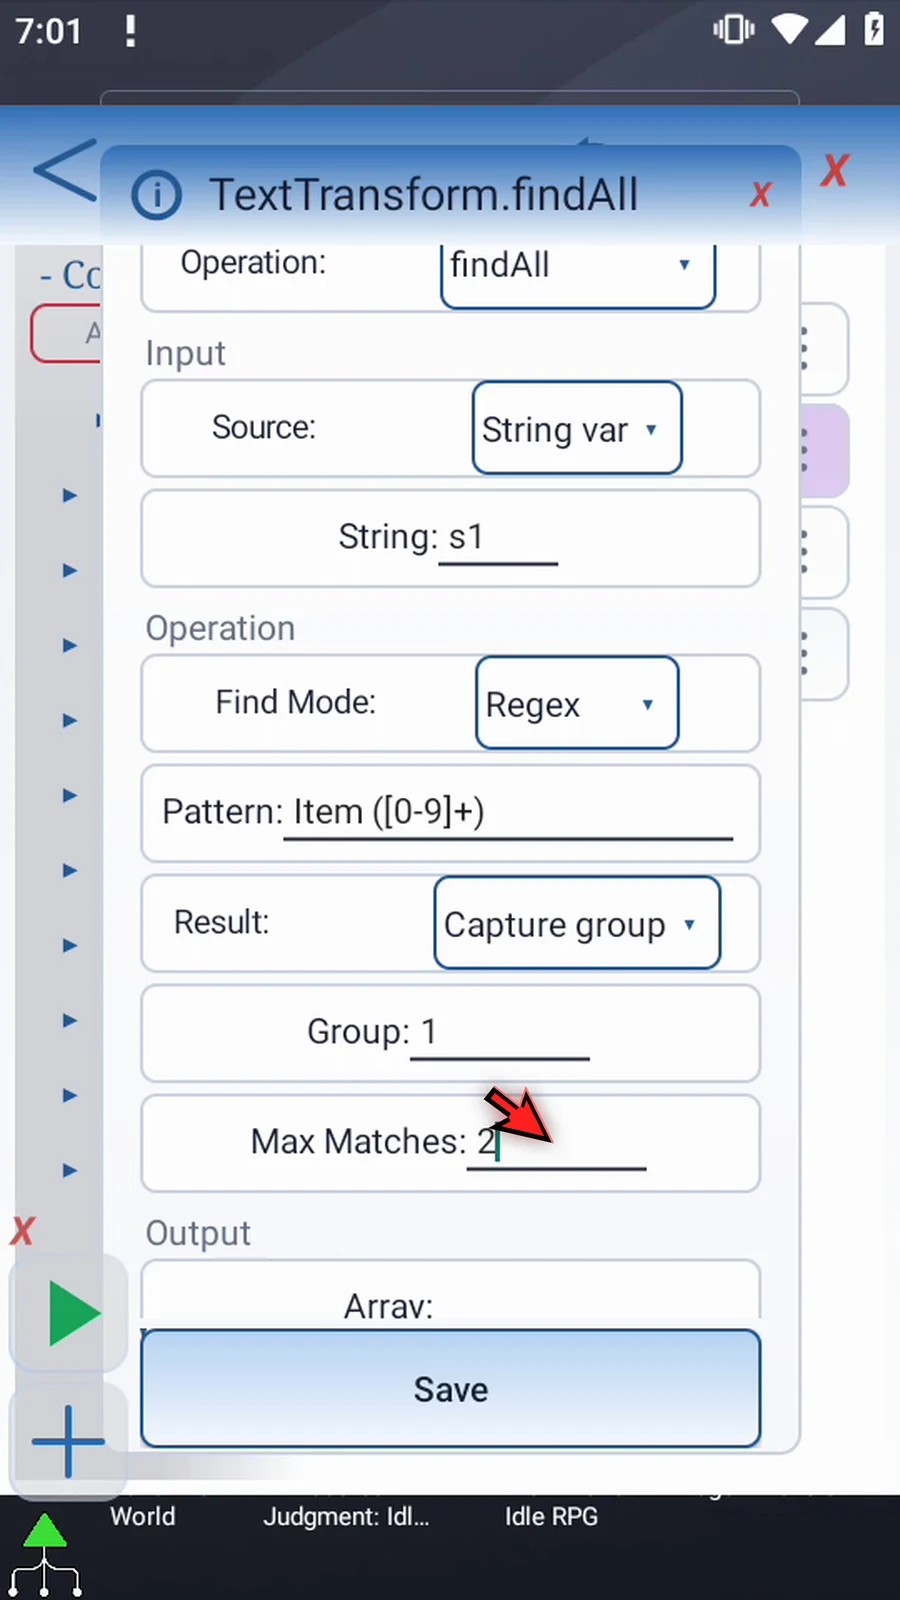
Step 11 Scroll down. Set Array to s and Start to two. Array s means variables s1, s2, and so on. Starting at two writes the results to s2 and s3, leaving our source s1 unchanged.
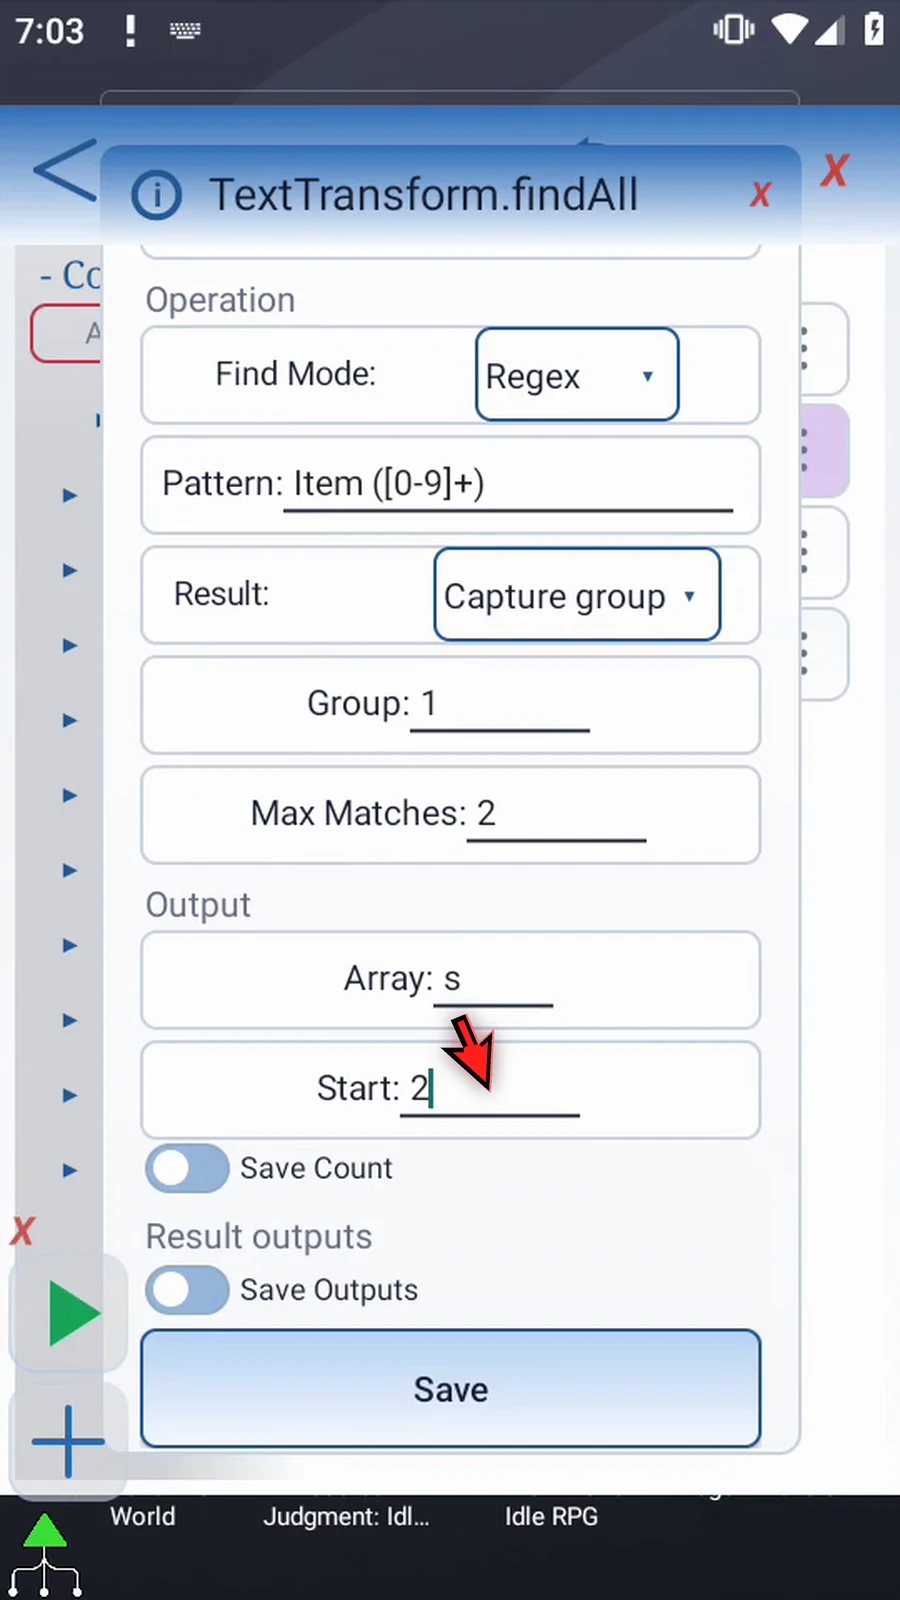
Step 12 Enable Save Count and choose Integer variable i1. It stores the number of results for a later loop. Use this count because older unused String slots are not cleared.
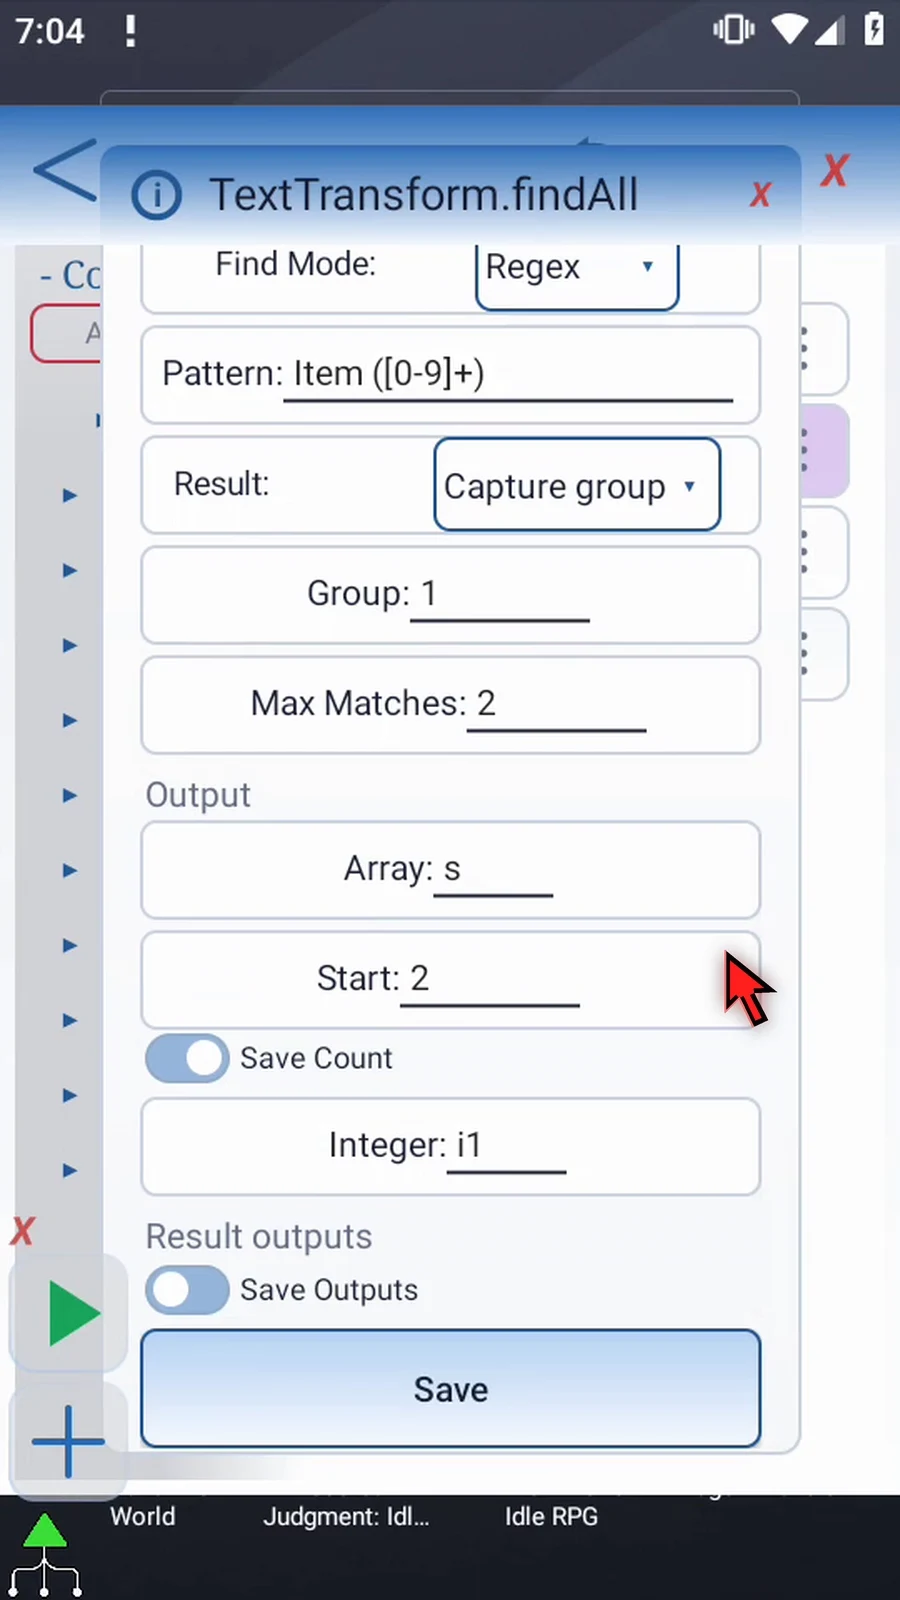
Step 13 Keep optional Save Outputs off and tap Save. Intro explains the optional Boolean Success and String Error outputs.
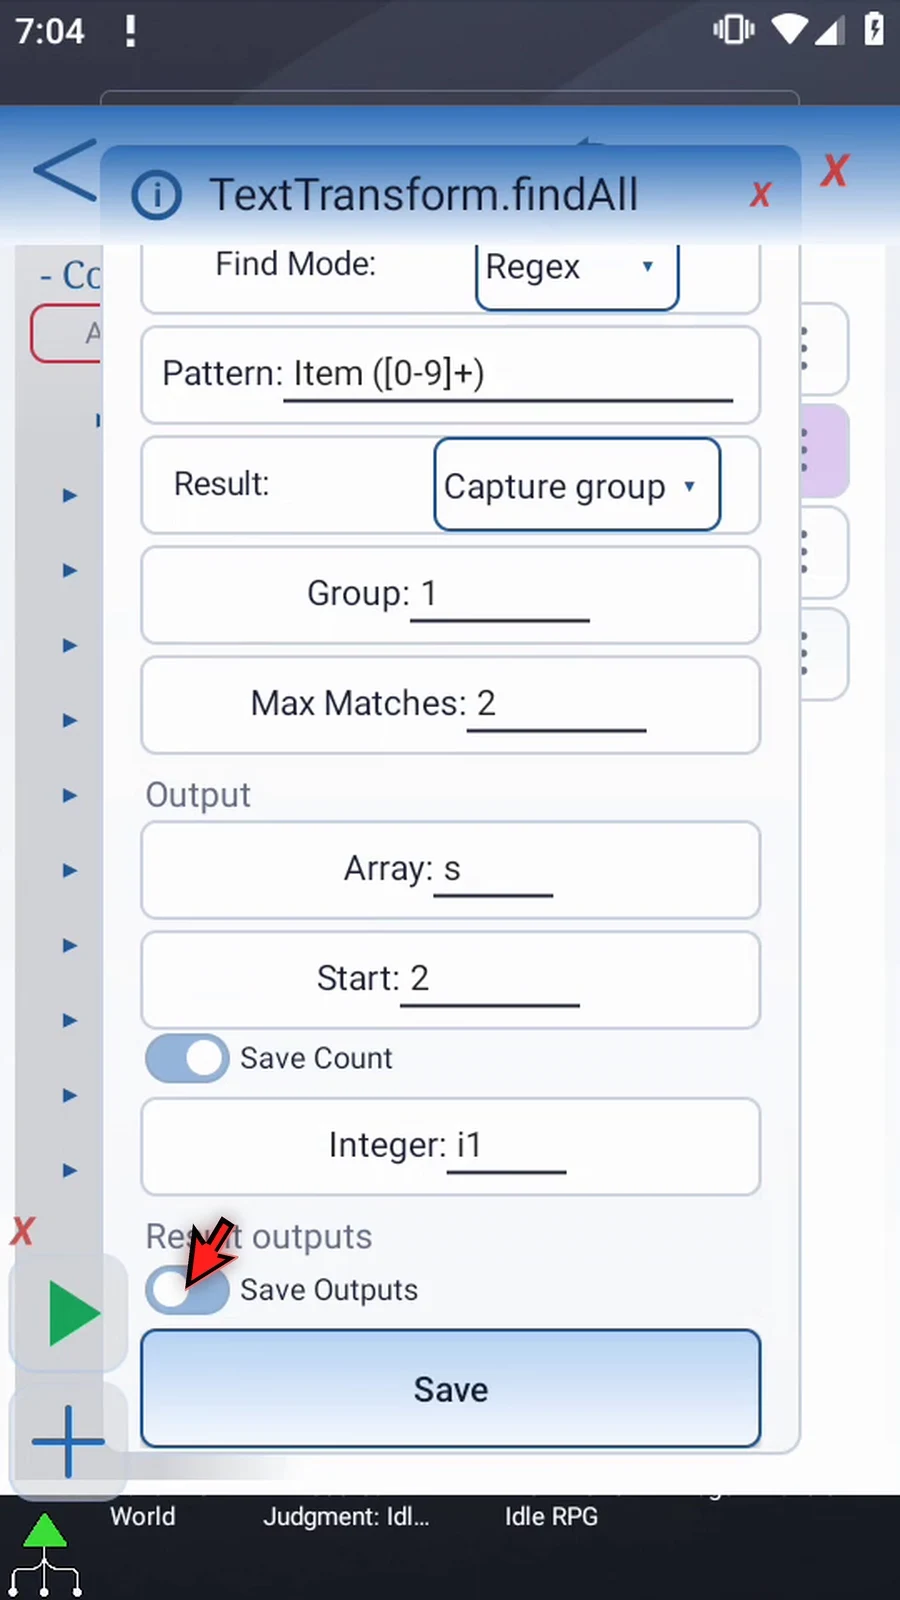
Step 14 Open Display to connect the first captured number.
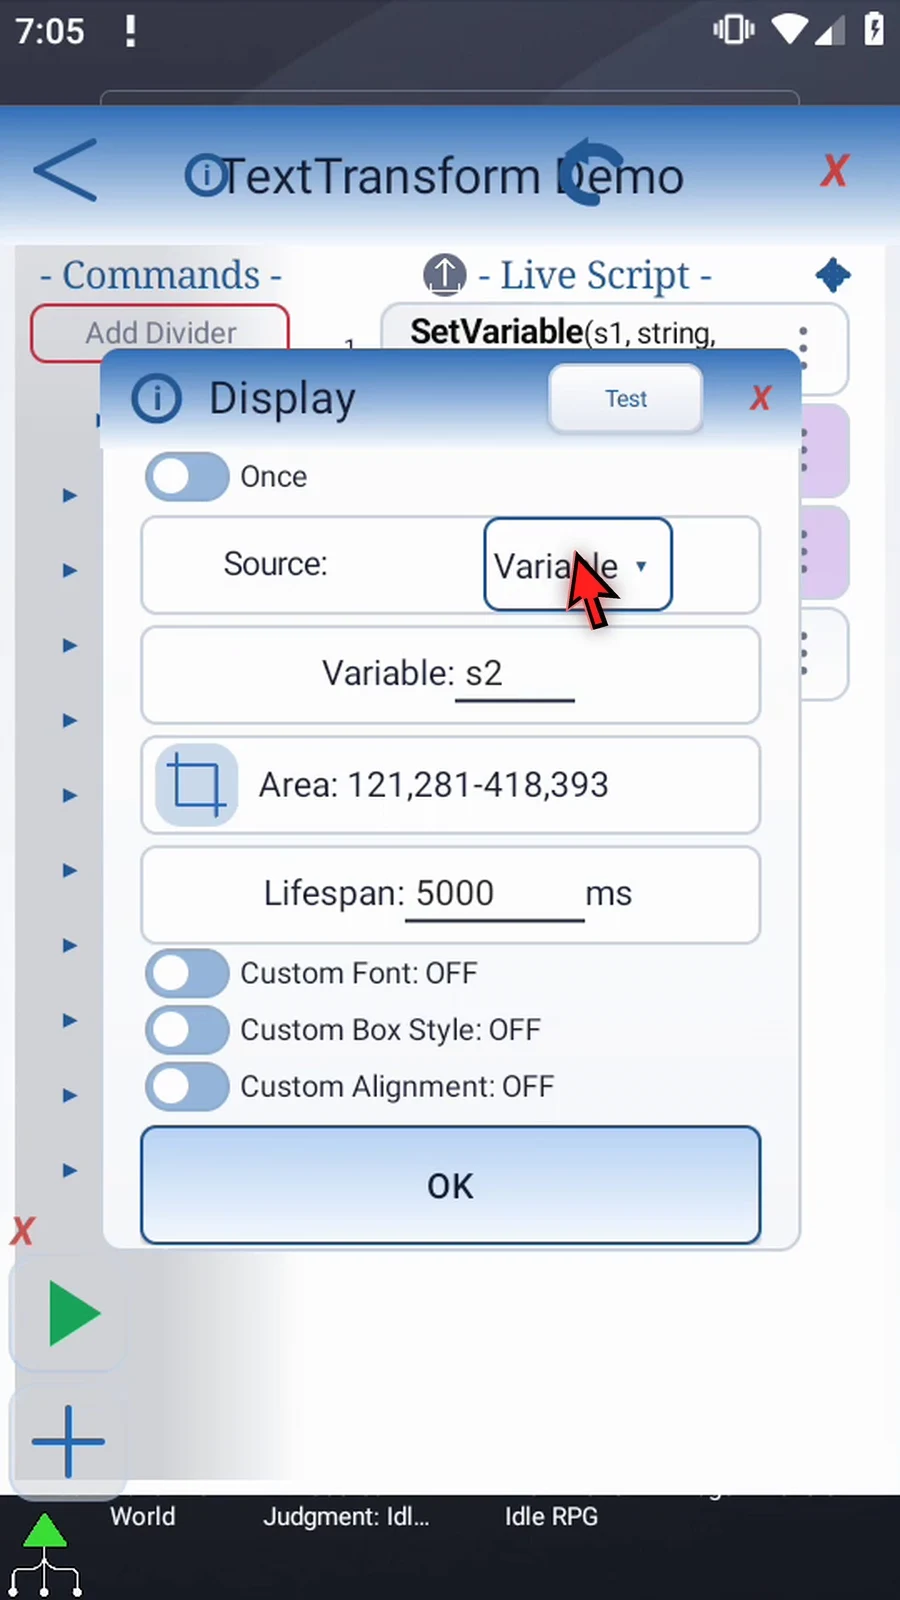
Step 15 Keep Variable s2, the same area, and the five-second lifespan. Tap OK. This Display will read the first output slot.
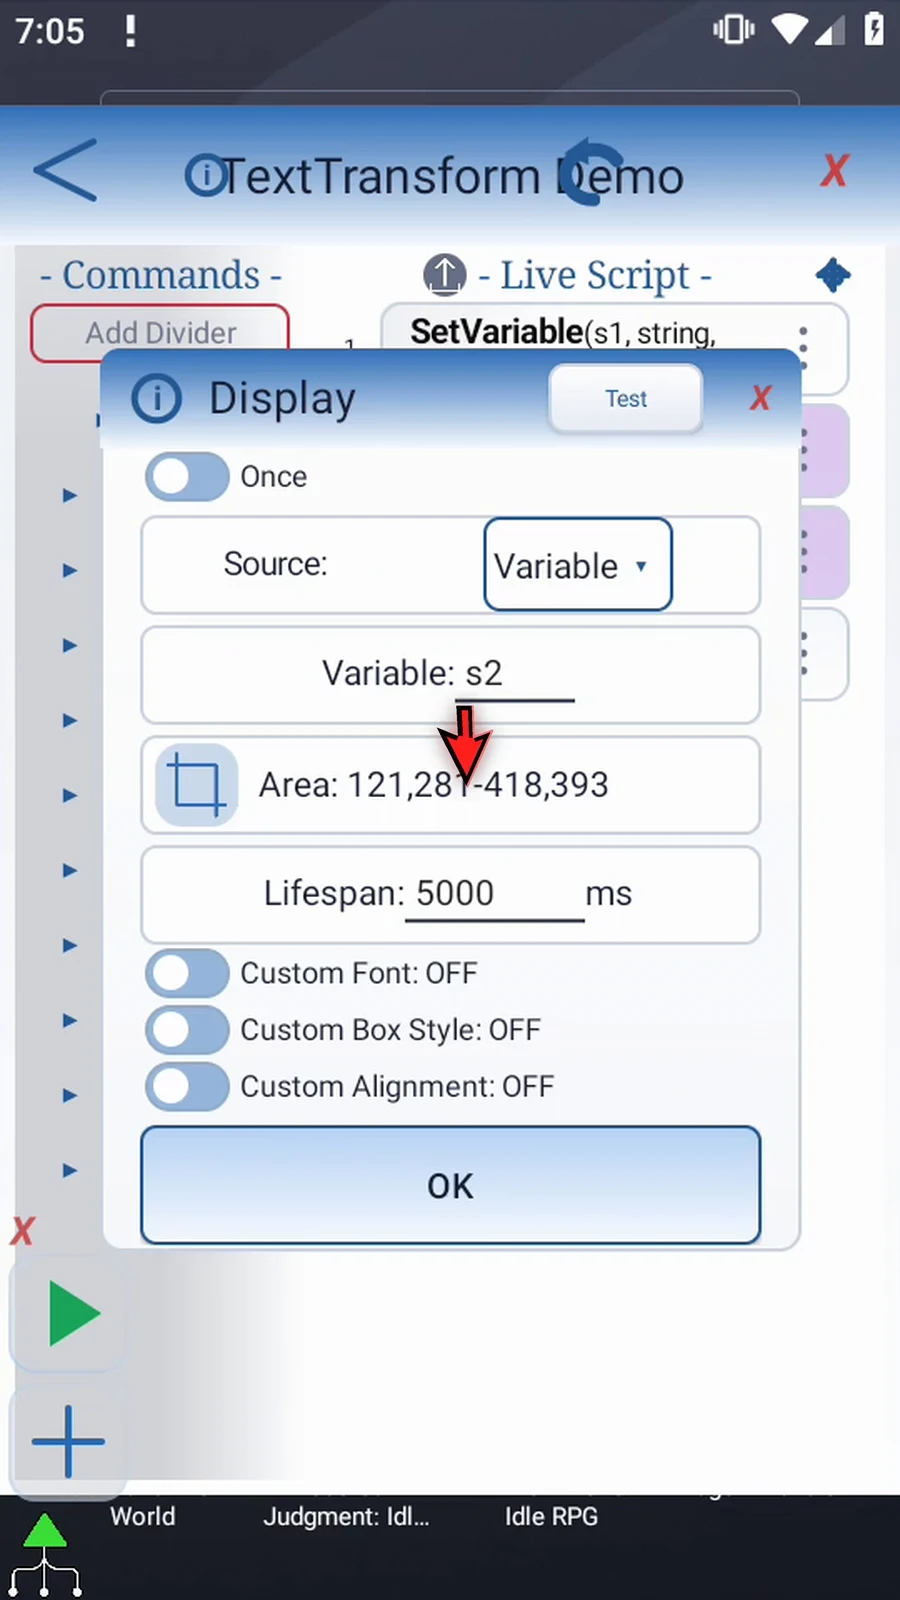
Step 16 Set Variable supplies the text, Find All captures both numbers, and Display shows one result. Prompt Me confirms completion. Close the editor to try it.
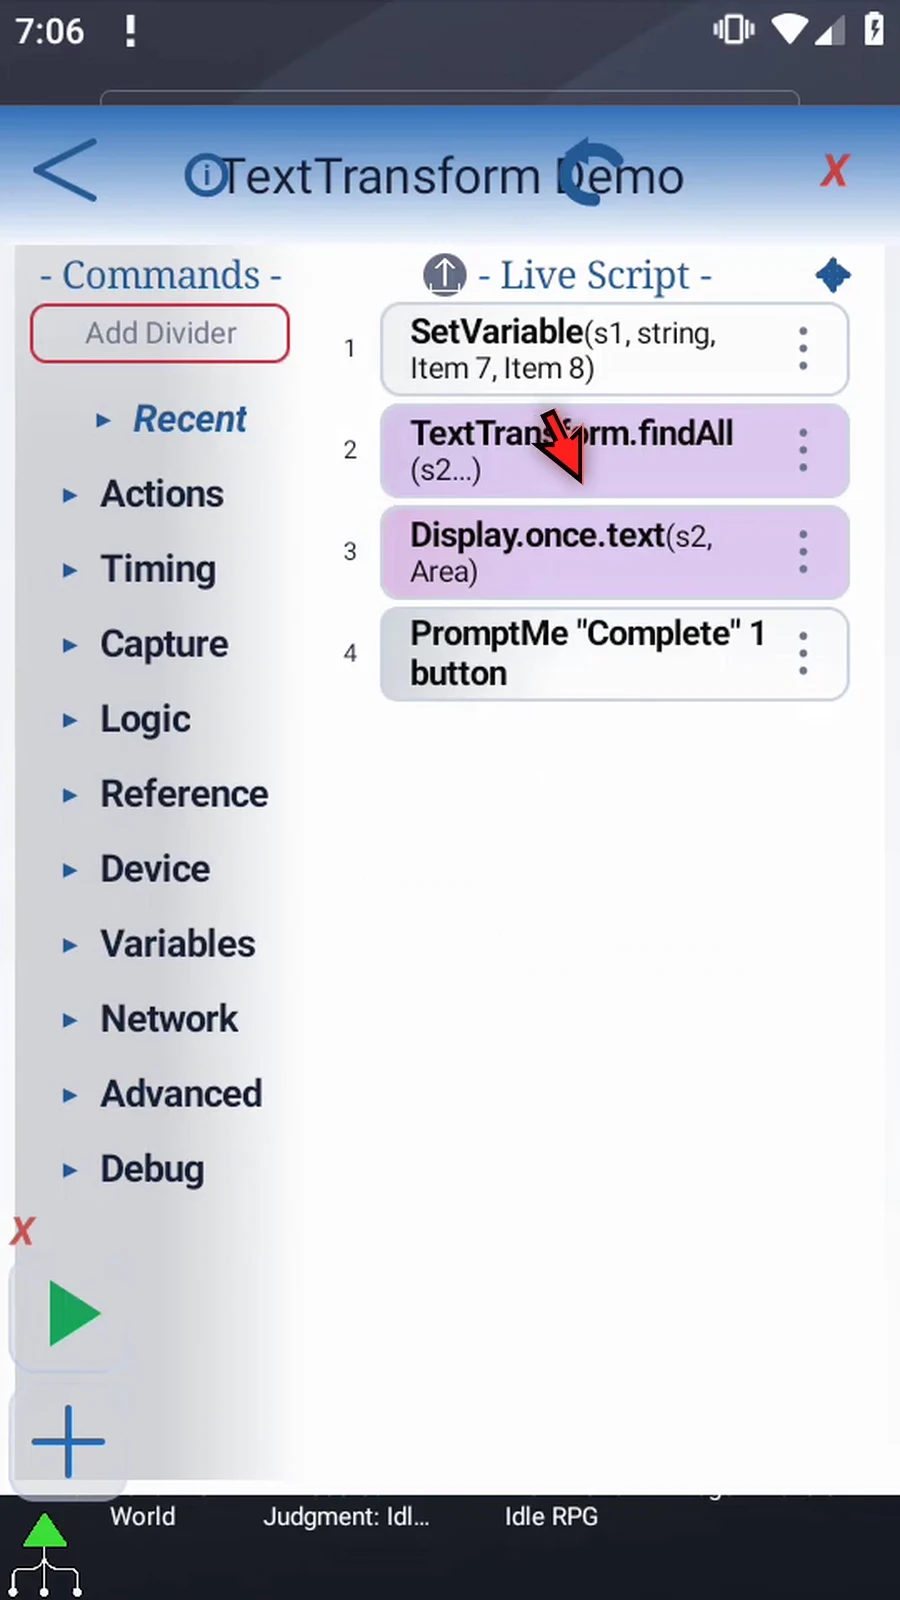
Step 17 When the script is complete, simply use the Play button in the main overlay.
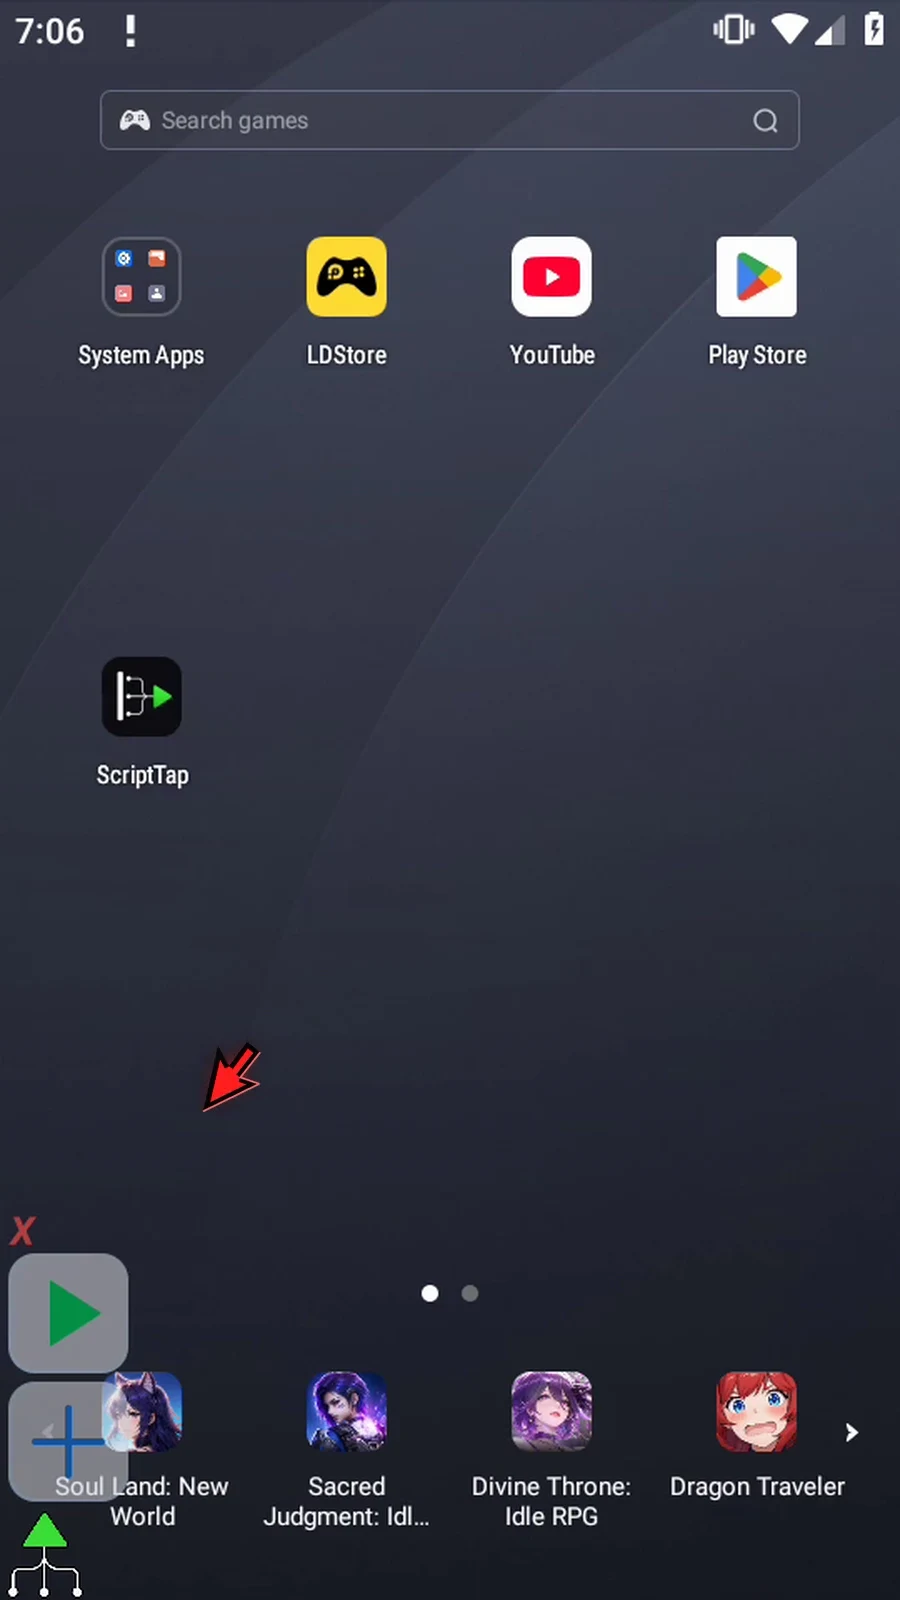
Step 18 The first captured number is seven, stored in s2.
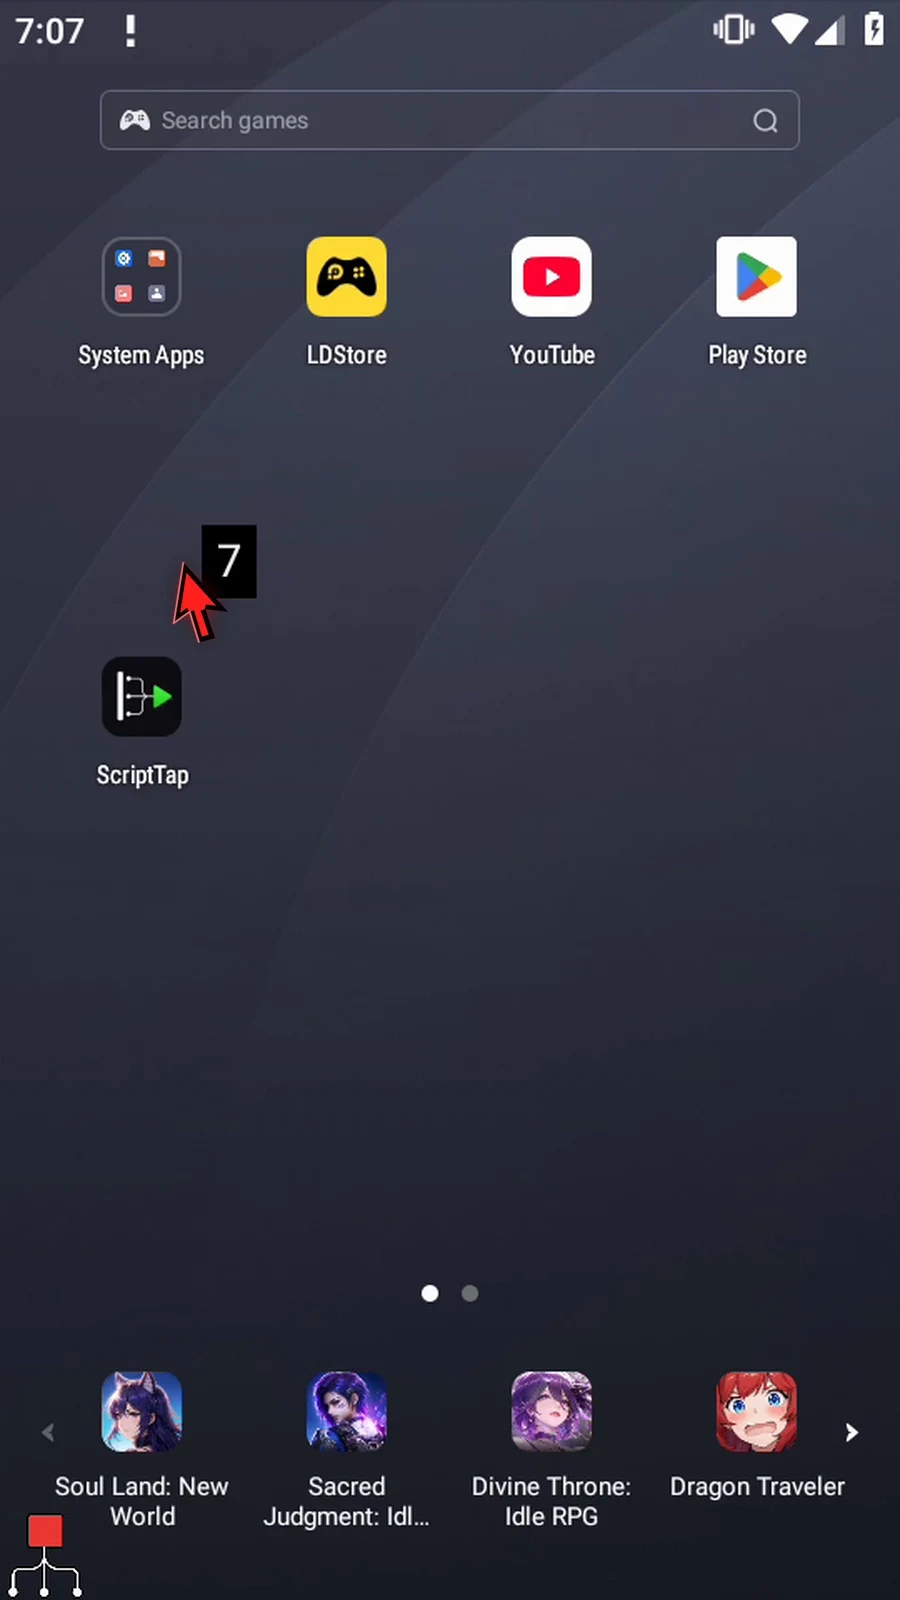
Step 19 Complete confirms that the script continued after finding the matches.
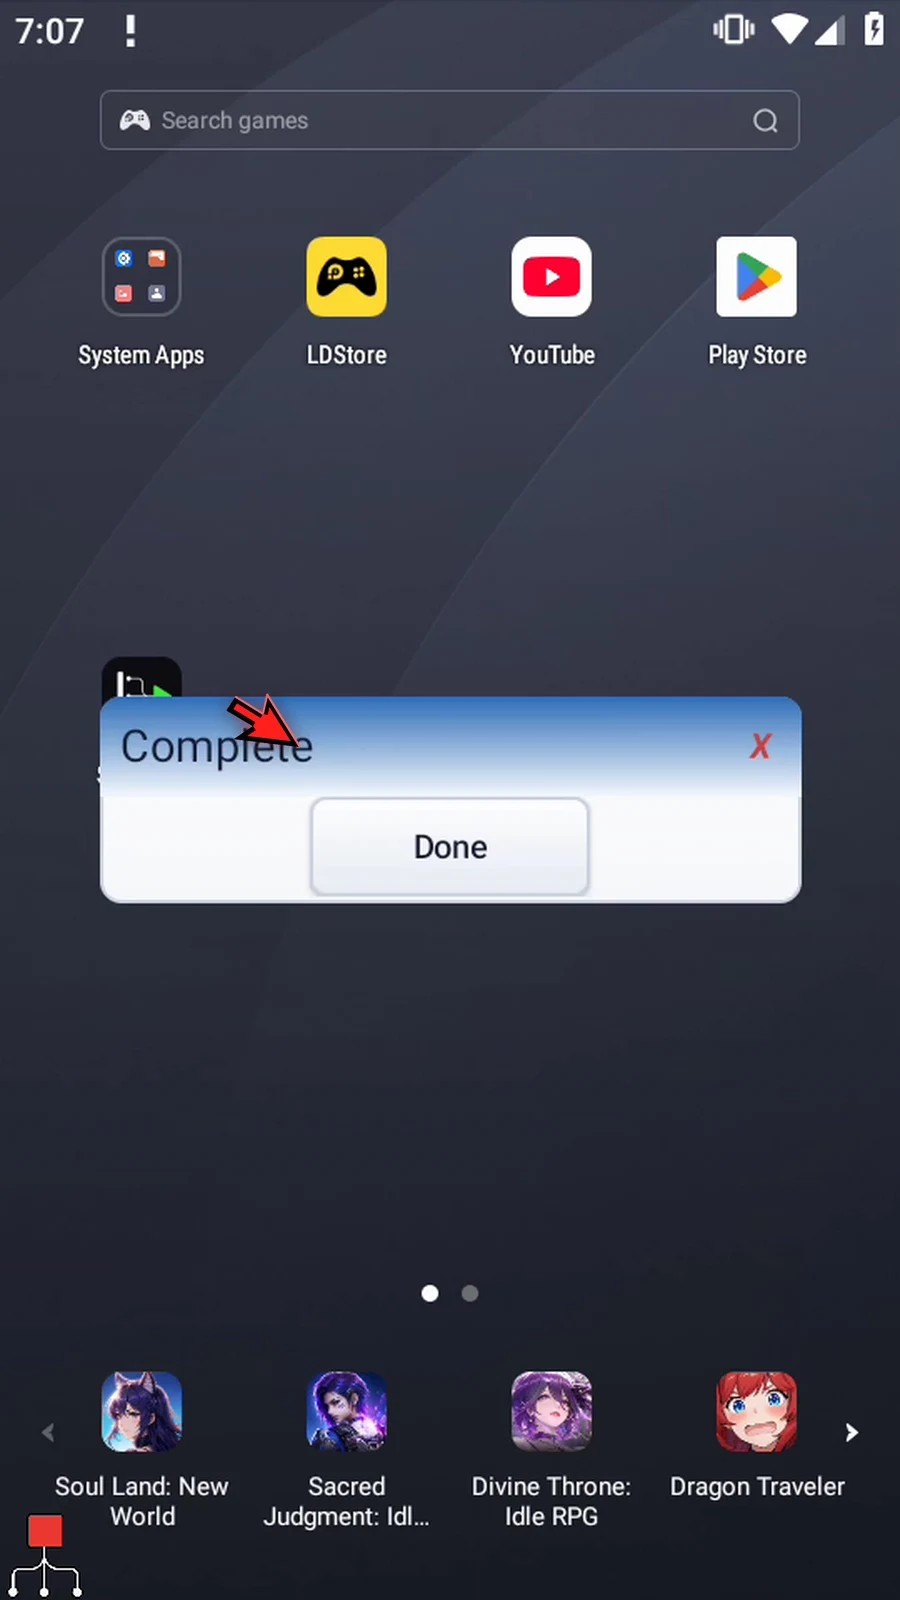
Step 20 Press Done. The script finishes. Next, check the second result.
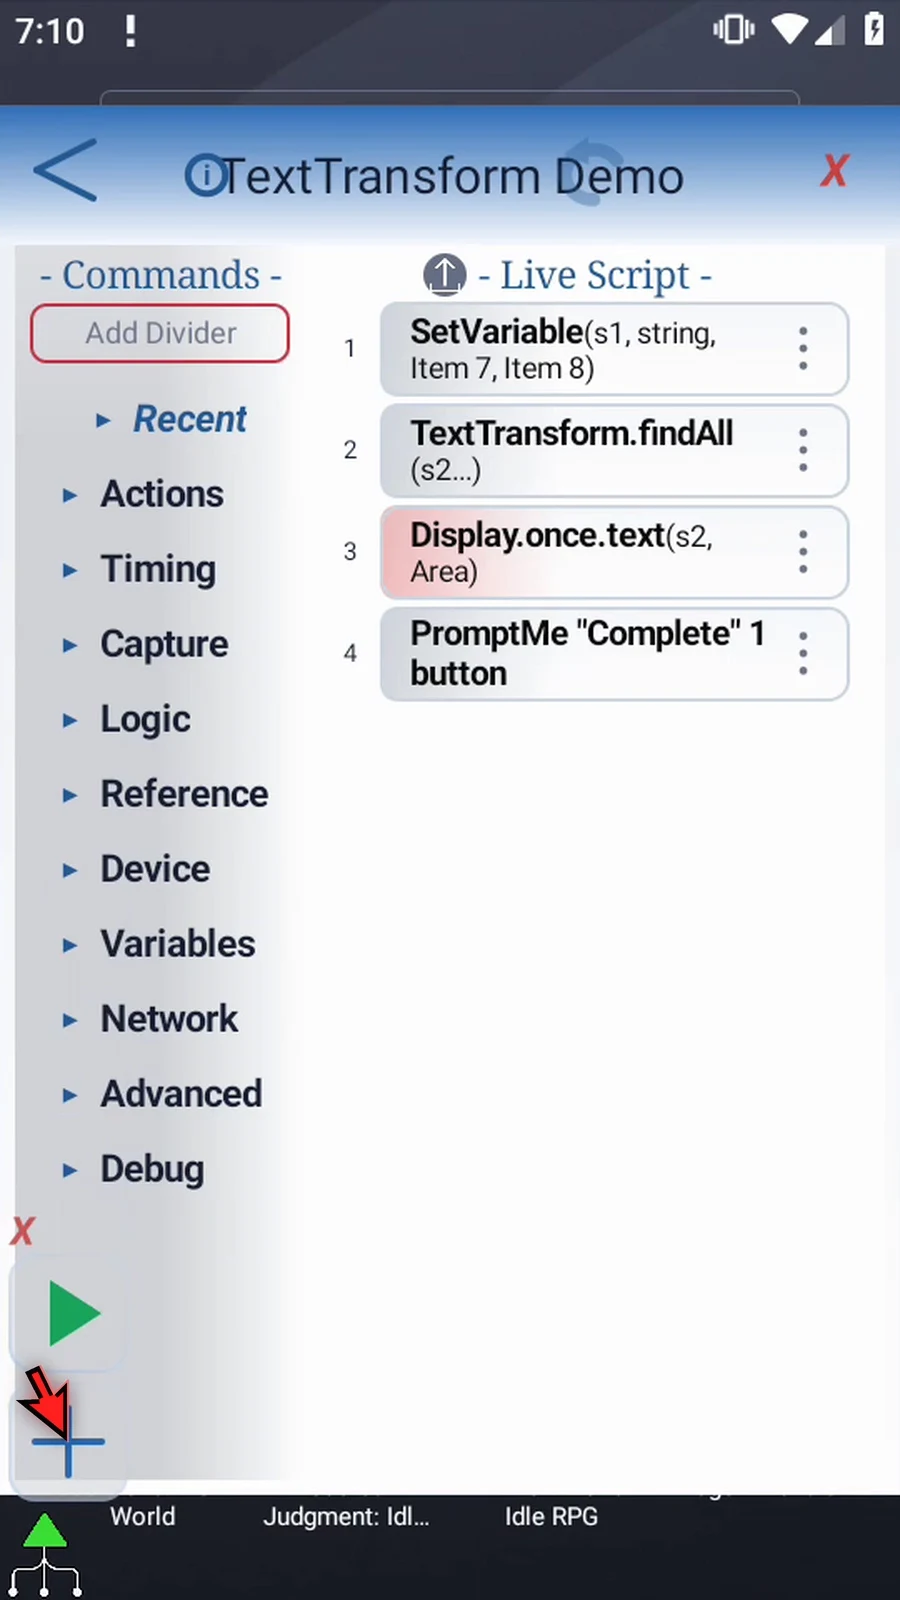
Step 21 Open the editor again so the second match can be displayed.
Step 22 Open Display, change only its Variable to s3, and tap OK. This is the next slot written by Find All.
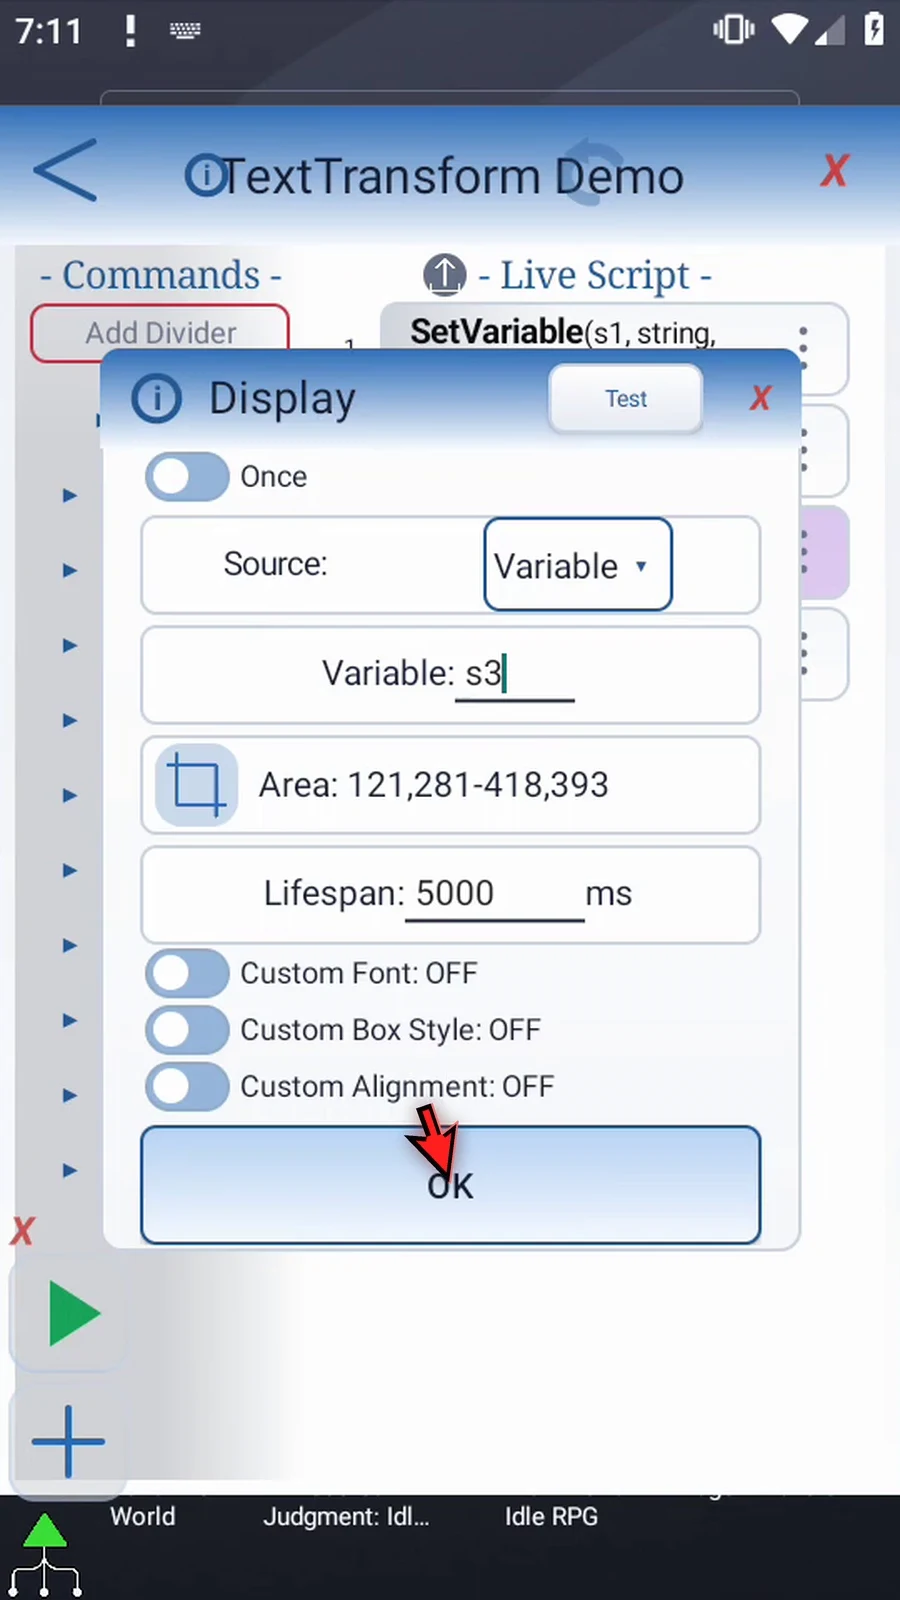
Step 23 The Find All settings are unchanged. Display now reads the second result. Close the editor.
Step 24 When the script is complete, simply use the Play button in the main overlay.
Step 25 The second captured number is eight, stored in s3.
Step 26 Complete confirms that both runs reached the end of the script.
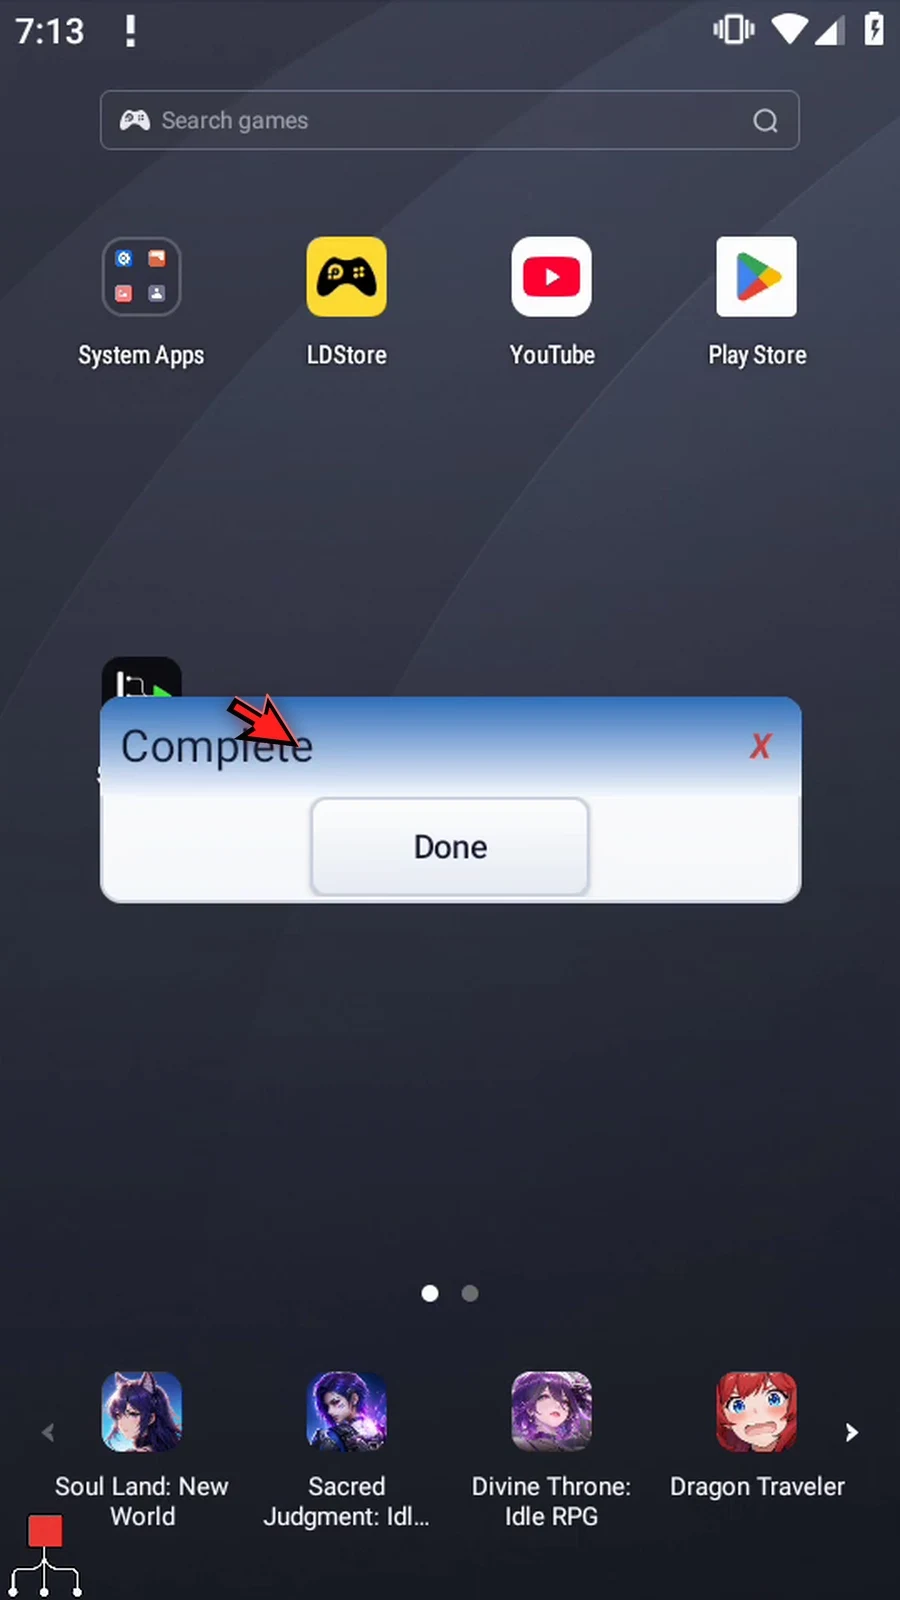
Step 27 Press Done. The script finishes automatically. Captured numbers are still Strings; use Parse Integer if later commands need whole-number math.
Split / Literal separates one String into successive indexed String slots for later commands or a loop. This guide continues with the four-command script built in Intro / Case; no new commands are inserted.
Normally set String s1 to Red,Blue,Green with no spaces, keeping This Script Only. In the existing TextTransform choose split, retain String var → s1, and local scope. Intro explains the common Text input and optional result controls.
Open Split Mode to see Literal and Regex. Literal treats the delimiter as exact text; Regex recognizes a Java regular-expression pattern. Keep Literal here. The delimiter source can be typed Text or a prior String variable; use Text and normally enter one comma ,. Literal delimiters must not be empty. A delimiter marks the boundary and is removed at that boundary.
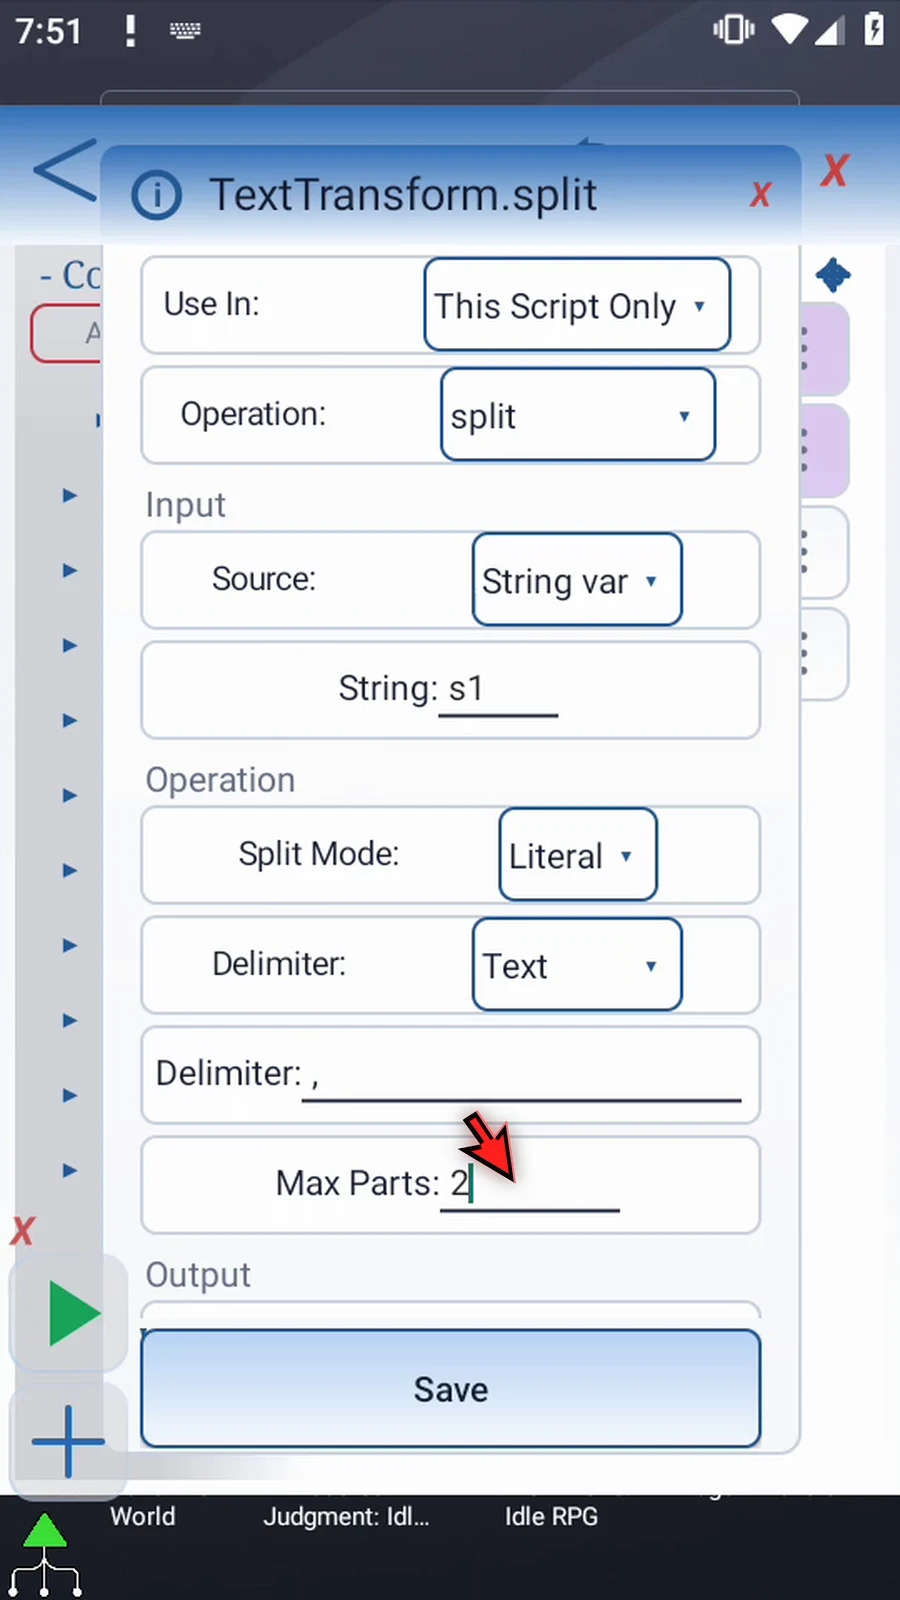
Set Max Parts to 2. The first part is Red; the final part keeps the remainder Blue,Green rather than discarding it. To get three individual colors, raise Max Parts to at least 3. Max Parts and output Start accept positive Integer literals or prior Integer variables within 1..4096; keep the complete destination range within supported slots.
Scroll down. Set output Array s, Start 2. Array s means String slots s1, s2, and so on. SetVariable already provides the String family. This writes s2 and s3, preserving the source in s1. Enable Save Count and set Integer i1. Use this run's count when looping: older unused slots are not cleared.
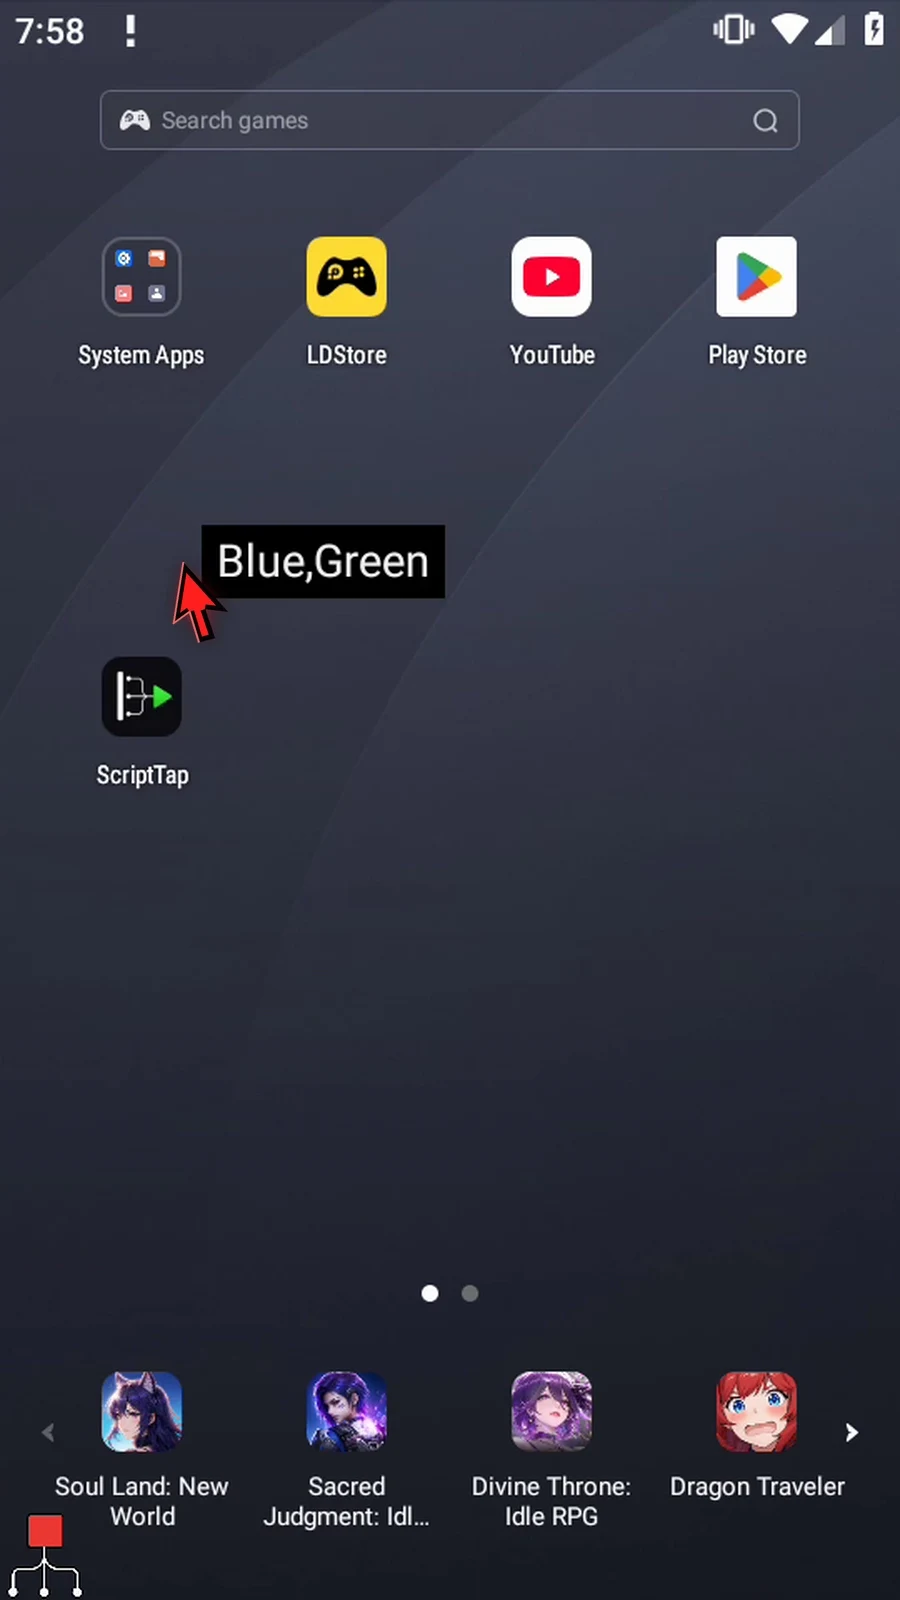
Keep Save Outputs OFF and Save. The existing Display reads Variable s2 for 5000 ms with the same area and default appearance; Complete/Done PromptMe is unchanged. The actual first Play displays Red. After Done, reopen the editor and change only Display's Variable to s3. The second Play displays Blue,Green, demonstrating the retained remainder.
Both actual four-command runs completed with zero warnings/errors, i1=2, and unchanged source s1. Both full timed displays and natural completion transitions are retained. Press Done to finish automatically. Choose Regex when separators need a pattern instead of one fixed text delimiter.
Split / Literal
Step-by-step guide
Step 01 Split separates one String into successive String slots for later commands or a loop. We will divide a comma-separated list of colors, using the four-command script built in Intro.
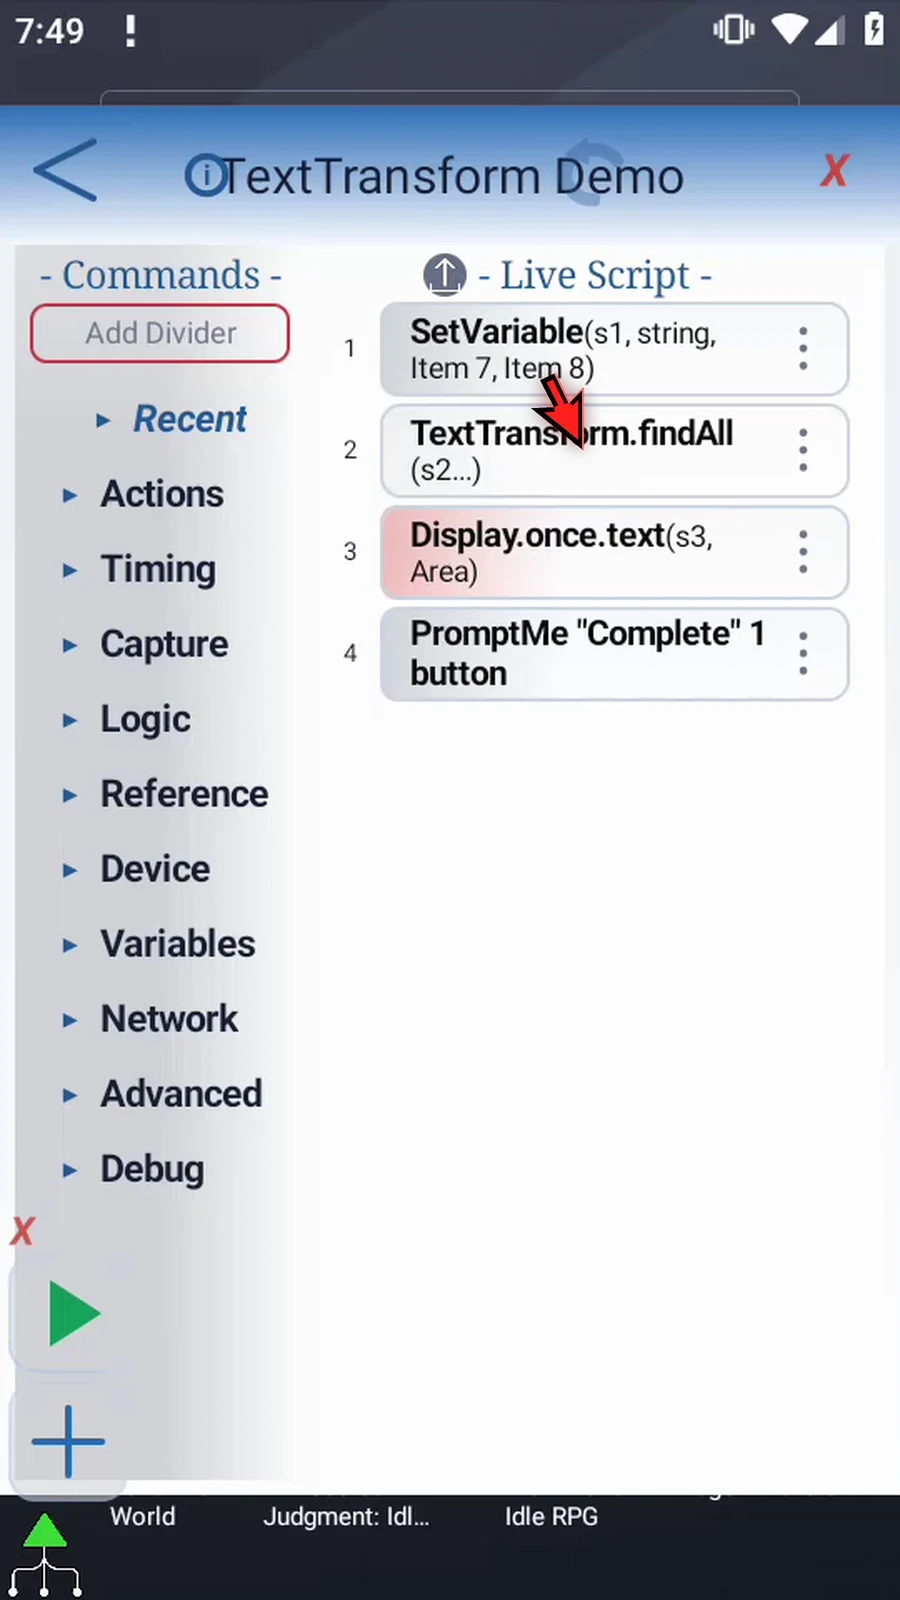
Step 02 Open Set Variable. Keep String variable s1 and This Script Only.
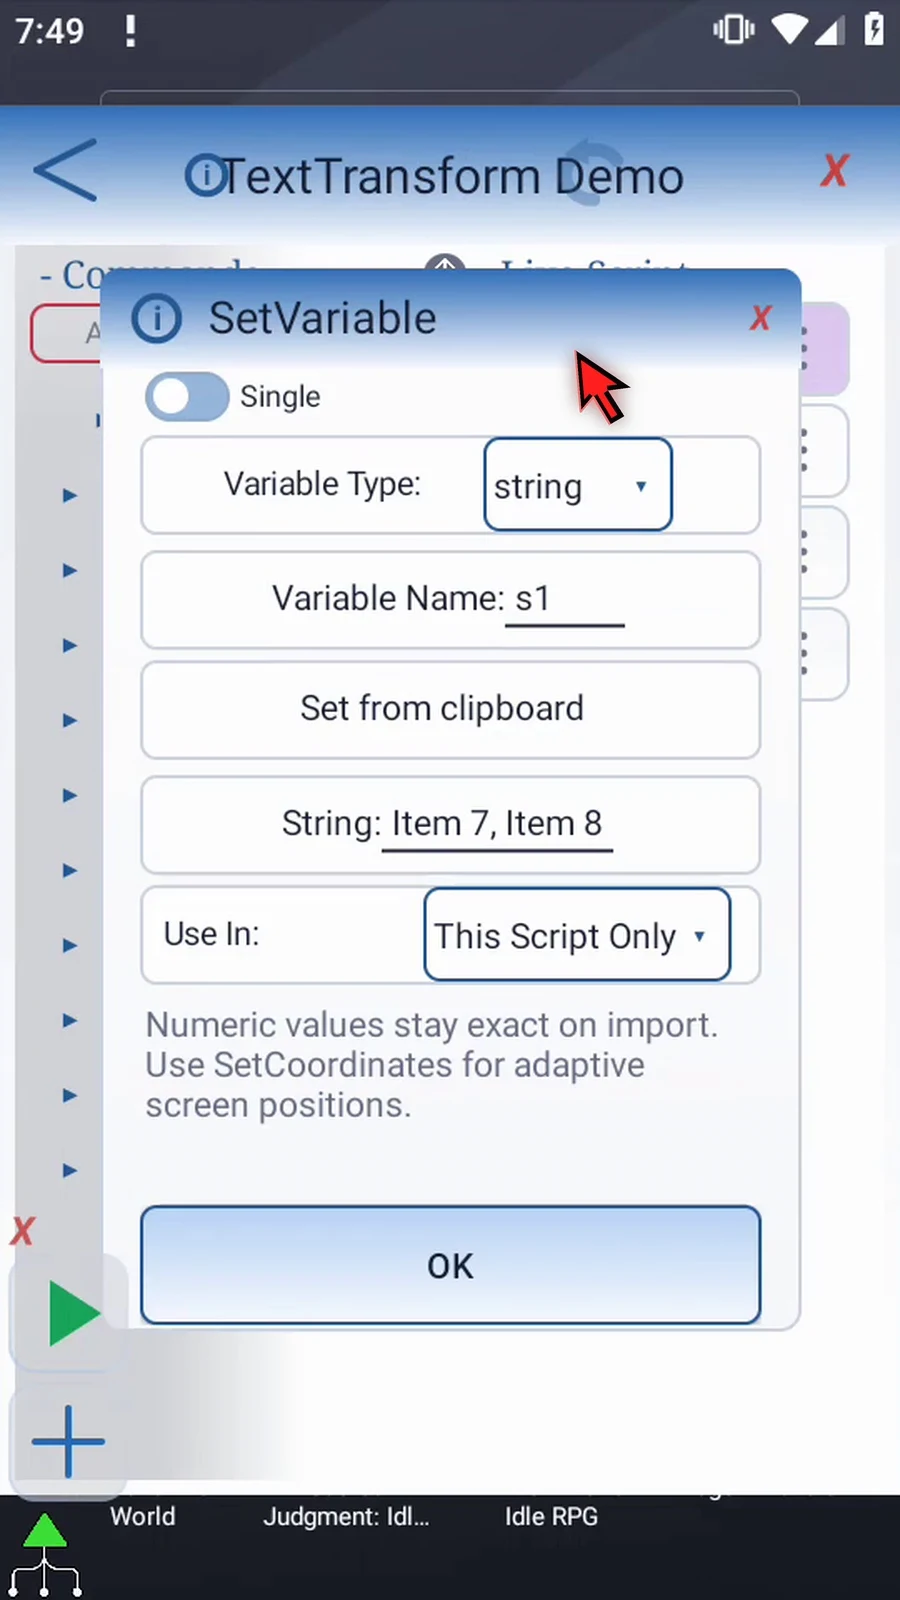
Step 03 Enter the three colors shown, separated by commas without spaces. Tap OK. This is the text we will separate into parts.
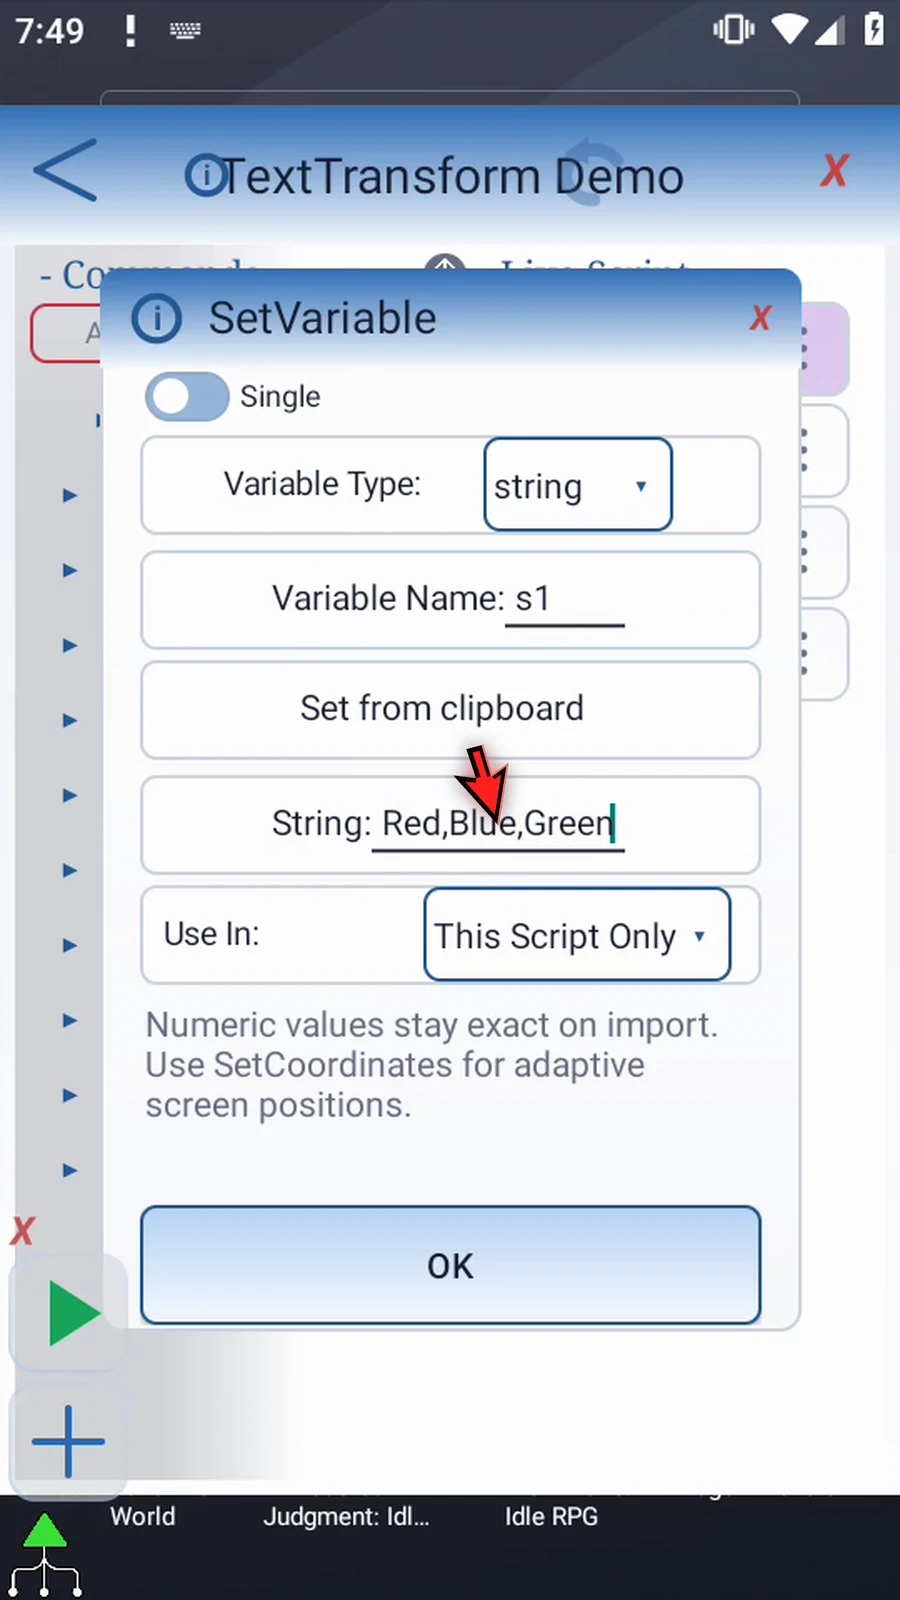
Step 04 Open Text Transform, then open the Operation menu.
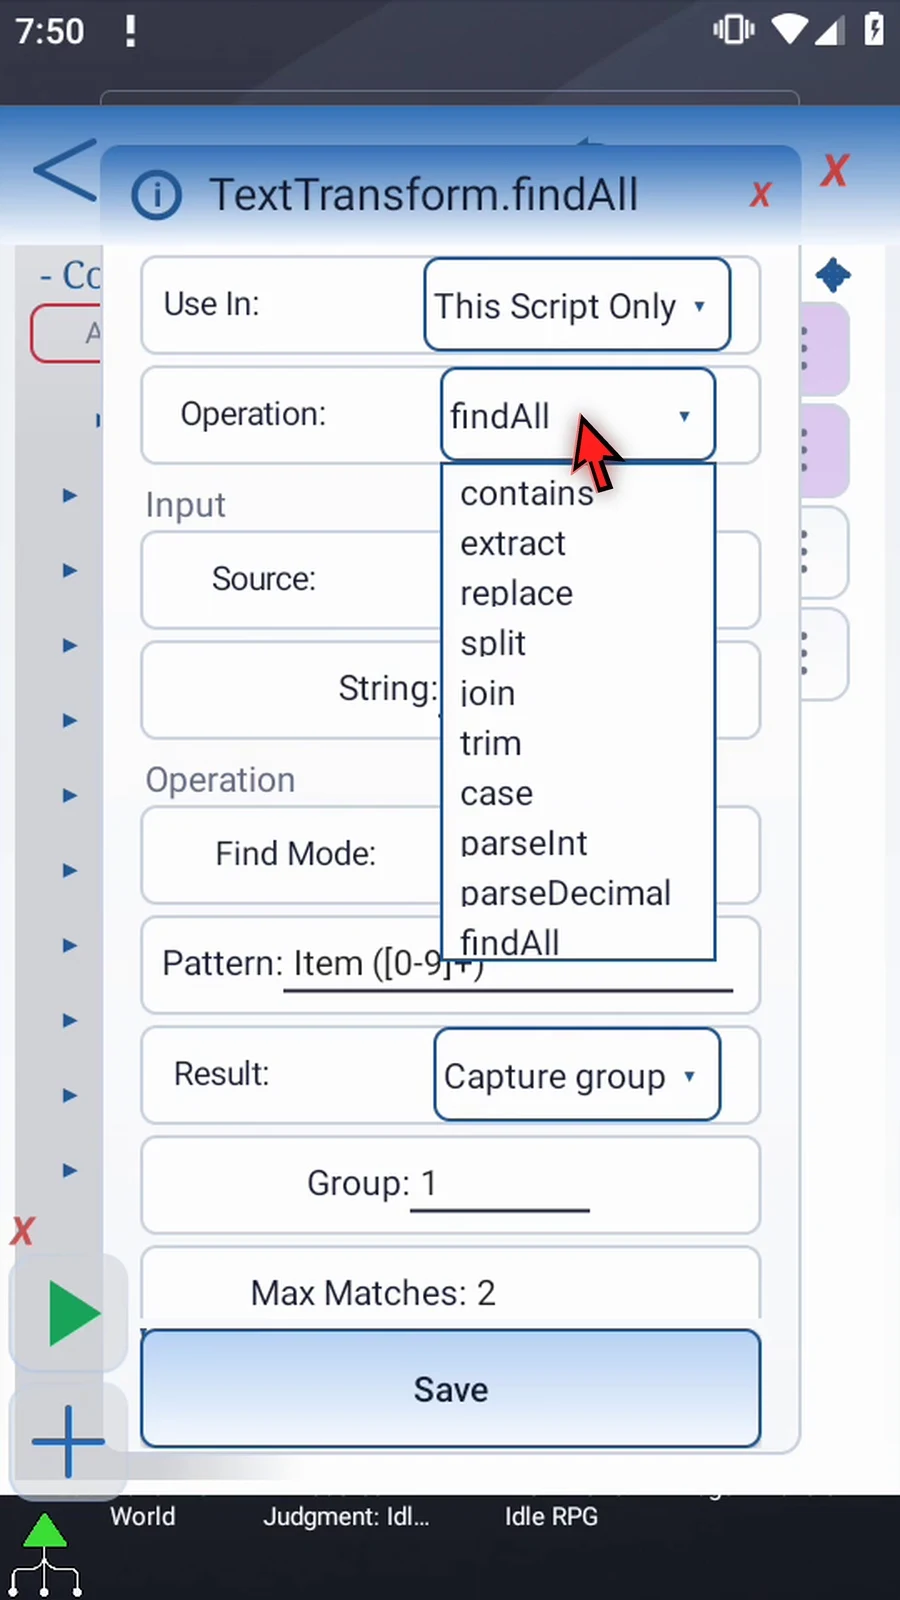
Step 05 Choose Split. Keep String input s1 and This Script Only. Intro explains the shared input and result controls.
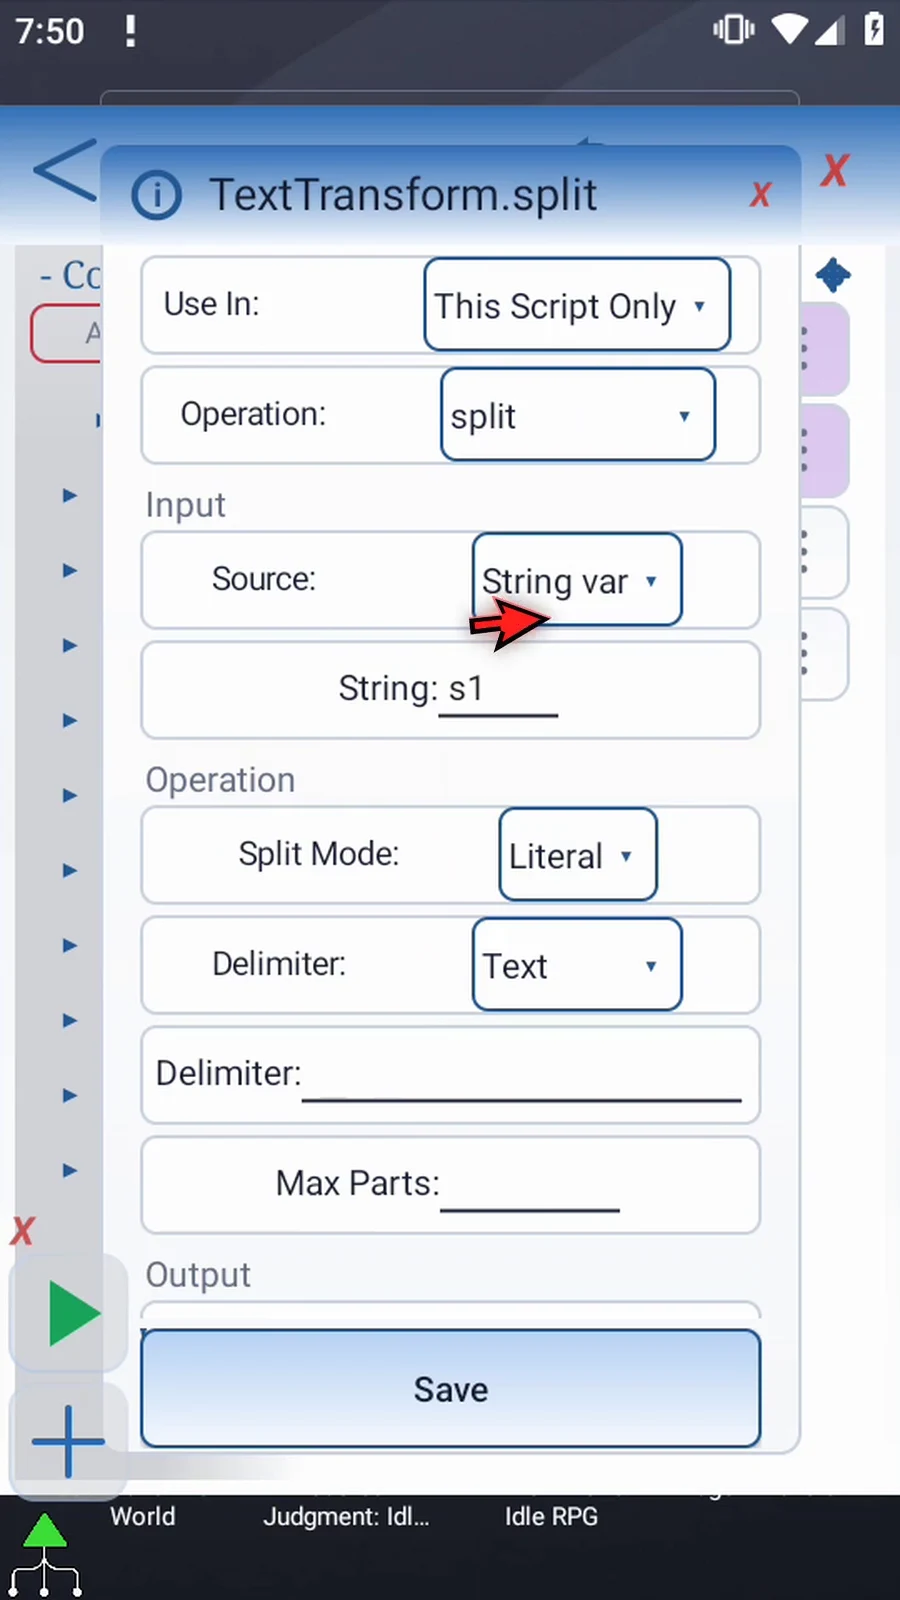
Step 06 Open Split Mode. Literal treats the delimiter as exact text; Regex uses a pattern. Keep Literal for this example.
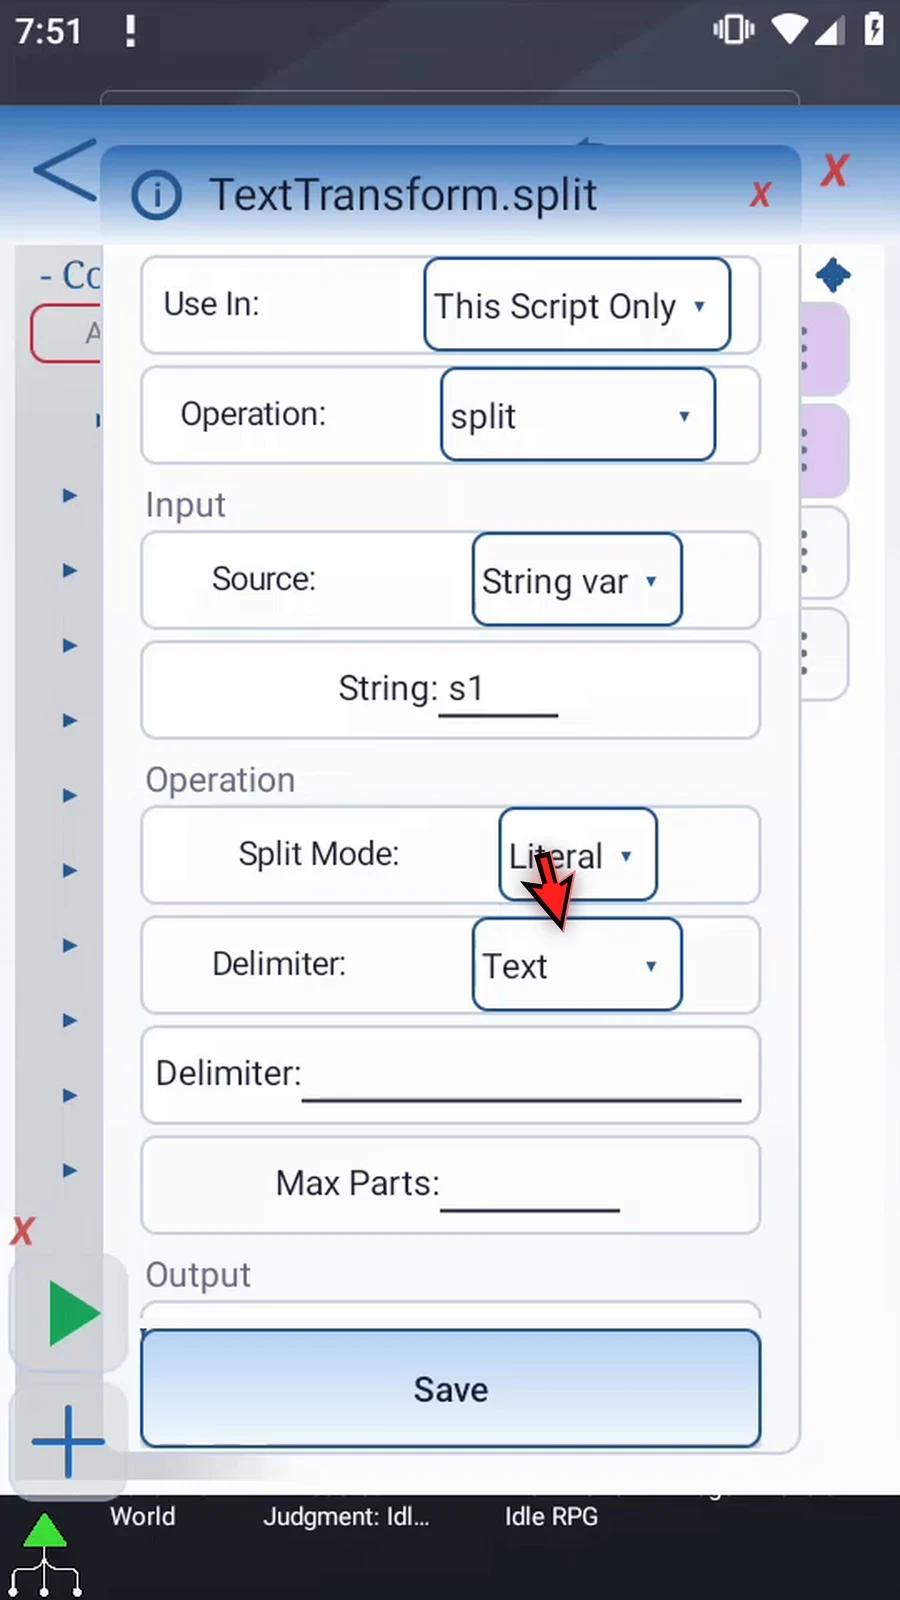
Step 07 Delimiter can be typed Text or an earlier String variable. We will use Text.
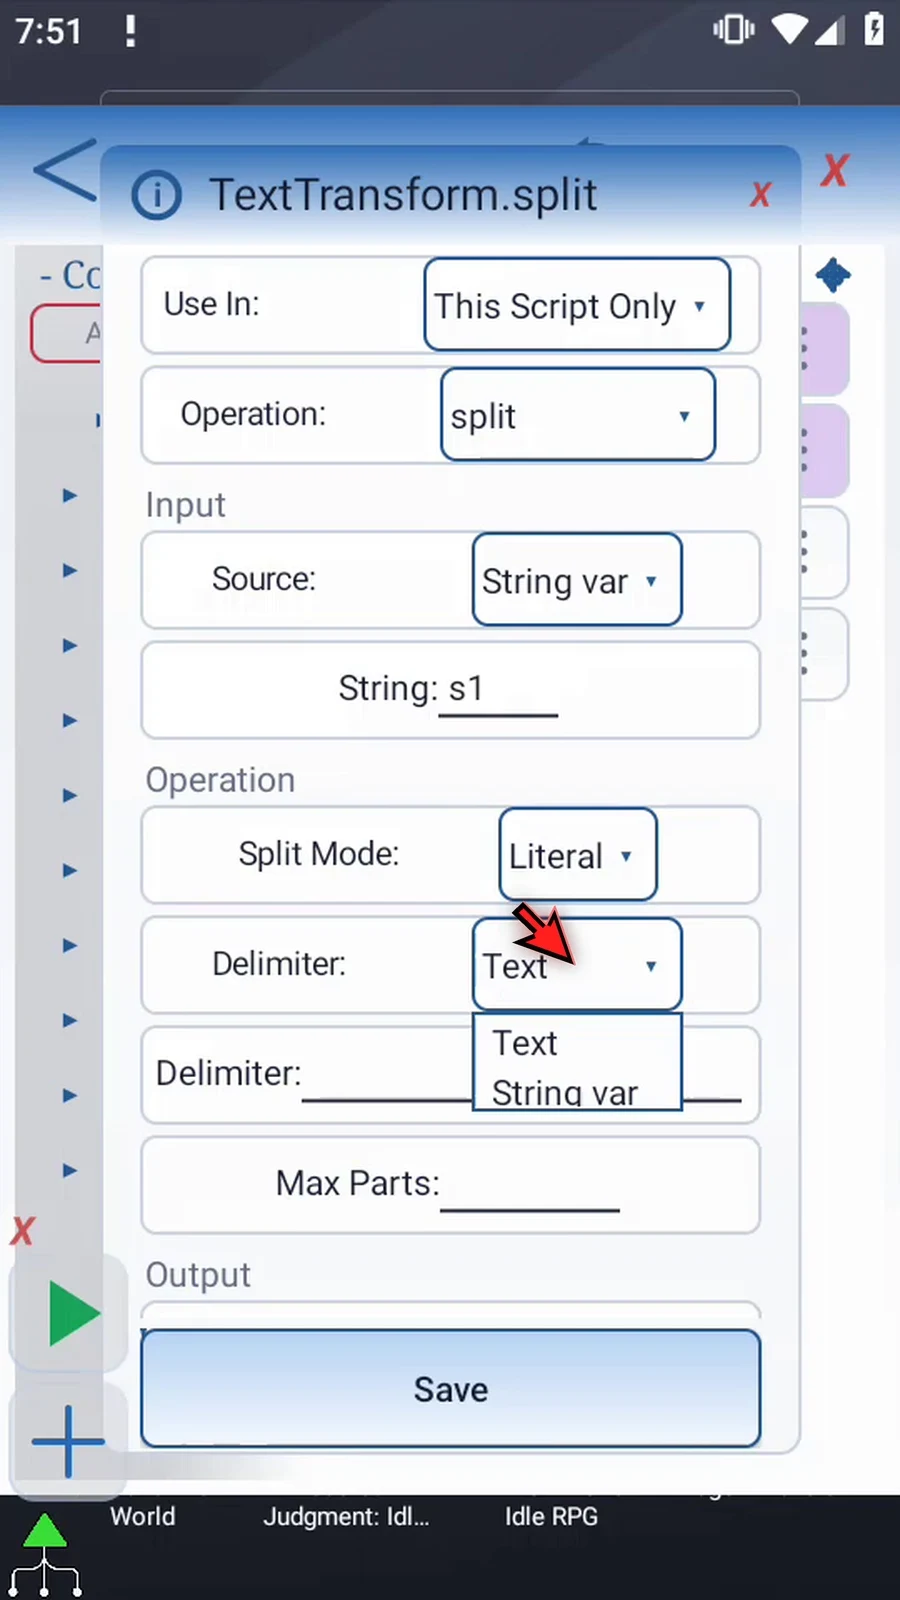
Step 08 Enter one comma. Each comma marks a boundary between parts and is removed from that boundary.
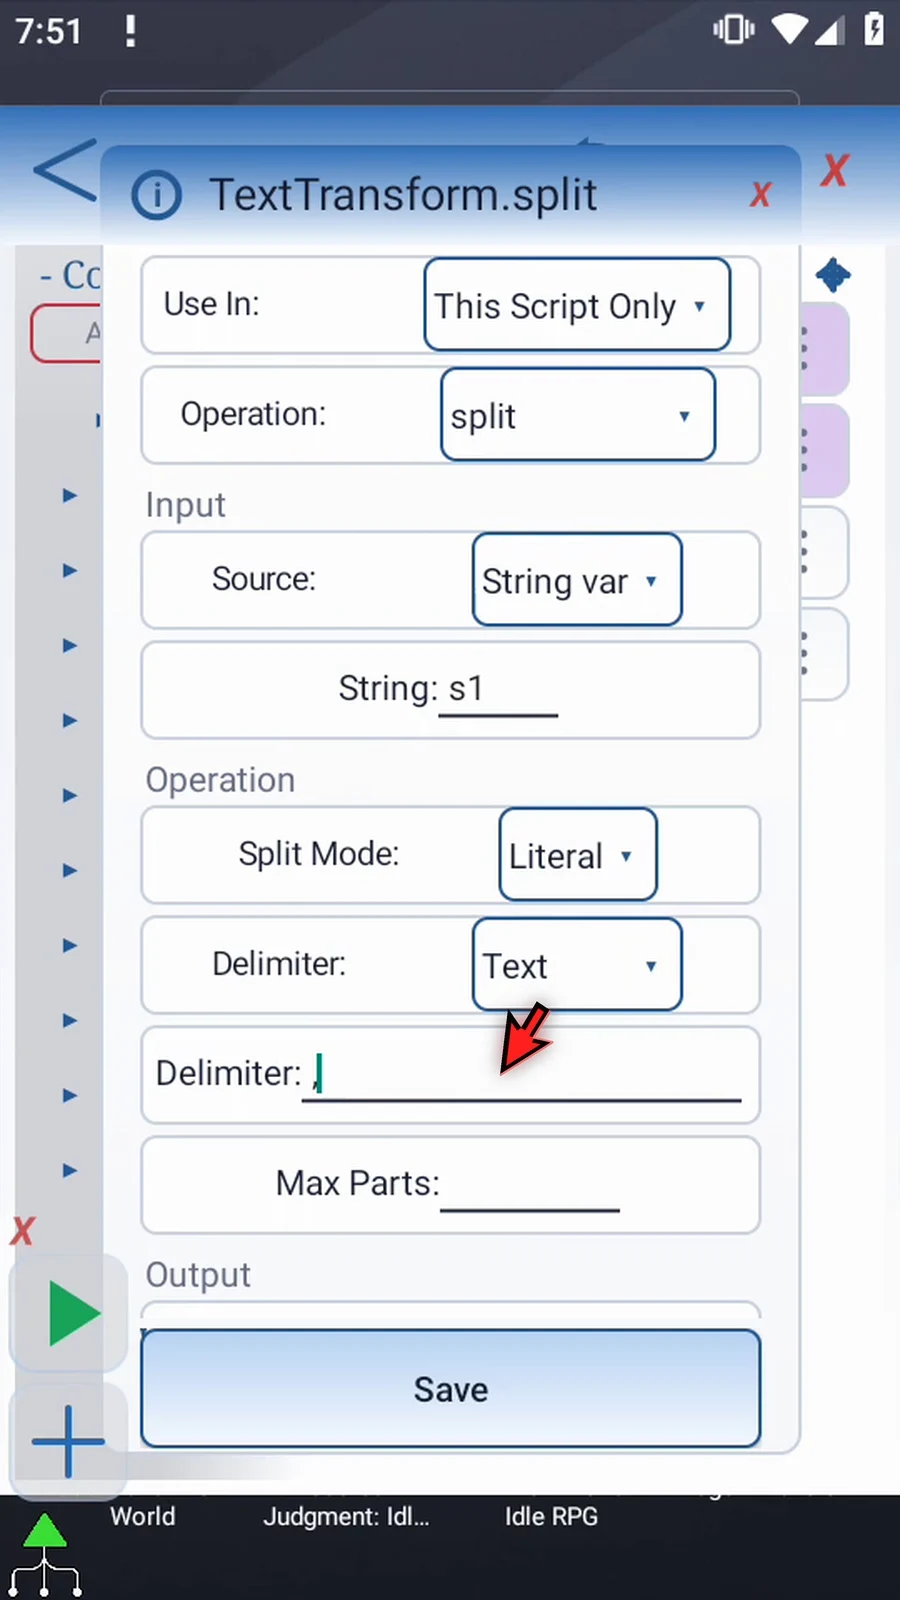
Step 09 Set Max Parts to two. At this limit, the last part keeps the rest of the source text instead of discarding it.
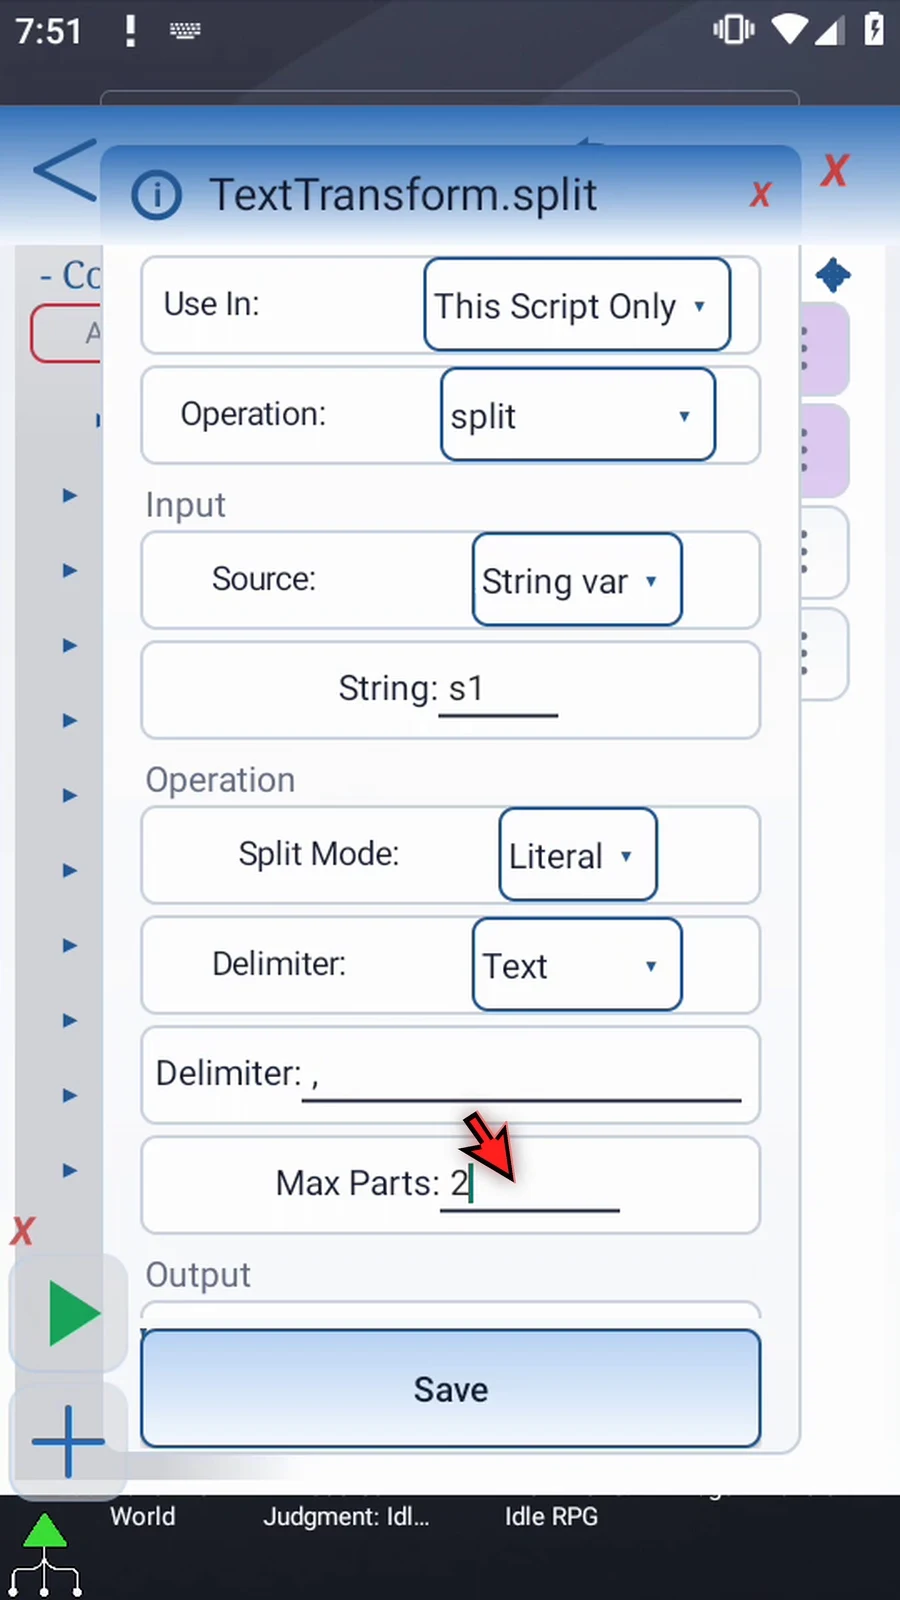
Step 10 Max Parts accepts a positive Integer literal or prior Integer variable, up to four thousand ninety-six. Keep the whole output range within the supported slots.
Step 11 Scroll down. Set Array to s and Start to two. This writes String slots s2 and s3 while preserving the original in s1.
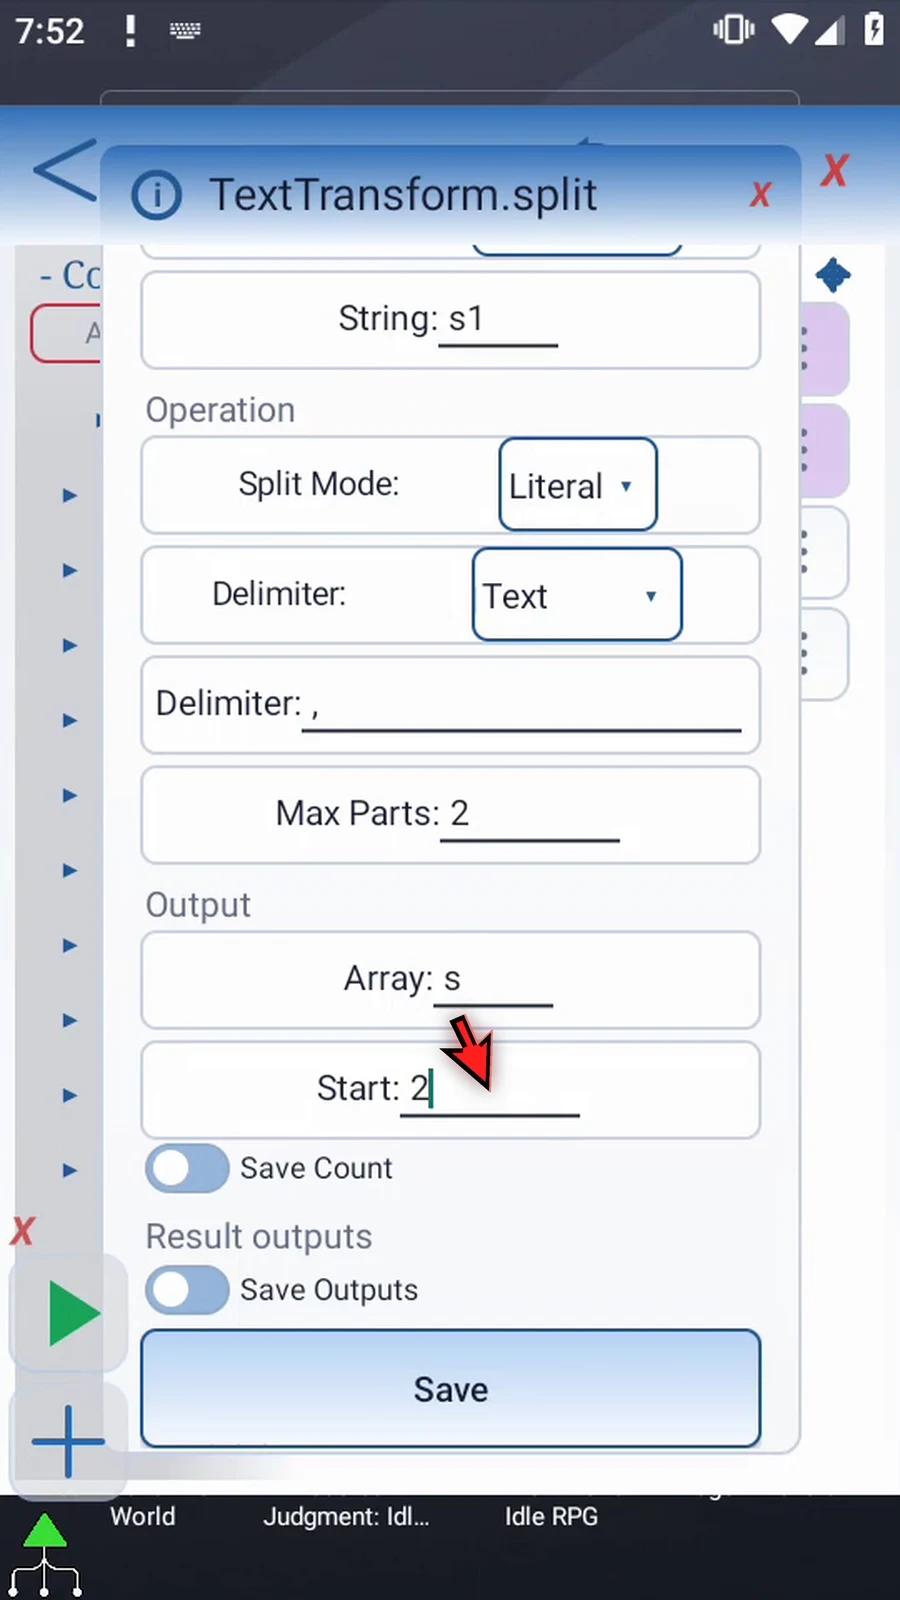
Step 12 Enable Save Count and set i1. It stores how many parts this run produced. Older unused slots are not cleared, so use the count when looping.
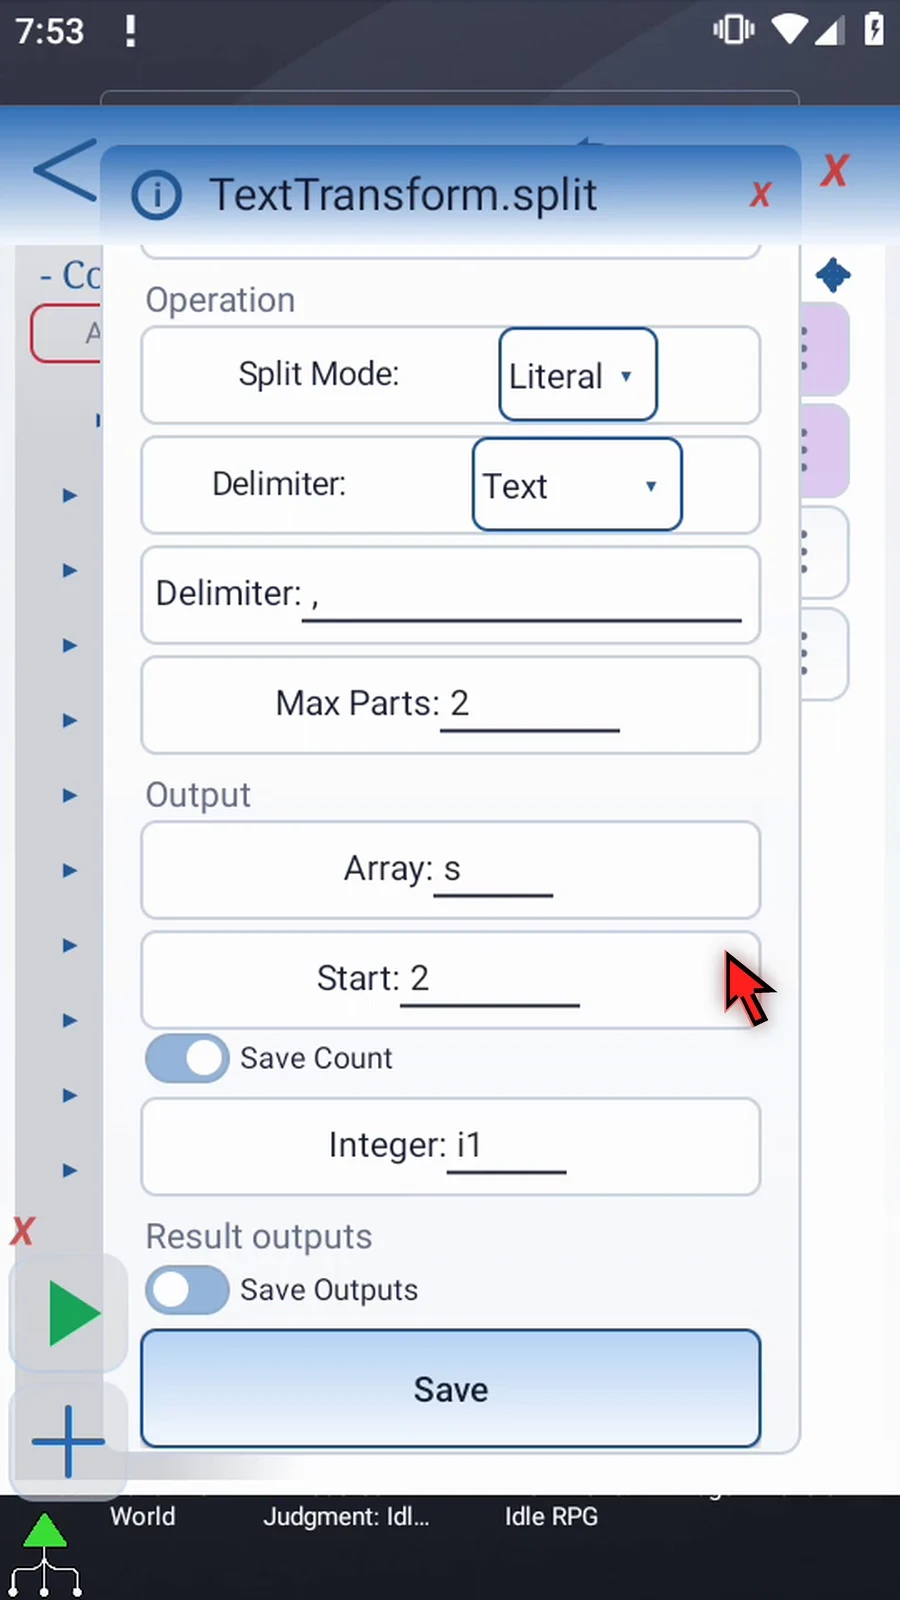
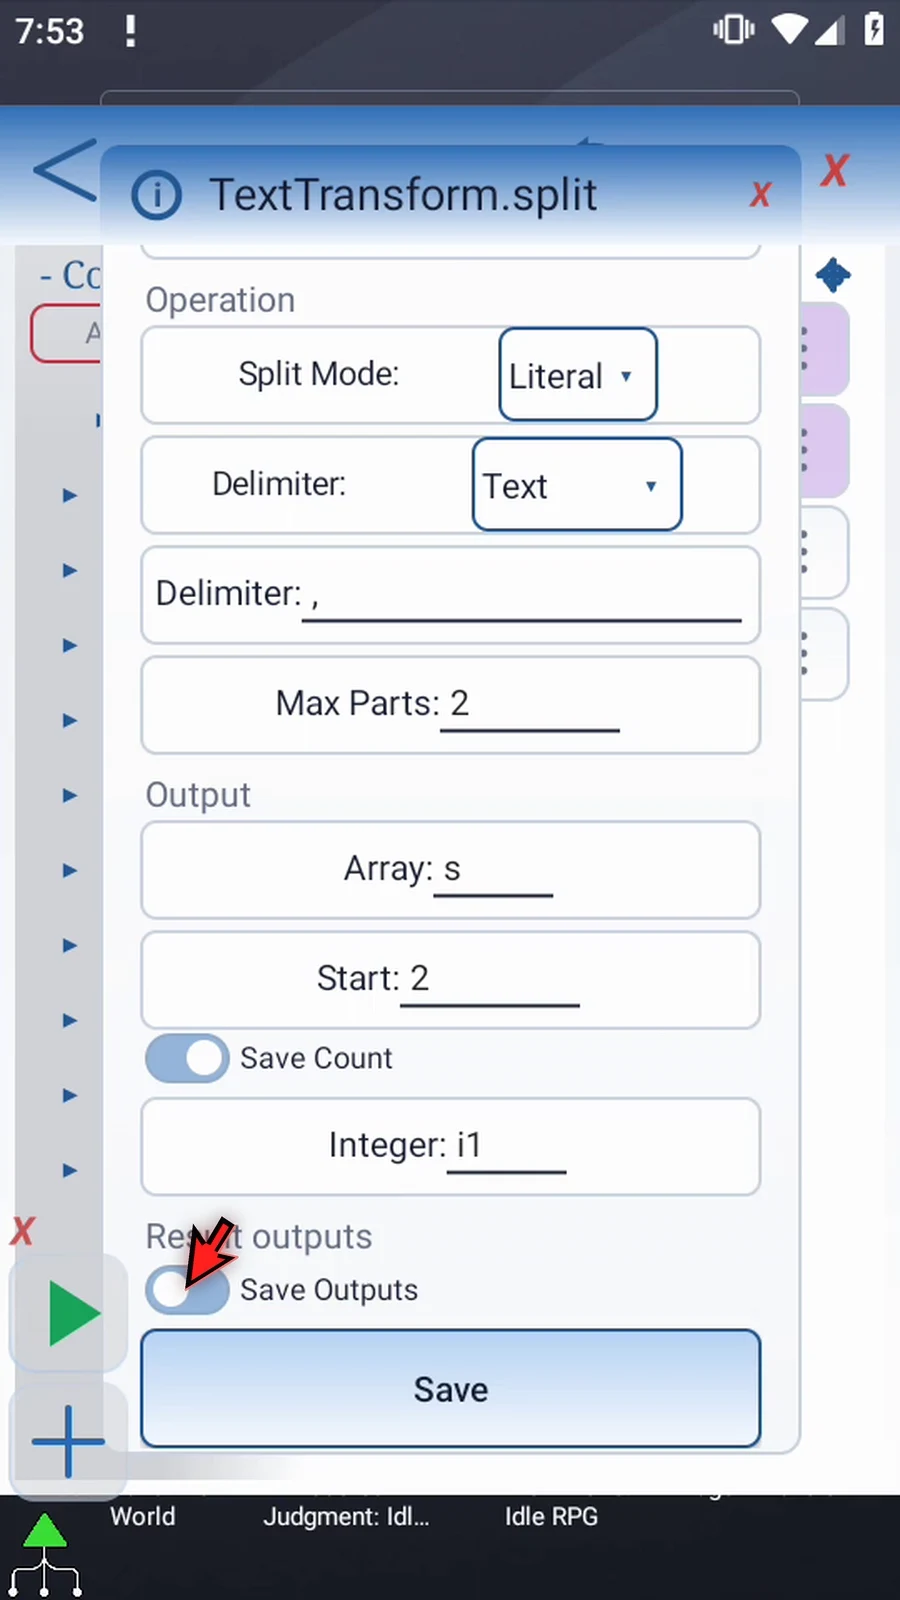
Step 13 Keep Save Outputs off and tap Save. Intro explains the optional Success and Error outputs.
Step 14 Open Display to connect the first part.
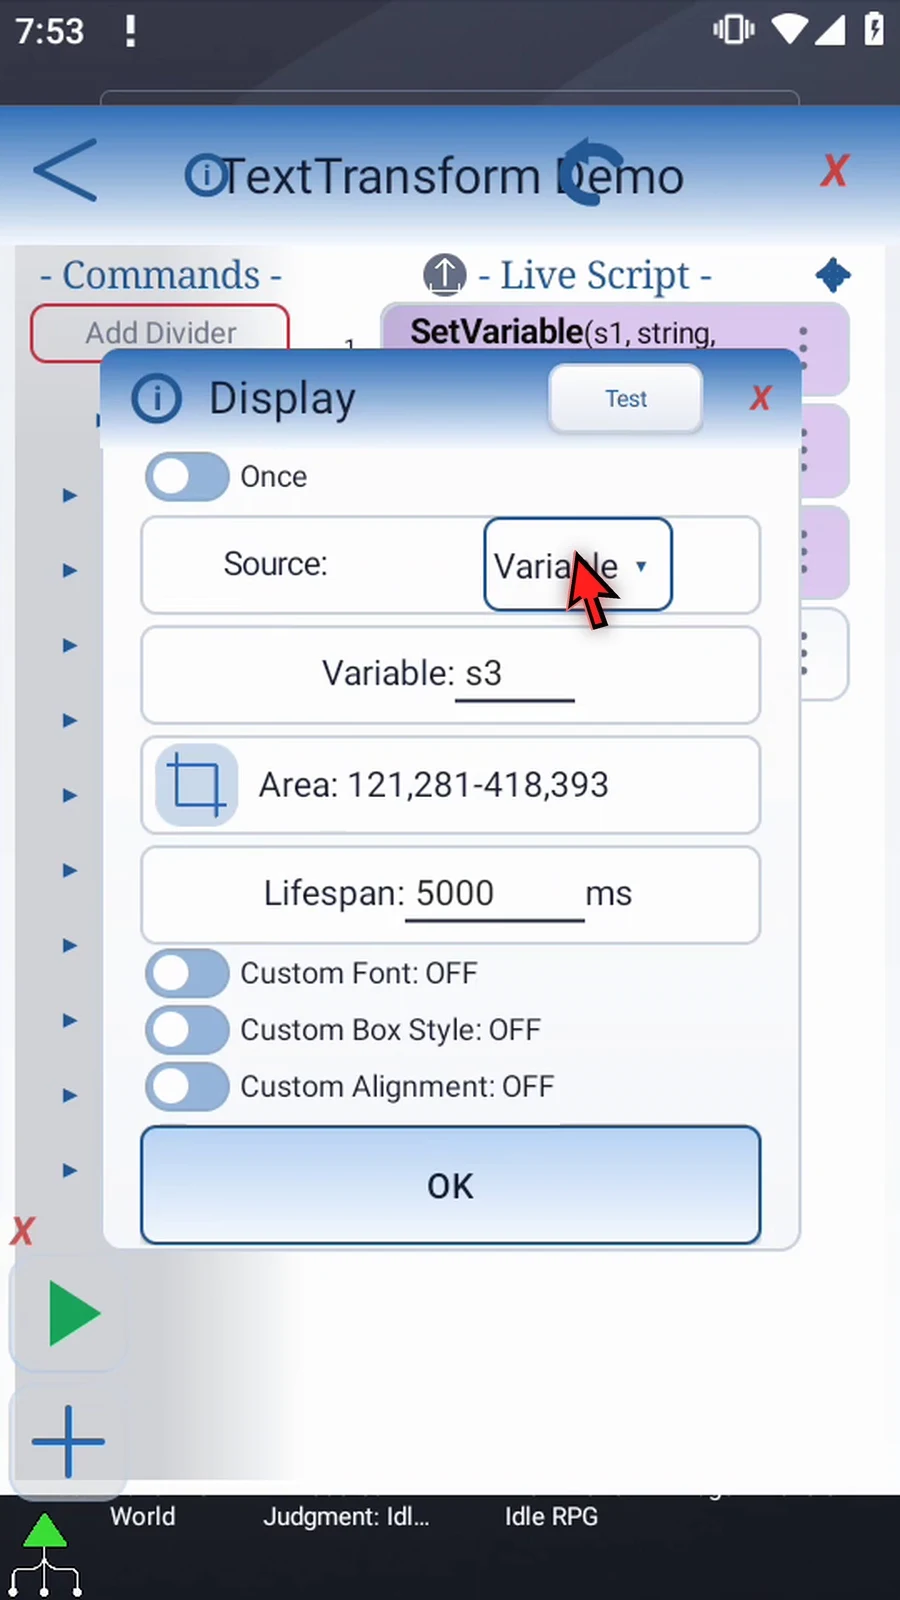
Step 15 Set its Variable to s2. Keep the area and five-second lifespan, then tap OK.
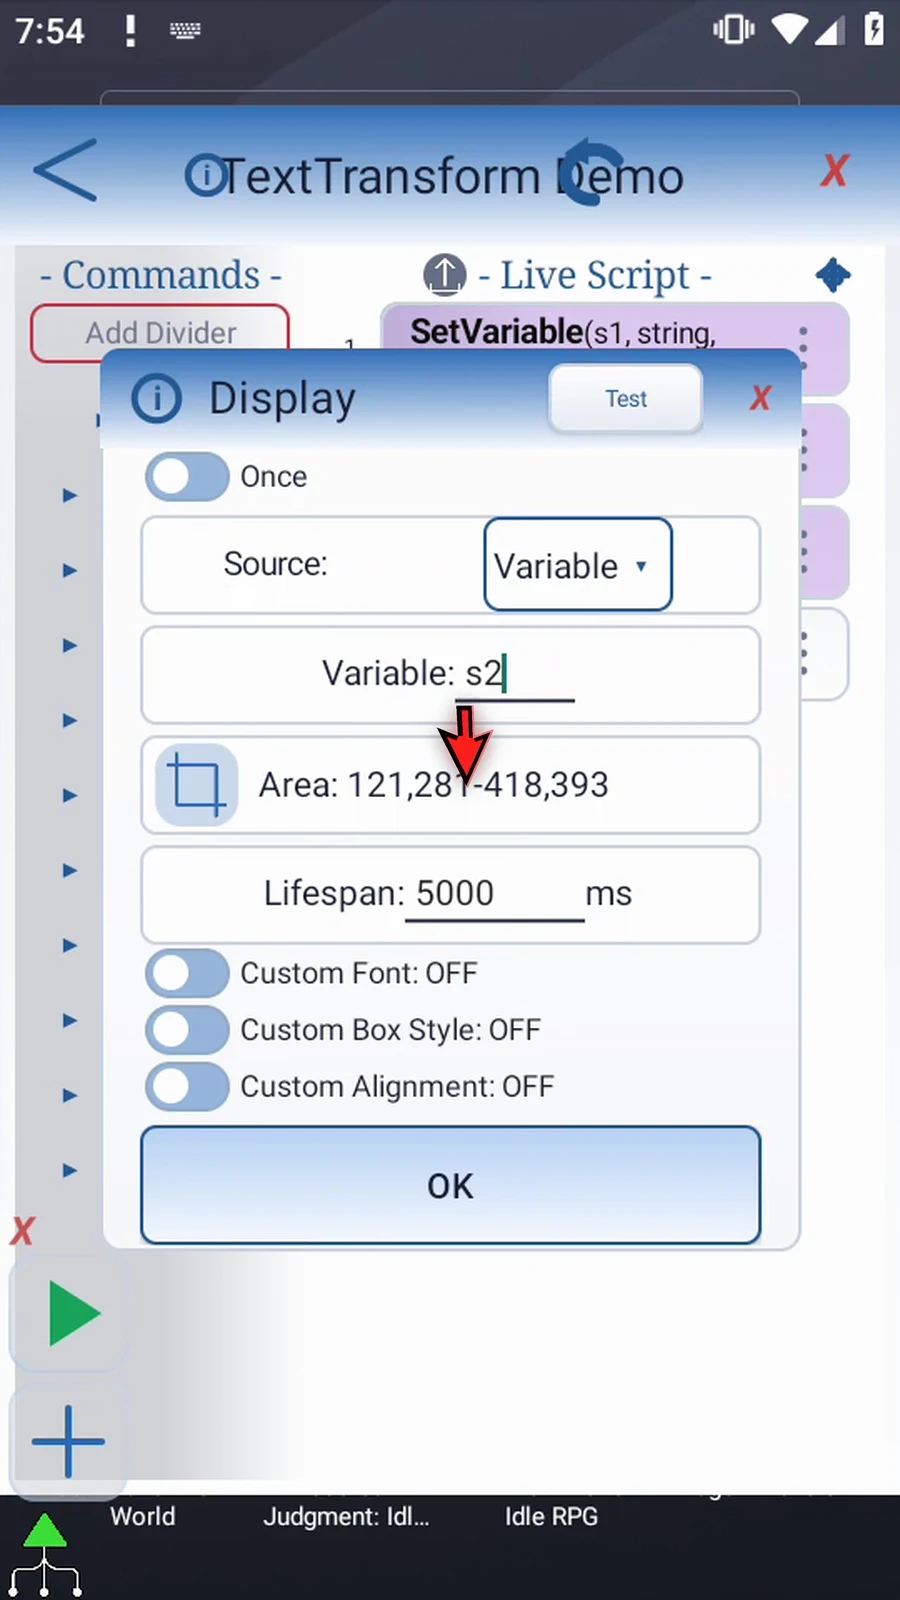
Step 16 Set Variable supplies three colors; Split creates two parts. Display shows the first part, and Prompt Me confirms completion. Close the editor.
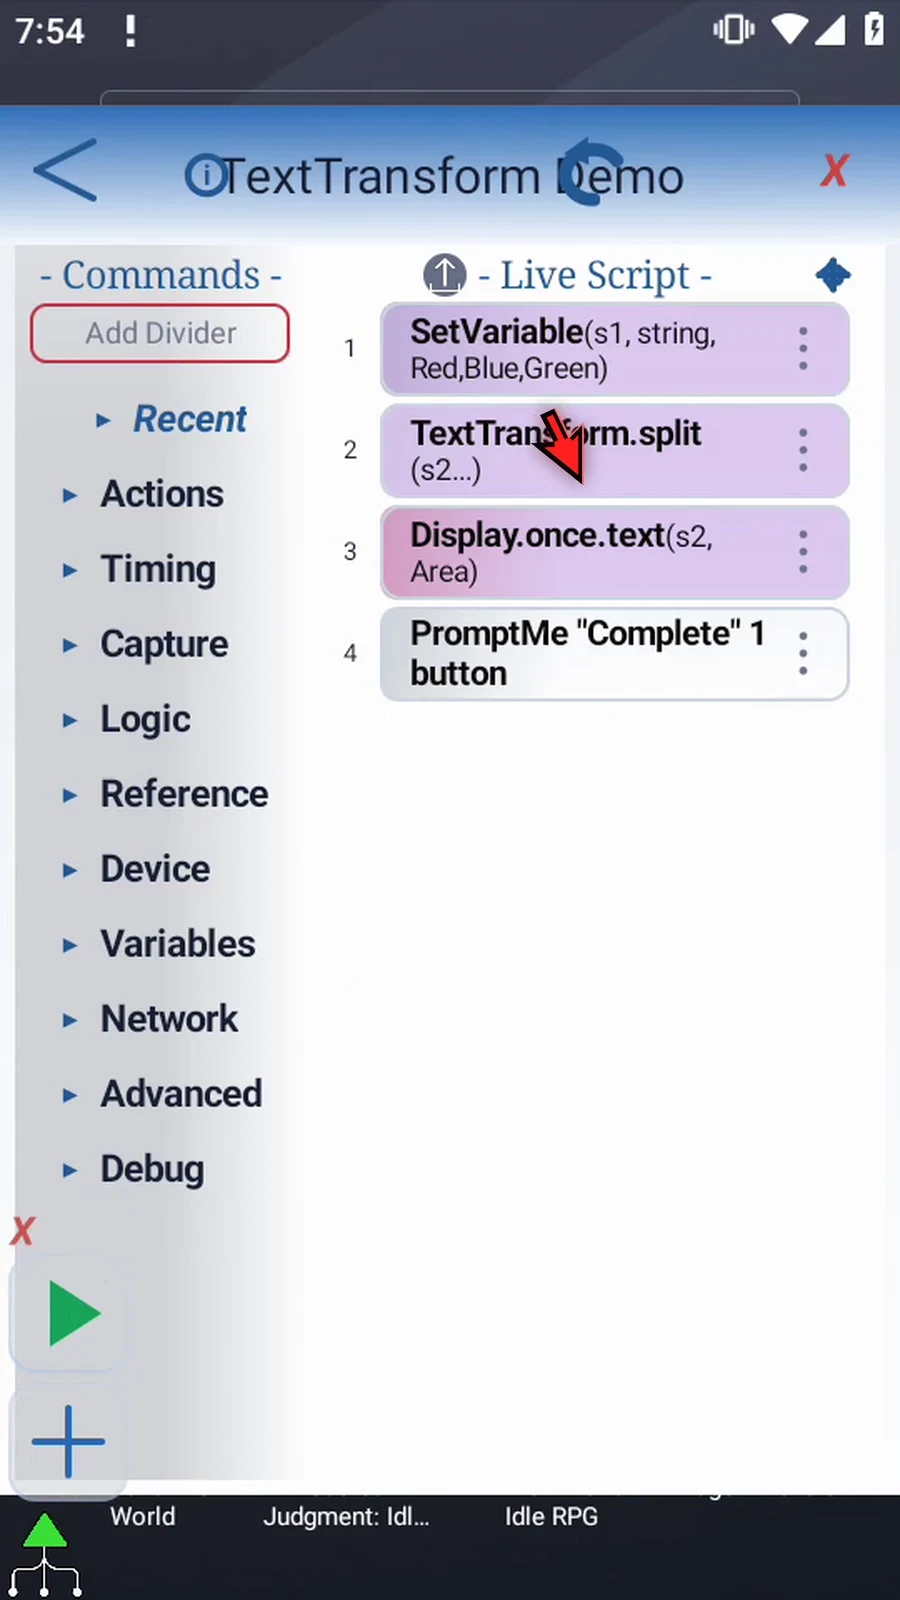
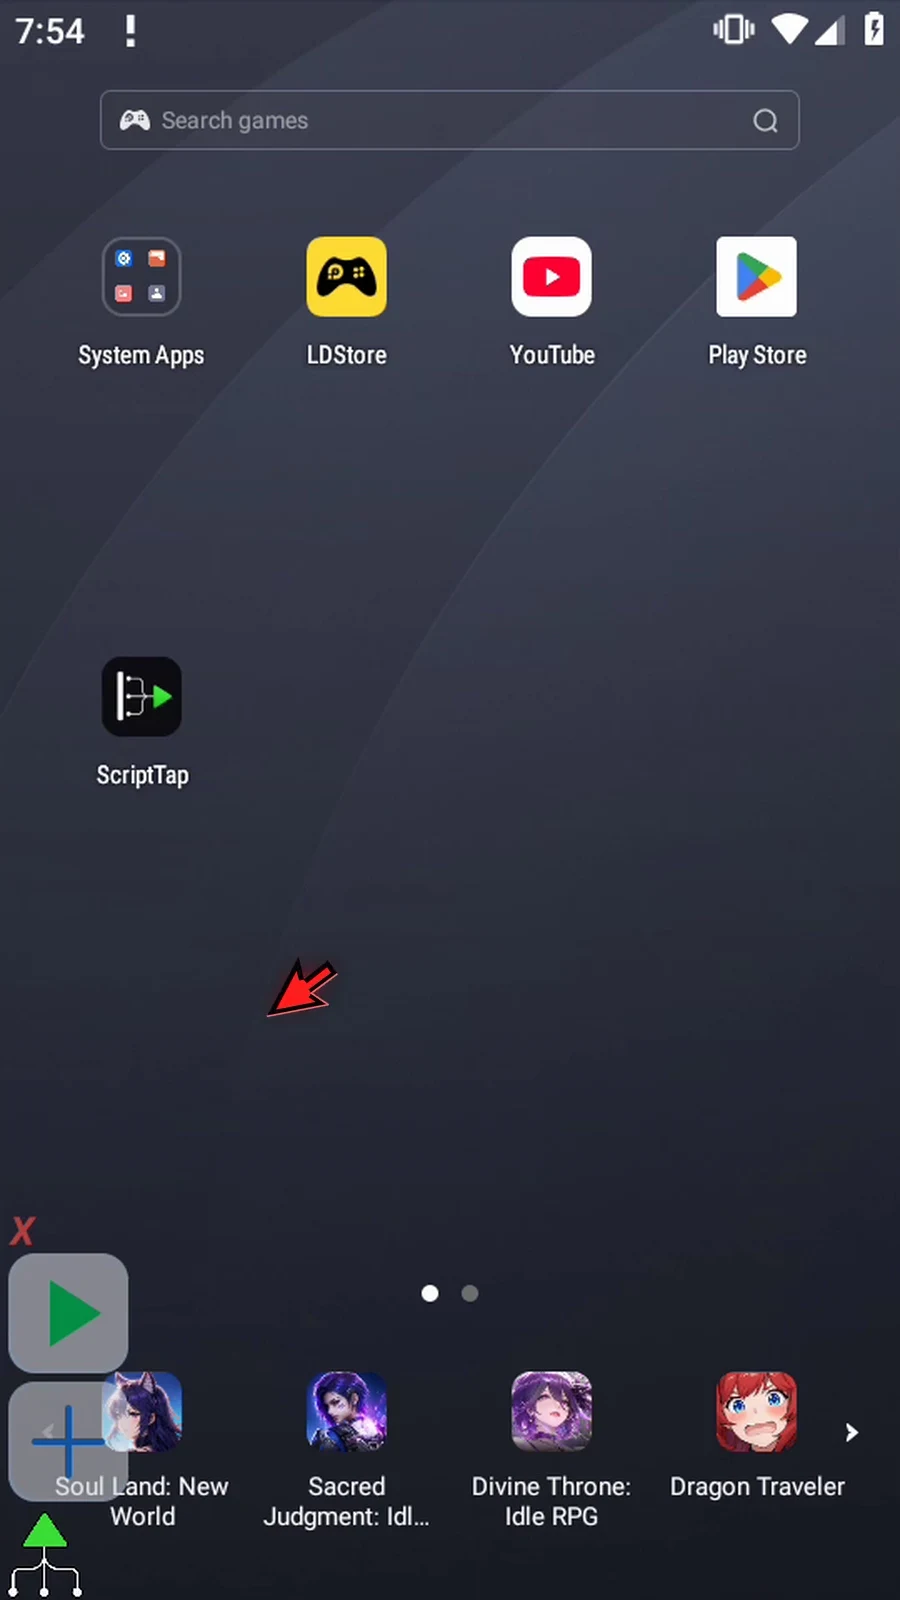
Step 17 When the script is complete, simply use the Play button in the main overlay.
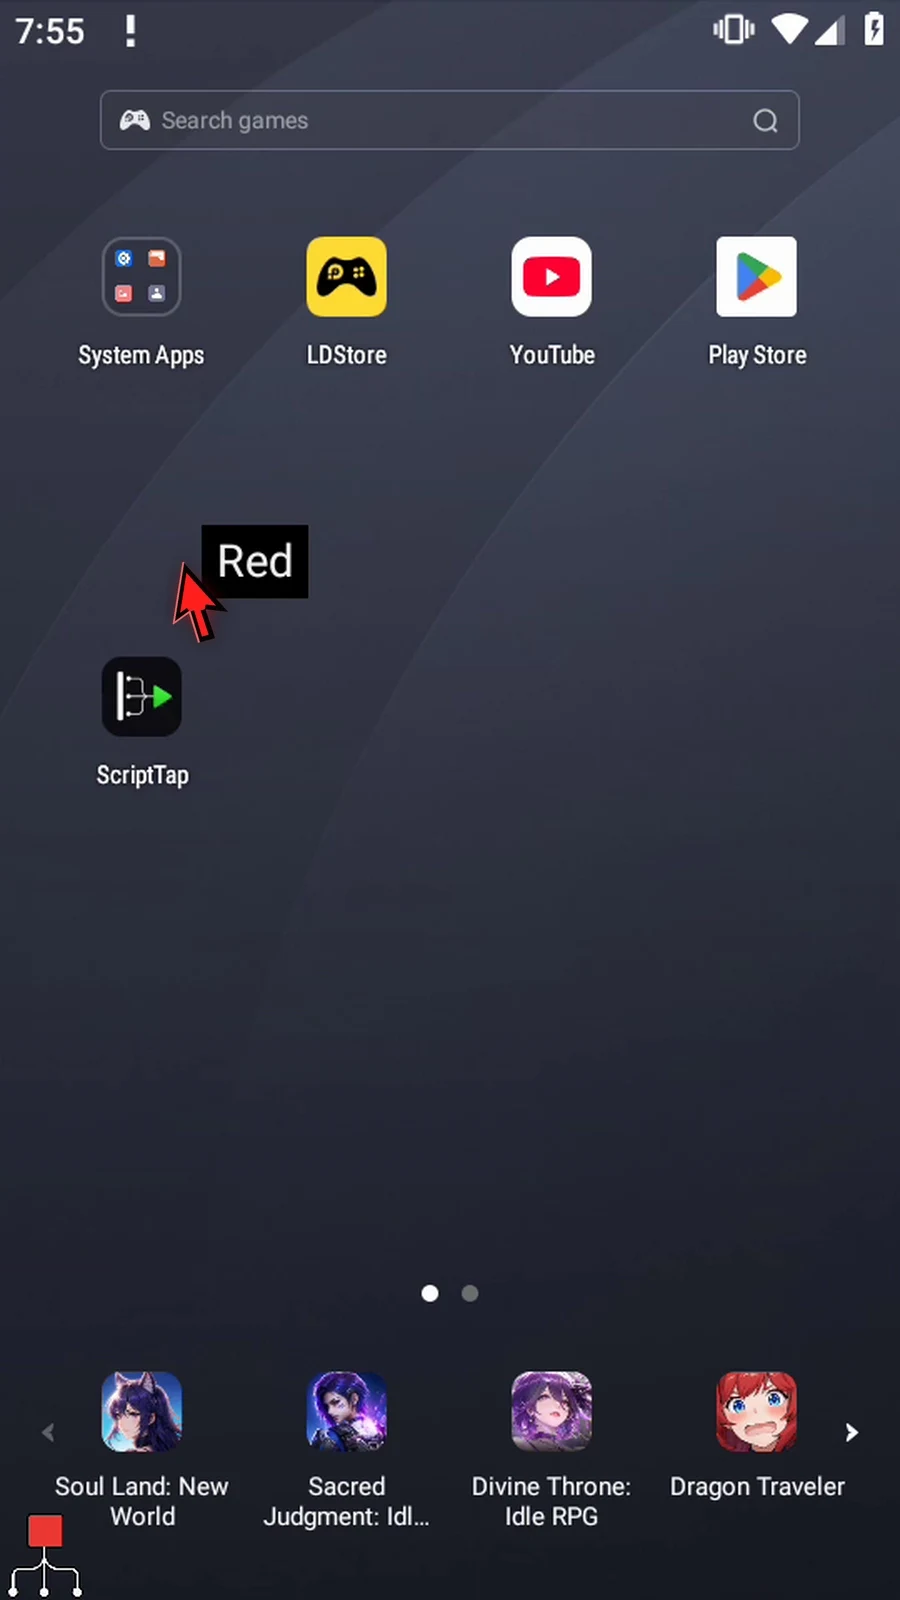
Step 18 Red is the first part, stored in s2.
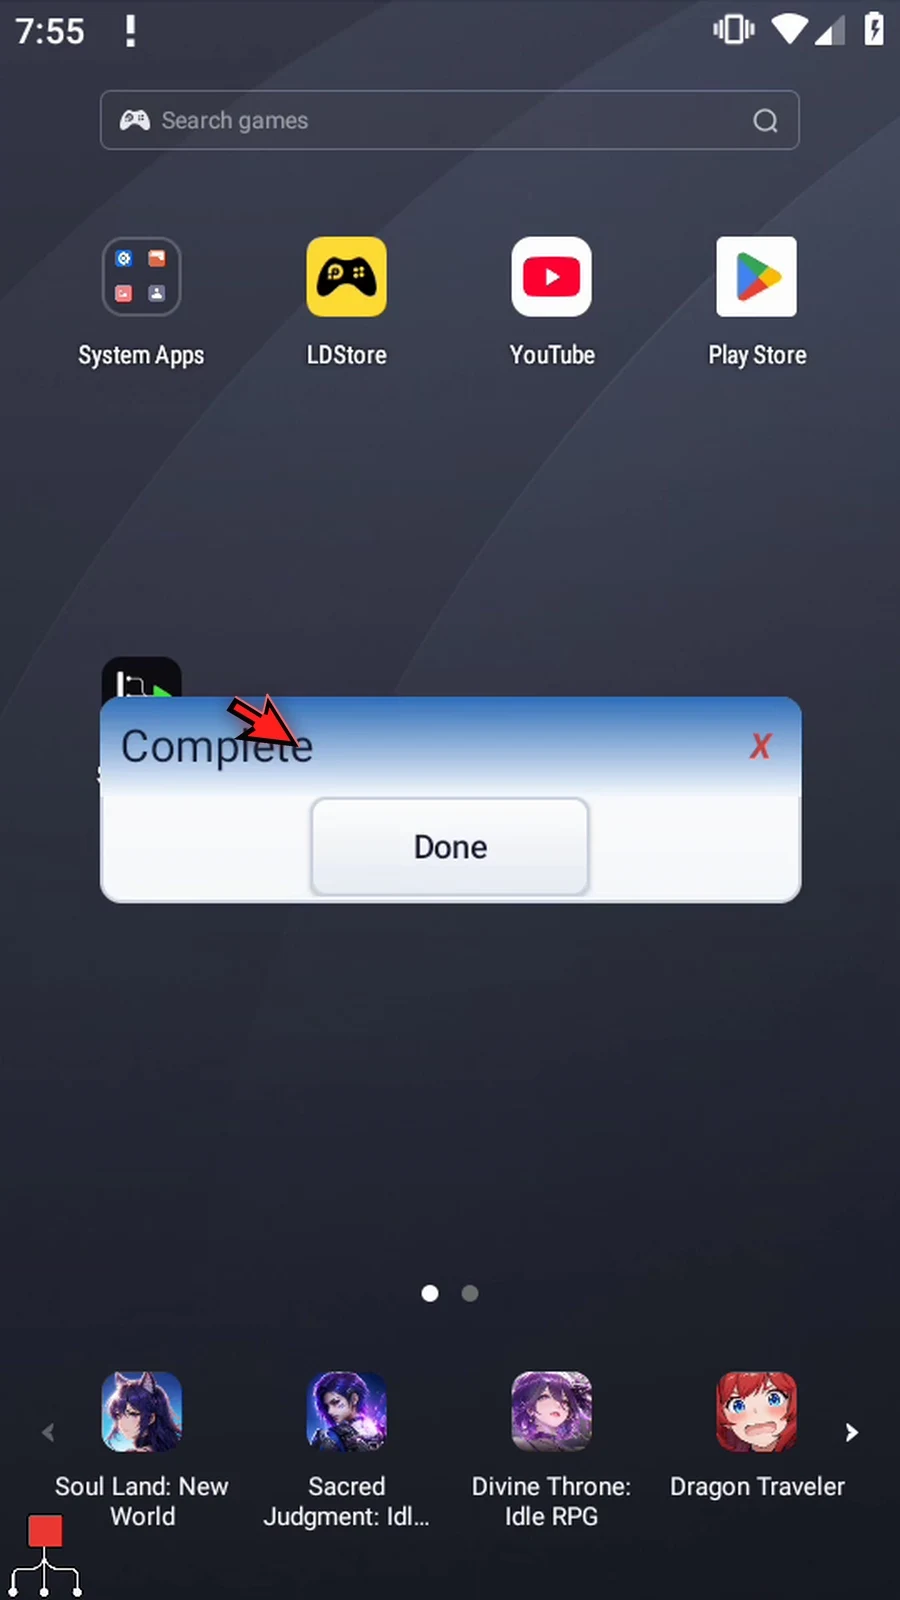
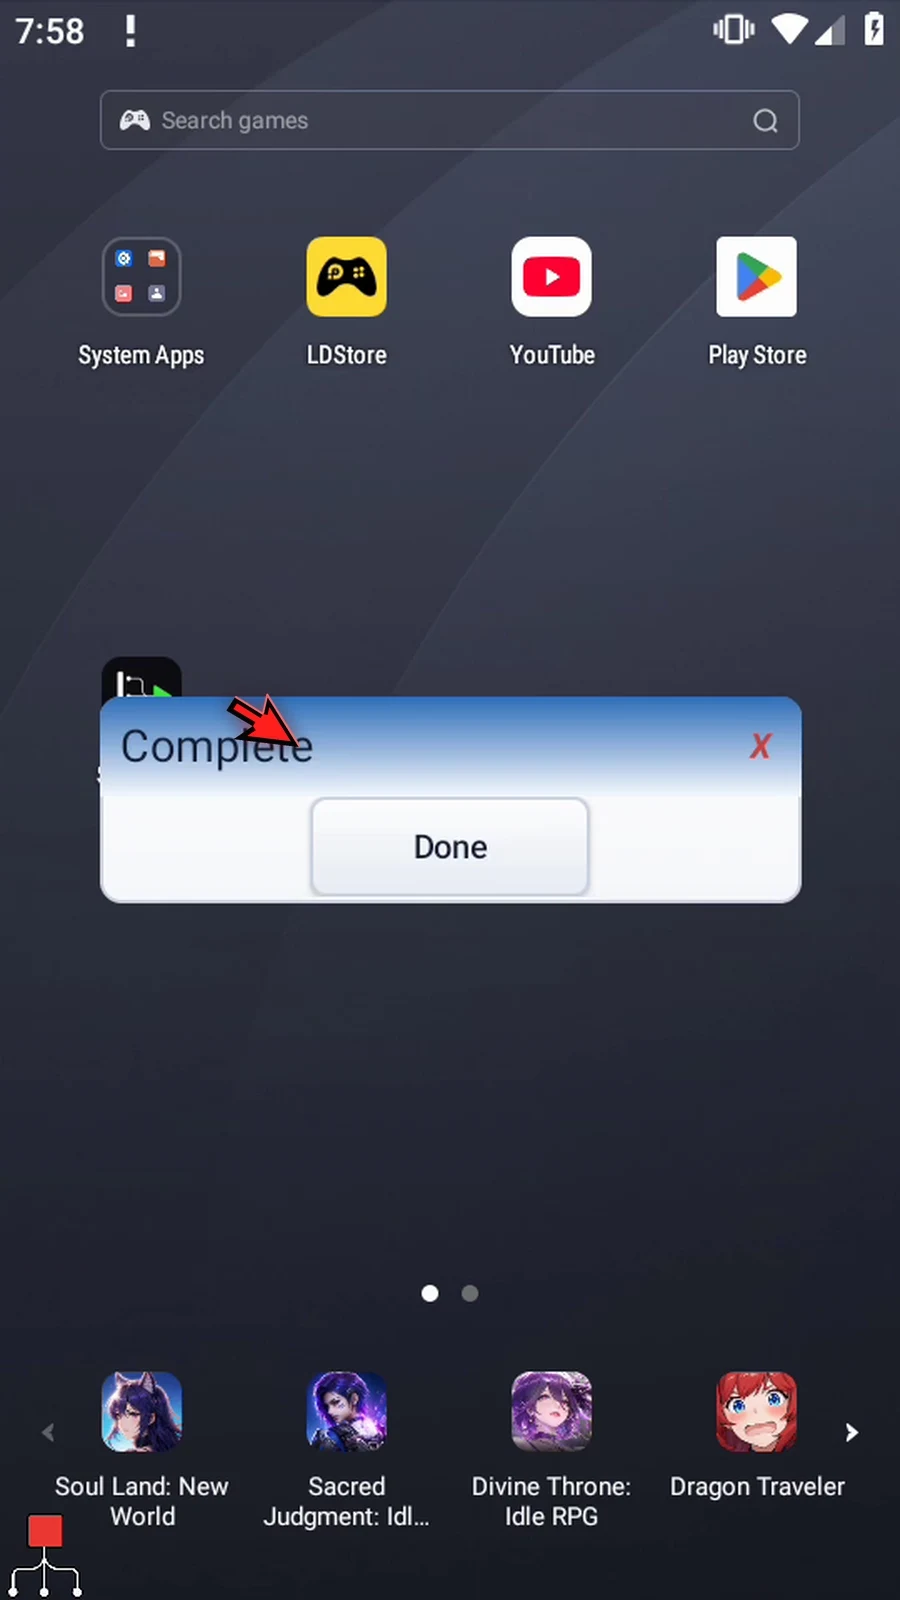
Step 19 Complete confirms that the script reached its final command.
Step 20 Press Done to finish. Next, inspect the remainder.
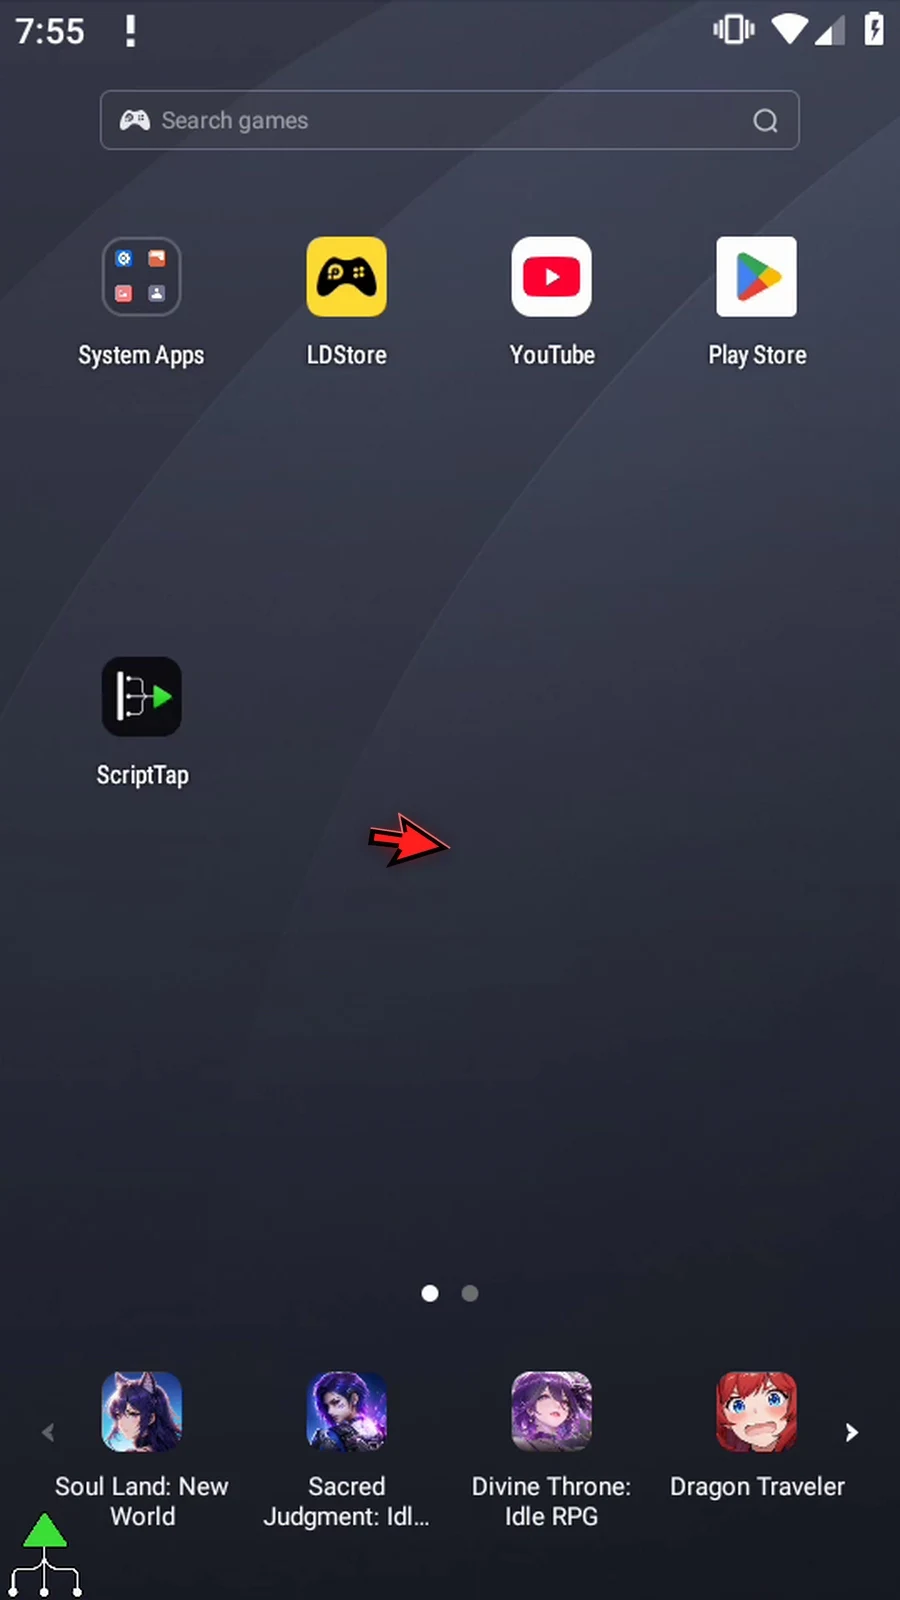
Step 21 Open the editor again to display the second part.
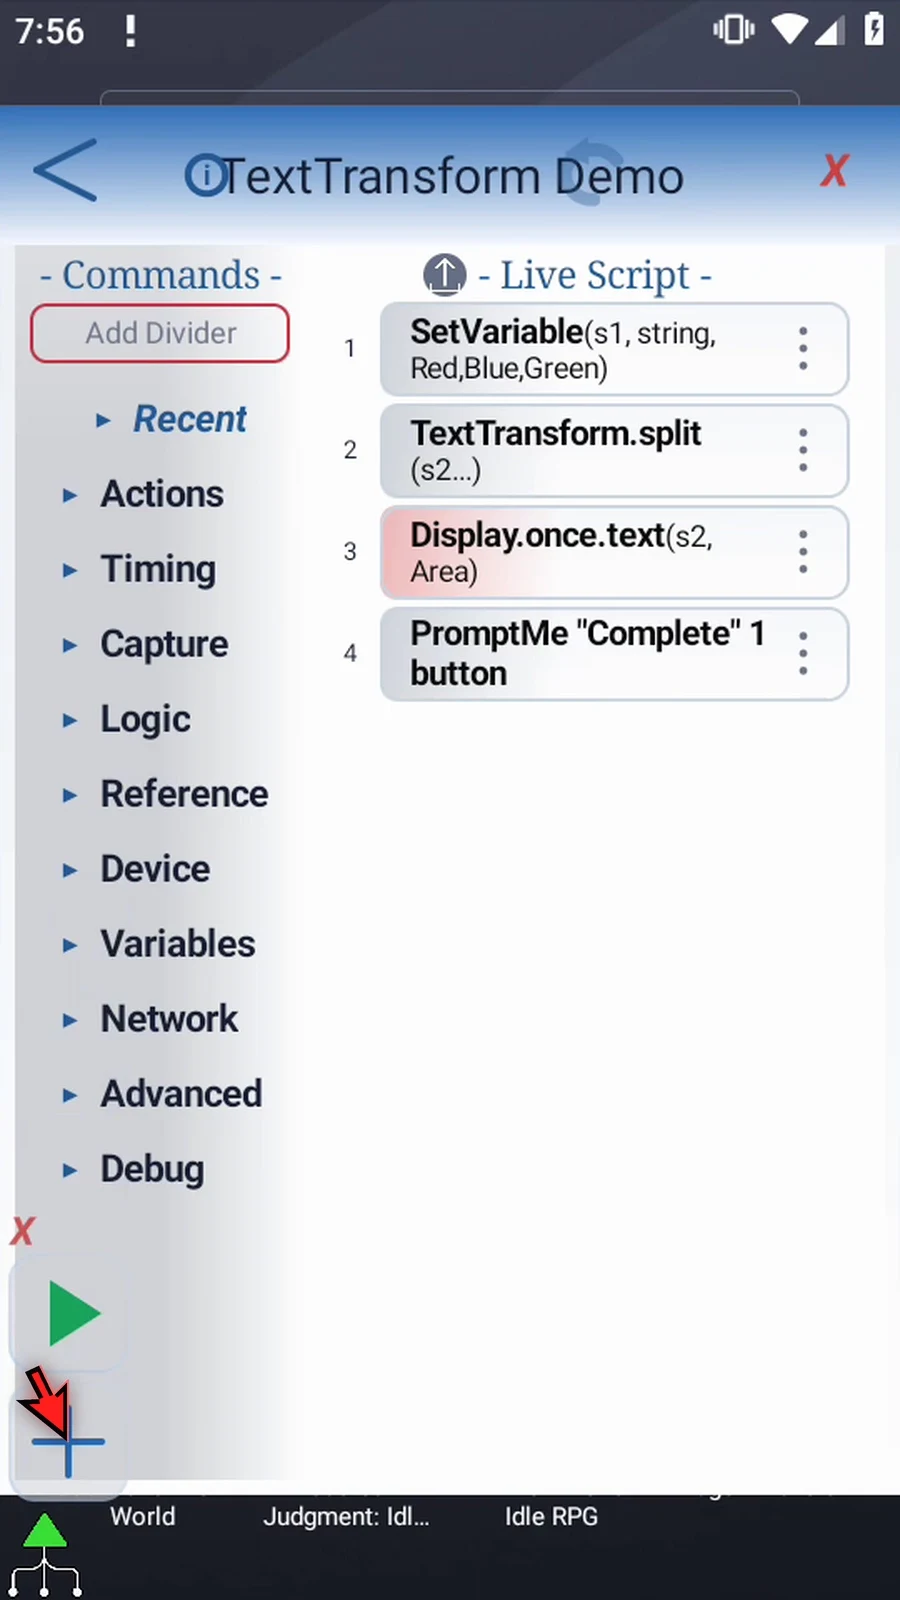
Step 22 Open Display, change only its Variable to s3, and tap OK.
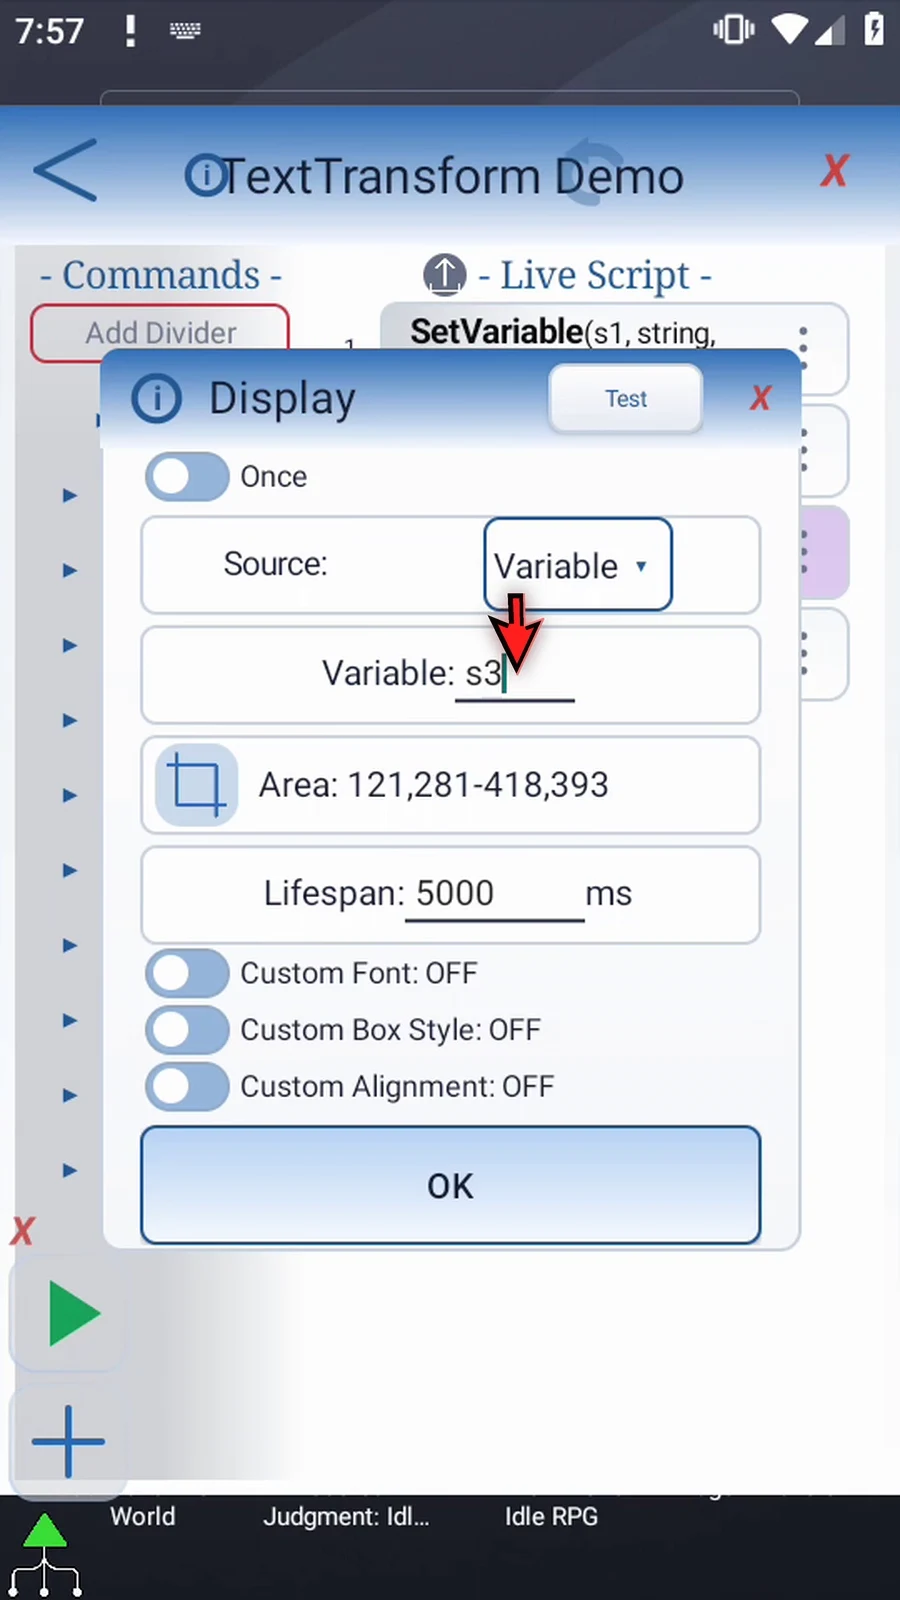
Step 23 Split still has Max Parts set to two. Only the displayed slot changed. Close the editor.
Step 24 When the script is complete, simply use the Play button in the main overlay.
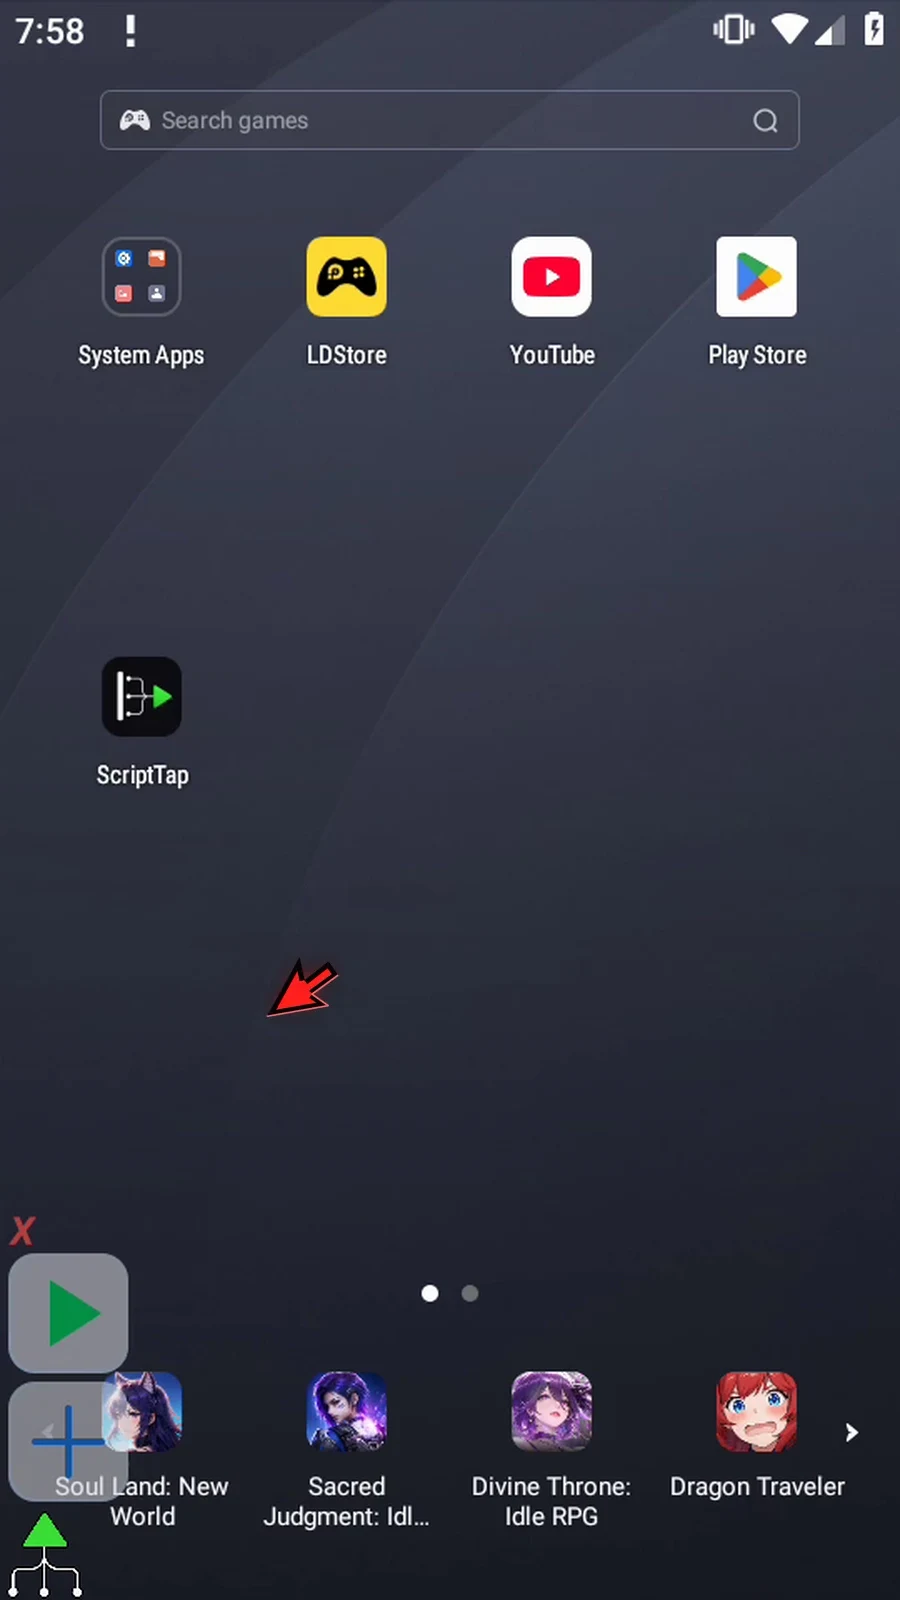
Step 25 The last part keeps Blue and Green together.
Step 26 Both parts were produced without changing the original String.
Step 27 Press Done. The script finishes automatically. To get three separate colors, raise Max Parts to at least three.
Split / Regex separates one String wherever a regular-expression pattern matches. This follow-up uses the four-command script from Split / Literal and handles a list containing two different separator characters.
Normally change String s1 to Red,Blue;Green: comma after Red, semicolon after Blue. Keep This Script Only. Open the existing Split command and change Split Mode → Regex; the source remains String var s1.
Keep Delimiter source Text and normally enter [,;]. The square brackets mean either a comma or a semicolon. Each matching separator marks a split boundary and is removed there. A prior String variable can also supply a delimiter pattern. A regex must be valid; Literal should be used when the delimiter is fixed text rather than a pattern.
Set Max Parts → 3. The colors are stored separately in s2, s3, and s4. With a smaller maximum, the last part retains the rest of the input, as demonstrated in the Literal video. Positive Integer literals or prior Integer variables can supply Max Parts and Start; keep values and the entire output range within 1..4096.
Scroll down and keep Array s, Start 2, and Save Count i1. SetVariable already provides the String family, and starting at two preserves the original s1. Use this run's saved count for later loops because older unused slots are not cleared. Leave optional Save Outputs OFF and Save; Intro explains Success and Error outputs.
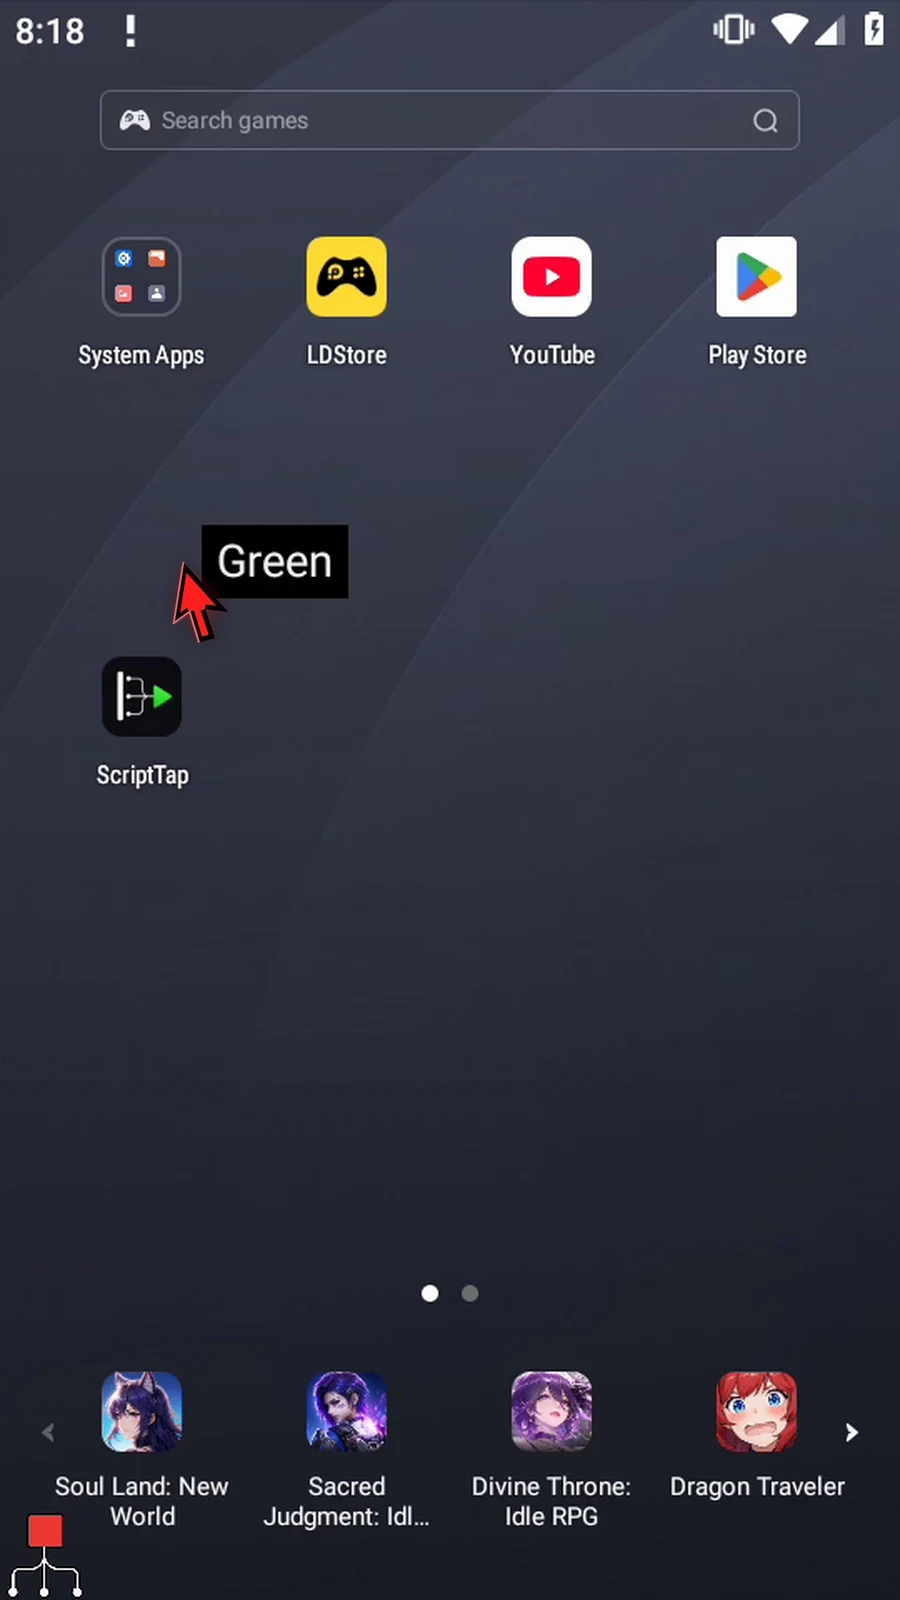
Change only Display's Variable to s4, keeping the same area, default appearance, and 5000 ms lifespan. Complete/Done PromptMe is unchanged. Actual Play displays Green, the third part. The four-command run completed with zero warnings/errors, i1=3, and unchanged source s1. The full timed display and natural completion transition are retained. Press Done to finish automatically.
Split / Regex
Step-by-step guide
Step 01 Split Regex separates text wherever a pattern matches. We will handle a list that uses both commas and semicolons, continuing with the script from Split Literal.
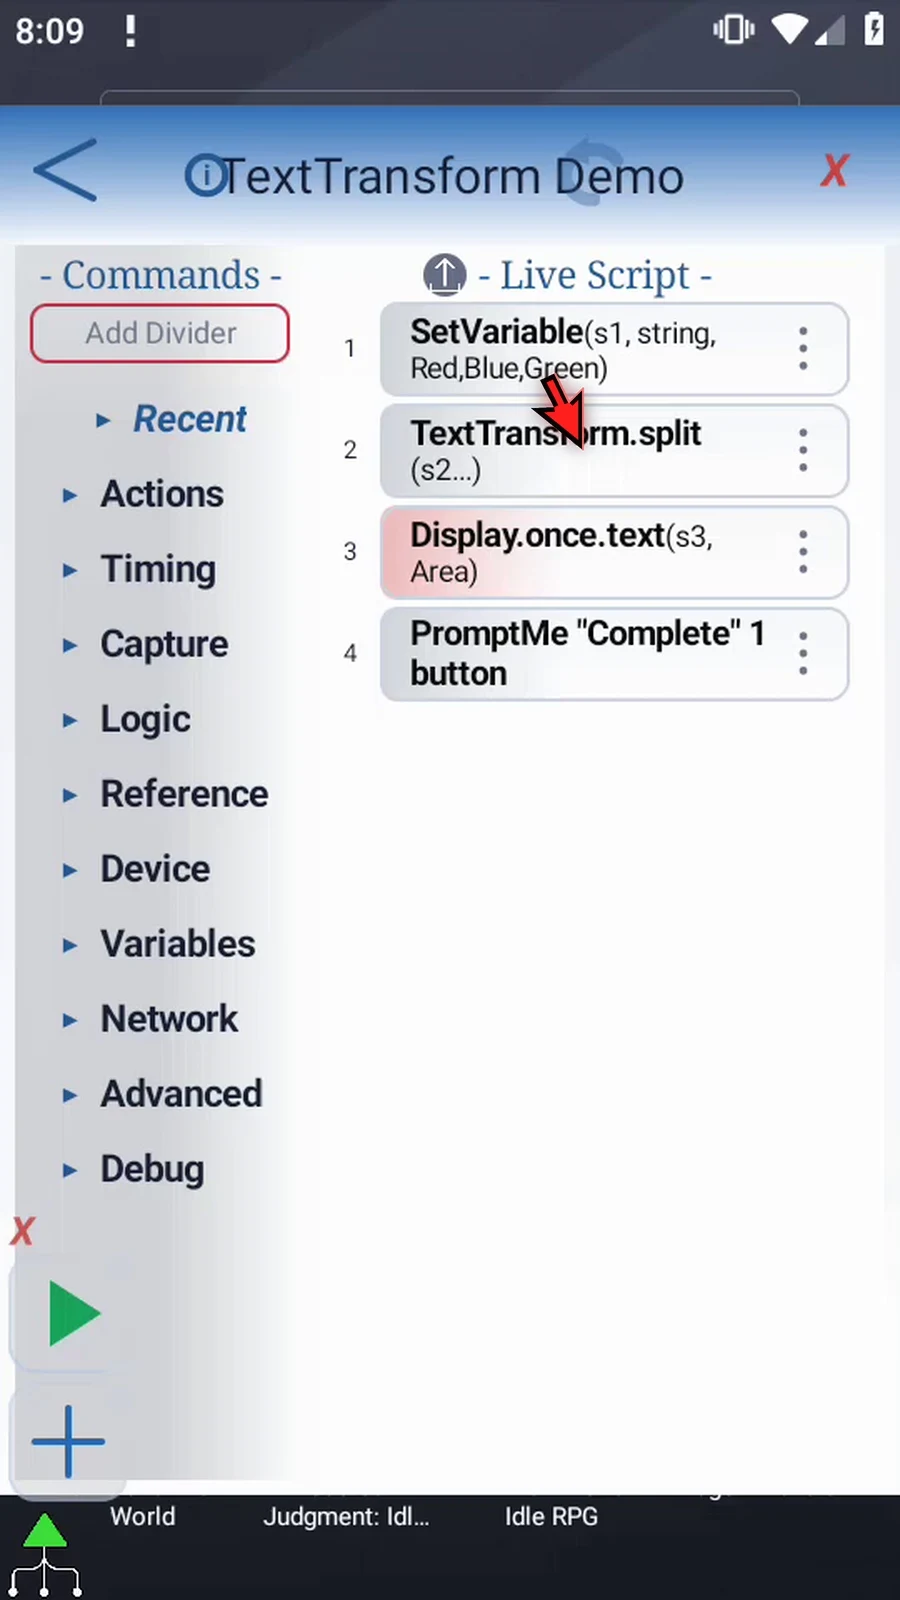
Step 02 Open Set Variable. Keep String variable s1 and This Script Only.
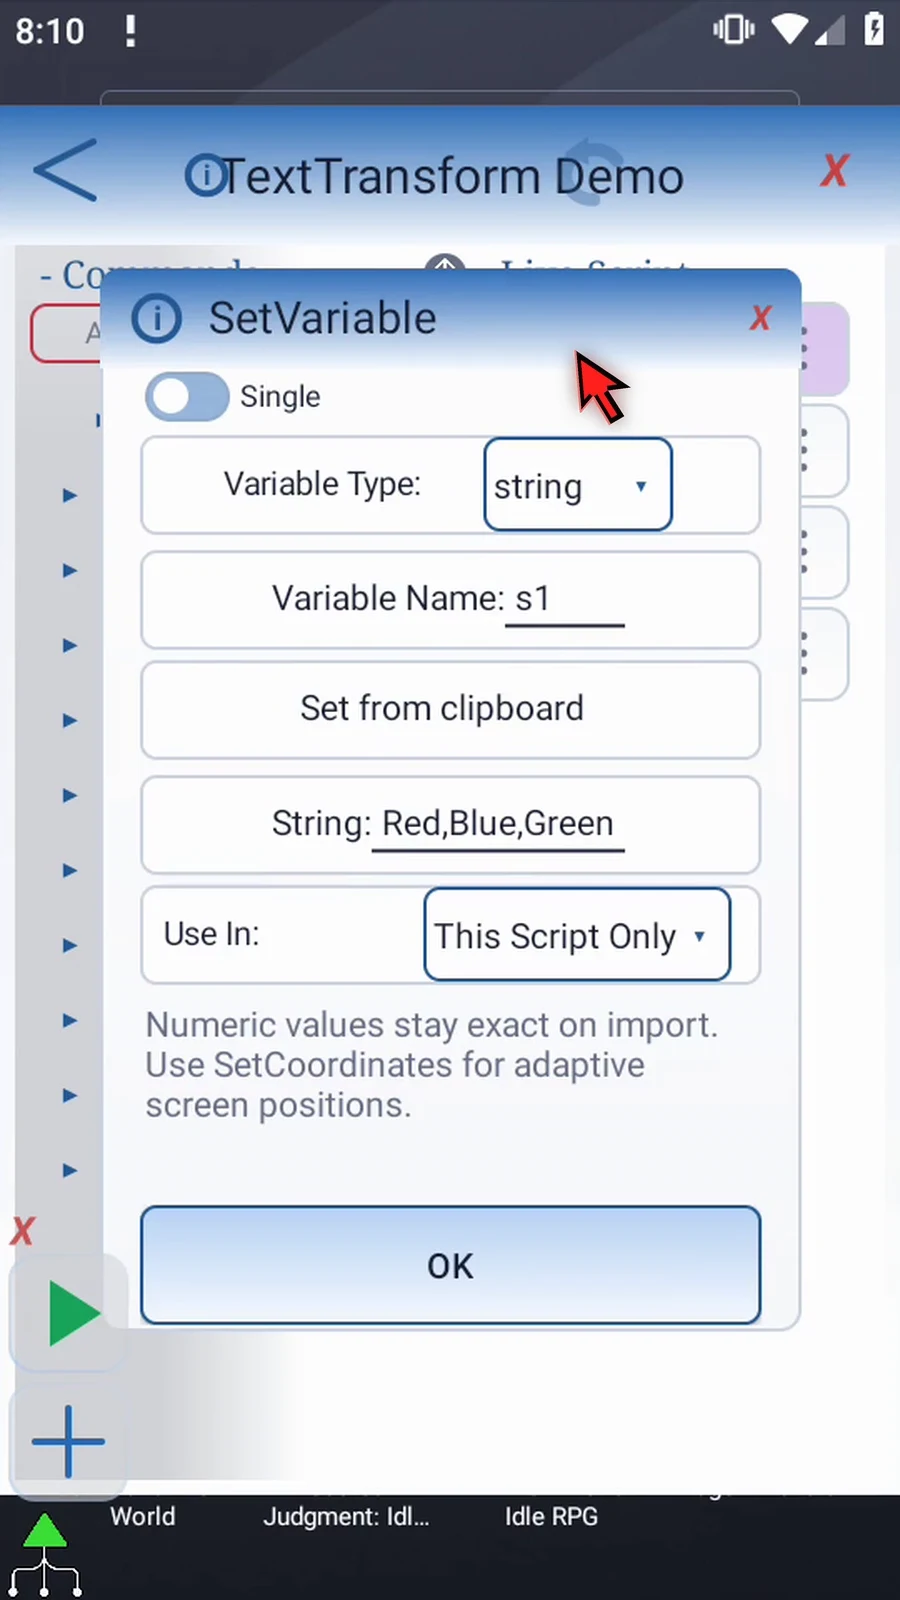
Step 03 Change the text as shown: a comma after Red and a semicolon after Blue. Tap OK. The list now uses two different separators.
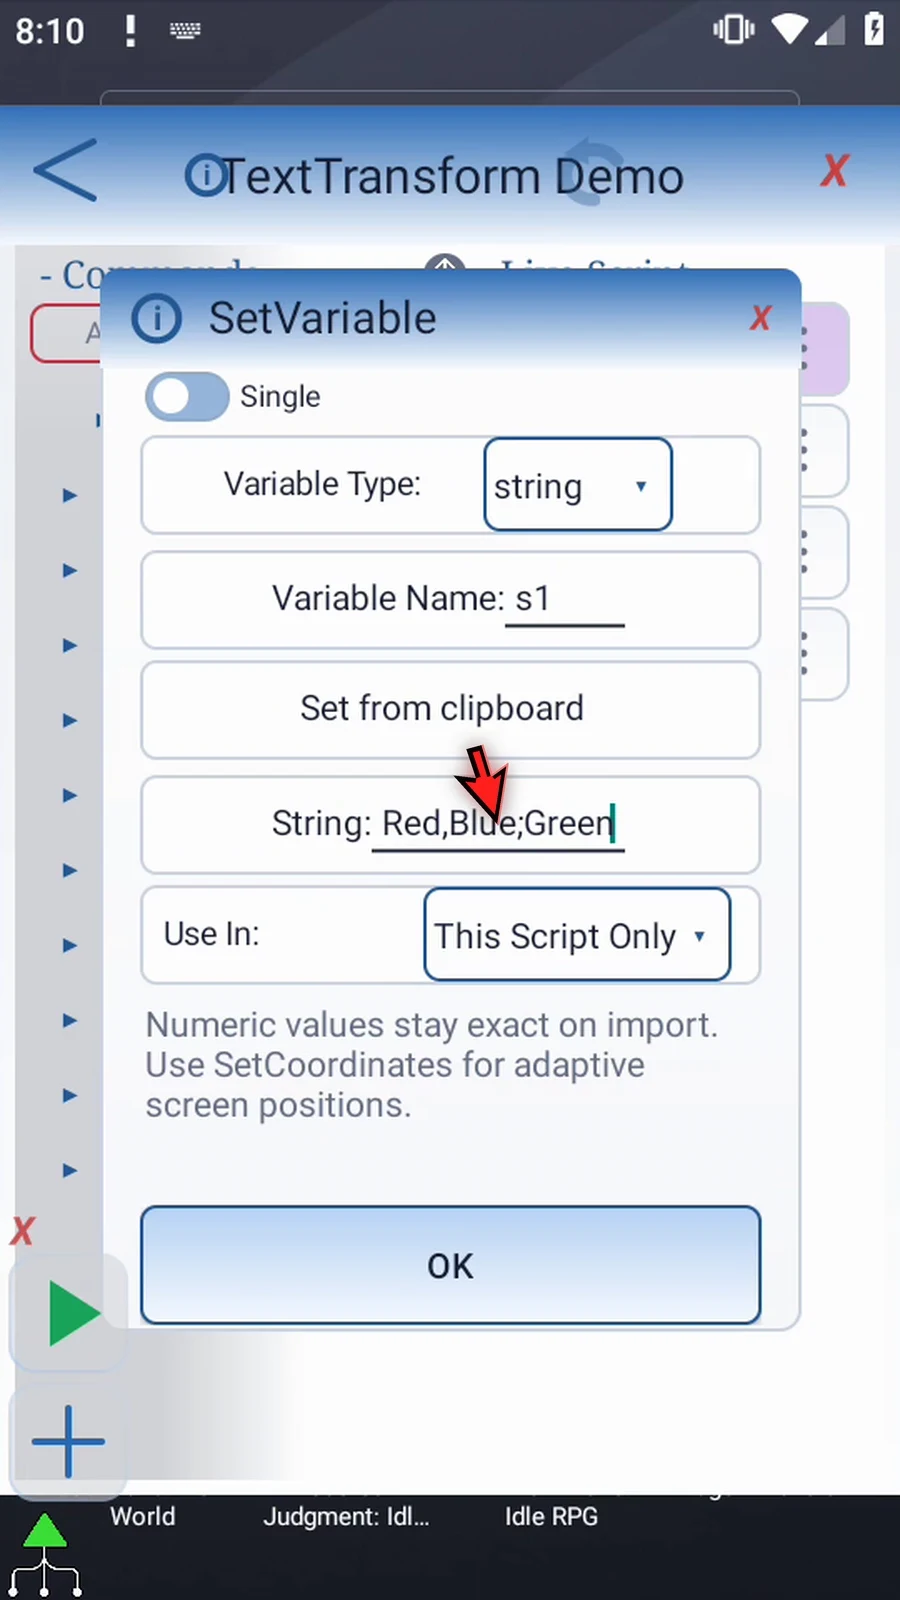
Step 04 Open the existing Split command.

Step 05 Open Split Mode and choose Regex. The delimiter will now be interpreted as a Java regular expression.

Step 06 Keep Delimiter set to Text and enter the pattern shown. The brackets mean either a comma or a semicolon. Each matching separator becomes a split boundary.
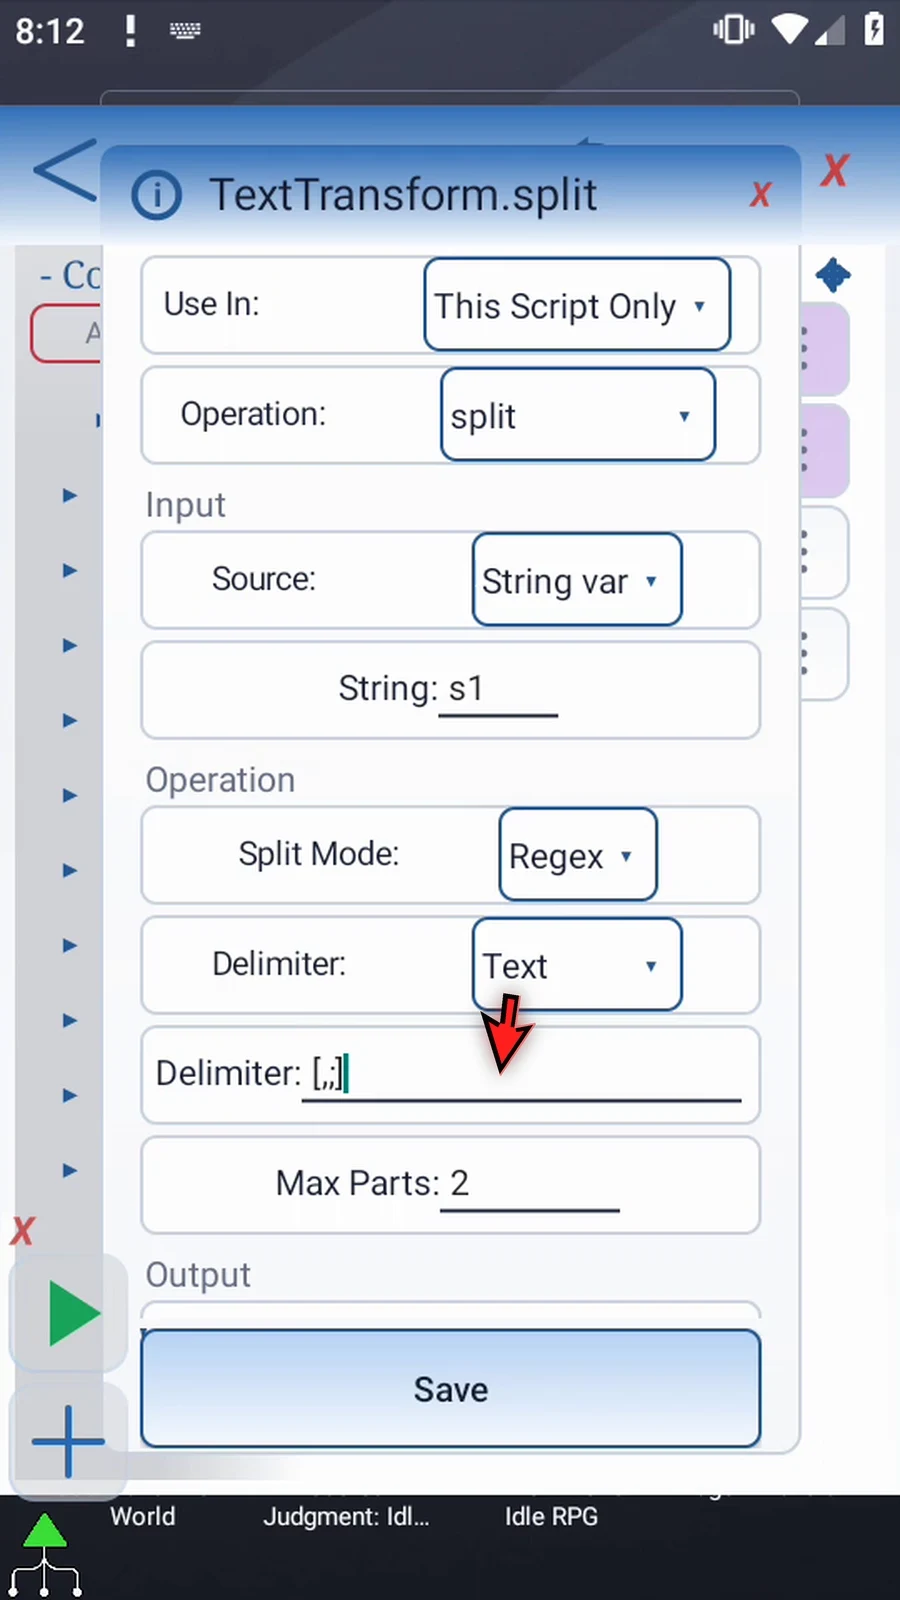
Step 07 Set Max Parts to three so the three color names can be stored separately. With a smaller limit, the last part would keep the remaining text.
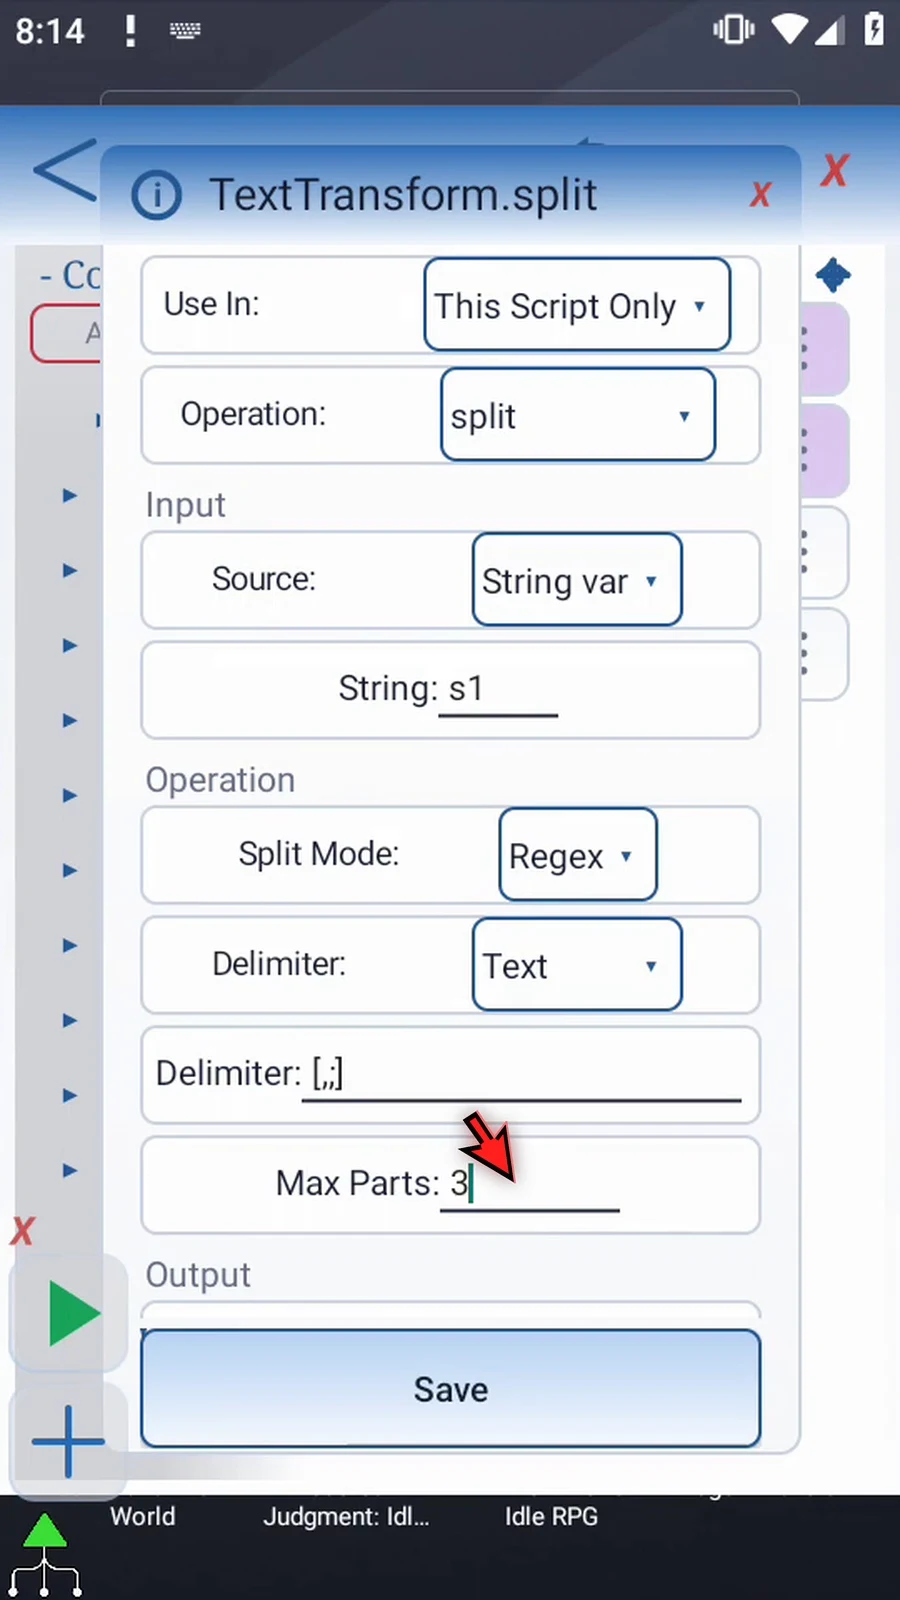
Step 08 Scroll down. Keep Array s, Start two, and Save Count i1. The colors will occupy s2, s3, and s4; the source in s1 stays unchanged.
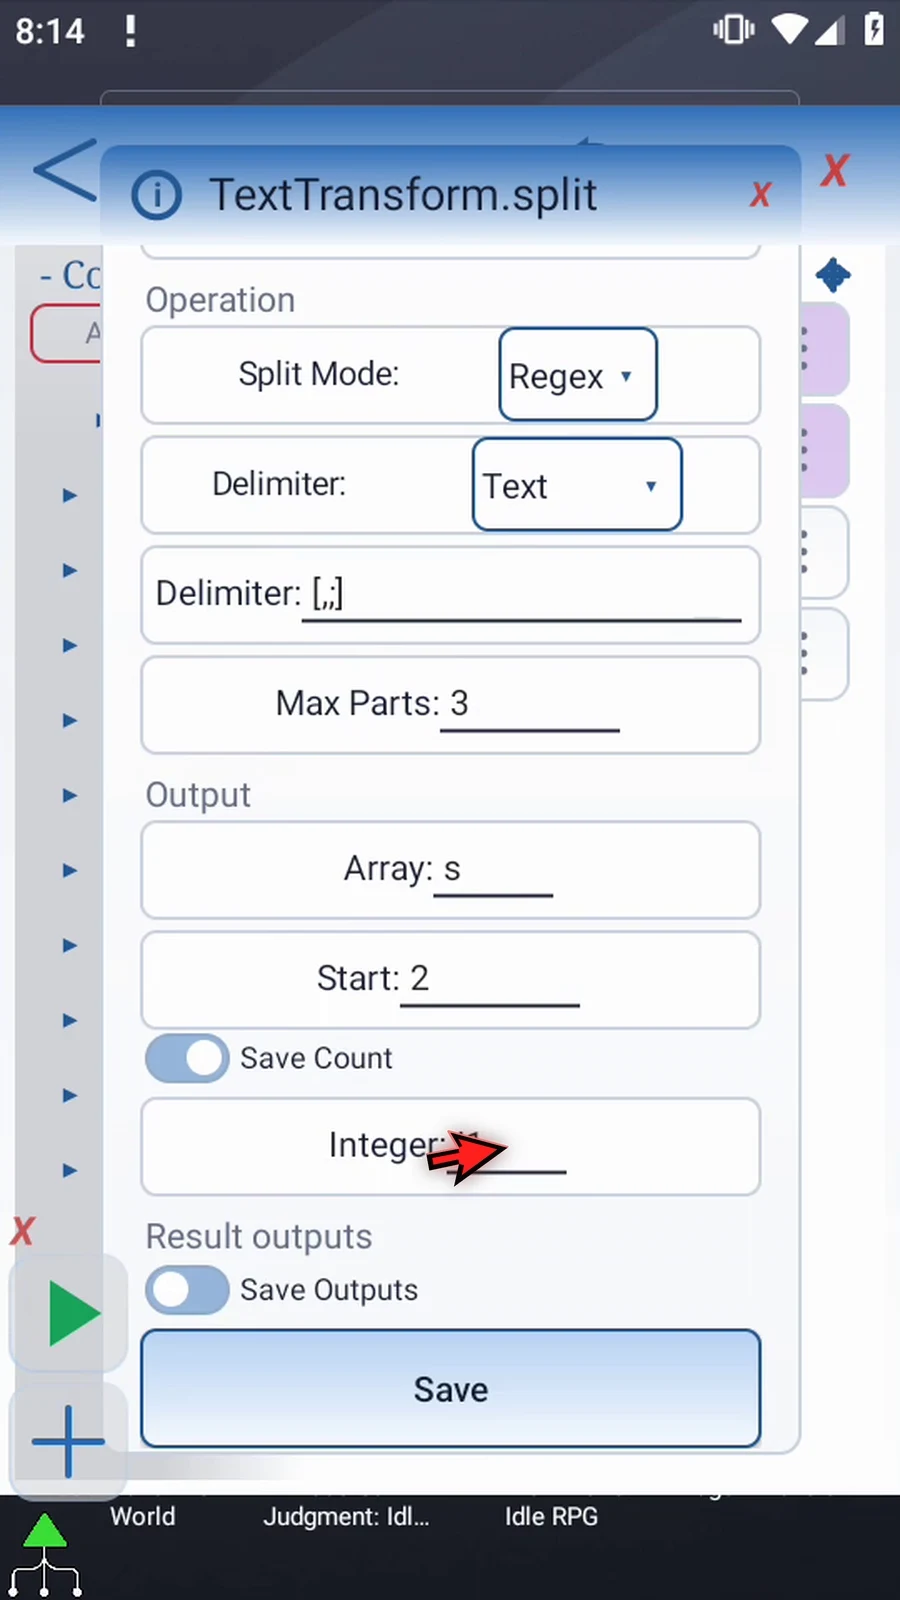
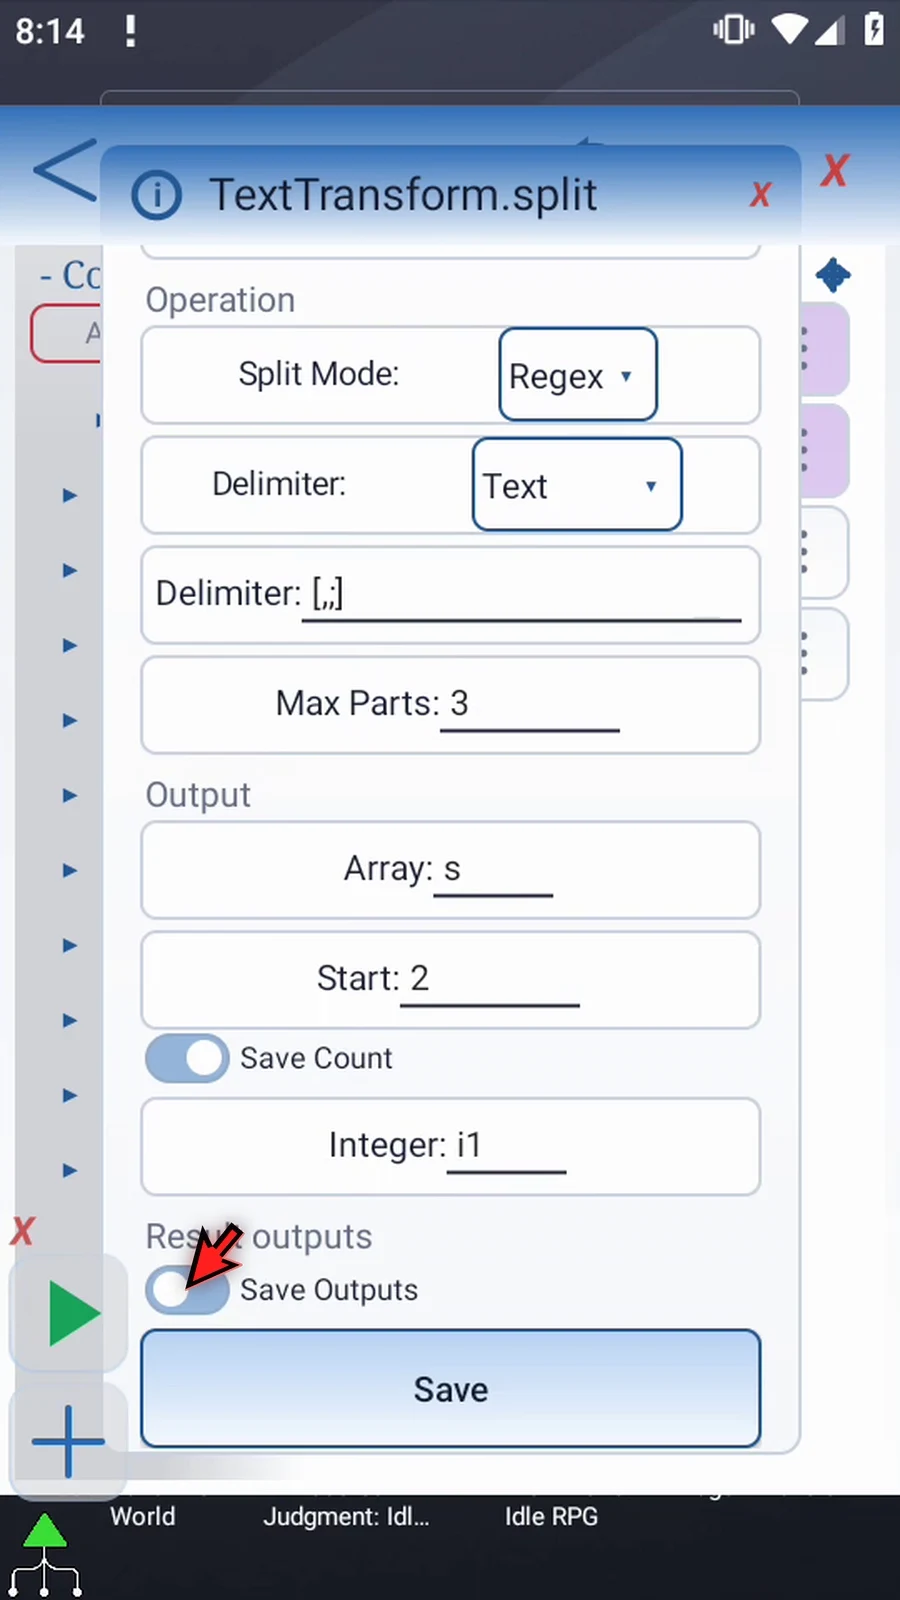
Step 09 Leave Save Outputs off and tap Save. A regex delimiter must be a valid pattern; Intro explains the optional Success and Error outputs.
Step 10 Open Display to show the last color.
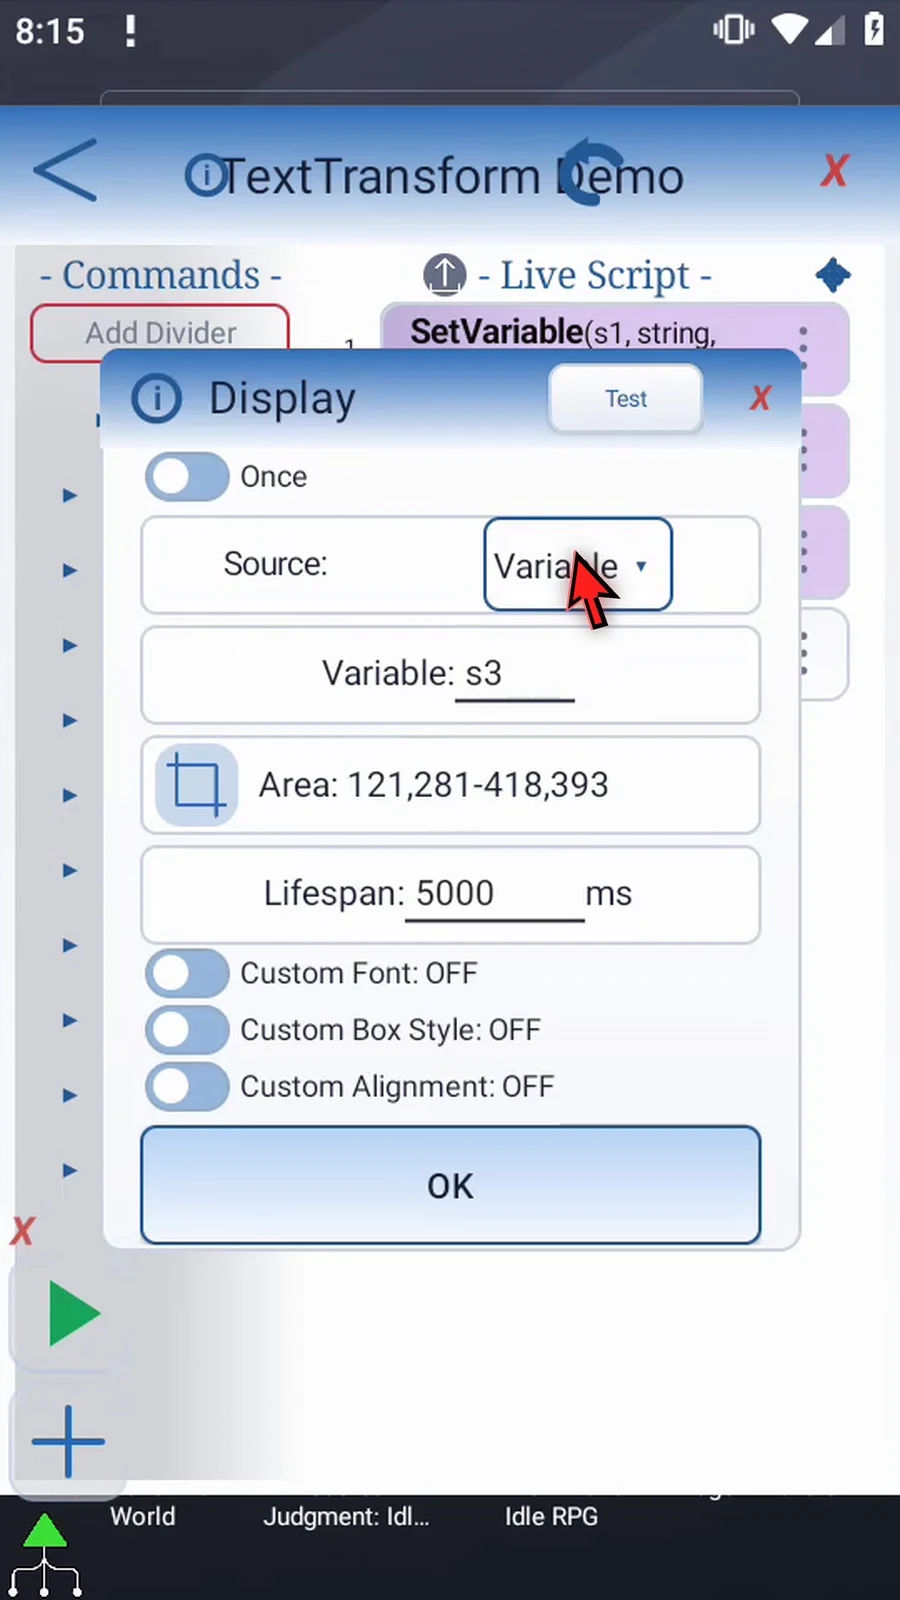
Step 11 Change its Variable to s4. Keep the same area and five-second lifespan, then tap OK.
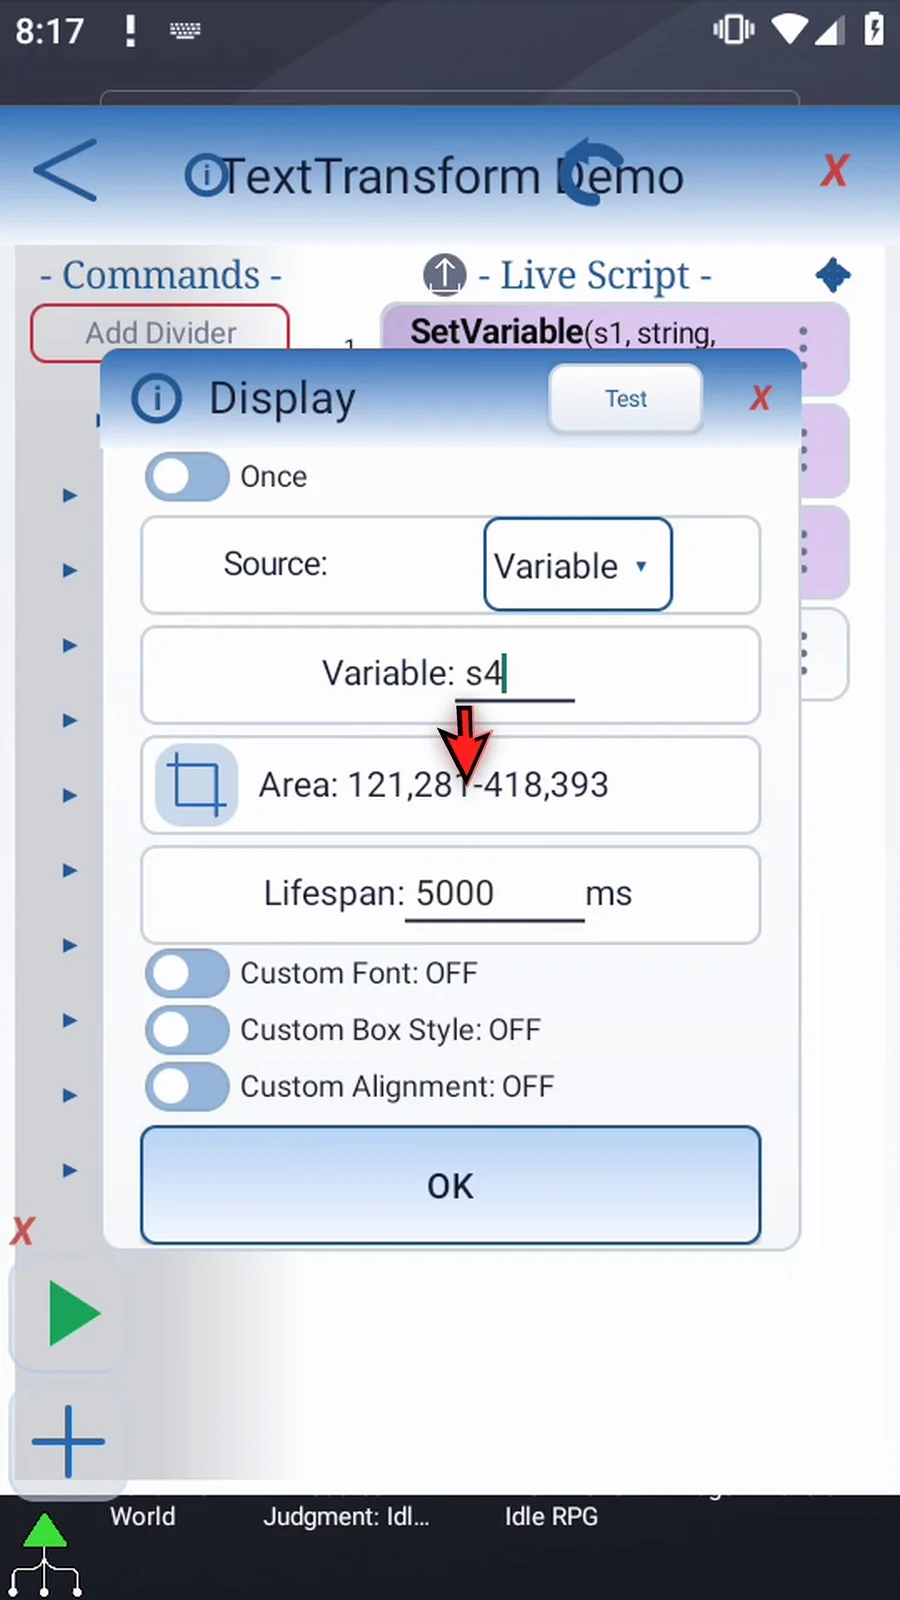
Step 12 Split can now recognize both separators in one pass. Display reads the third part, and Prompt Me confirms completion. Close the editor.
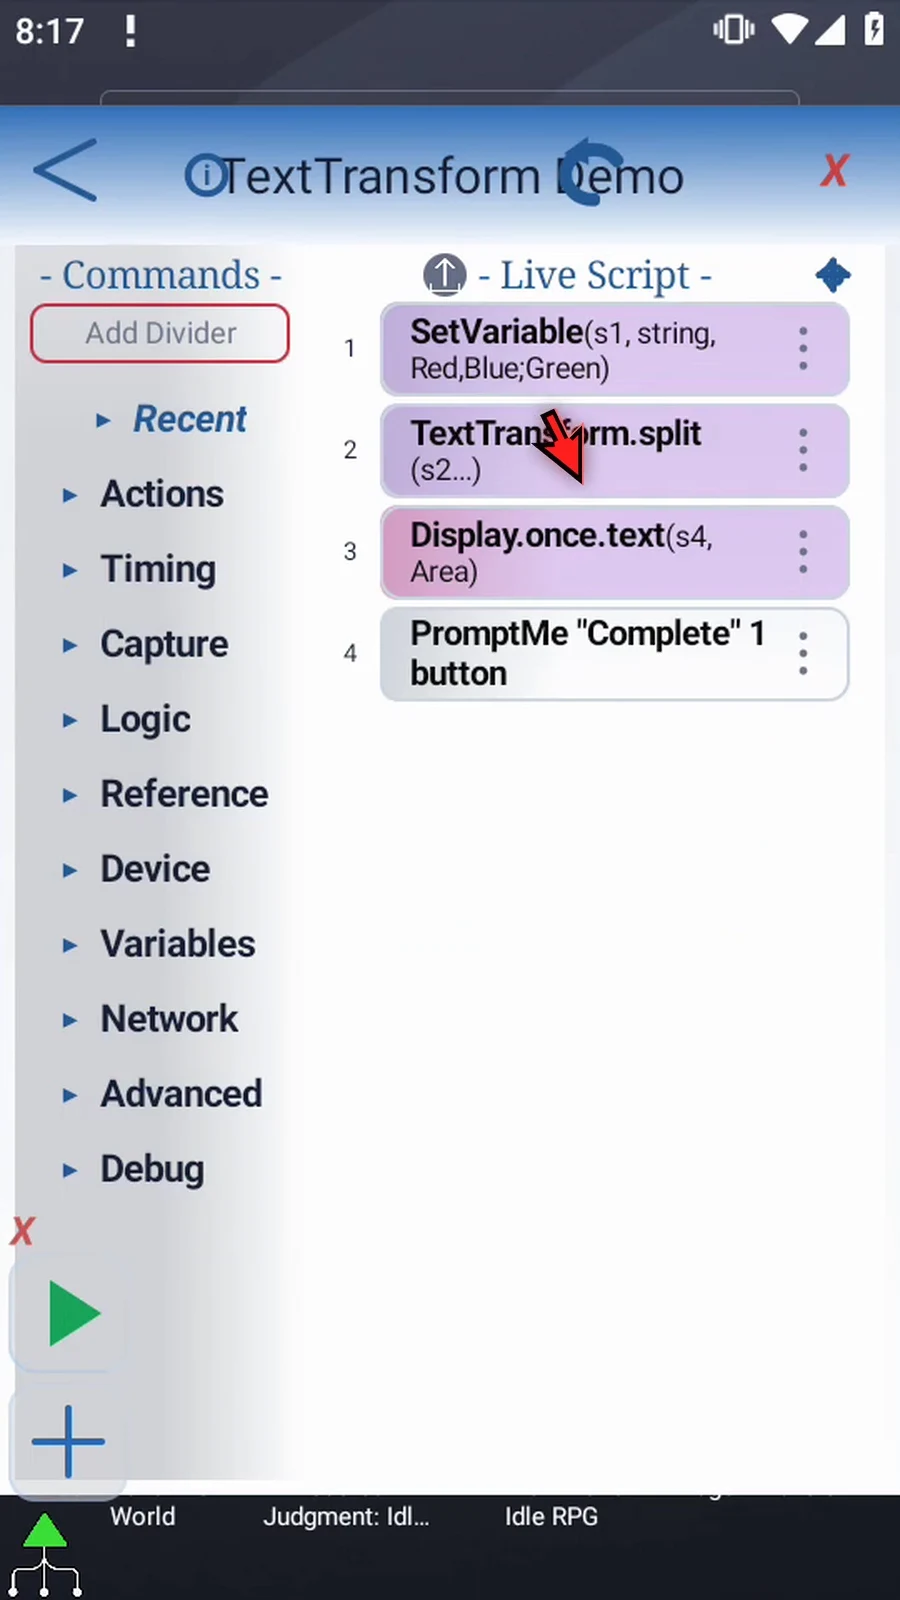
Step 13 When the script is complete, simply use the Play button in the main overlay.
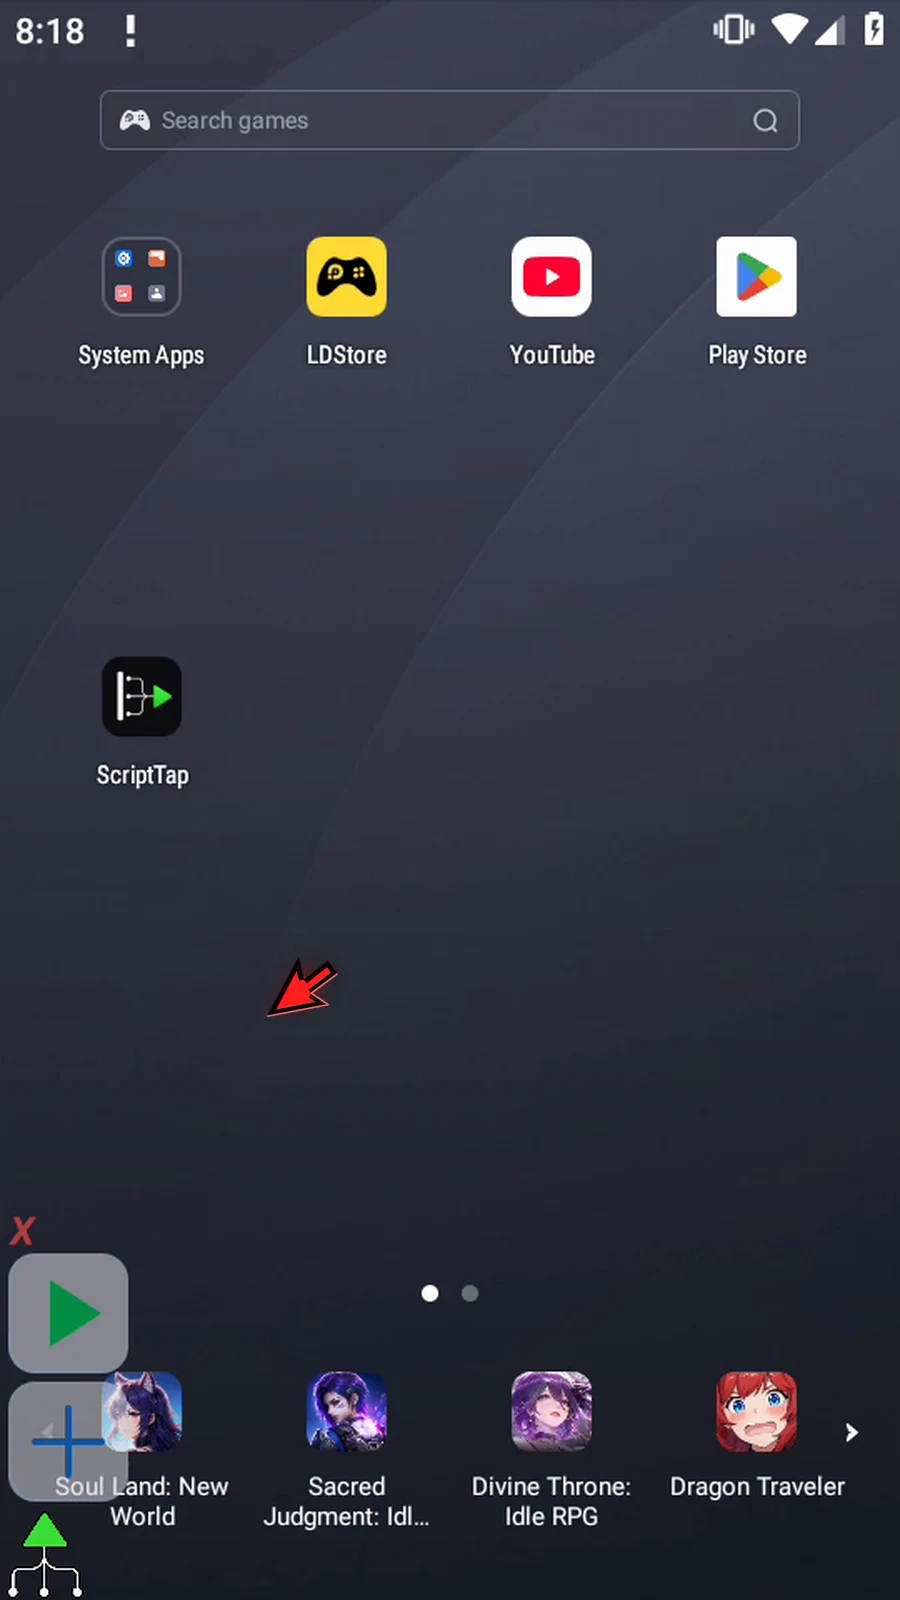
Step 14 Green is the third part, stored in s4.
Step 15 Complete confirms that the script reached the end.
Step 16 Press Done. The script finishes automatically. Use Literal for a fixed separator, or Regex when one pattern must recognize several separators.
Join combines an ordered range of indexed String parts into one String value for later commands. This guide reuses the script from Split / Regex and reformats its three colors with slash separators.
The existing SetVariable and Split commands produce Red, Blue, and Green in s2, s3, and s4, with count i1=3. The original list remains in s1. The Split guides show how to build that setup.
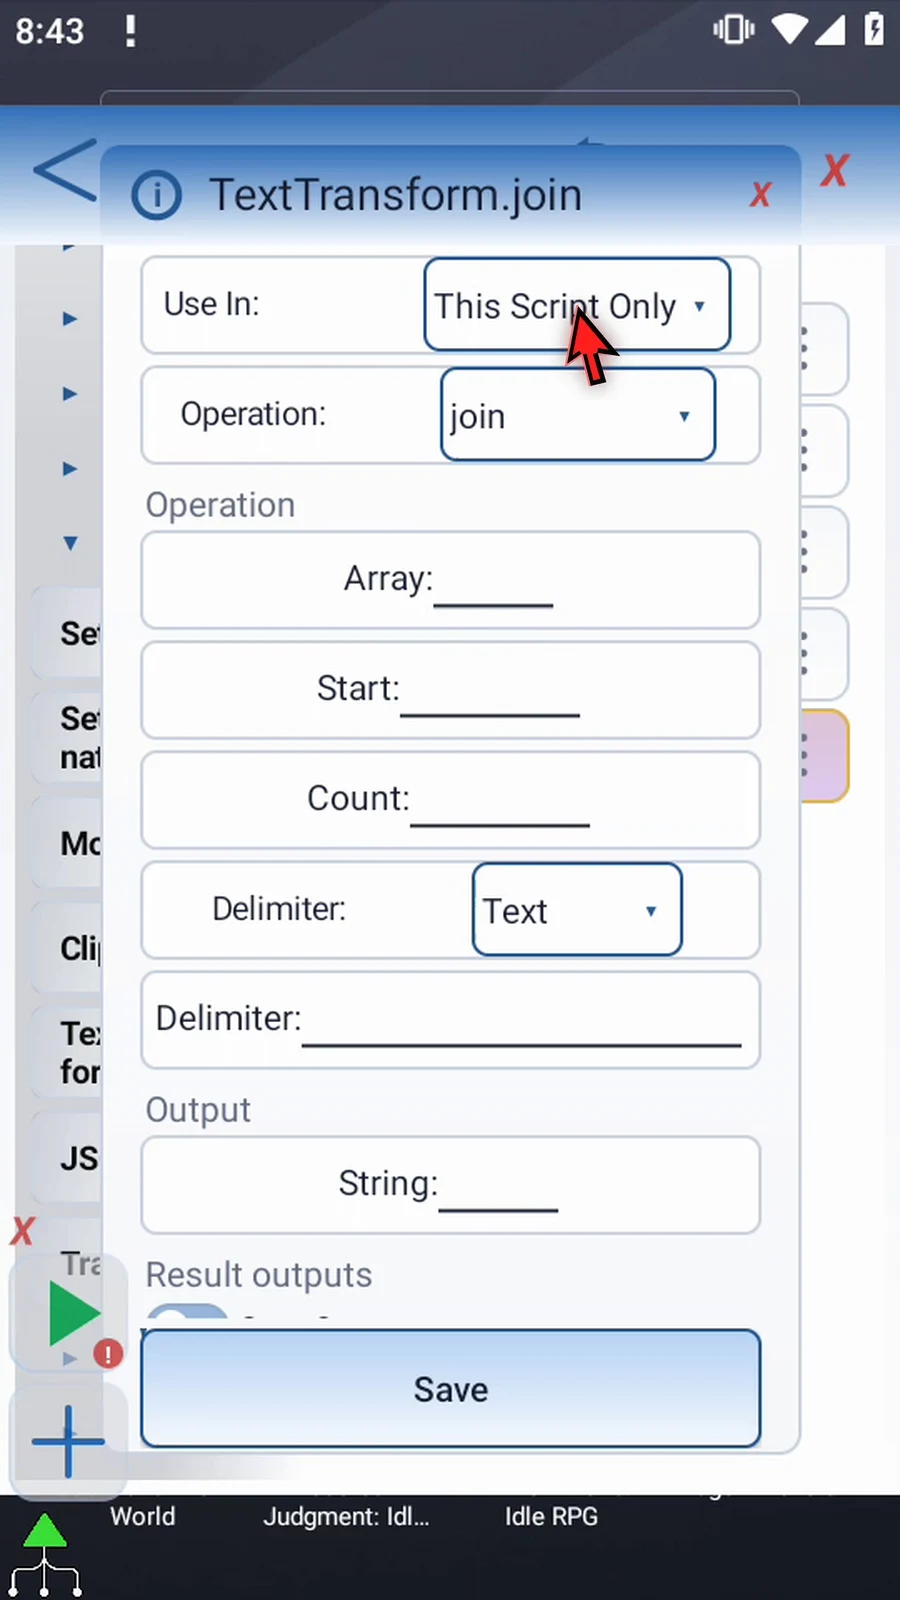
Expand Variables, find TextTransform, and manually drag a new command into the script. Open the added row, choose Operation join, and keep This Script Only. Set Array s, Start 2, and Count i1. This prior Integer supplies the number of parts from Split, so Join reads s2 through s4. Start and Count can also be positive Integer literals; keep the whole selected range inside 1..4096 and provide String inputs before Join runs.
The delimiter can be typed Text or a prior String variable. Choose Text; an empty delimiter joins parts directly. In this example, normally type a space, slash, and another space: / . Join inserts the separator only between parts, not before or after the complete result.
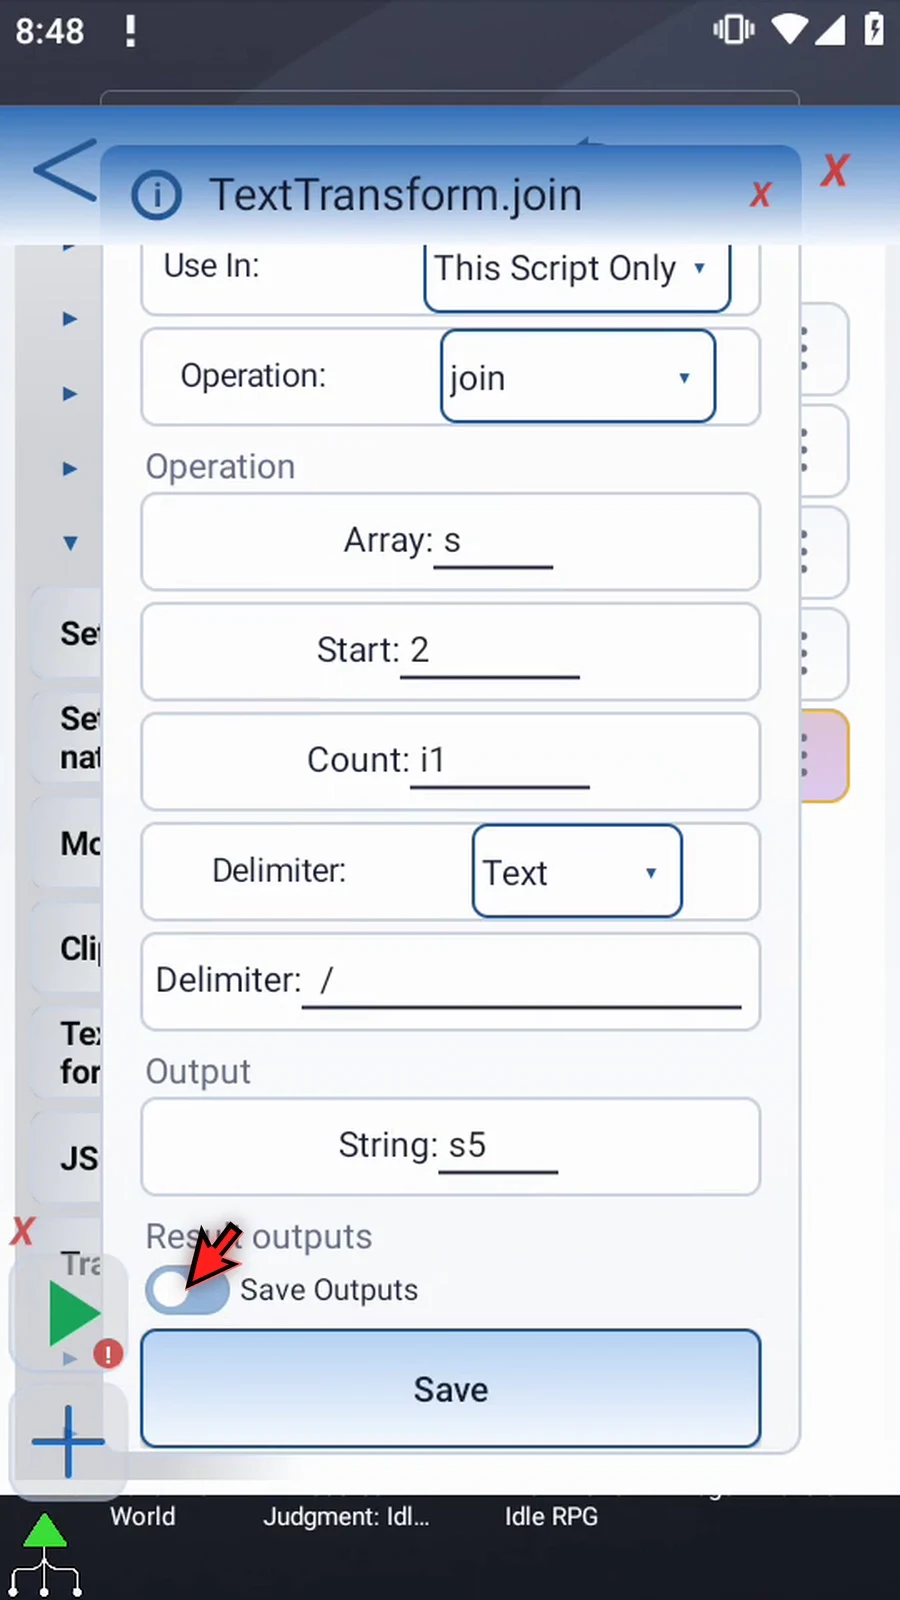
Set String output s5, preserving the original input and separate parts for later use. Scroll slightly to reveal the result controls, keep Save Outputs OFF, and Save. Intro explains optional Success and Error outputs.
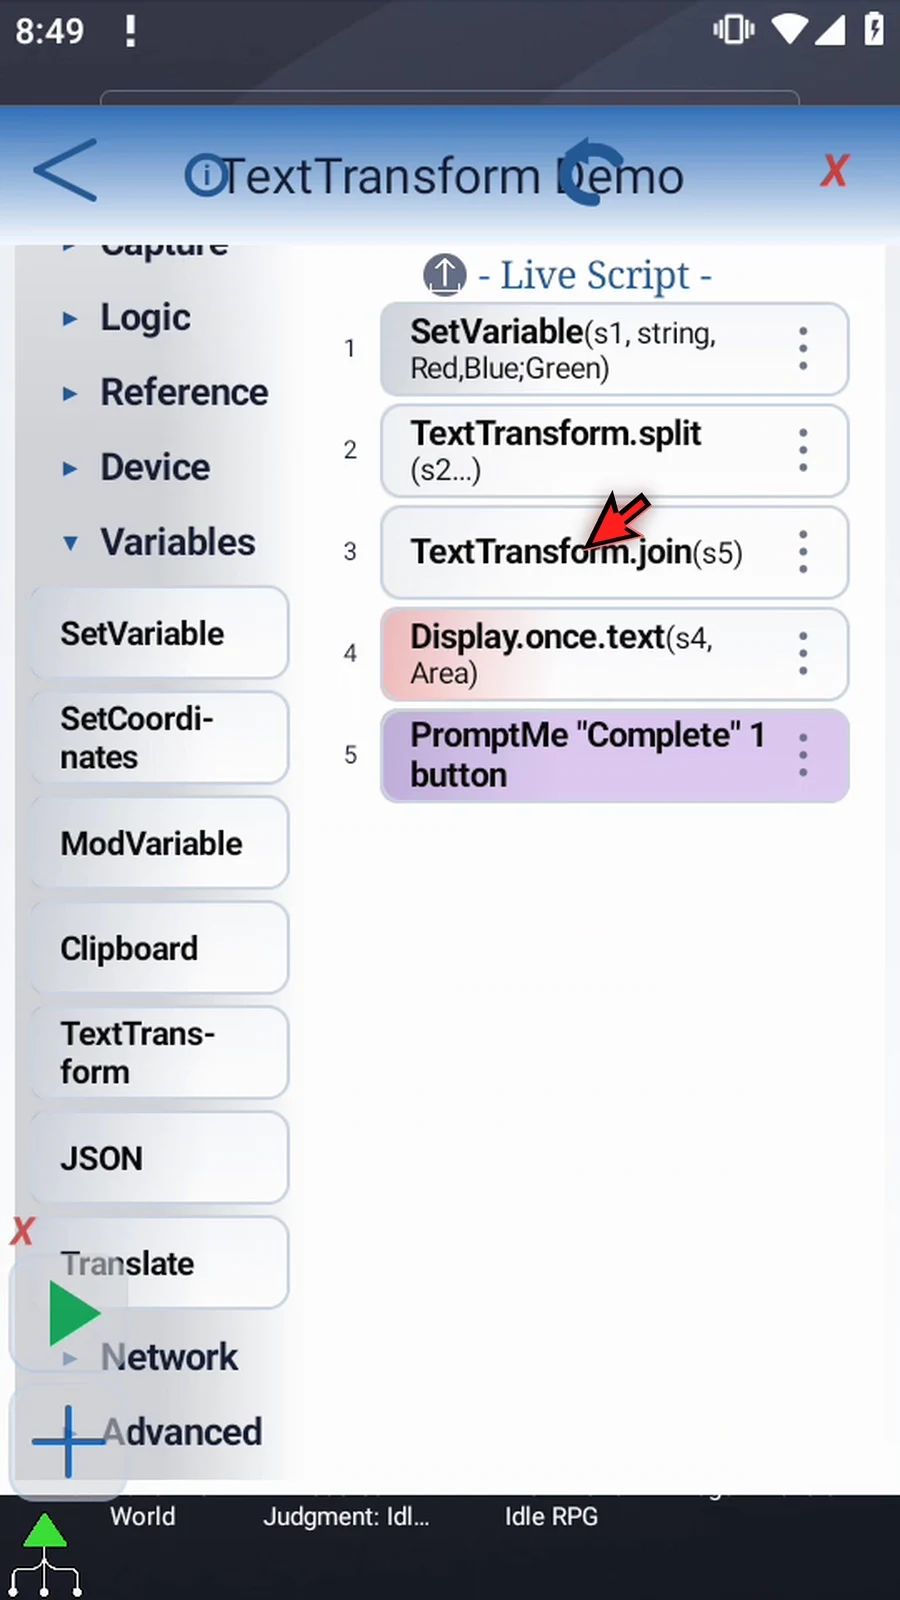
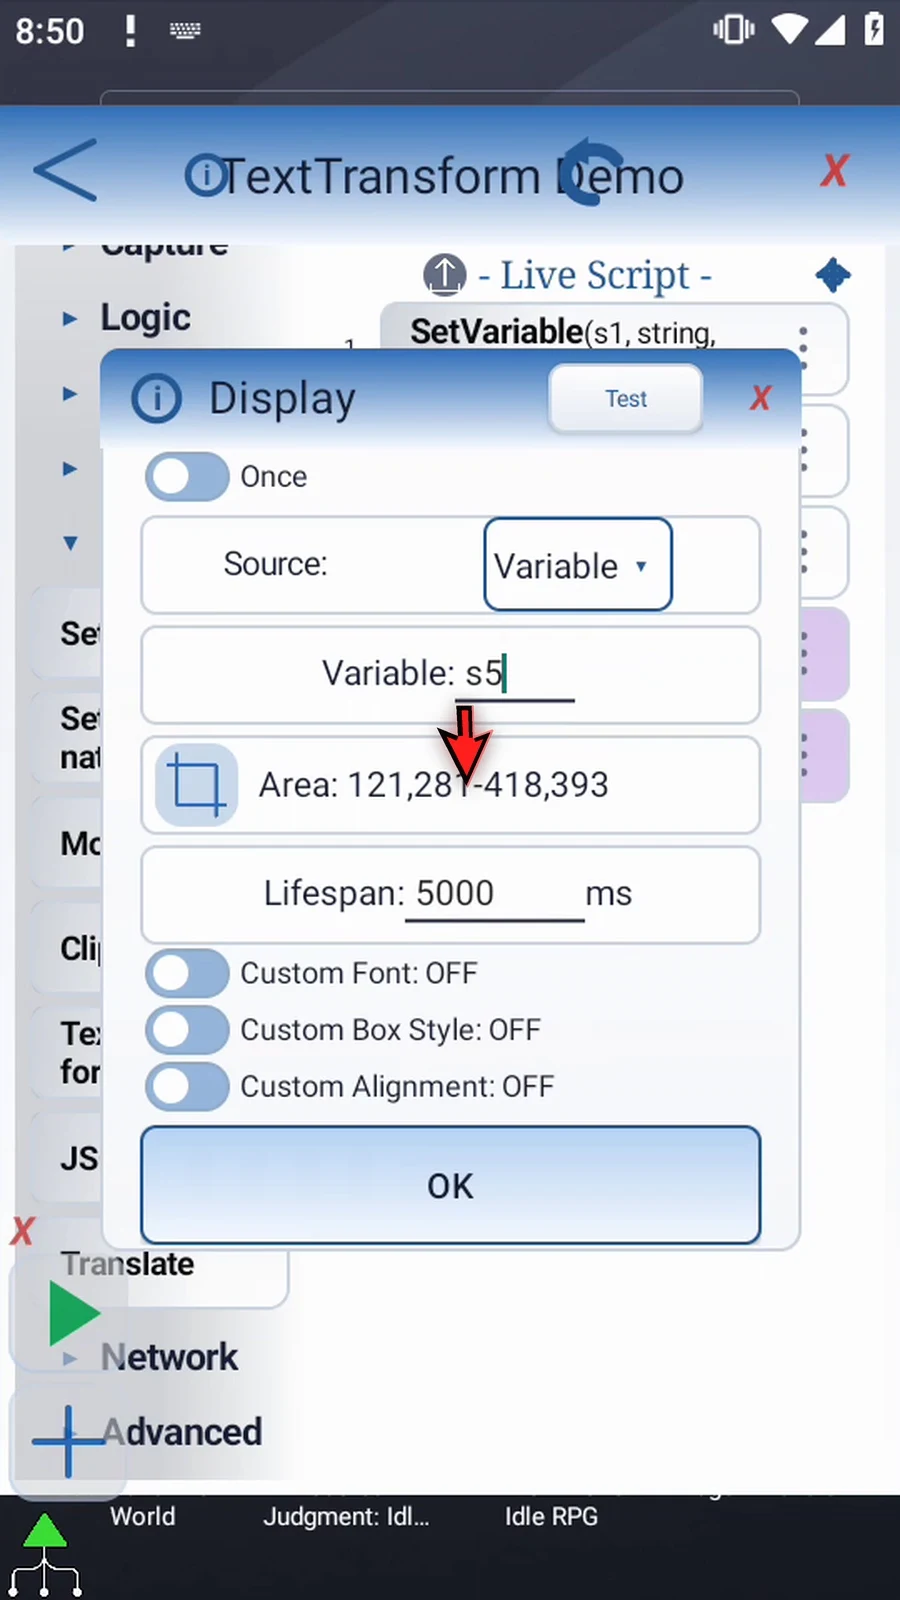
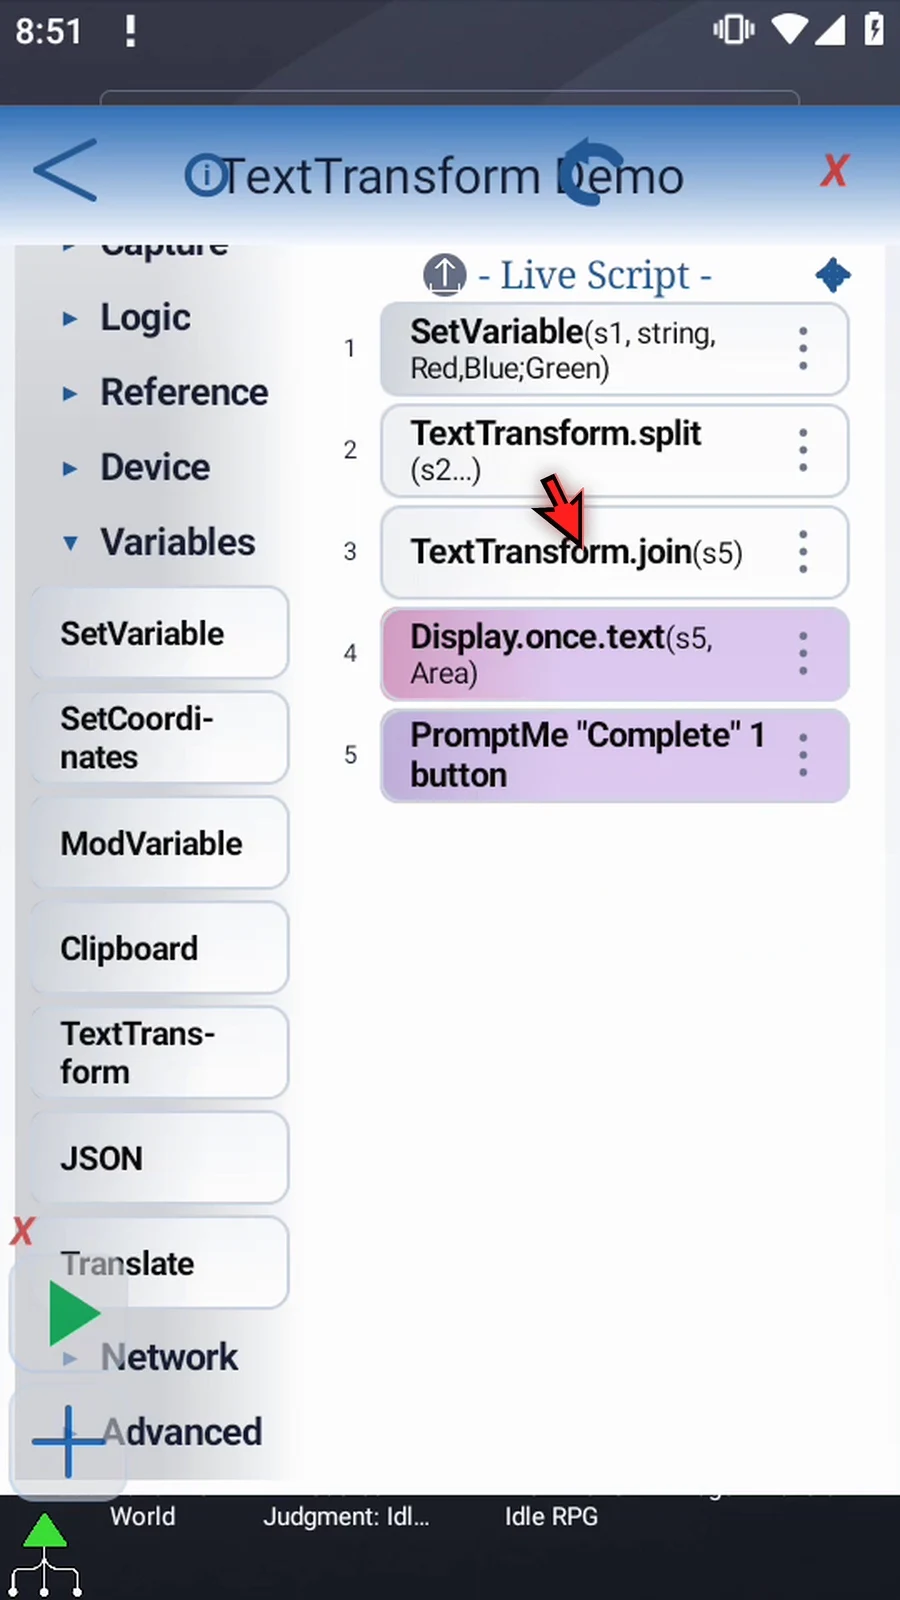
Manually drag the new Join row between Split and Display. Split must supply the parts before Join reads them, and Join must produce s5 before Display reads it. Change only Display's Variable to s5, retaining the same area, default appearance, and 5000 ms lifespan. Complete/Done PromptMe is unchanged.
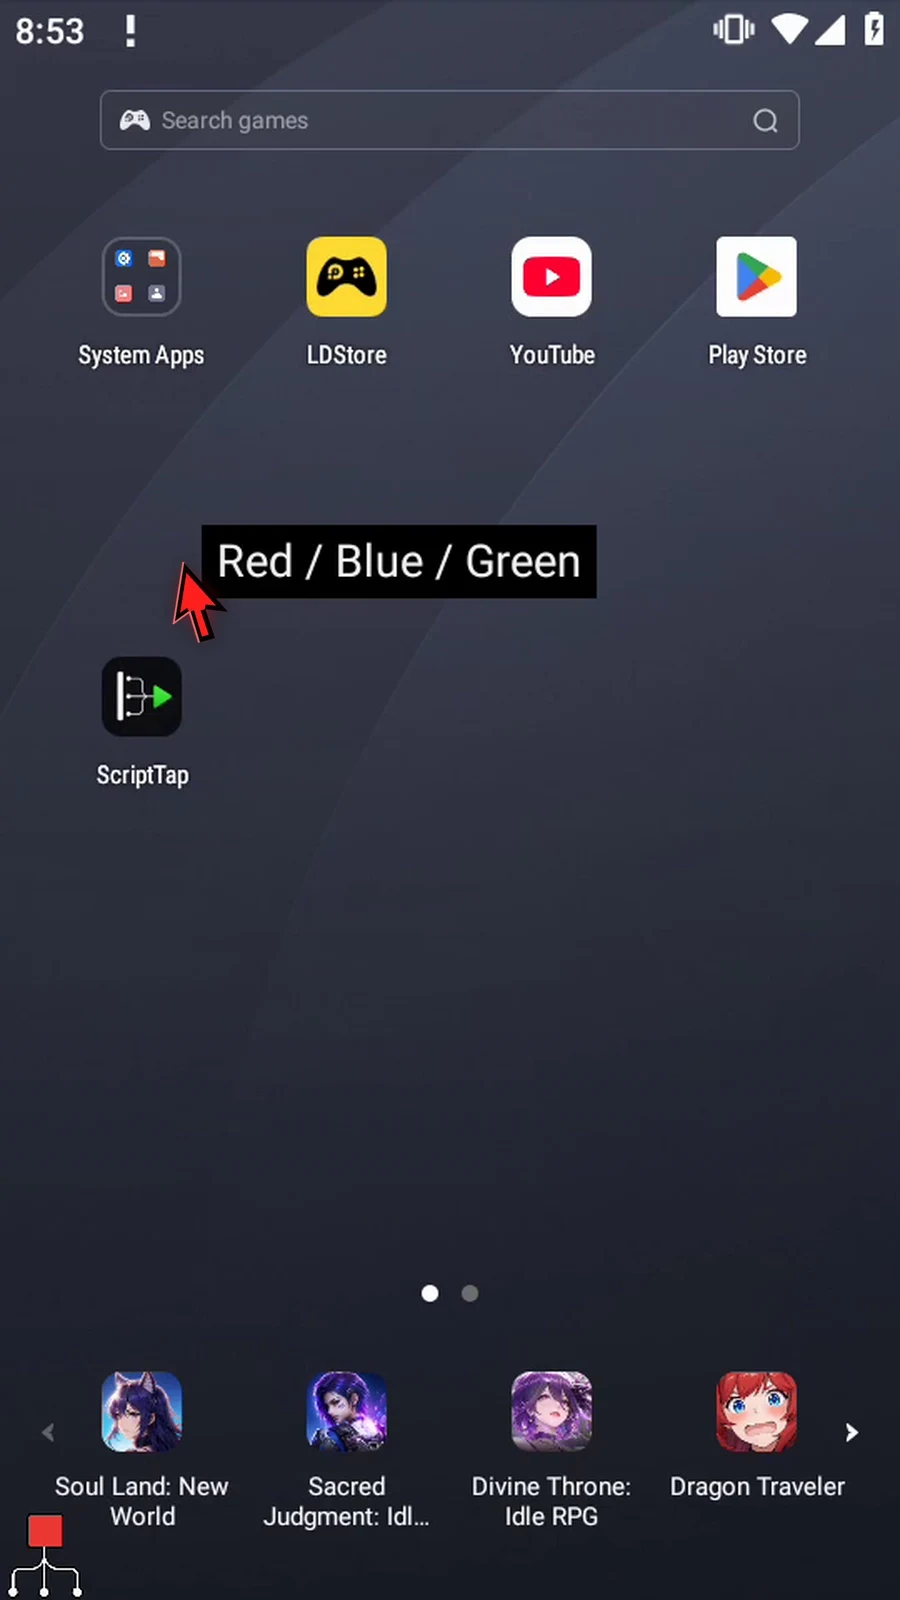
The actual five-command Play displays Red / Blue / Green. It completed with zero warnings/errors, Split and Join both reported count3, and source s1 stayed unchanged. Both manual command drags, their insertion lines, the full timed result, and the natural completion transition are retained. Press Done to finish automatically.
Join
Step-by-step guide
Step 01 Join combines indexed String parts into one text value. We will reuse Split's three colors and join them with slashes for a later command.
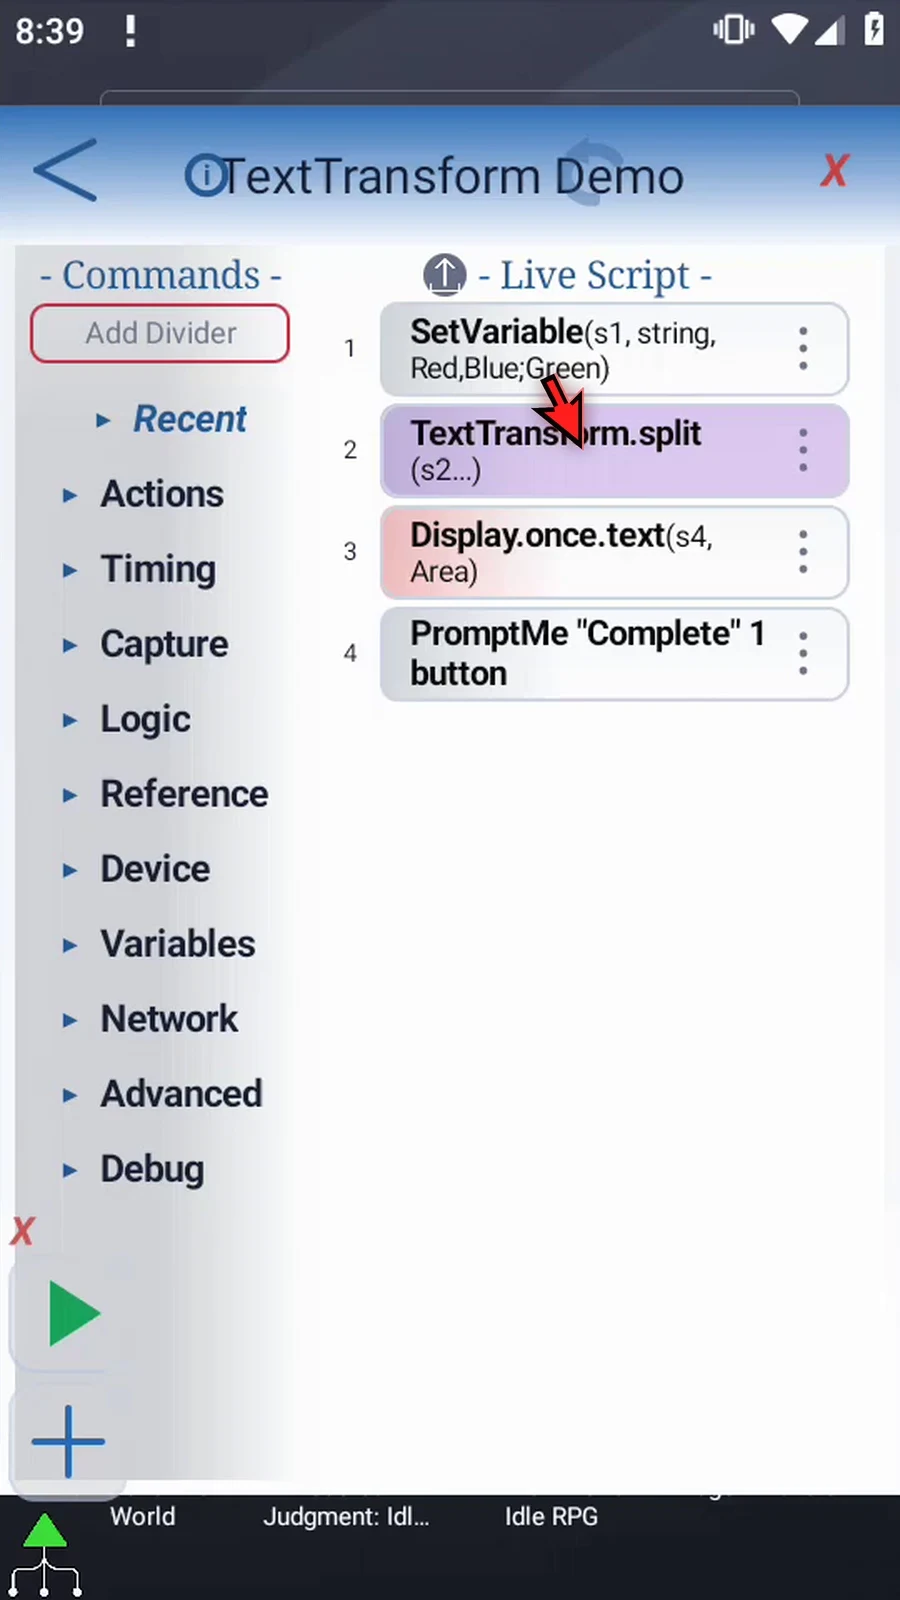
Step 02 The first two commands already produce Red, Blue, and Green in s2 through s4, with the number of parts saved in i1. The Split guides show that setup.
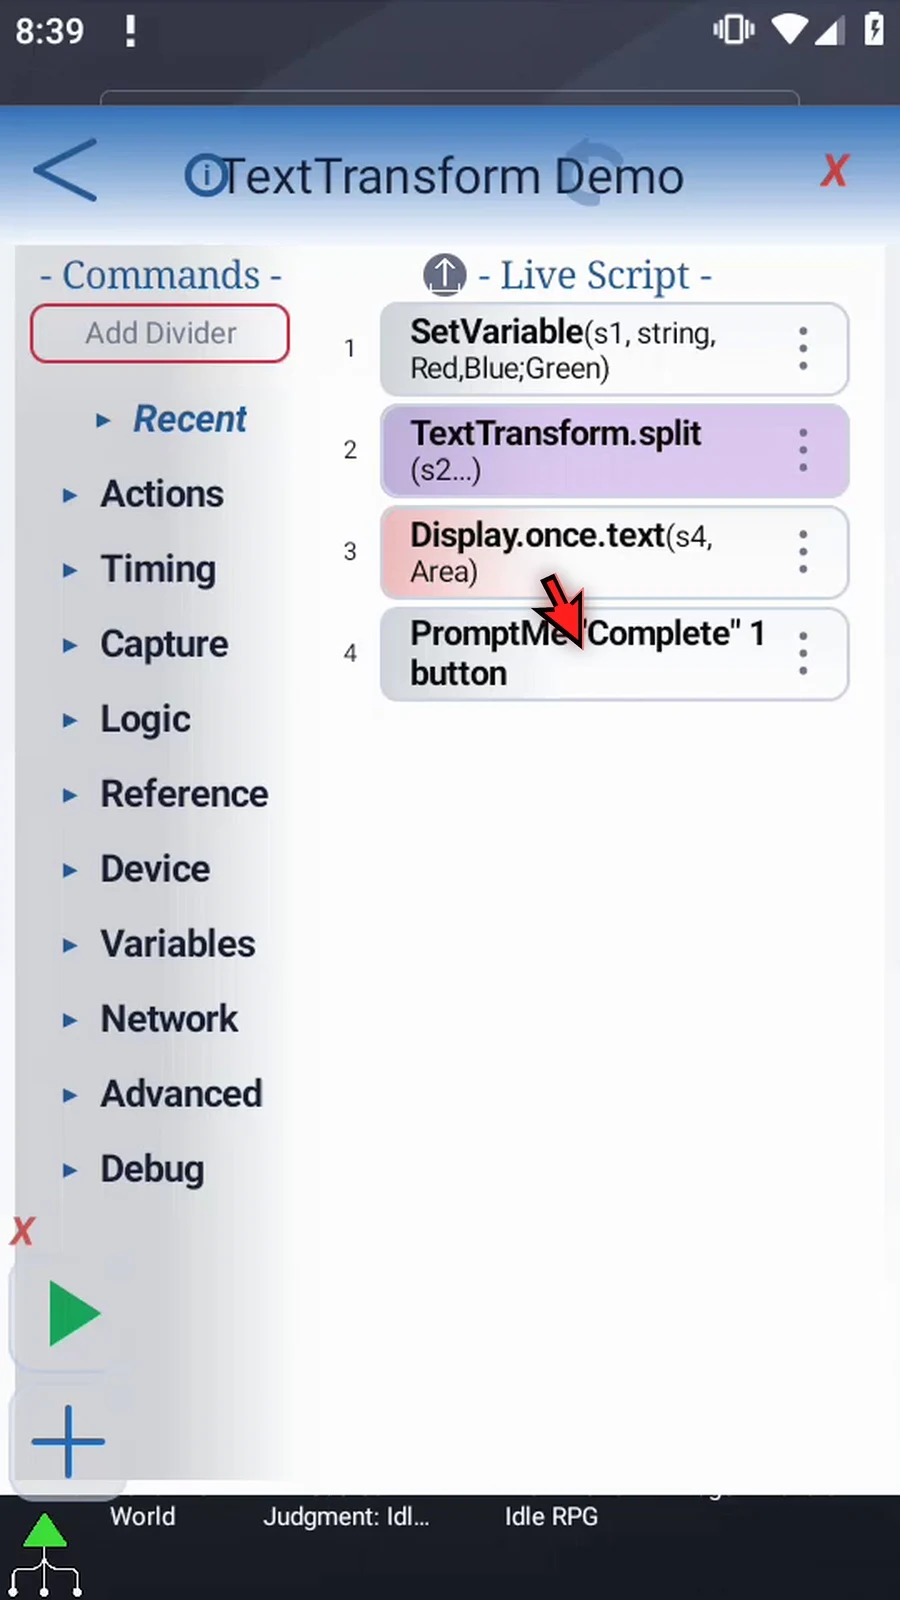
Step 03 Expand Variables and find Text Transform.
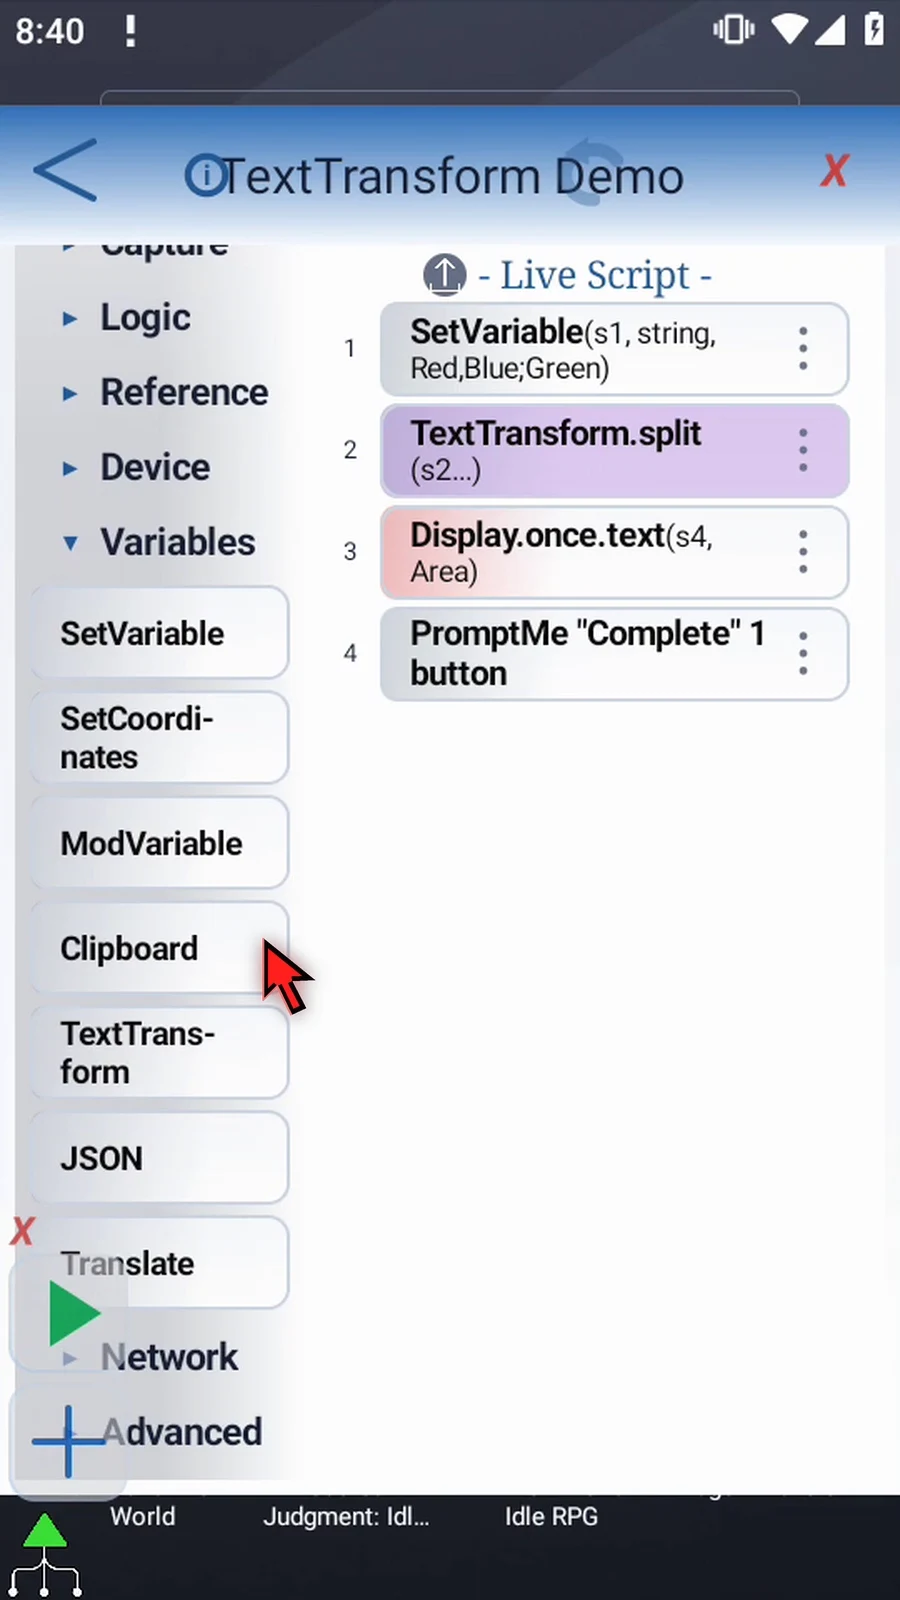
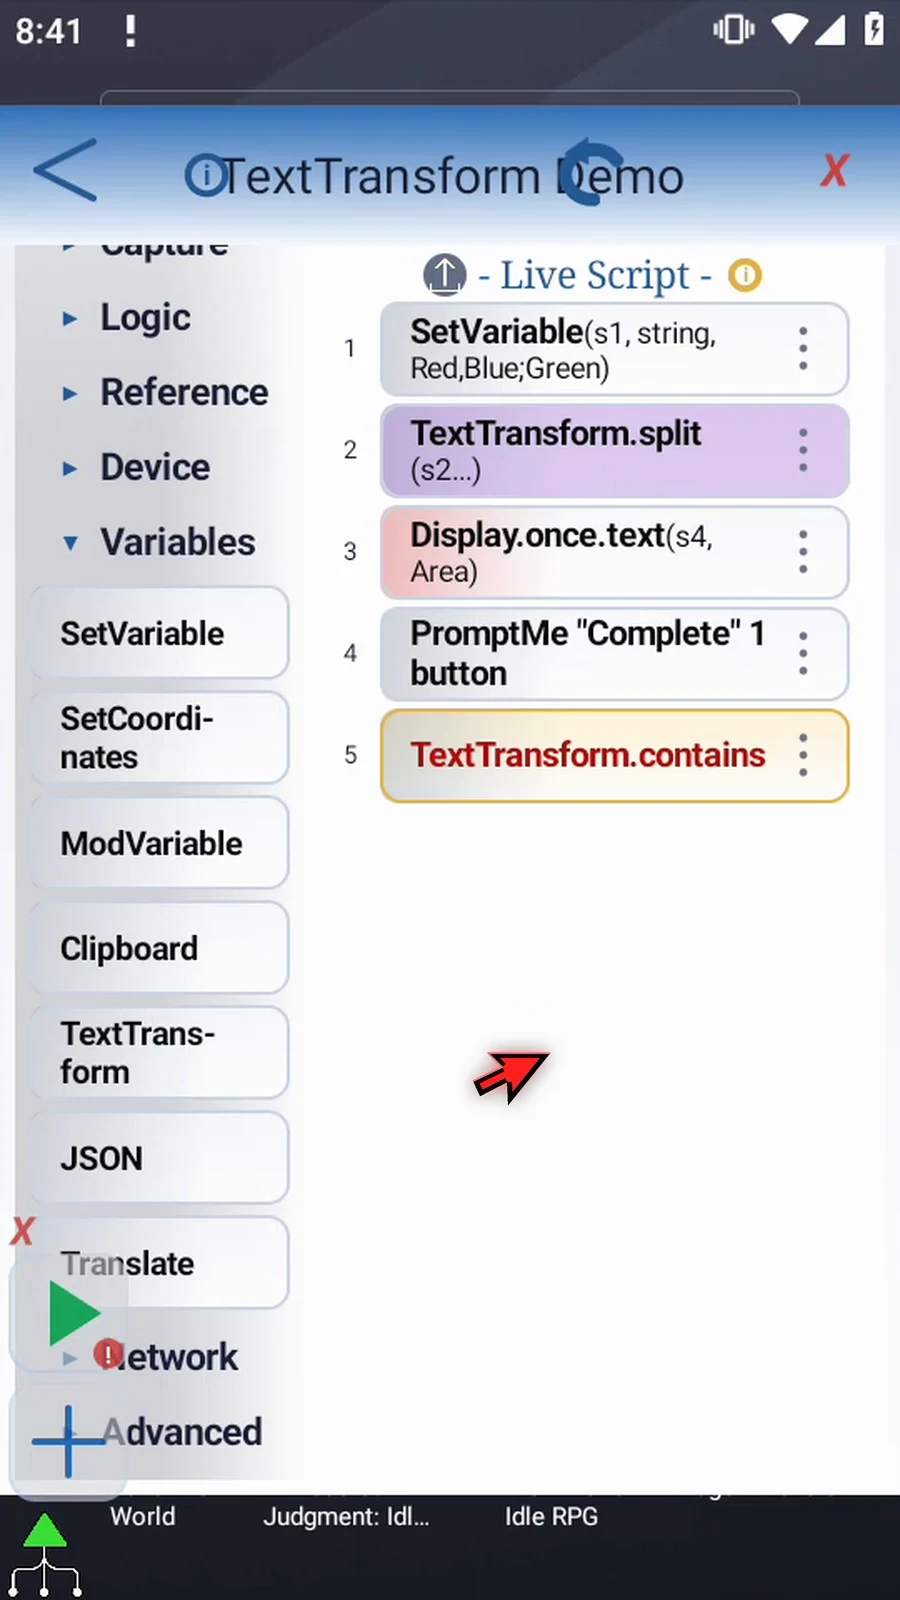
Step 04 Drag a new Text Transform into the script. We will place it after Split once its settings are saved.
Step 05 Open Operation and choose Join. Keep This Script Only so the command uses this script's variables.
Step 06 Set Array to s. This is the String family containing our separate colors.
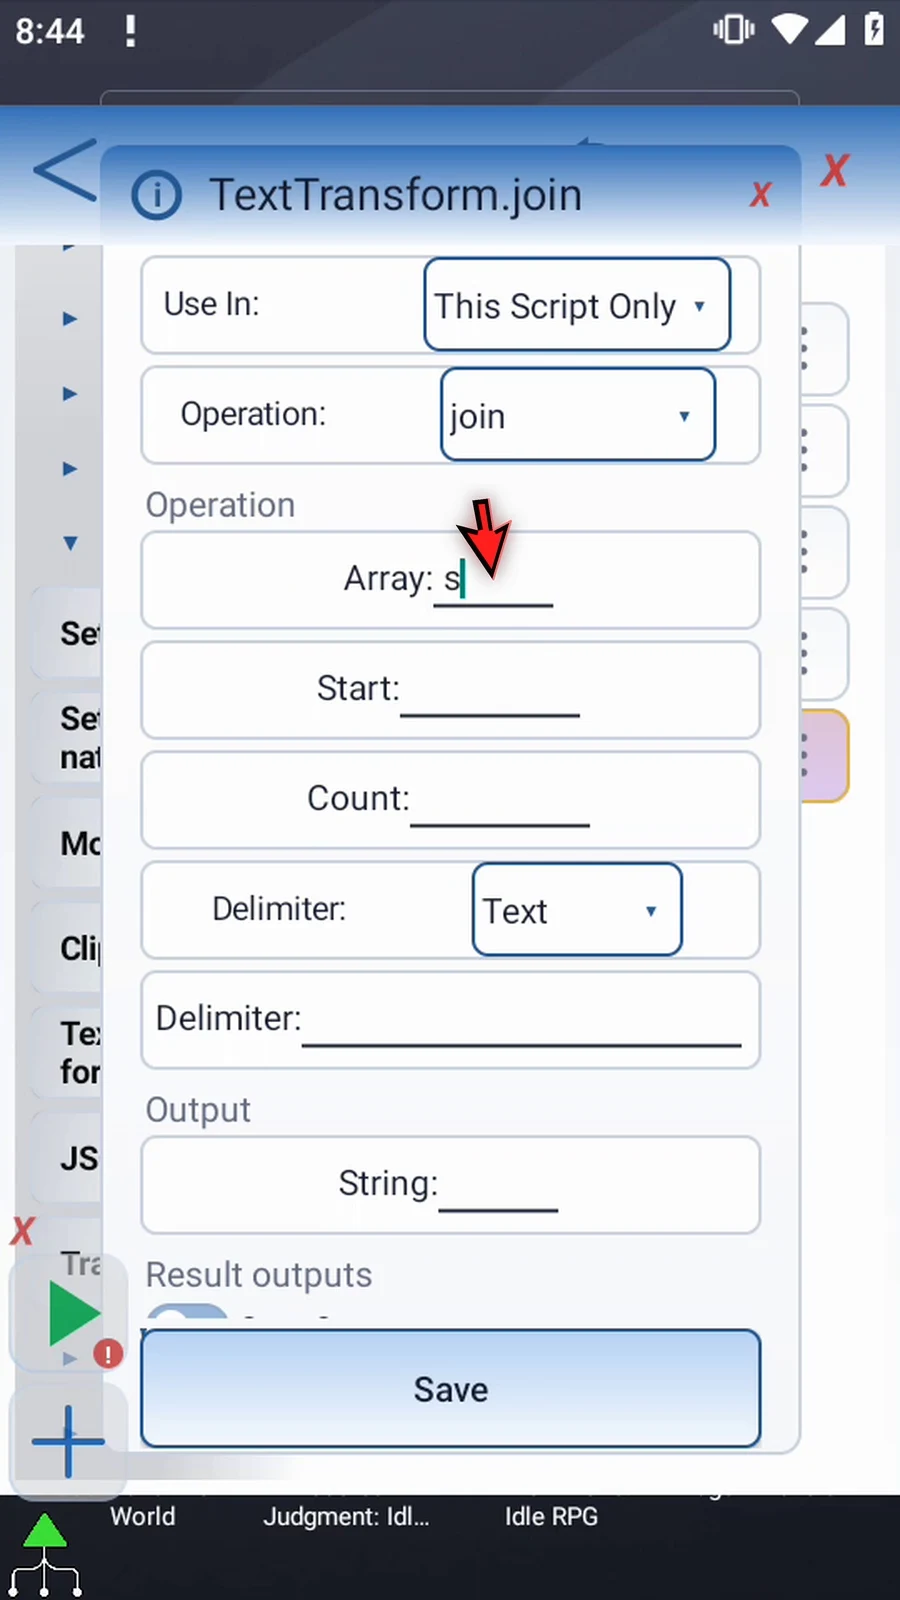
Step 07 Set Start to two. Joining begins at s2, leaving the source text in s1 out of the result.
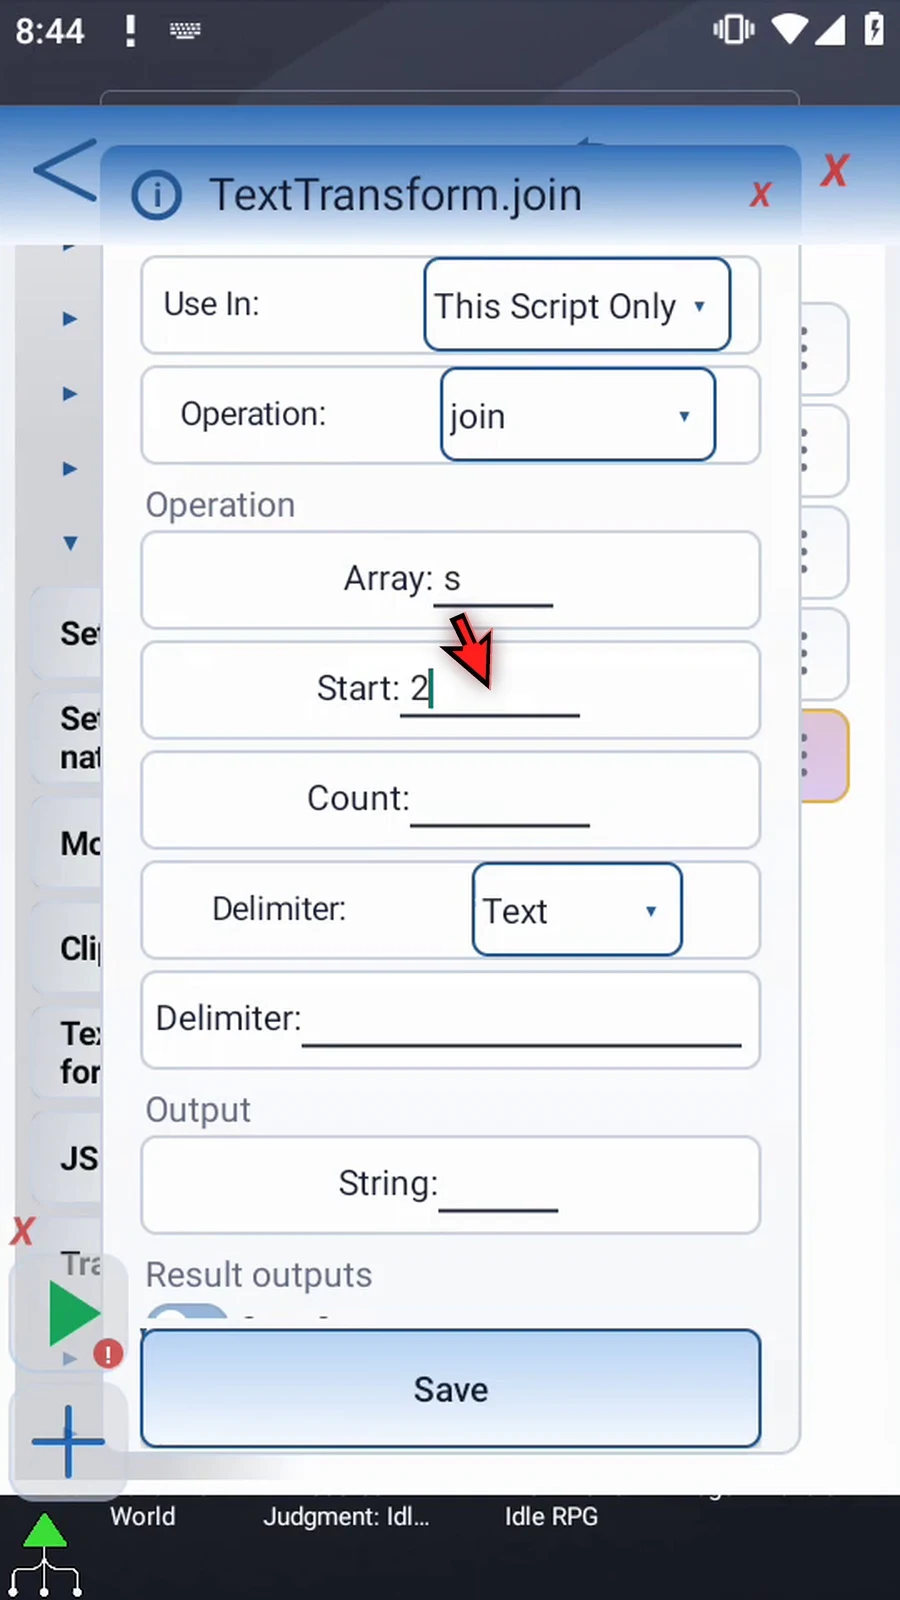
Step 08 Set Count to i1. This earlier Integer supplies the three parts saved by Split, so Join reads s2, s3, and s4.
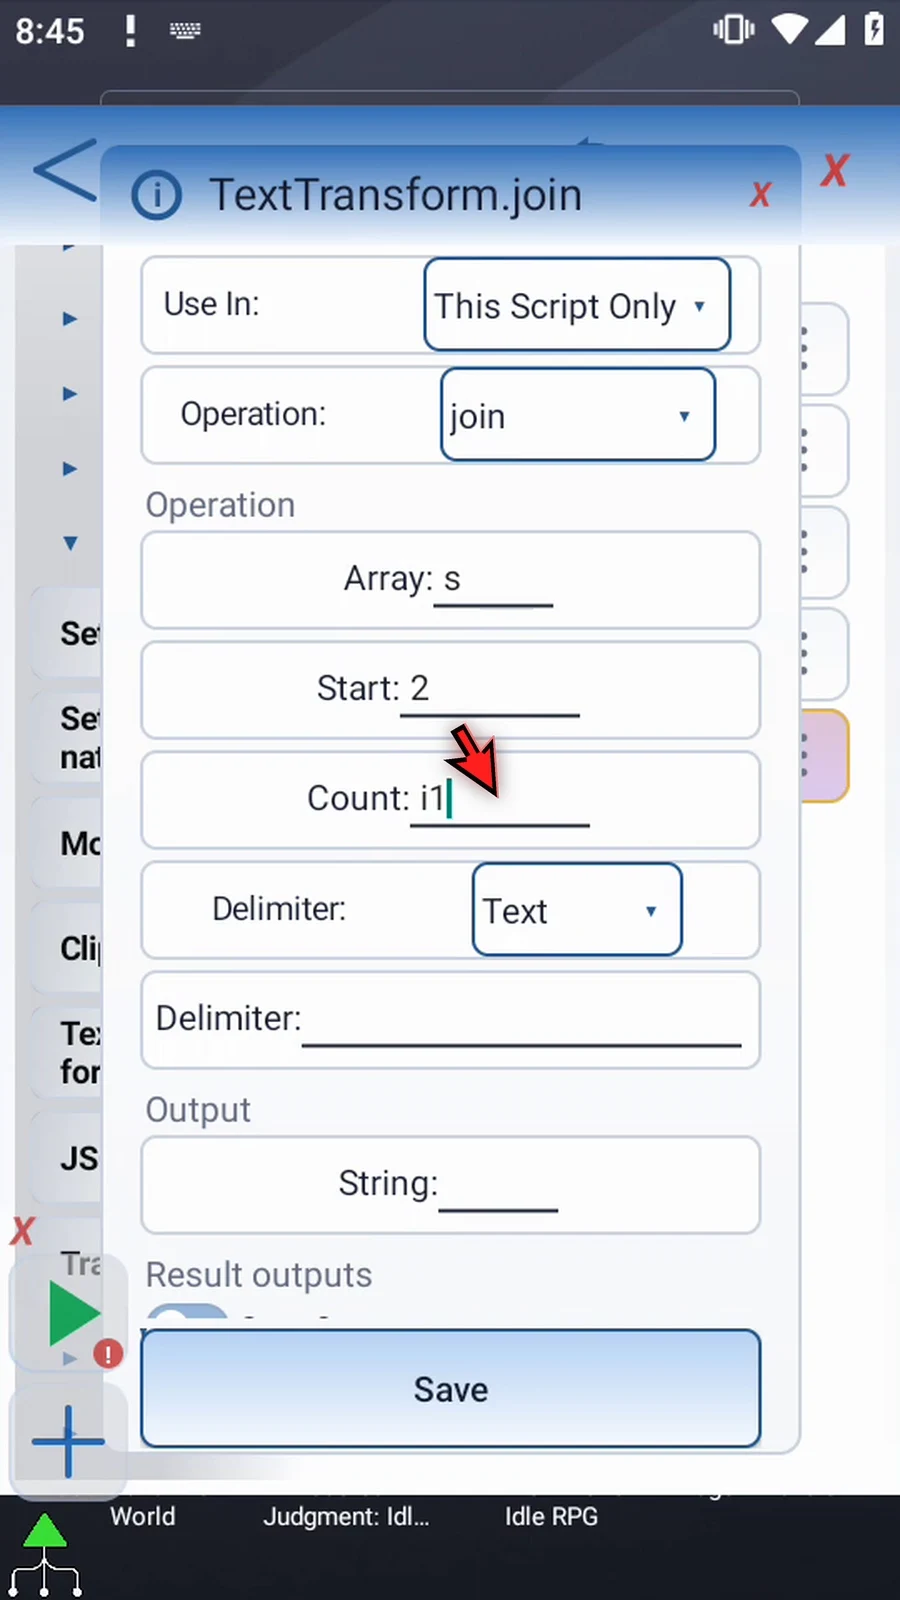
Step 09 Start and Count can also be positive Integer literals. Keep the full source range within one through four thousand ninety-six.
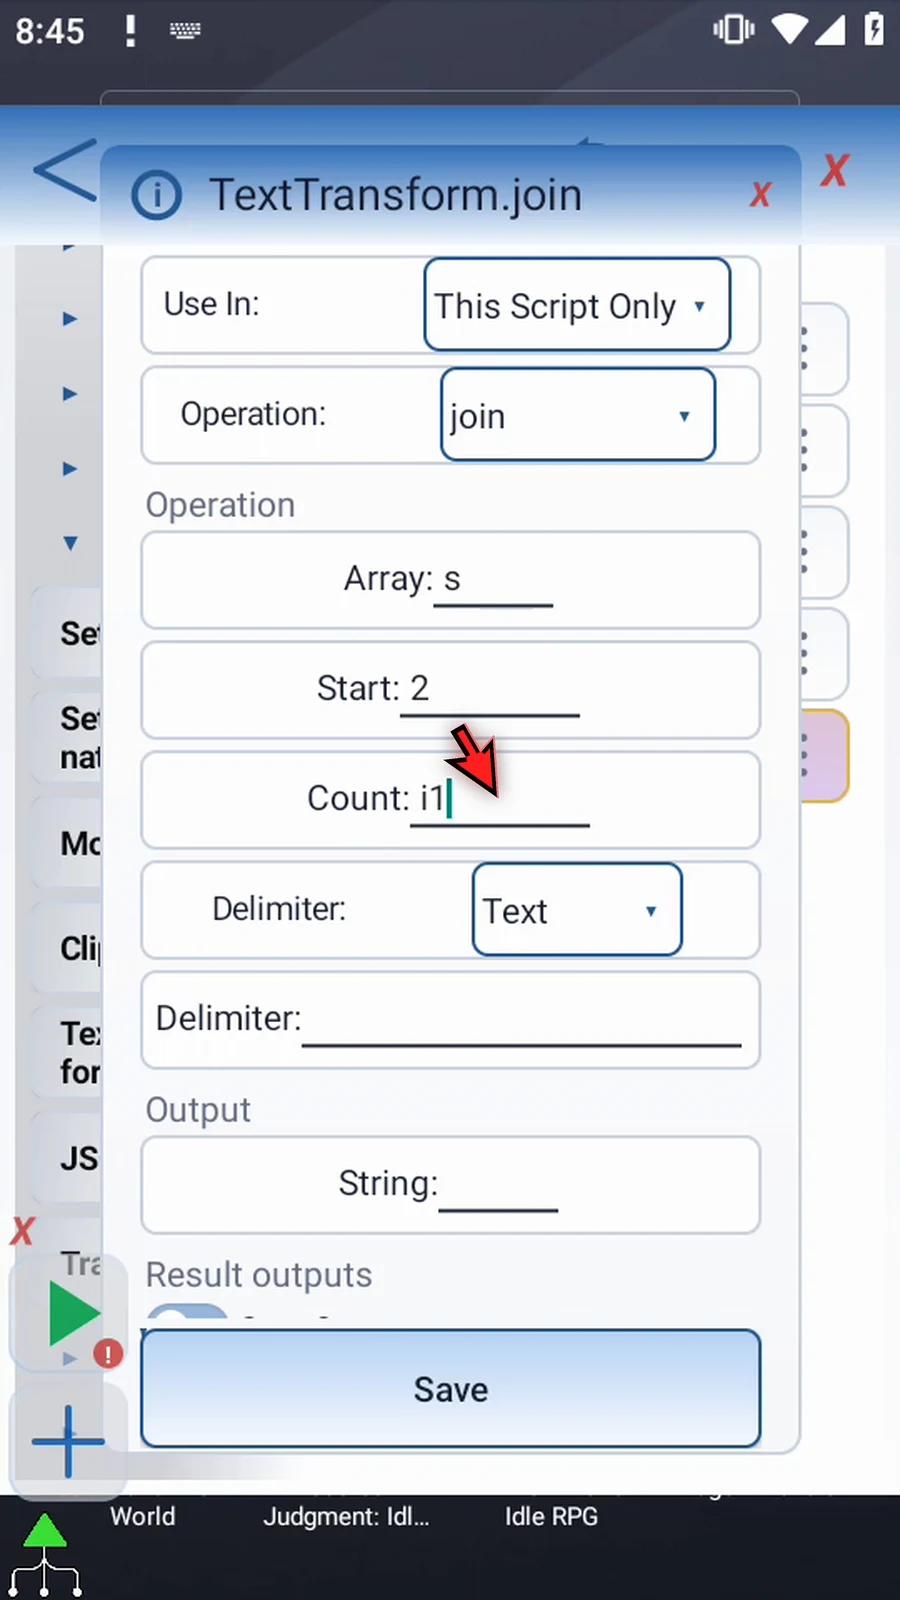
Step 10 Delimiter can be typed Text or an earlier String variable. Choose Text. Leave it empty to join without a separator.
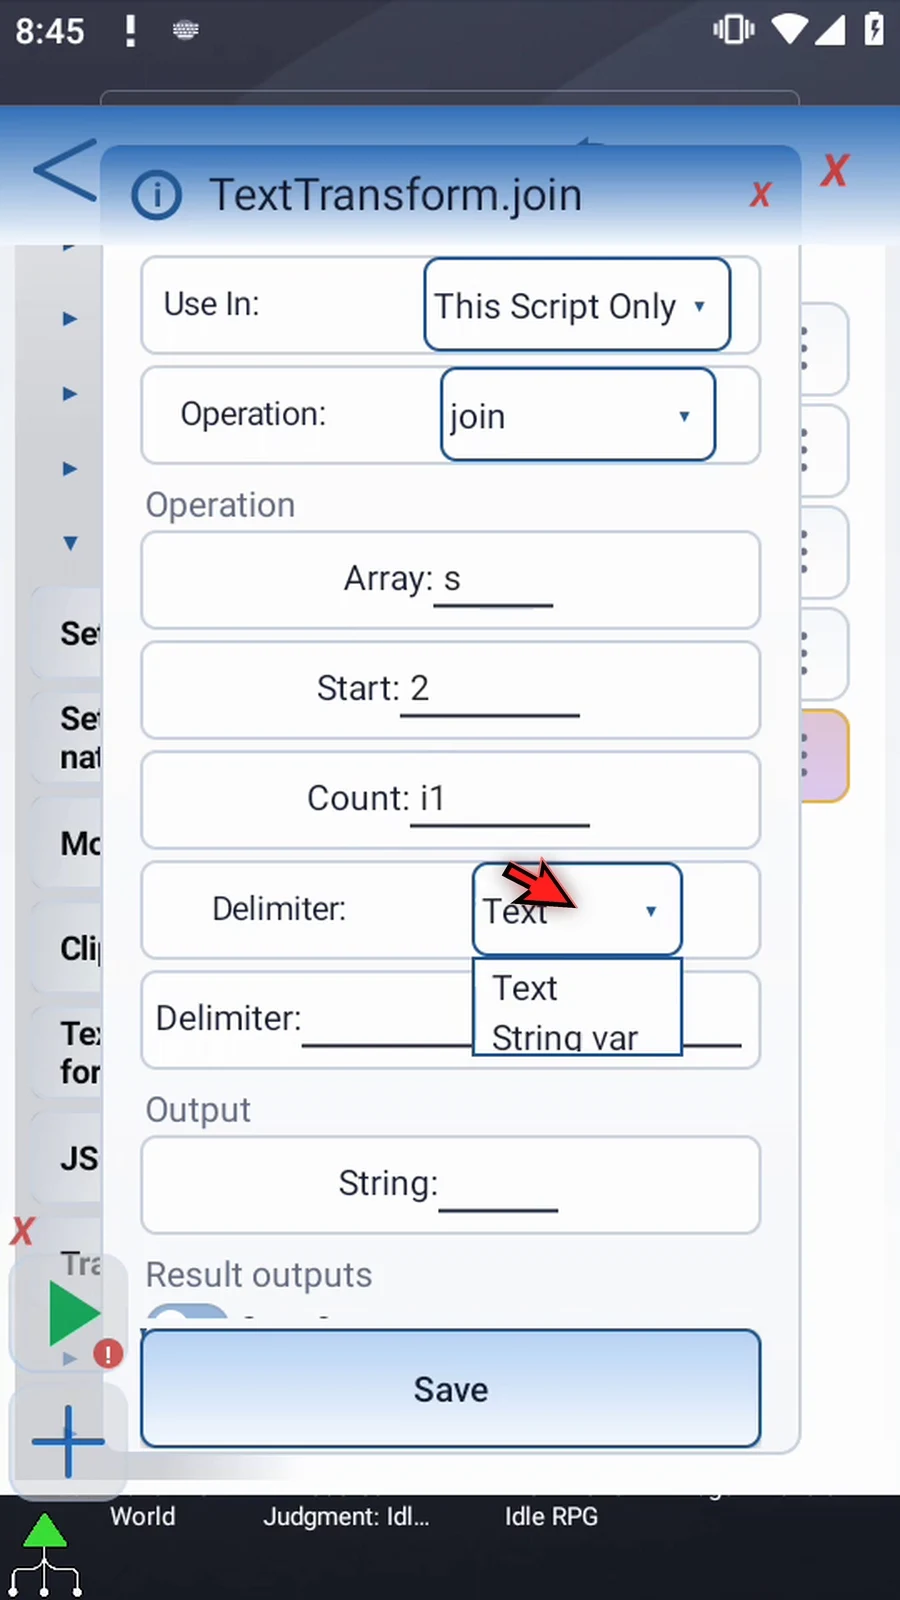
Step 11 Enter a space, a slash, and another space. Join inserts this separator between the parts, not before or after the whole result.
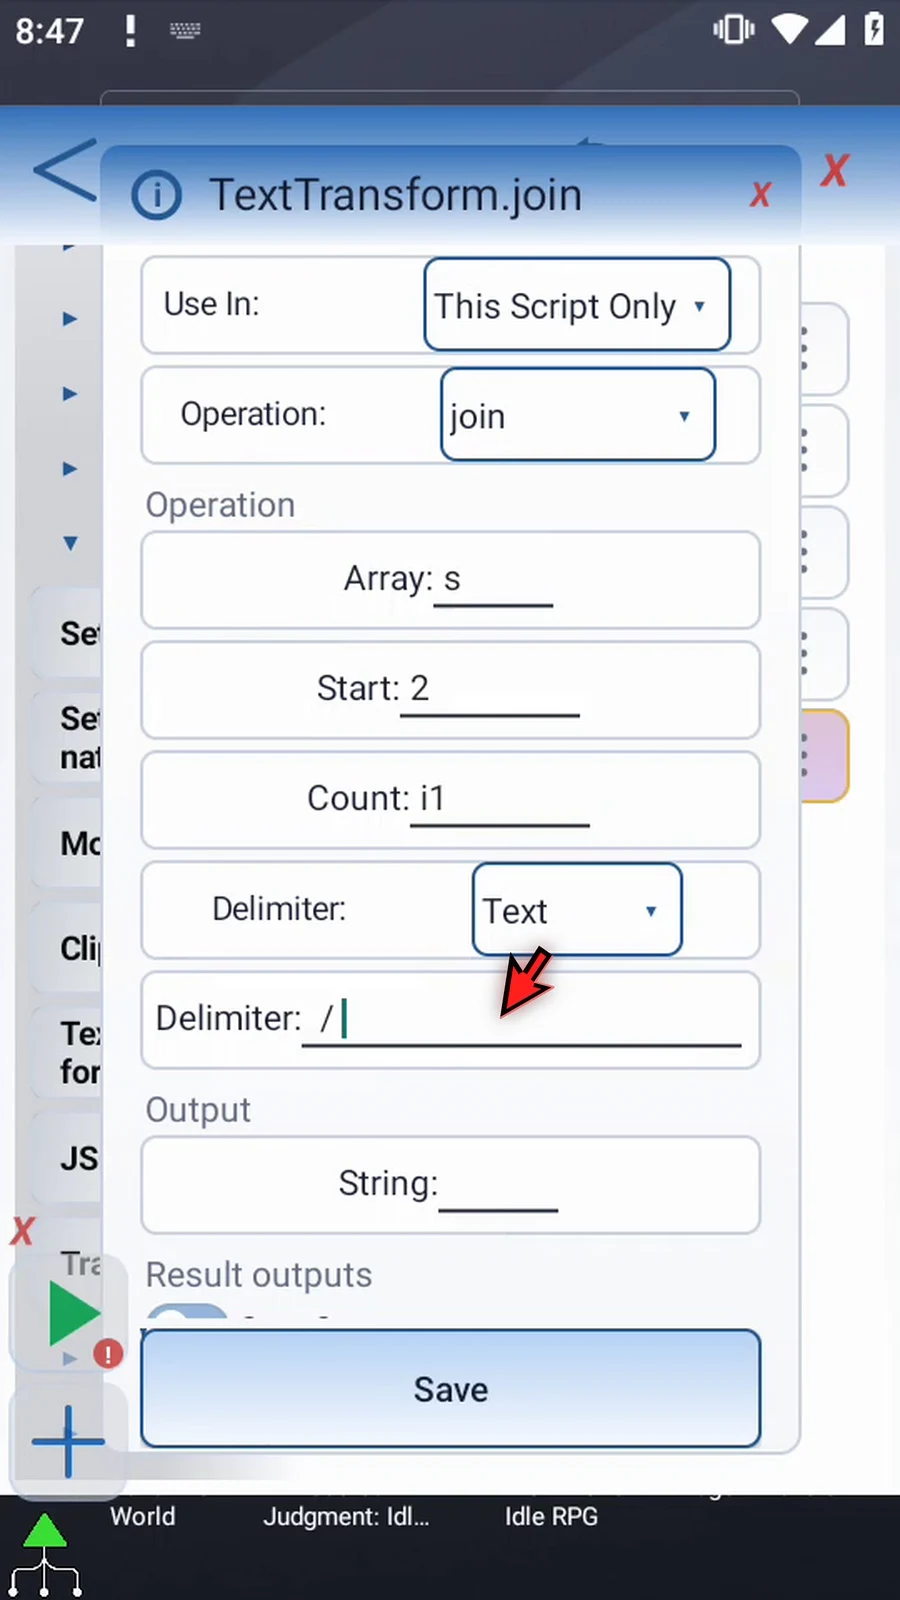
Step 12 Set the String output to s5. This keeps the original text and the three input parts available for later commands.
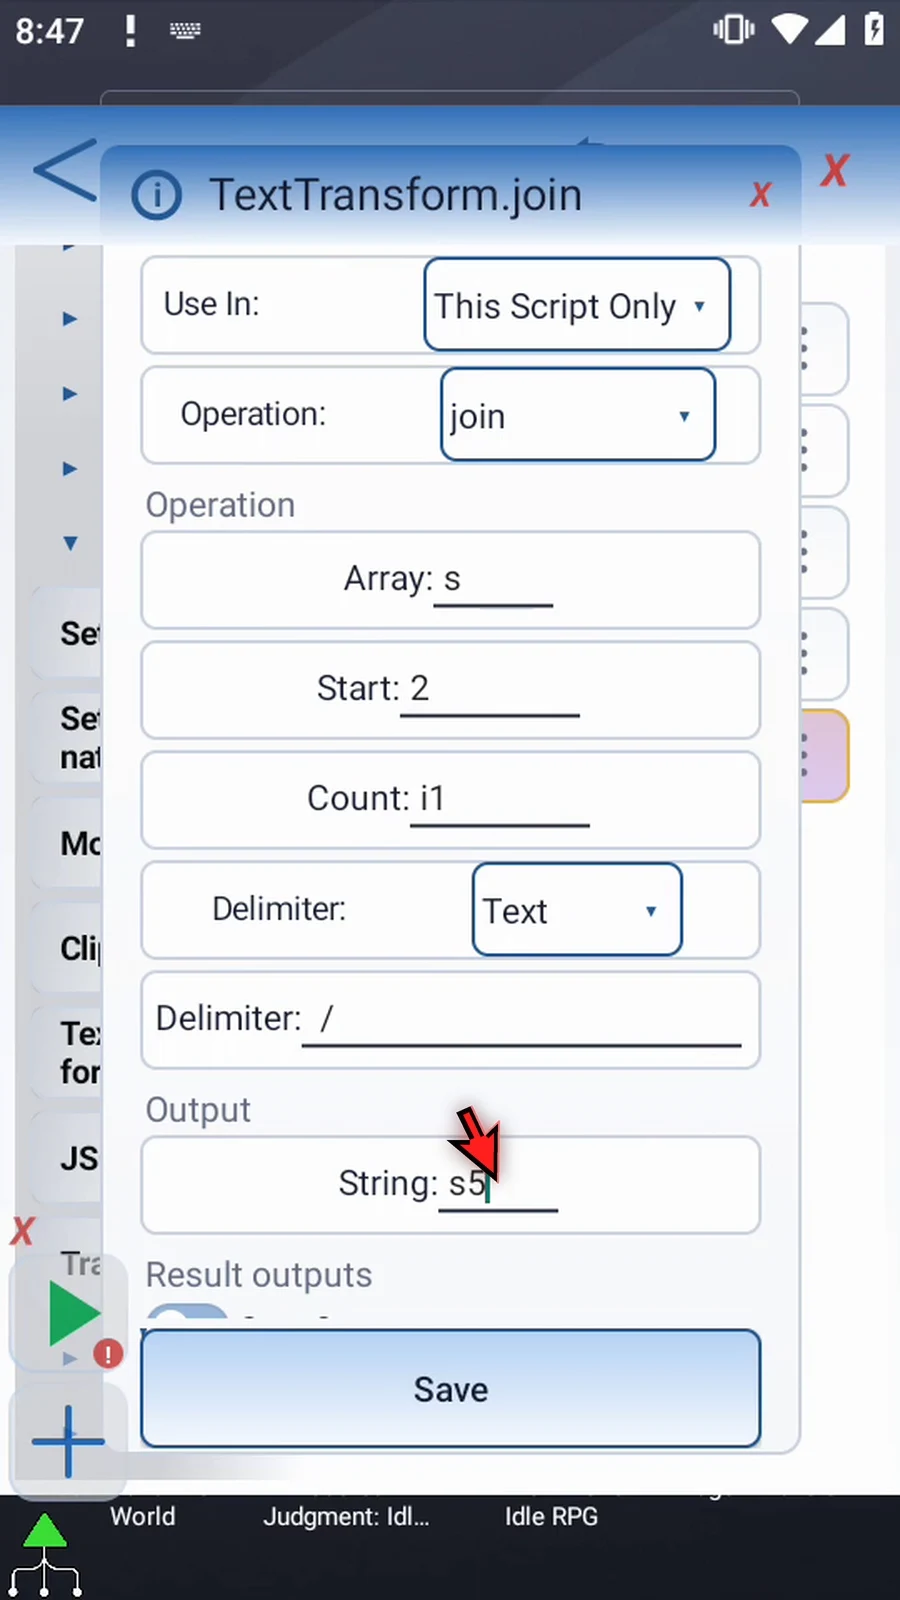
Step 13 Scroll down, keep Save Outputs off, and tap Save. Intro explains the optional Success and Error outputs.
Step 14 Drag the new Join command between Split and Display. The parts must exist before Join runs, and the joined text must exist before Display reads it.
Step 15 Open Display to show the joined text.
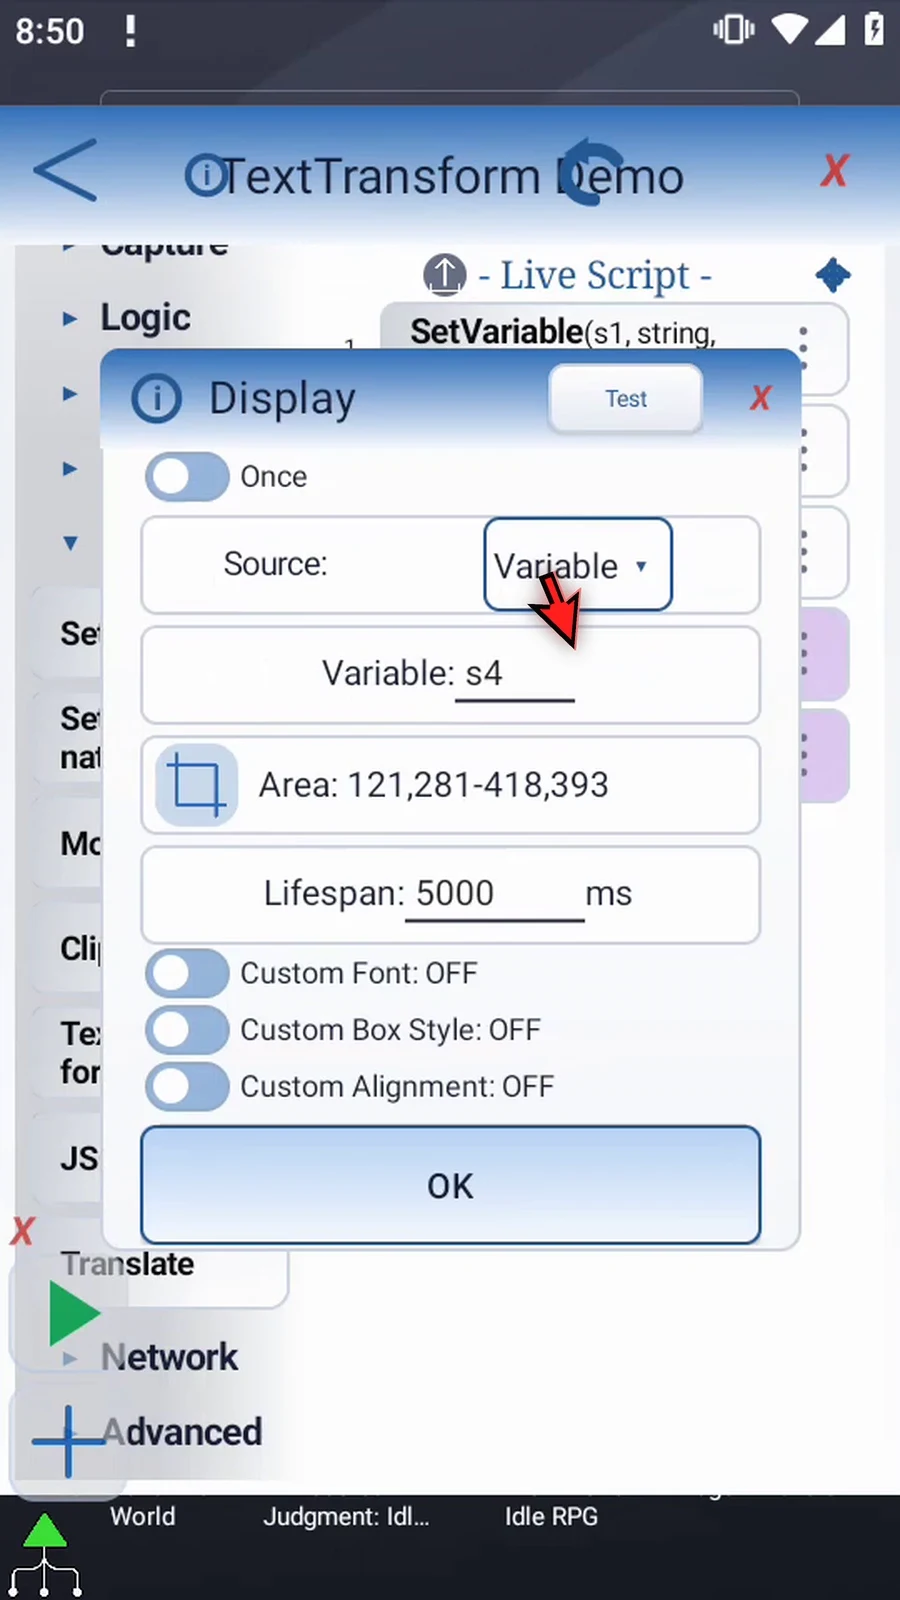
Step 16 Change its Variable to s5. Keep the same area and five-second lifespan, then tap OK.
Step 17 Set Variable supplies the list; Split creates parts; Join recombines them with slashes. Display shows the new text, and Prompt Me confirms completion. Close the editor.
Step 18 When the script is complete, simply use the Play button in the main overlay.
Step 19 The three colors are now separated by slashes.
Step 20 Complete confirms that all five commands ran.
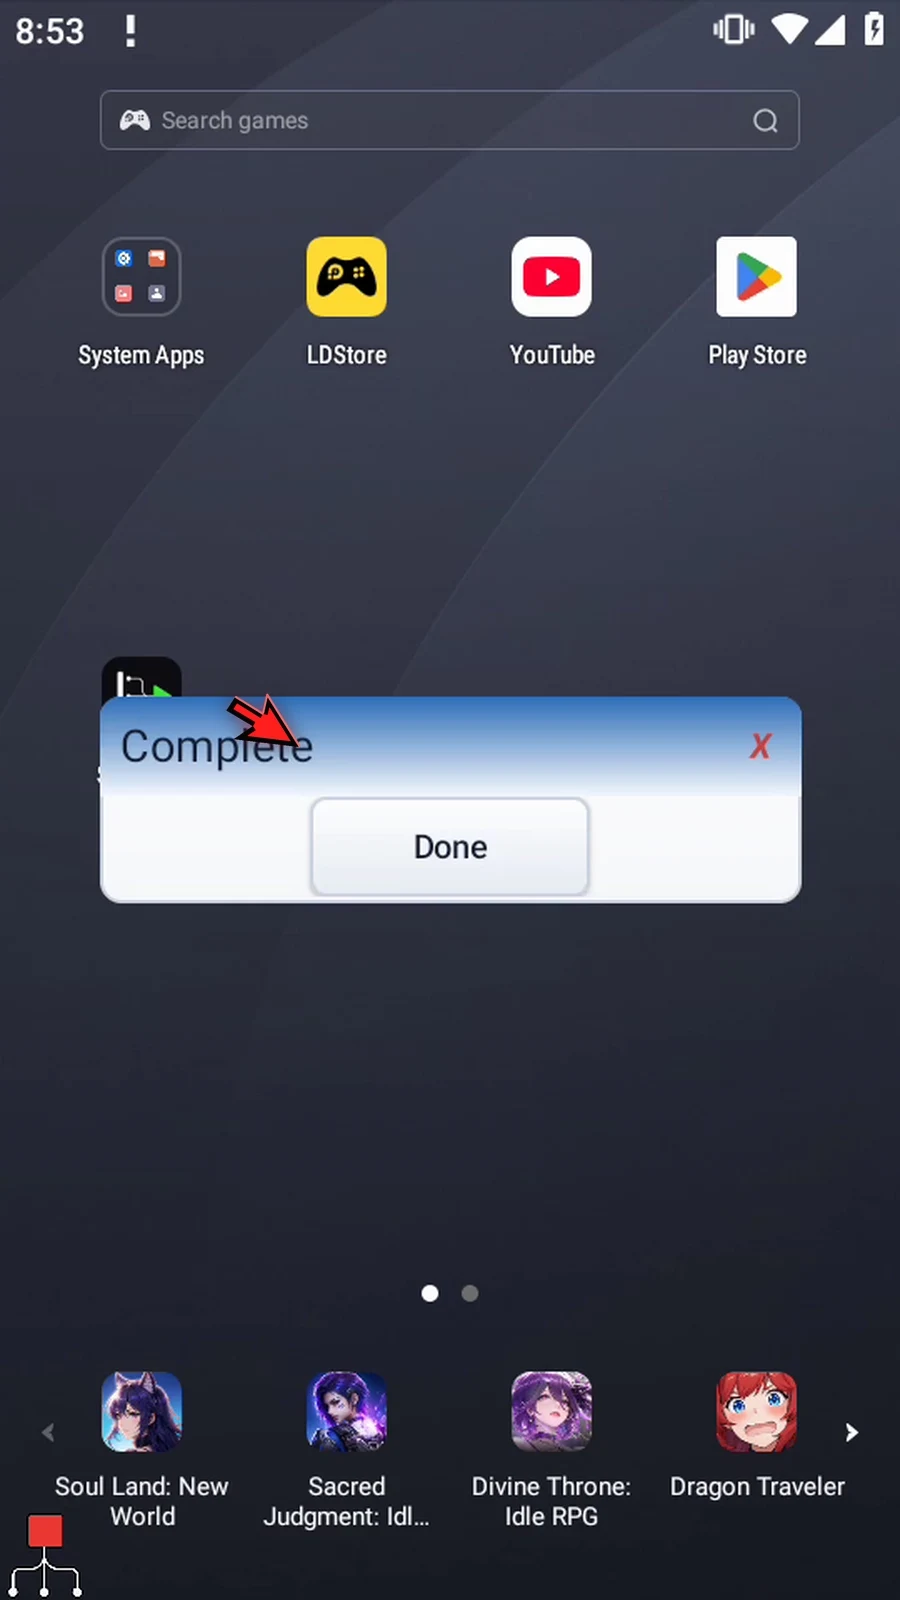
Step 21 Press Done. The script finishes automatically. Use Join when separate String slots need to become one value for a later command.