
ScriptTap
TouchDown / TouchMove

Command video guide

TouchDown / TouchMove

Keep the original touch uninterrupted while other actions run. Build one TouchDown block, move a held home-screen icon with two TouchMove commands, then release it with End Touch.

Watch the walkthrough

Step-by-step guide

  1. Step 01

    TouchDown keeps a finger pressed while other actions run, without interrupting the original touch. TouchMove moves that same held finger.
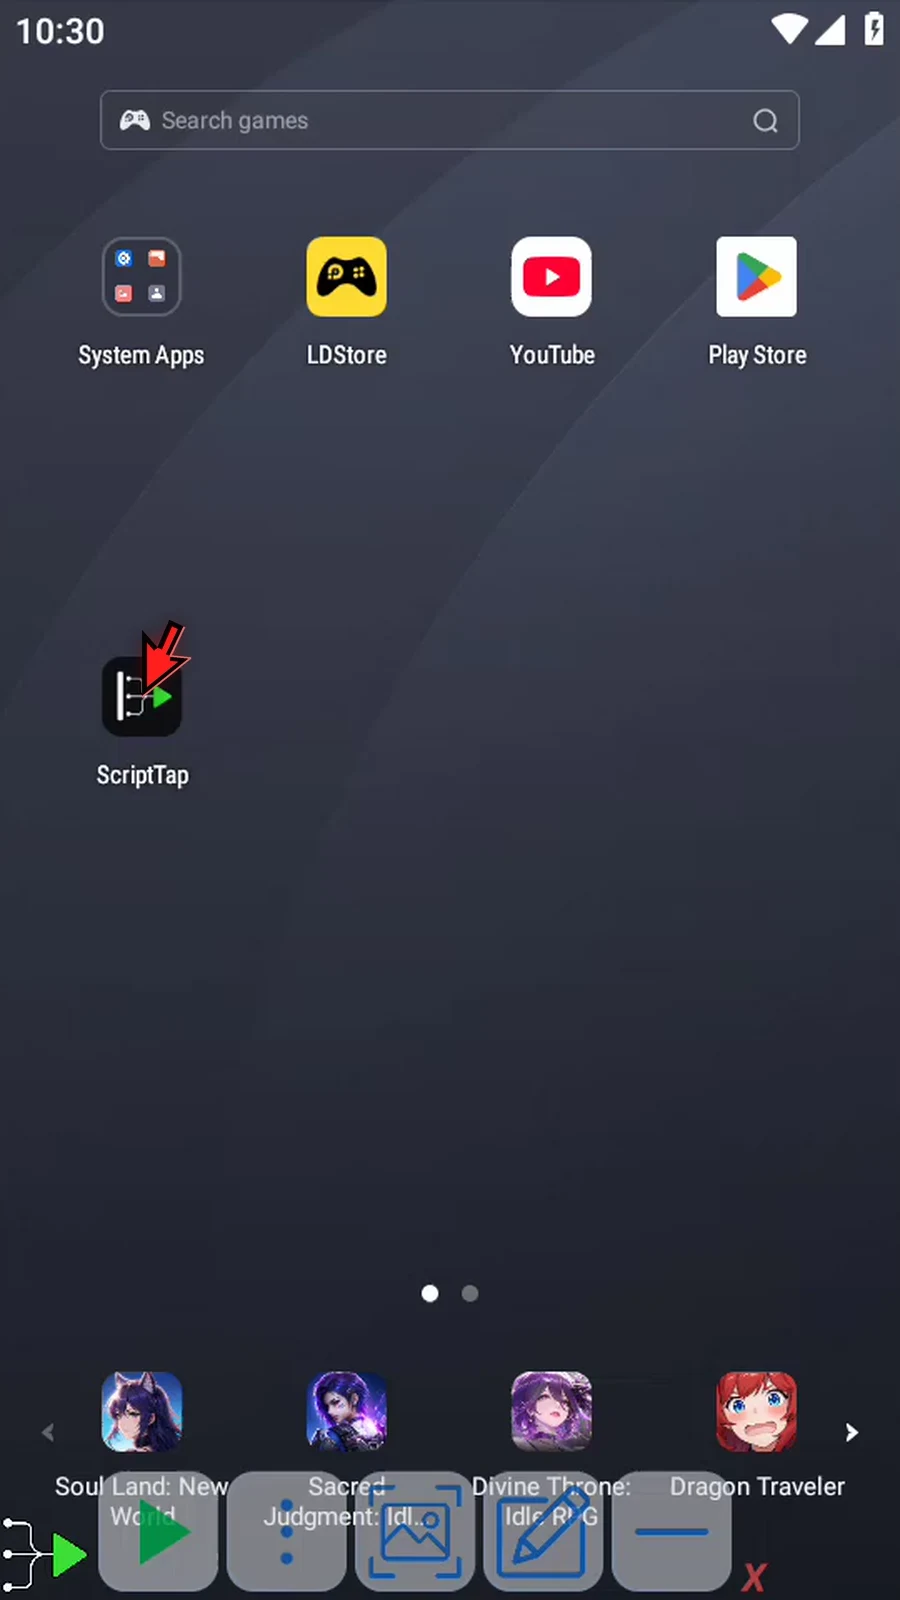
    TouchDown / TouchMove step 1: TouchDown keeps a finger pressed while other actions run, without interrupting the original touch. TouchMove moves that same held finger.
  2. Step 02

    Open the main menu, then choose Scripts.
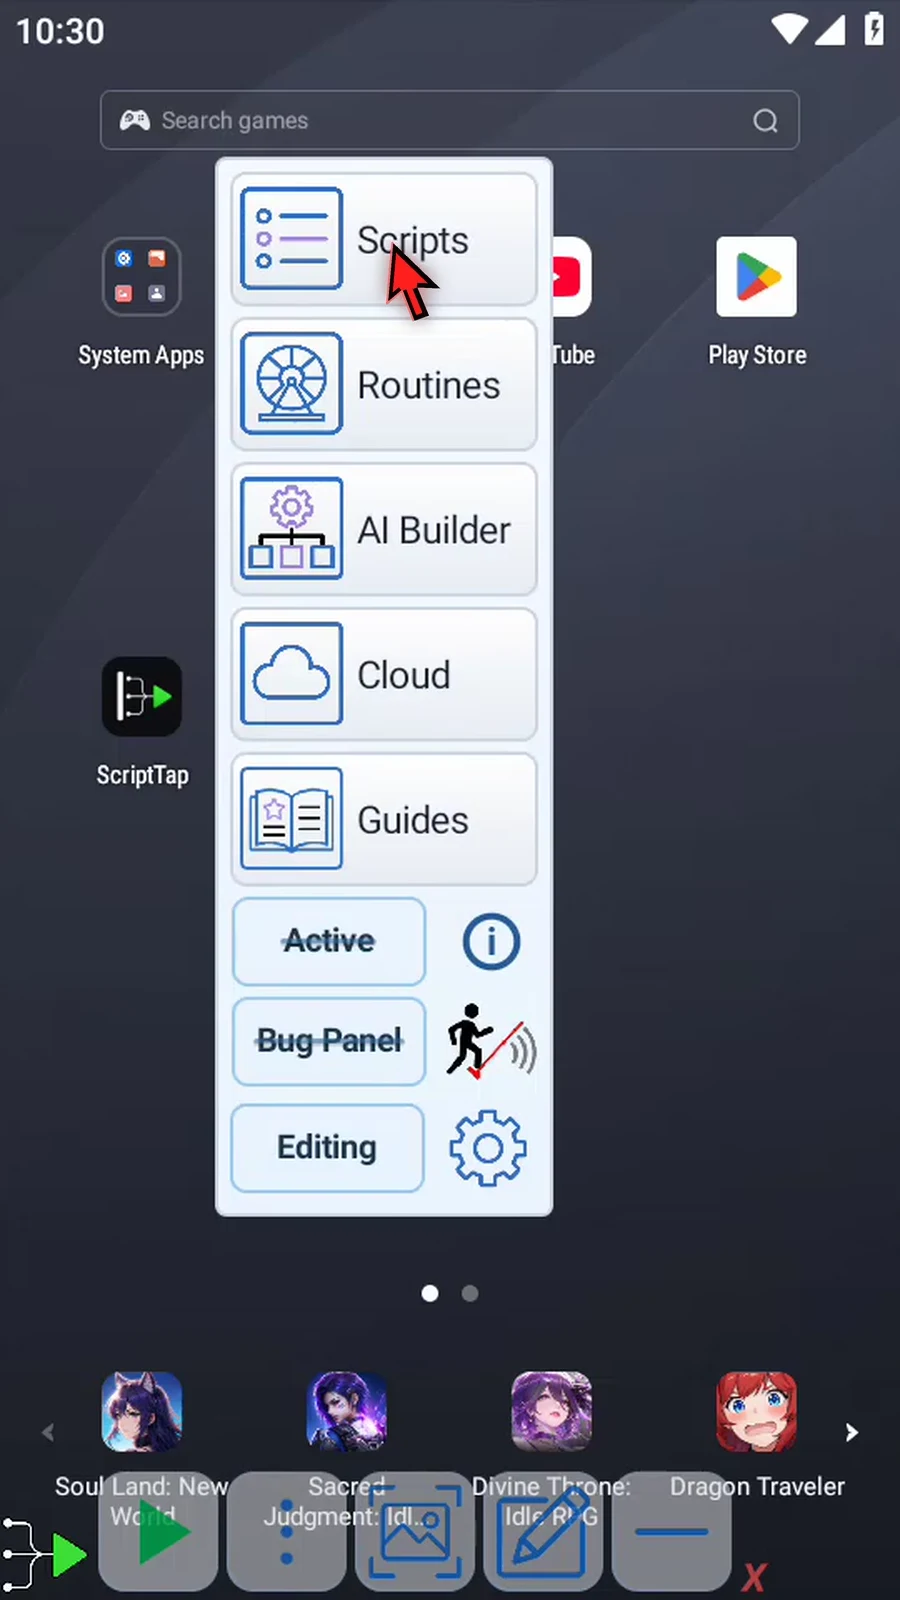
    TouchDown / TouchMove step 2: Open the main menu, then choose Scripts.
  3. Step 03

    Tap New Script, then choose Blank Script.
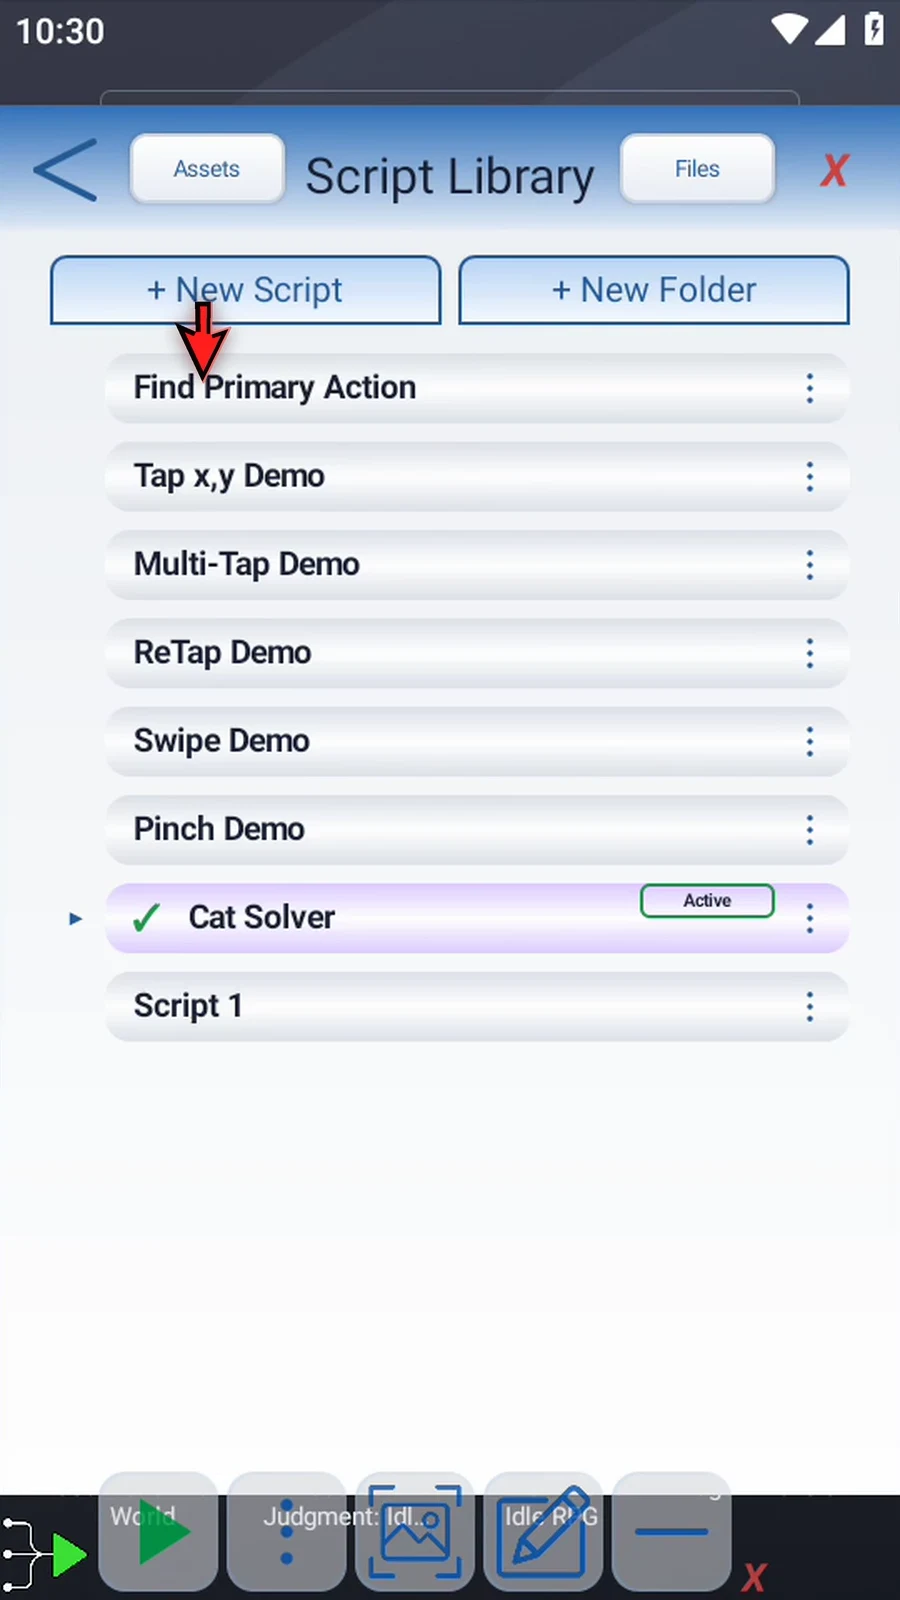
    TouchDown / TouchMove step 3: Tap New Script, then choose Blank Script.
  4. Step 04

    Open the new script’s three-dot menu and choose Rename.
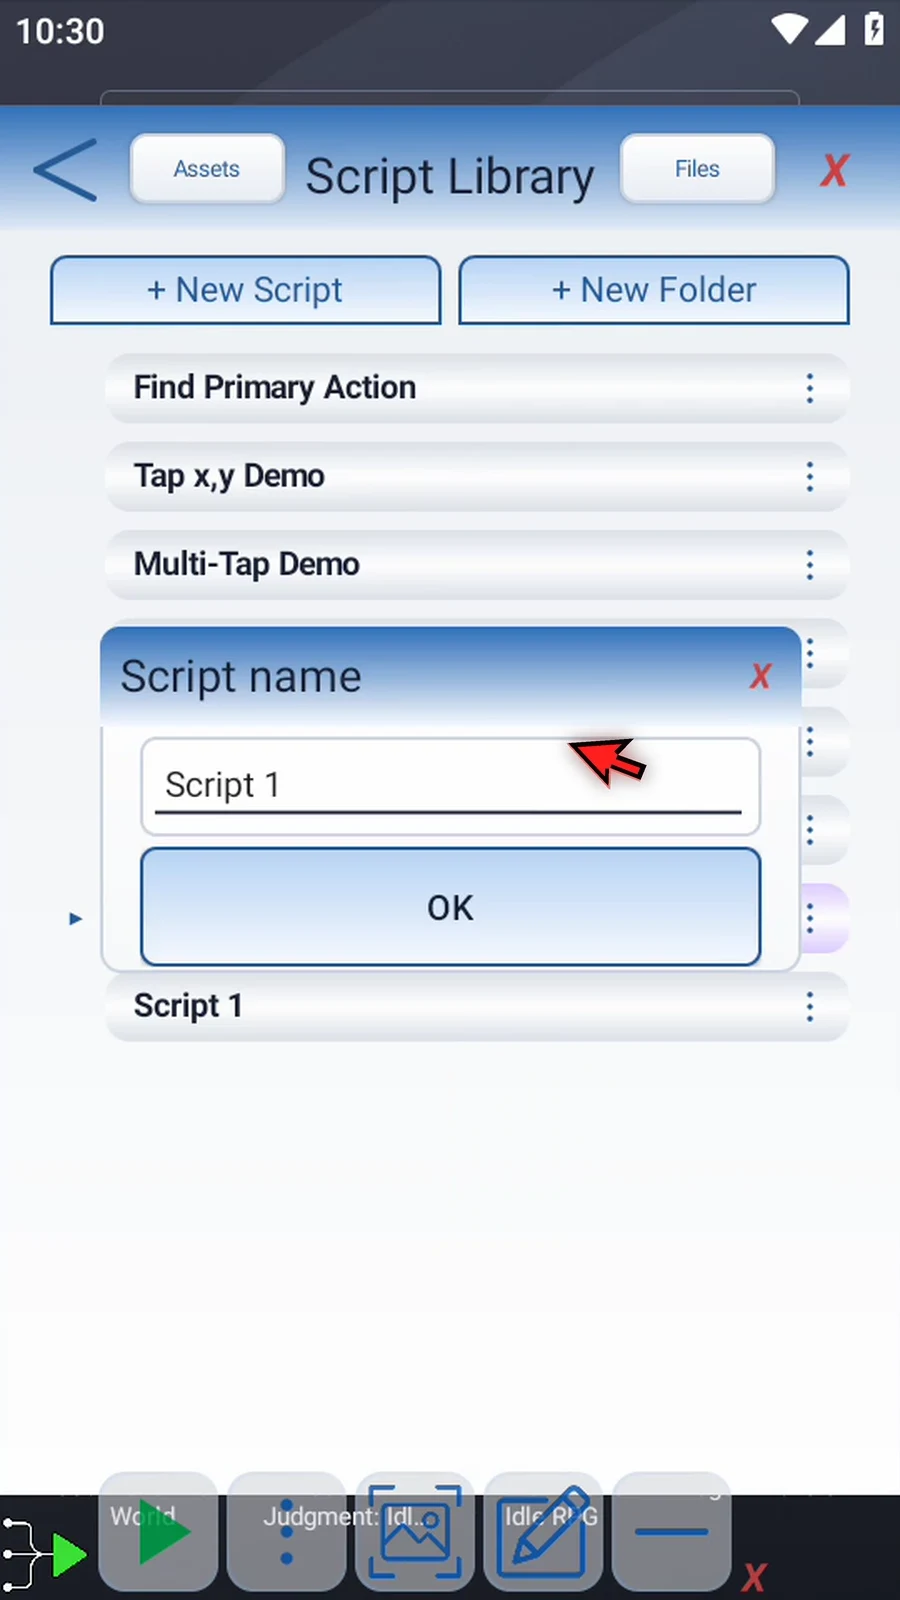
    TouchDown / TouchMove step 4: Open the new script’s three-dot menu and choose Rename.
  5. Step 05

    Pick a name for your script, then tap OK.
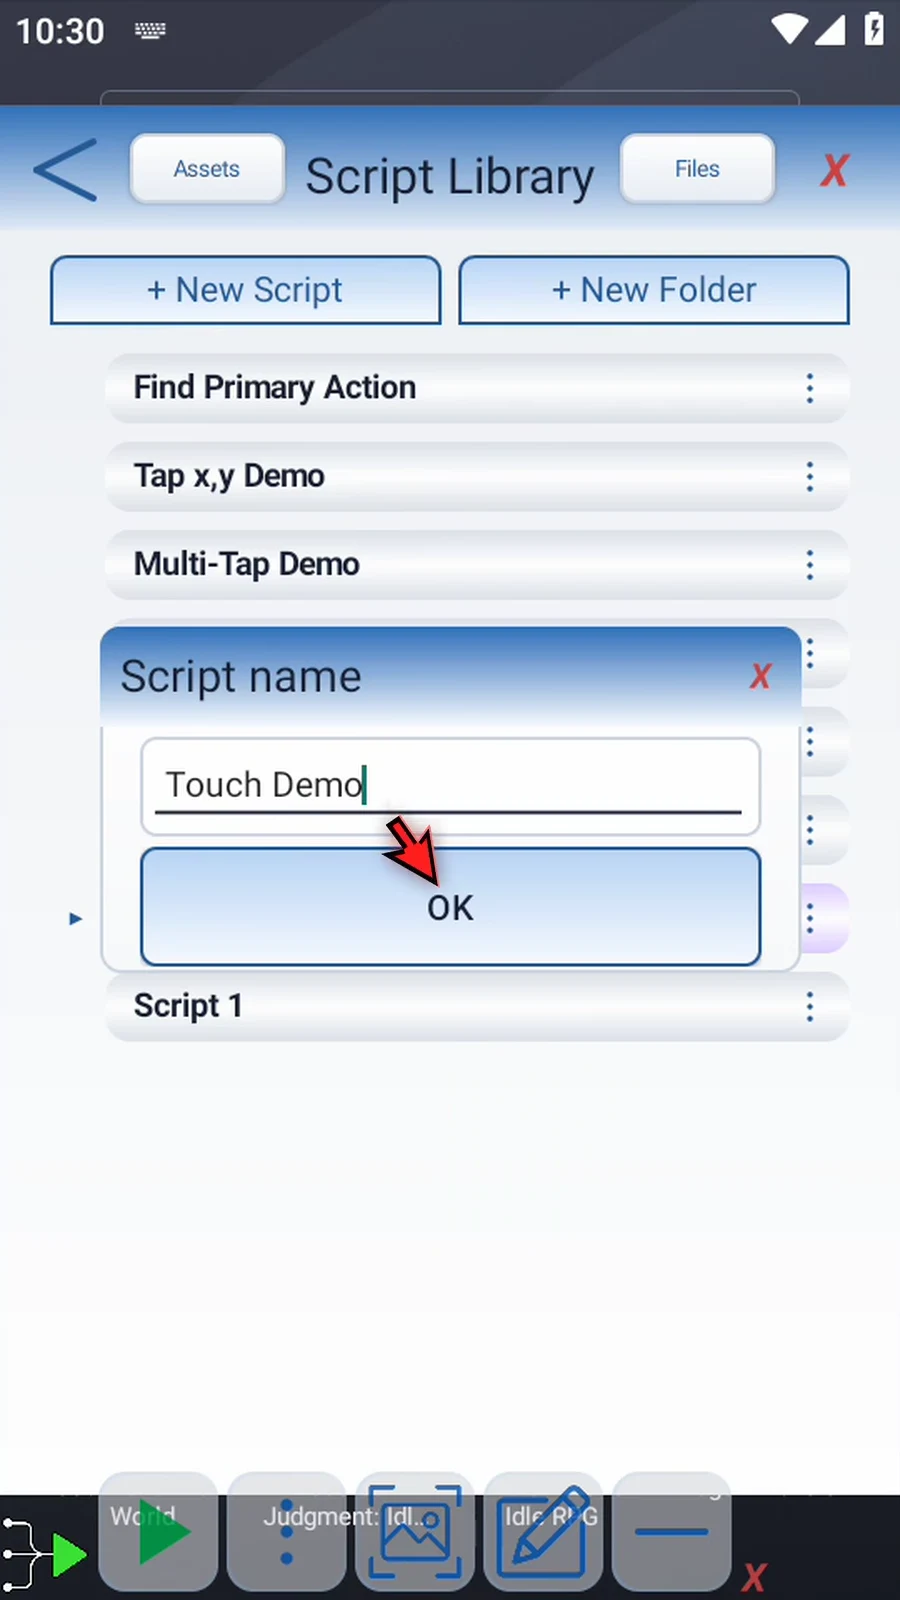
    TouchDown / TouchMove step 5: Pick a name for your script, then tap OK.
  6. Step 06

    Select the new script, then open the Script Editor.
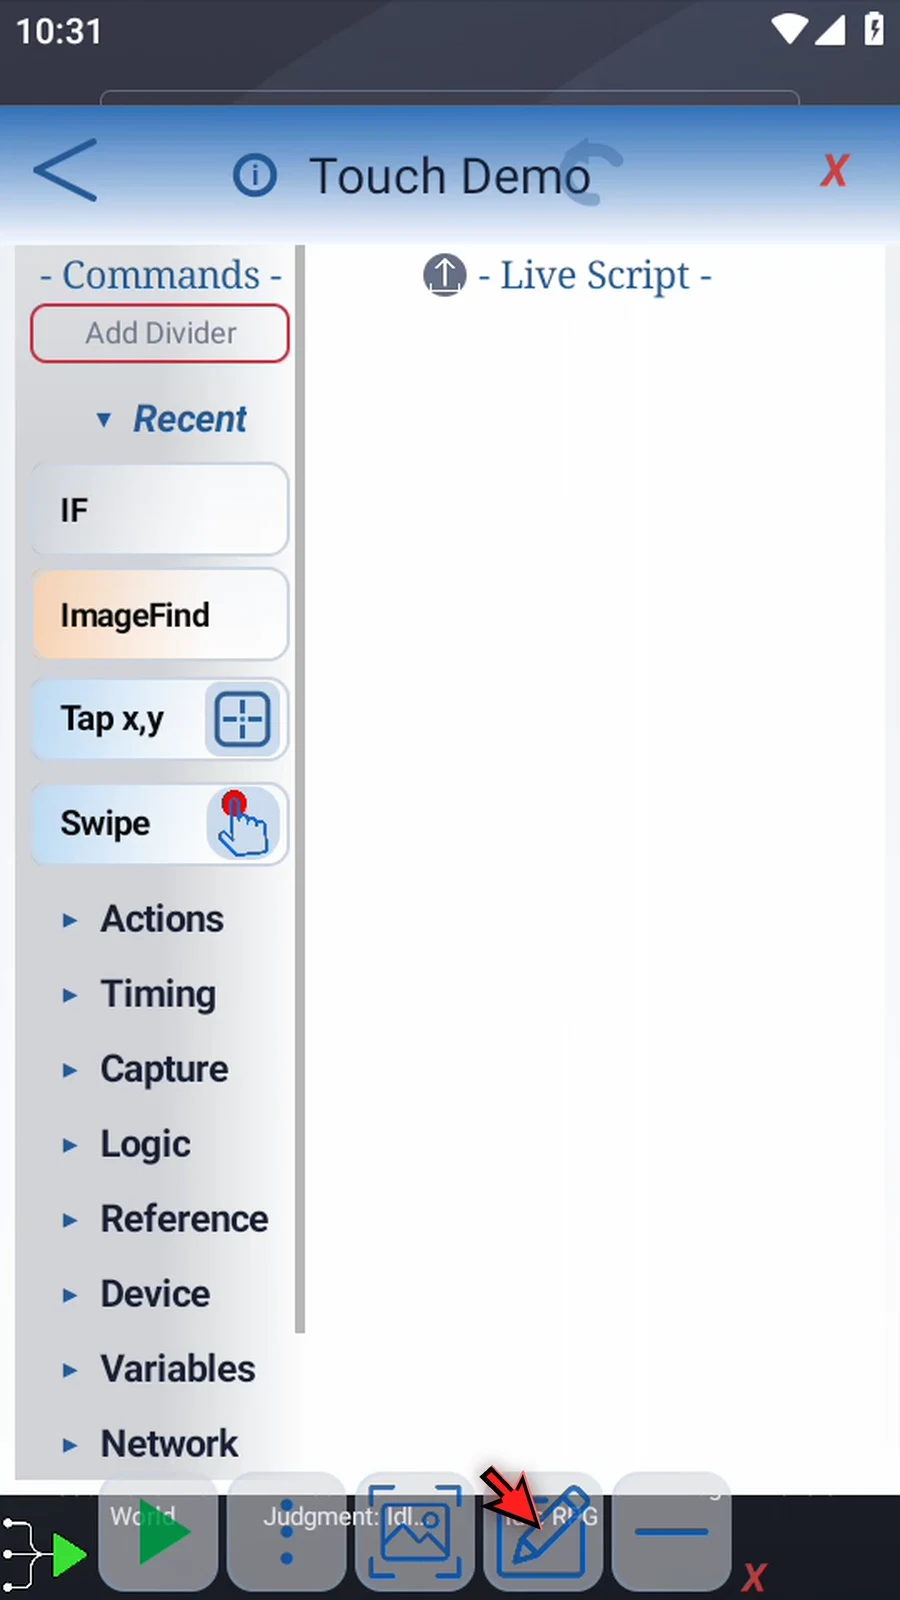
    TouchDown / TouchMove step 6: Select the new script, then open the Script Editor.
  7. Step 07

    Expand Actions. Drag TouchDown into the script, and release at the blue insertion line.
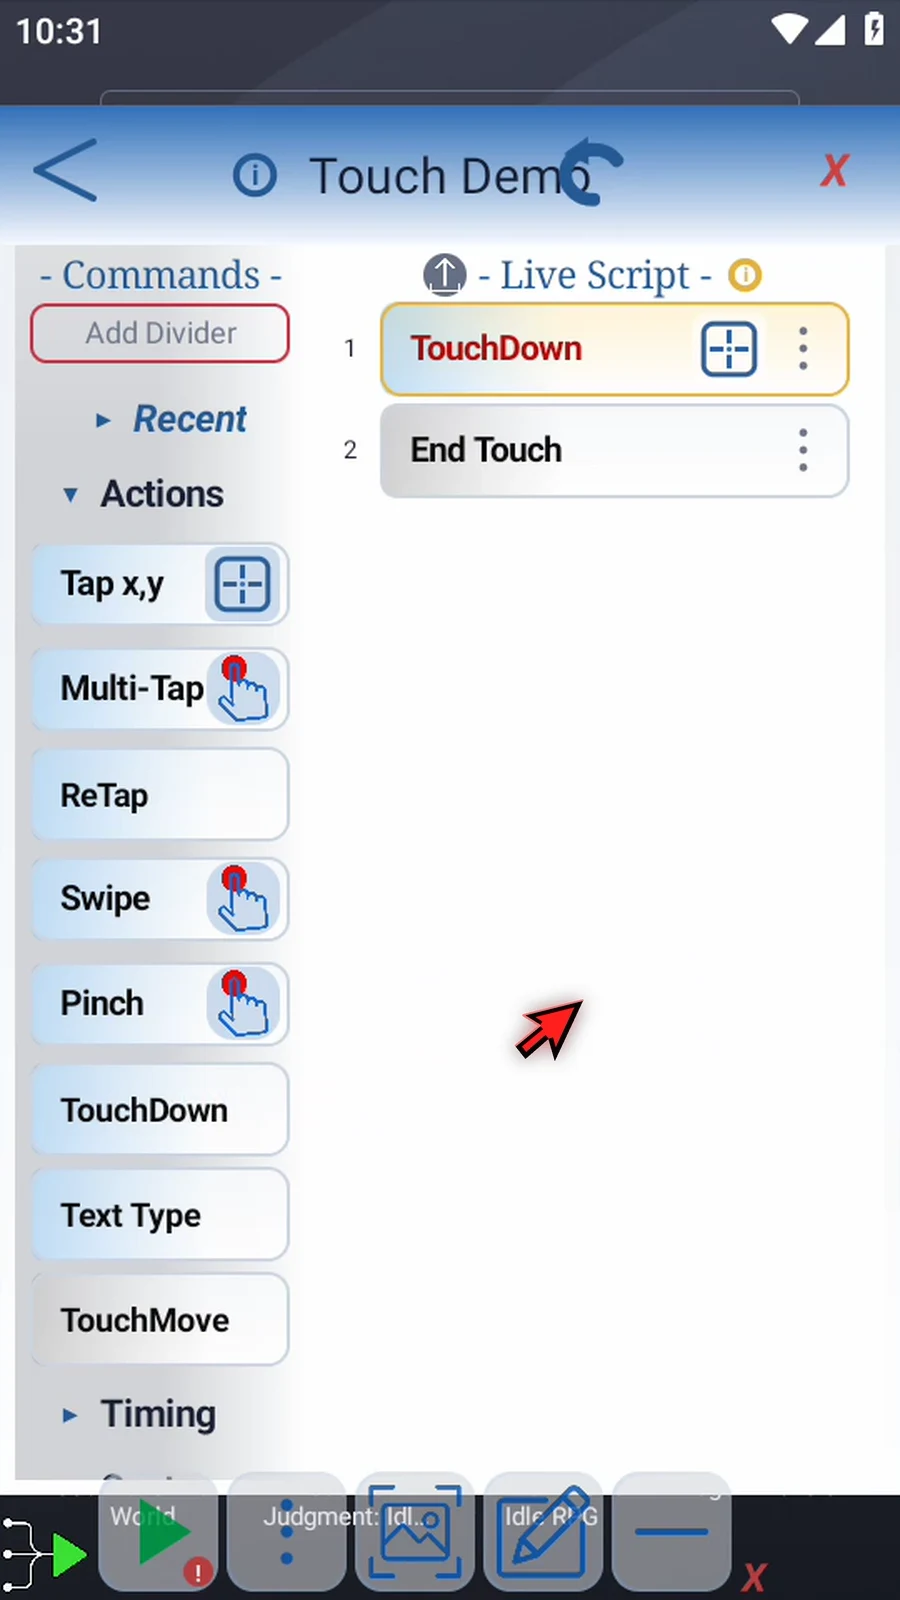
    TouchDown / TouchMove step 7: Expand Actions. Drag TouchDown into the script, and release at the blue insertion line.
  8. Step 08

    TouchDown creates a block ending with End Touch. Double-tap the TouchDown frame to open its settings.
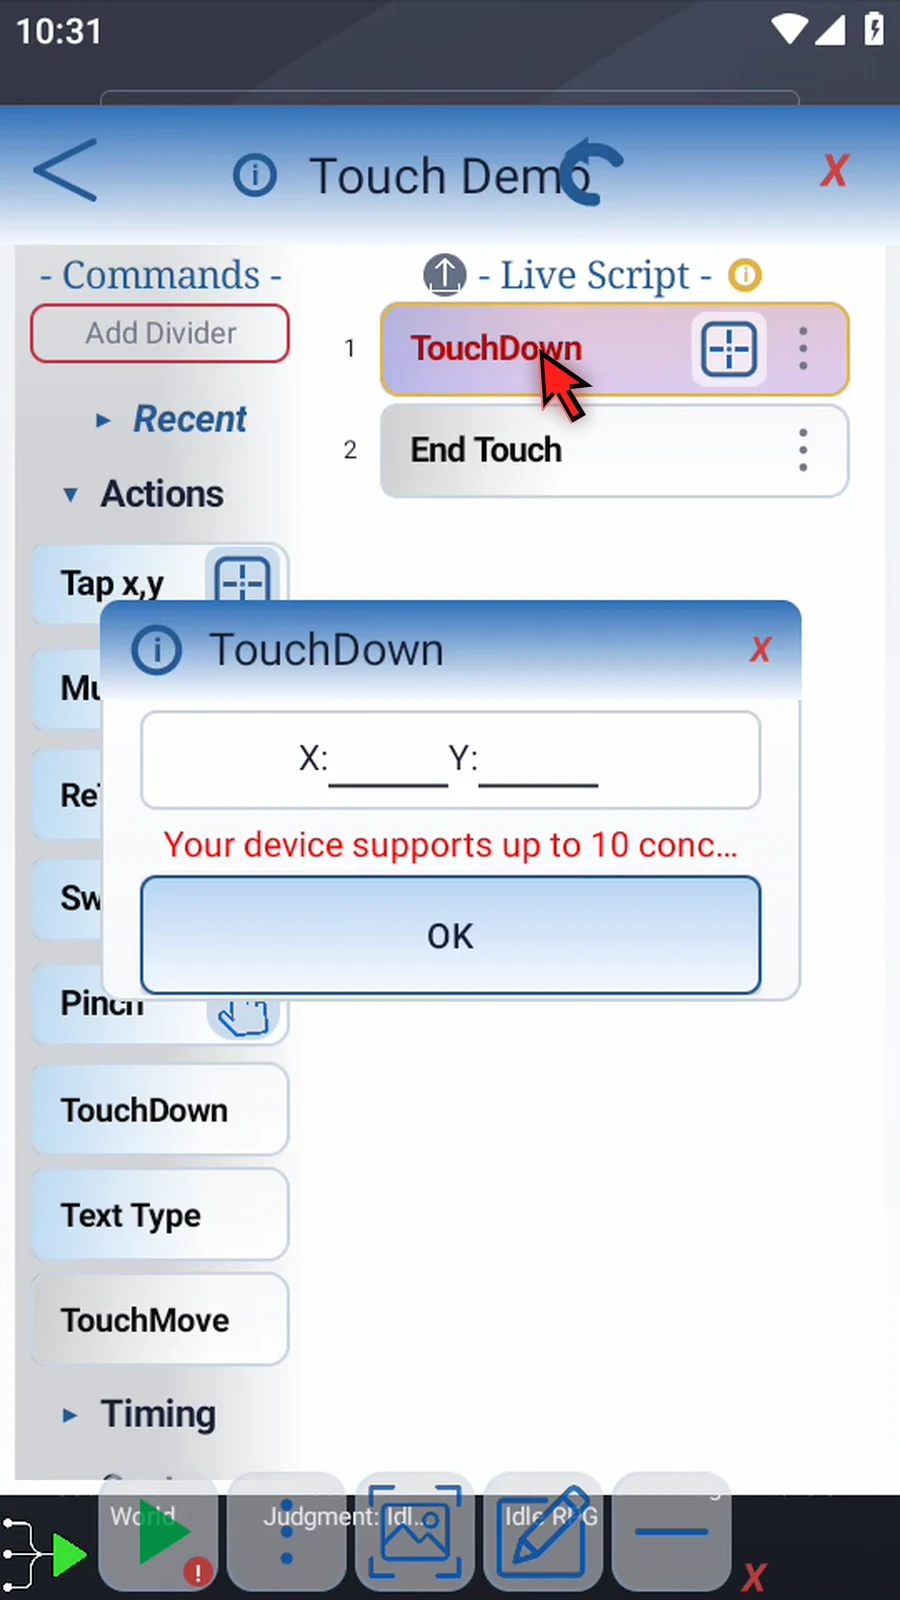
    TouchDown / TouchMove step 8: TouchDown creates a block ending with End Touch. Double-tap the TouchDown frame to open its settings.
  9. Step 09

    Set X and Y to the center of the home-screen icon. X runs across the screen; Y runs down it.
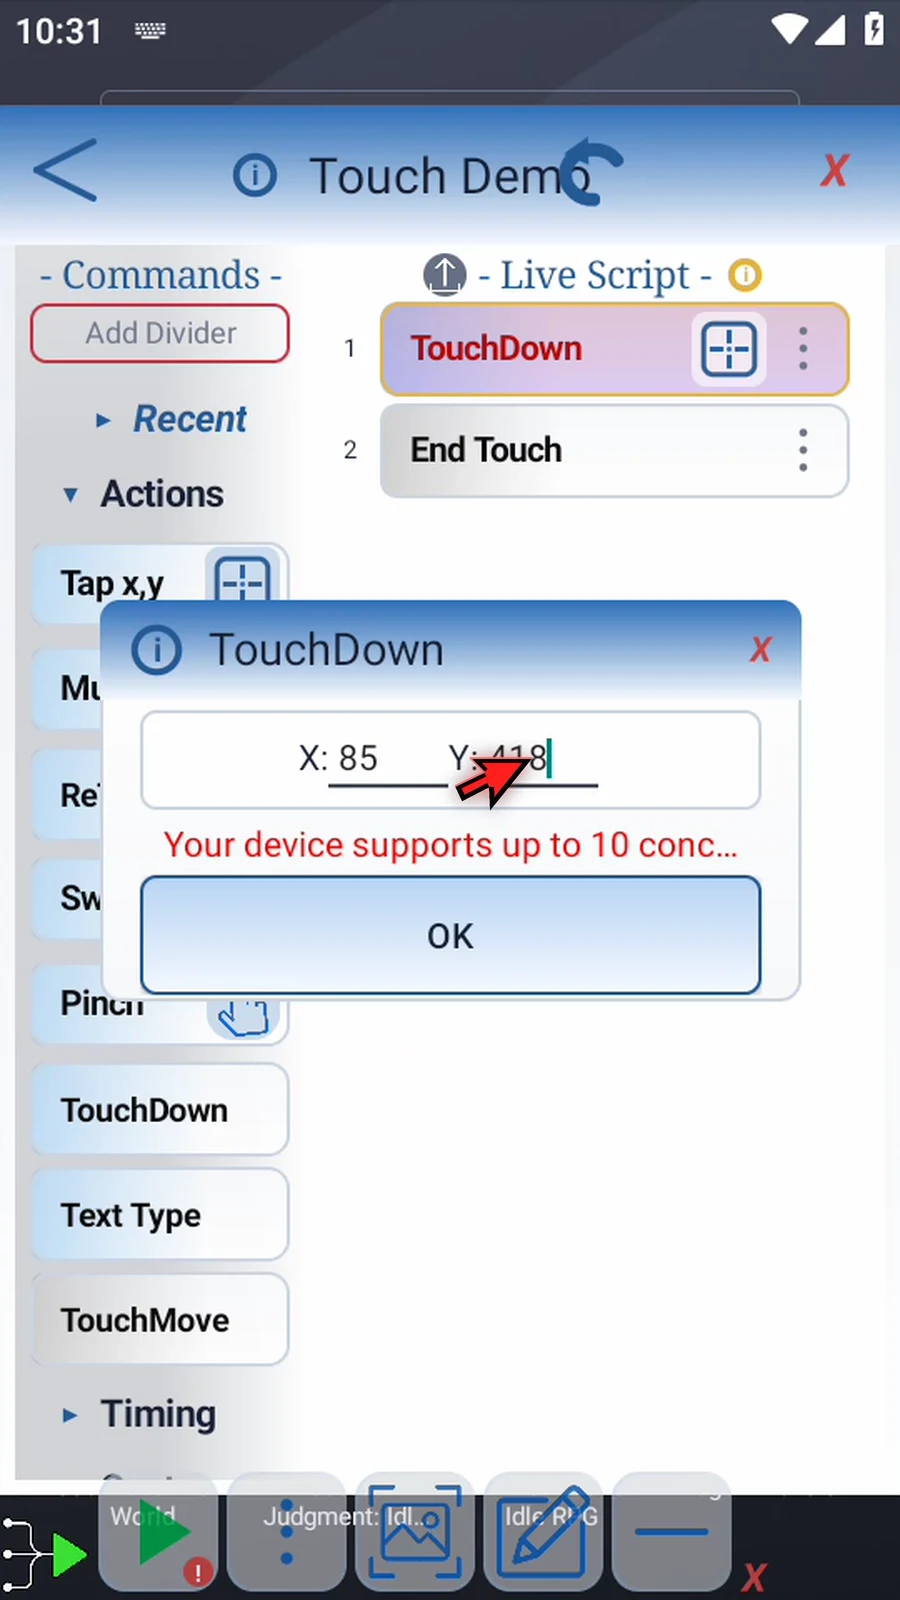
    TouchDown / TouchMove step 9: Set X and Y to the center of the home-screen icon. X runs across the screen; Y runs down it.
  10. Step 10

    Coordinates can also use Integer variables defined earlier in the script.
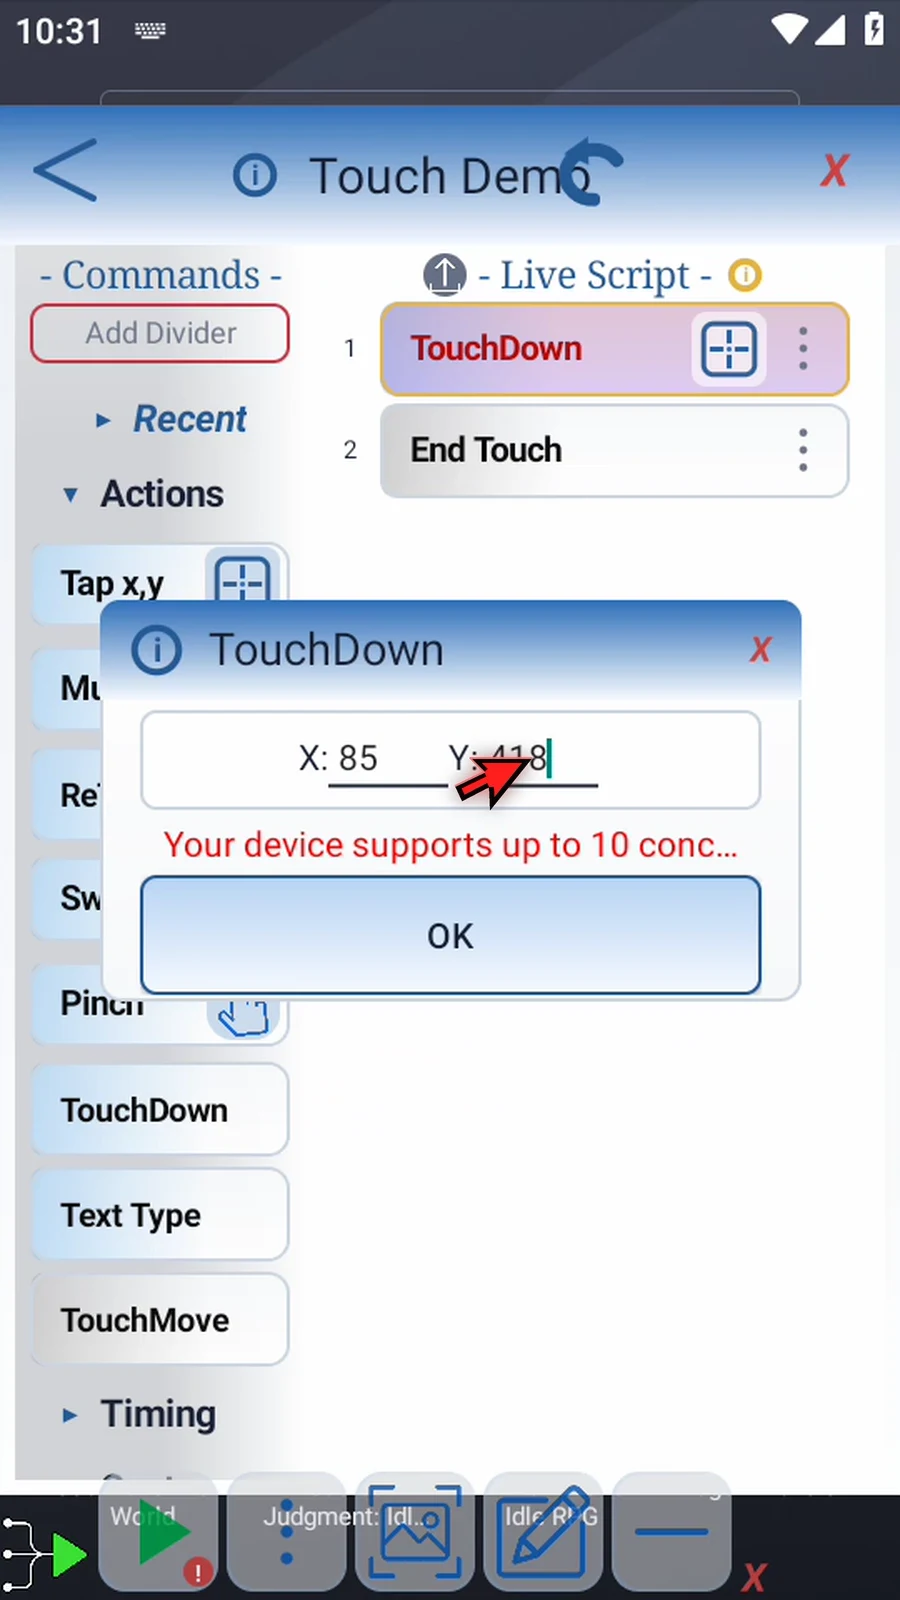
    TouchDown / TouchMove step 10: Coordinates can also use Integer variables defined earlier in the script.
  11. Step 11

    The editor shows this device’s concurrent touch-point limit. Tap OK to save.
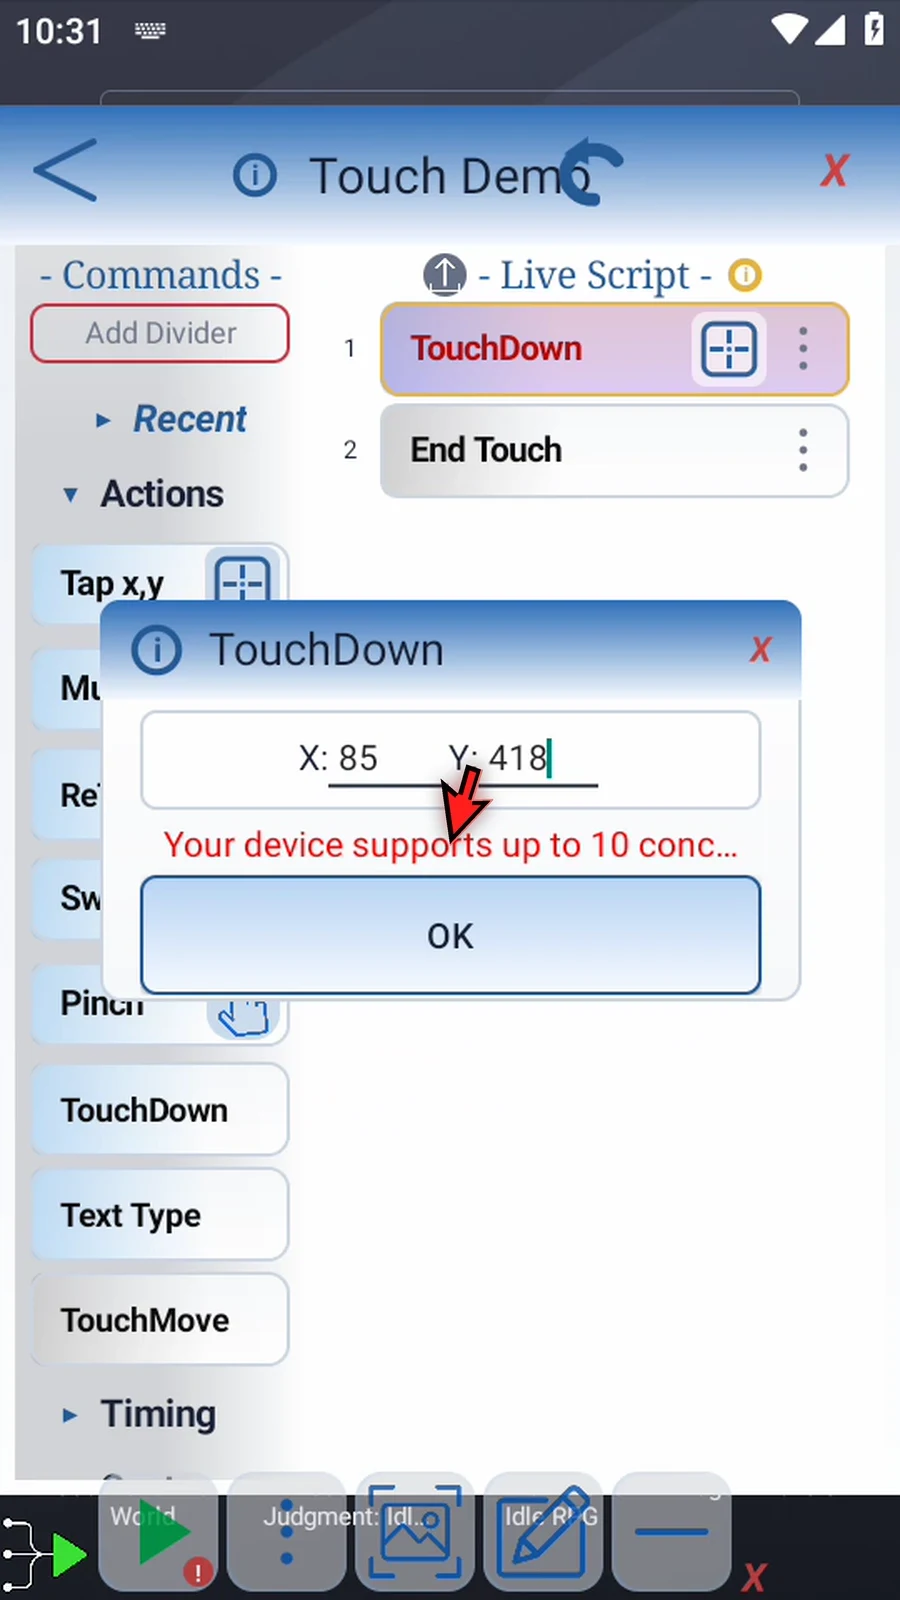
    TouchDown / TouchMove step 11: The editor shows this device’s concurrent touch-point limit. Tap OK to save.
  12. Step 12

    Expand Timing and drag Delay inside the block, above End Touch.
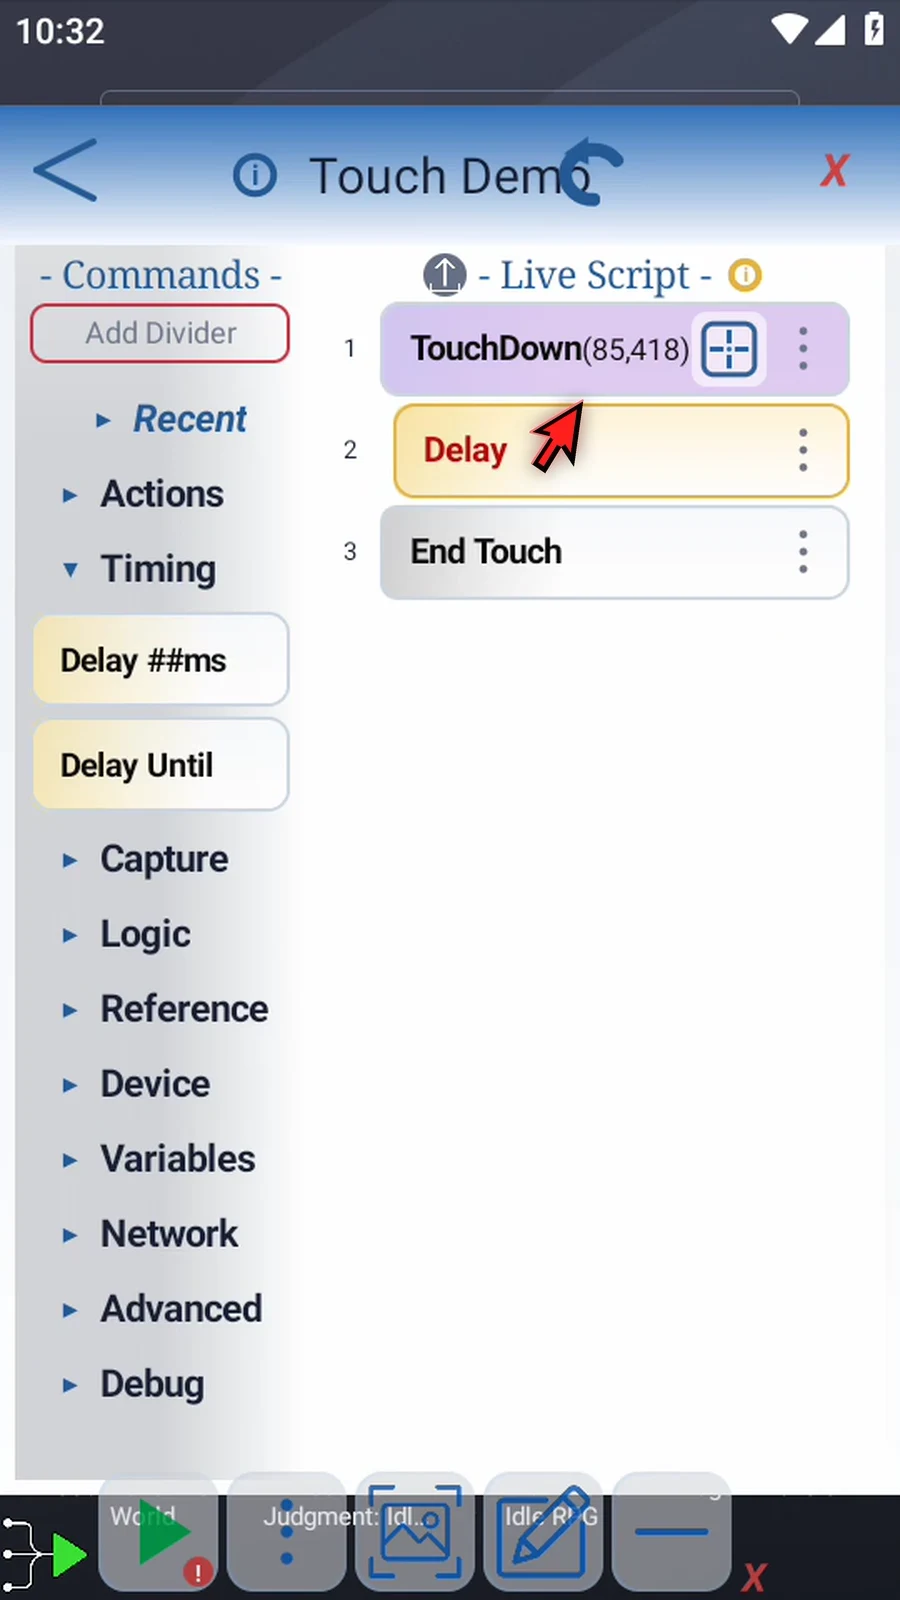
    TouchDown / TouchMove step 12: Expand Timing and drag Delay inside the block, above End Touch.
  13. Step 13

    Open Delay and set one thousand milliseconds. This gives the launcher time to pick up the icon while the touch stays held.
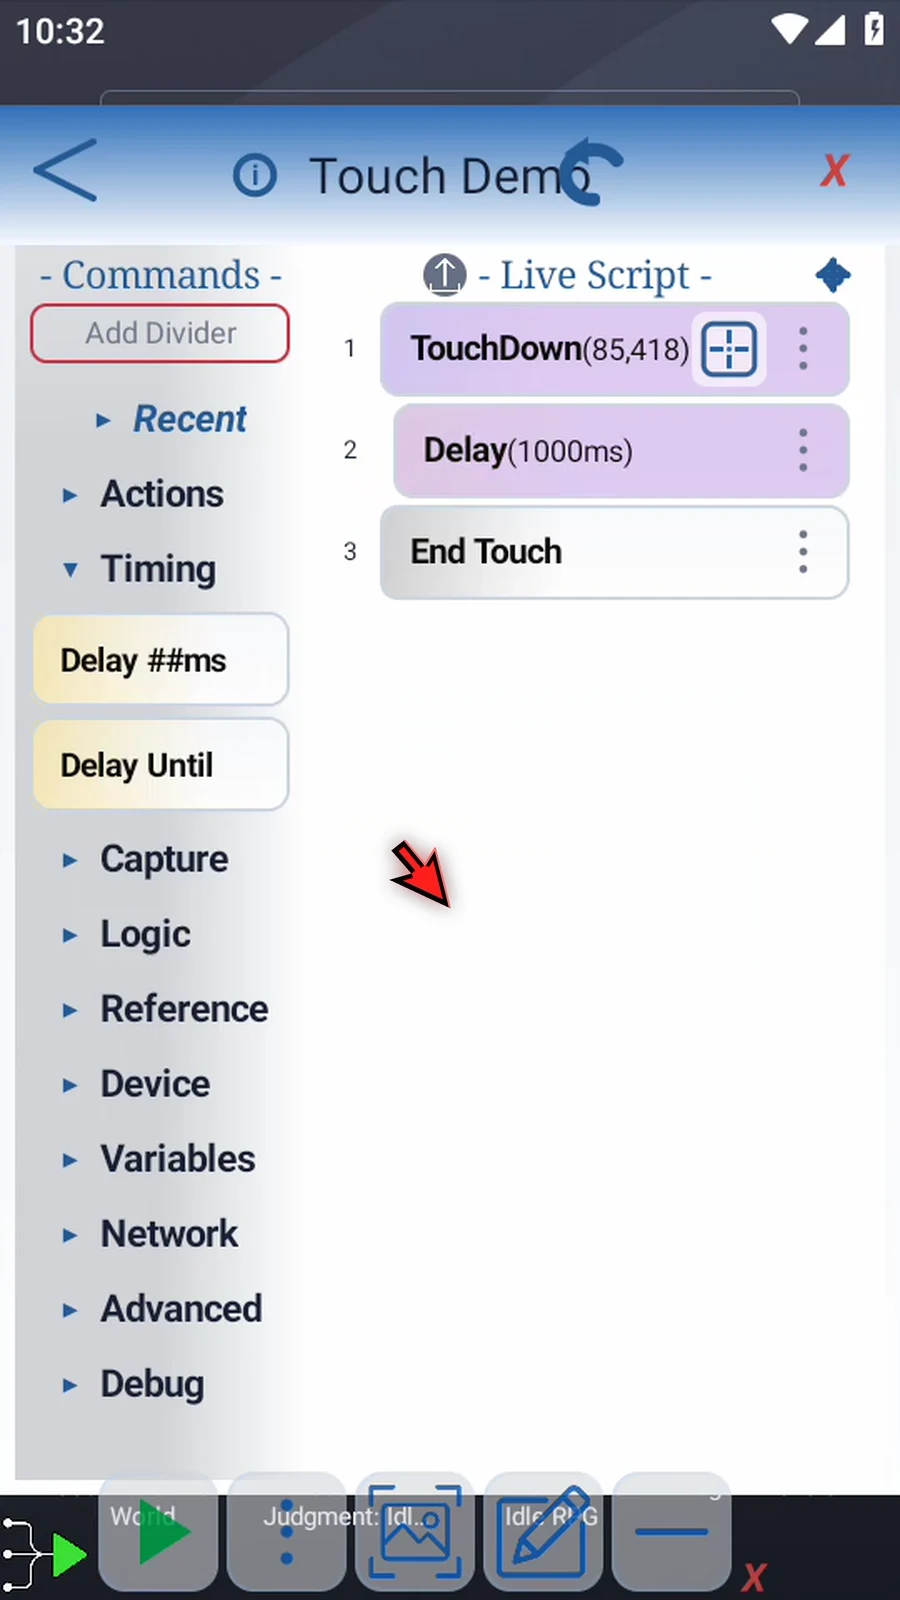
    TouchDown / TouchMove step 13: Open Delay and set one thousand milliseconds. This gives the launcher time to pick up the icon while the touch stays held.
  14. Step 14

    Return to Actions. TouchMove is now available. Drag it inside the TouchDown block, after the delay.
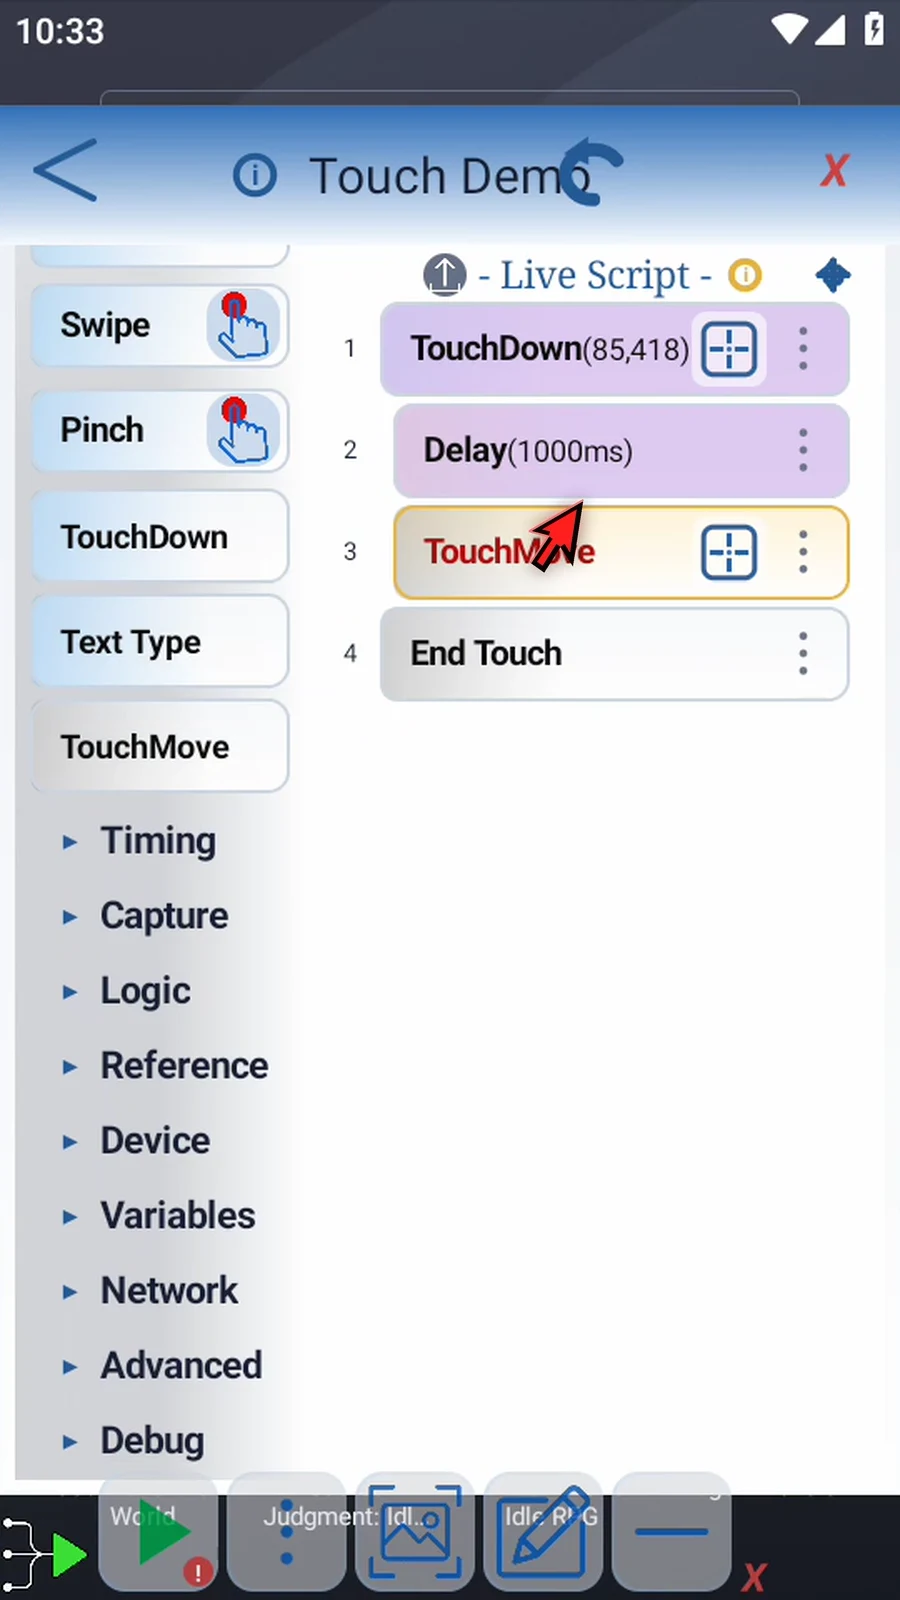
    TouchDown / TouchMove step 14: Return to Actions. TouchMove is now available. Drag it inside the TouchDown block, after the delay.
  15. Step 15

    Open TouchMove. Set the first destination and a Total Move Time of fifteen hundred milliseconds: one and a half seconds.
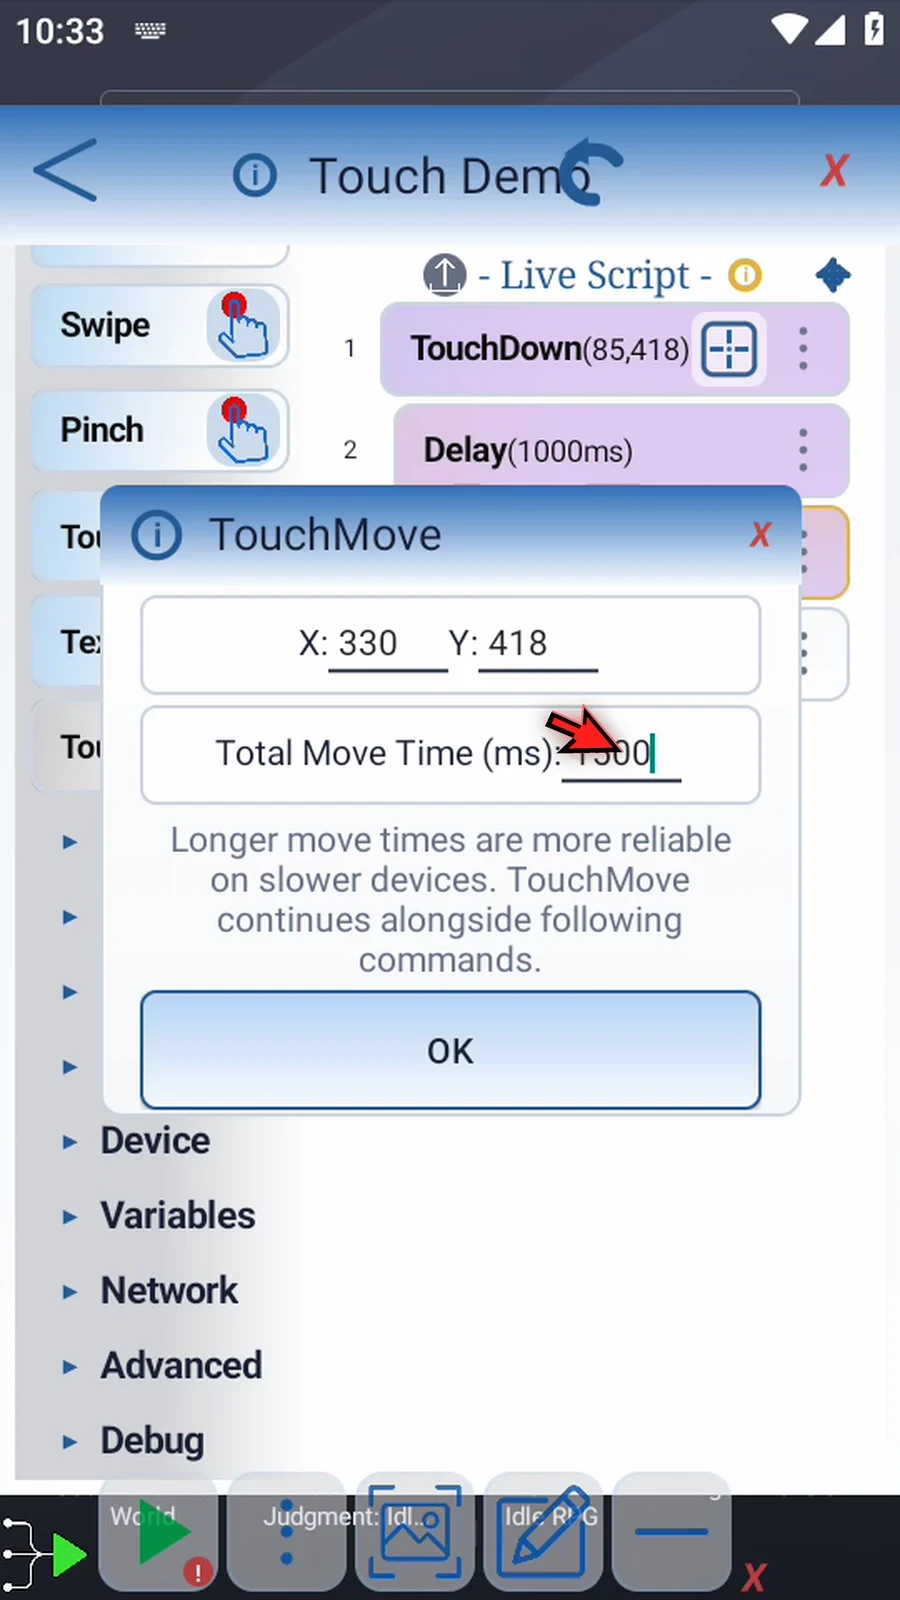
    TouchDown / TouchMove step 15: Open TouchMove. Set the first destination and a Total Move Time of fifteen hundred milliseconds: one and a half seconds.
  16. Step 16

    Total Move Time can also use an earlier Integer variable. TouchMove continues alongside following commands. Longer move times can be more reliable on slower devices.
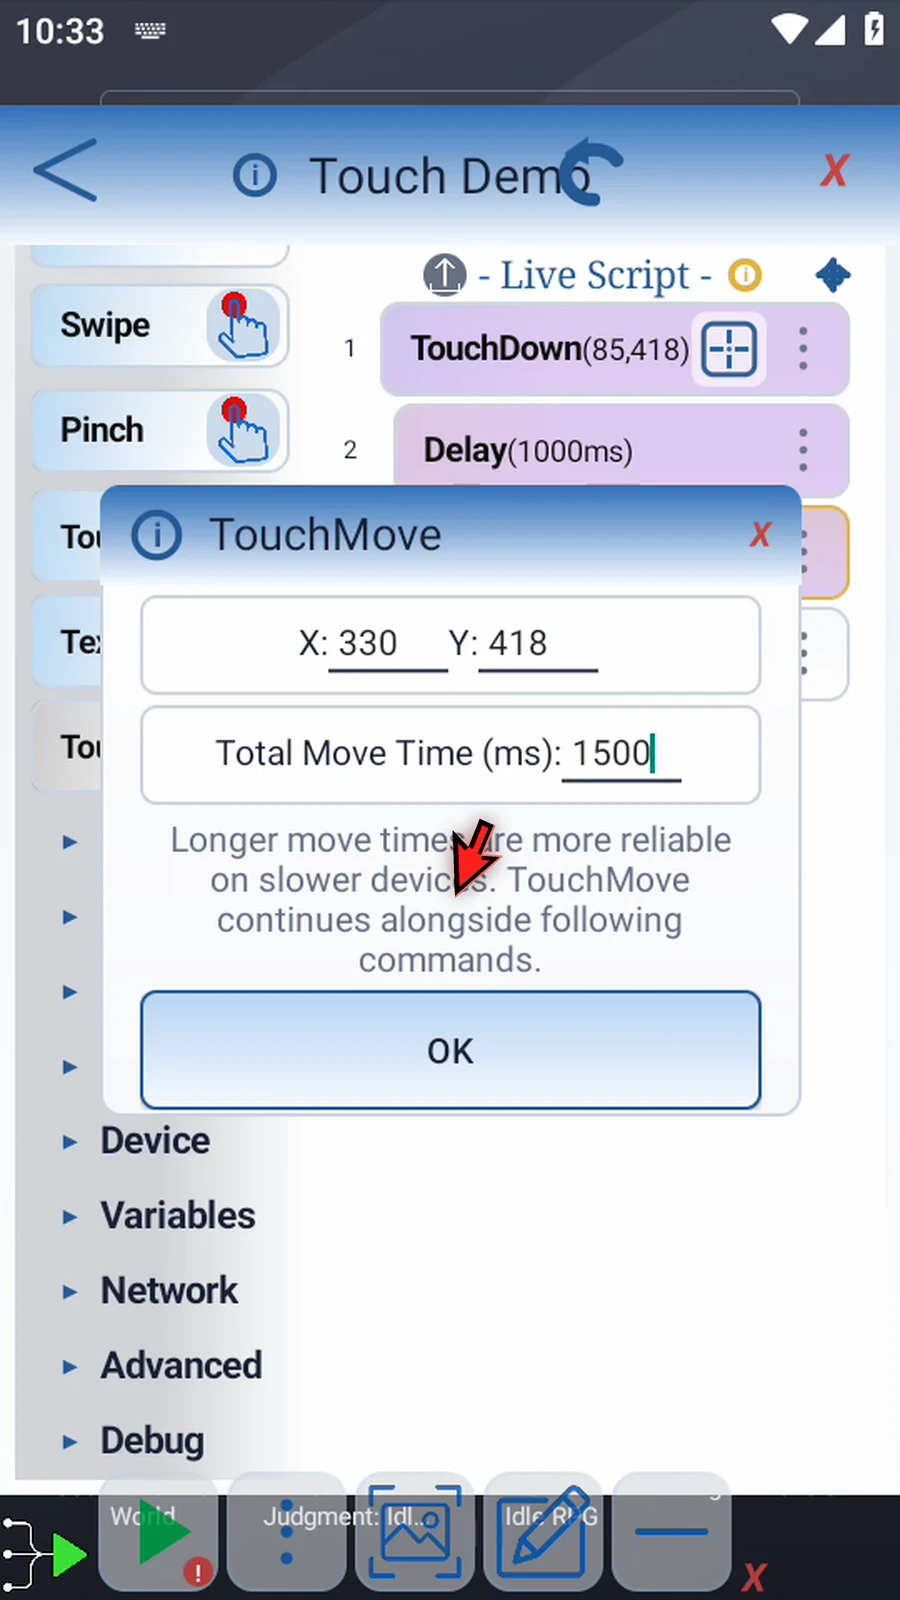
    TouchDown / TouchMove step 16: Total Move Time can also use an earlier Integer variable. TouchMove continues alongside following commands. Longer move times can be more reliable on slower devices.
  17. Step 17

    Add another Delay after the move, still inside the block.
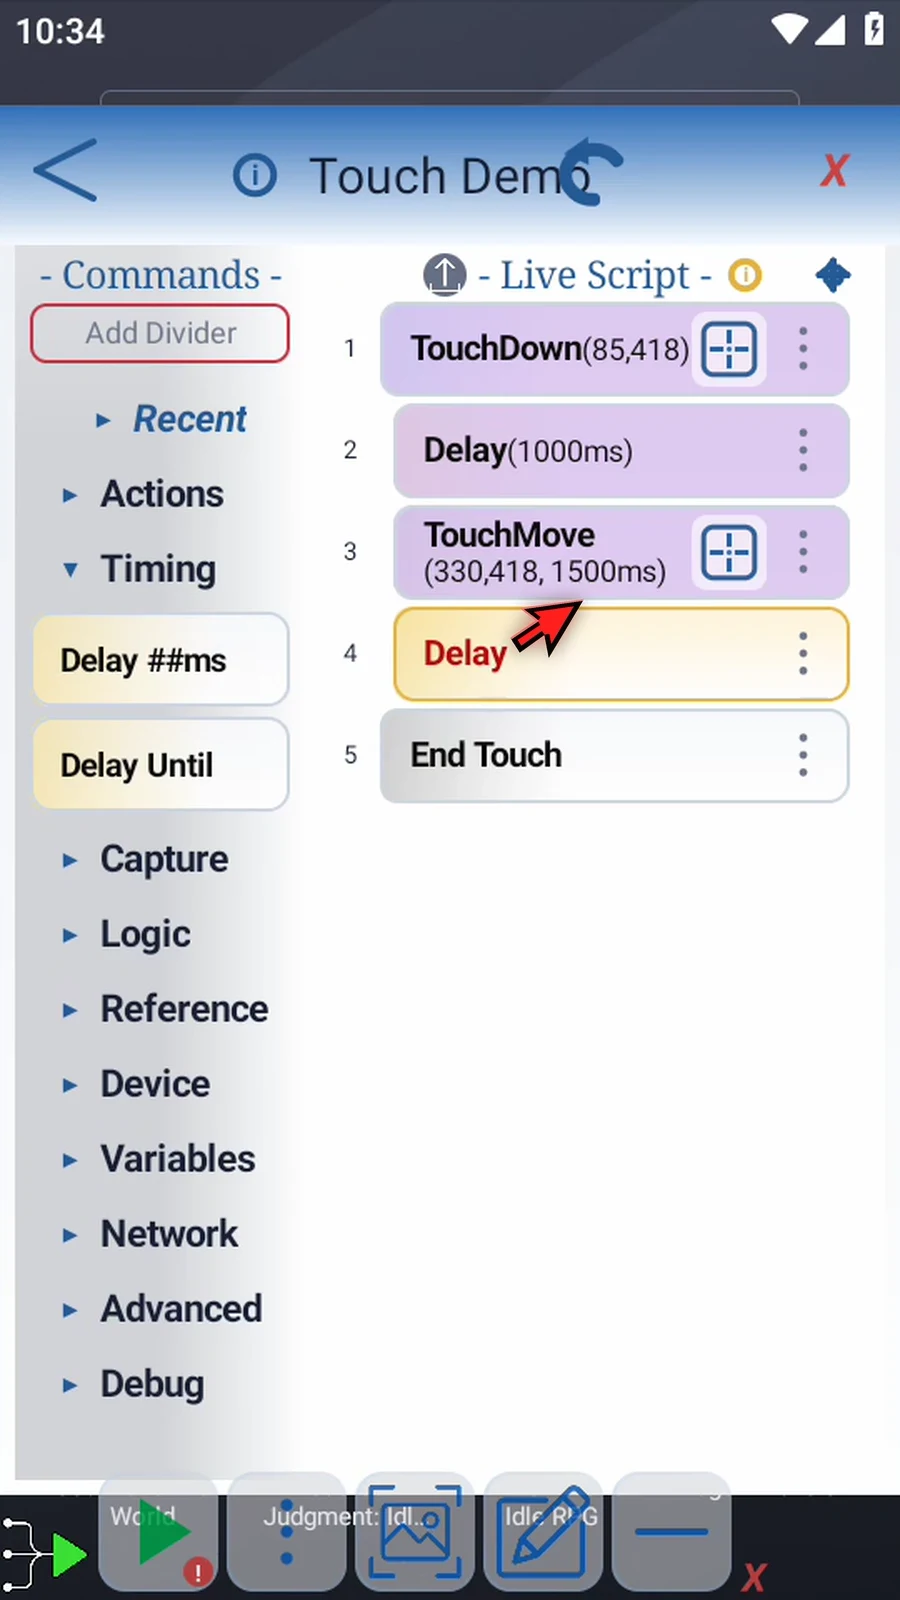
    TouchDown / TouchMove step 17: Add another Delay after the move, still inside the block.
  18. Step 18

    Set two thousand milliseconds, so the first move finishes before the next one begins.
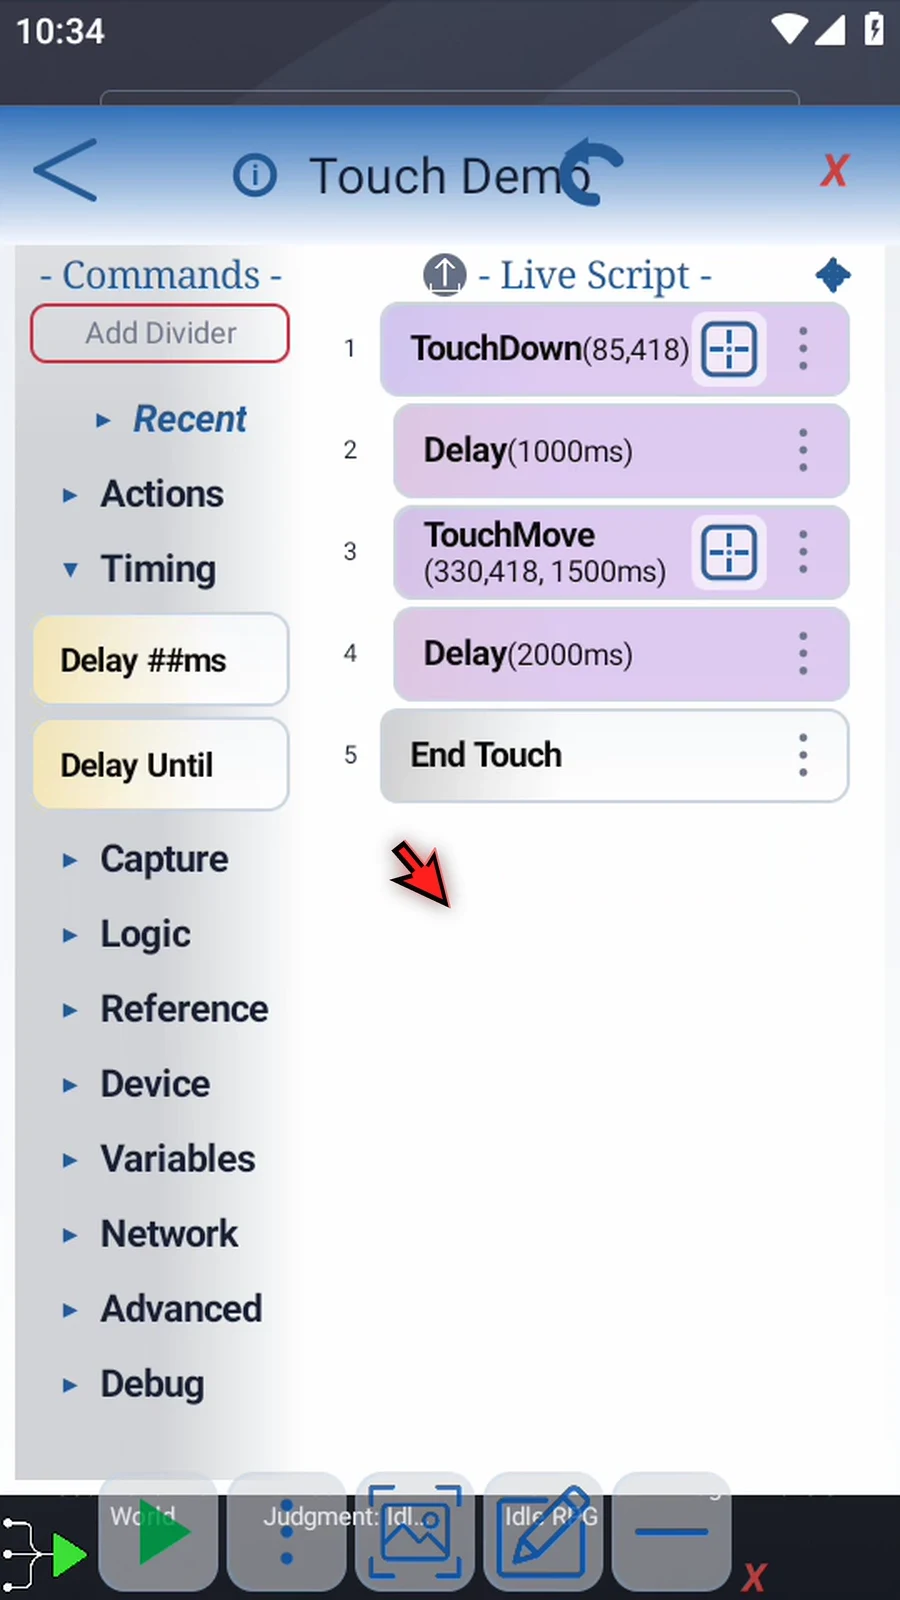
    TouchDown / TouchMove step 18: Set two thousand milliseconds, so the first move finishes before the next one begins.
  19. Step 19

    Drag a second TouchMove into the block, after that delay.
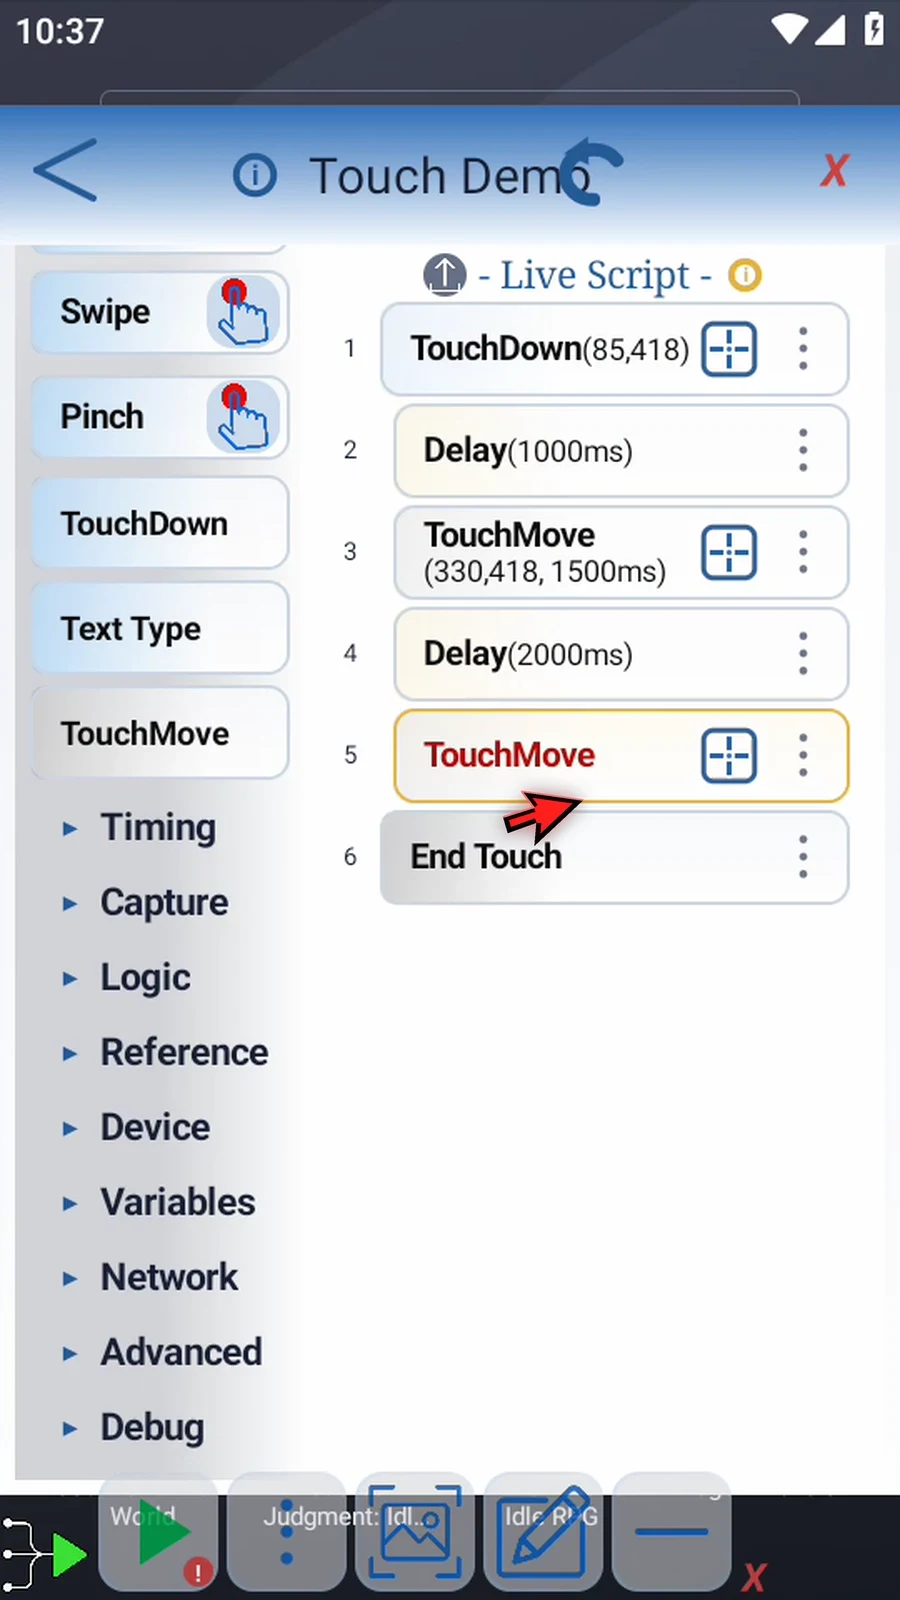
    TouchDown / TouchMove step 19: Drag a second TouchMove into the block, after that delay.
  20. Step 20

    Give it a different destination, with the same fifteen-hundred-millisecond move time.
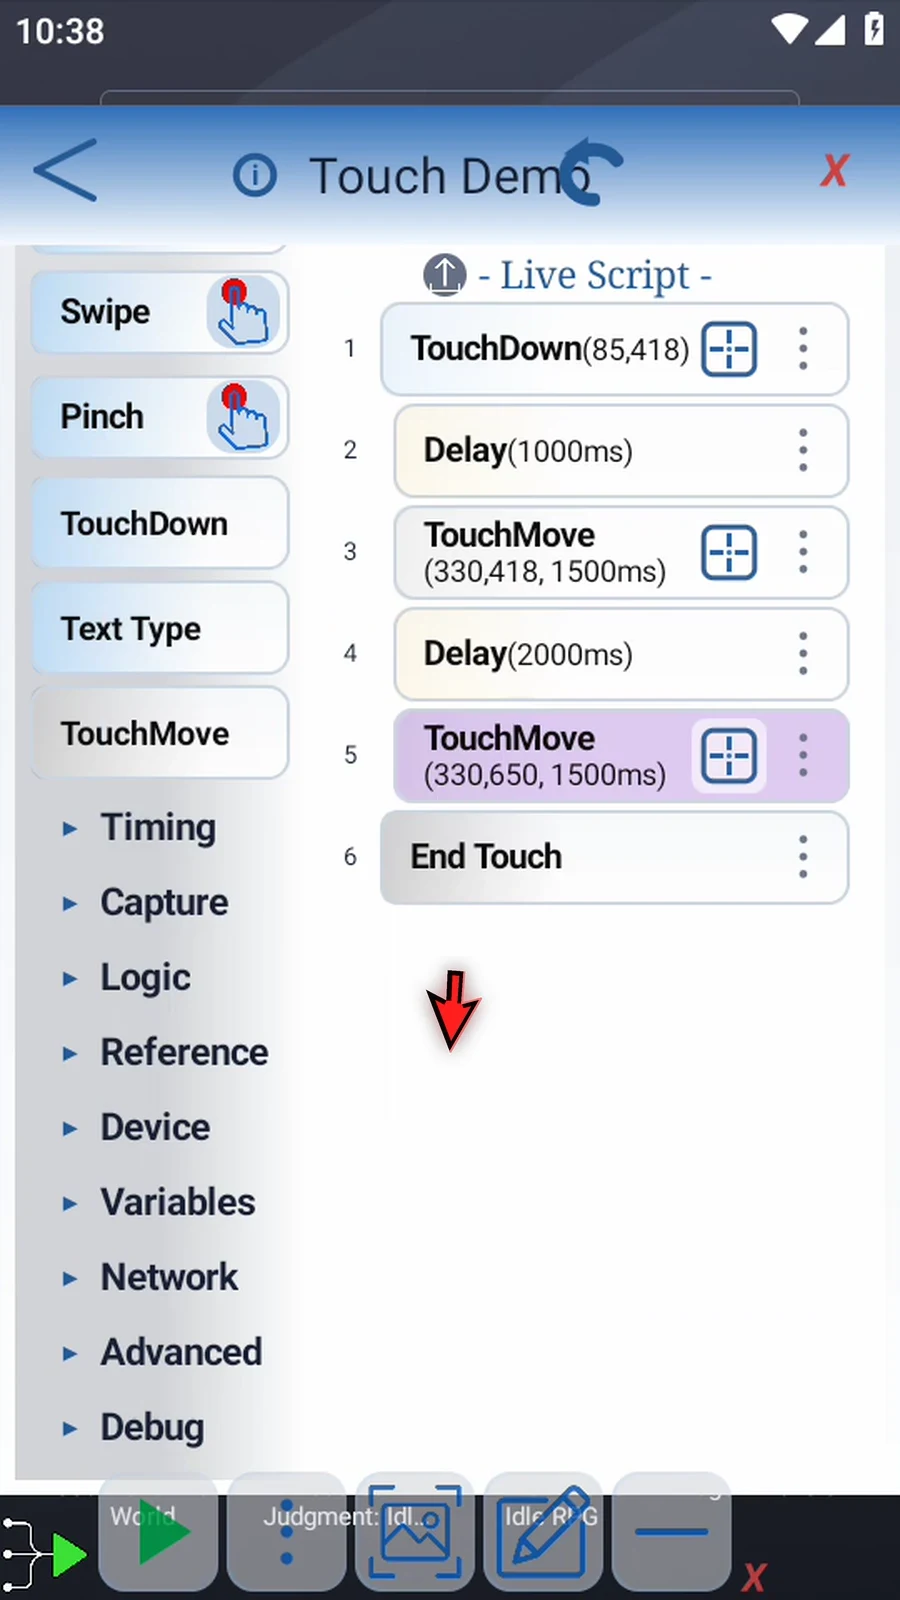
    TouchDown / TouchMove step 20: Give it a different destination, with the same fifteen-hundred-millisecond move time.
  21. Step 21

    Add a final Delay before End Touch.
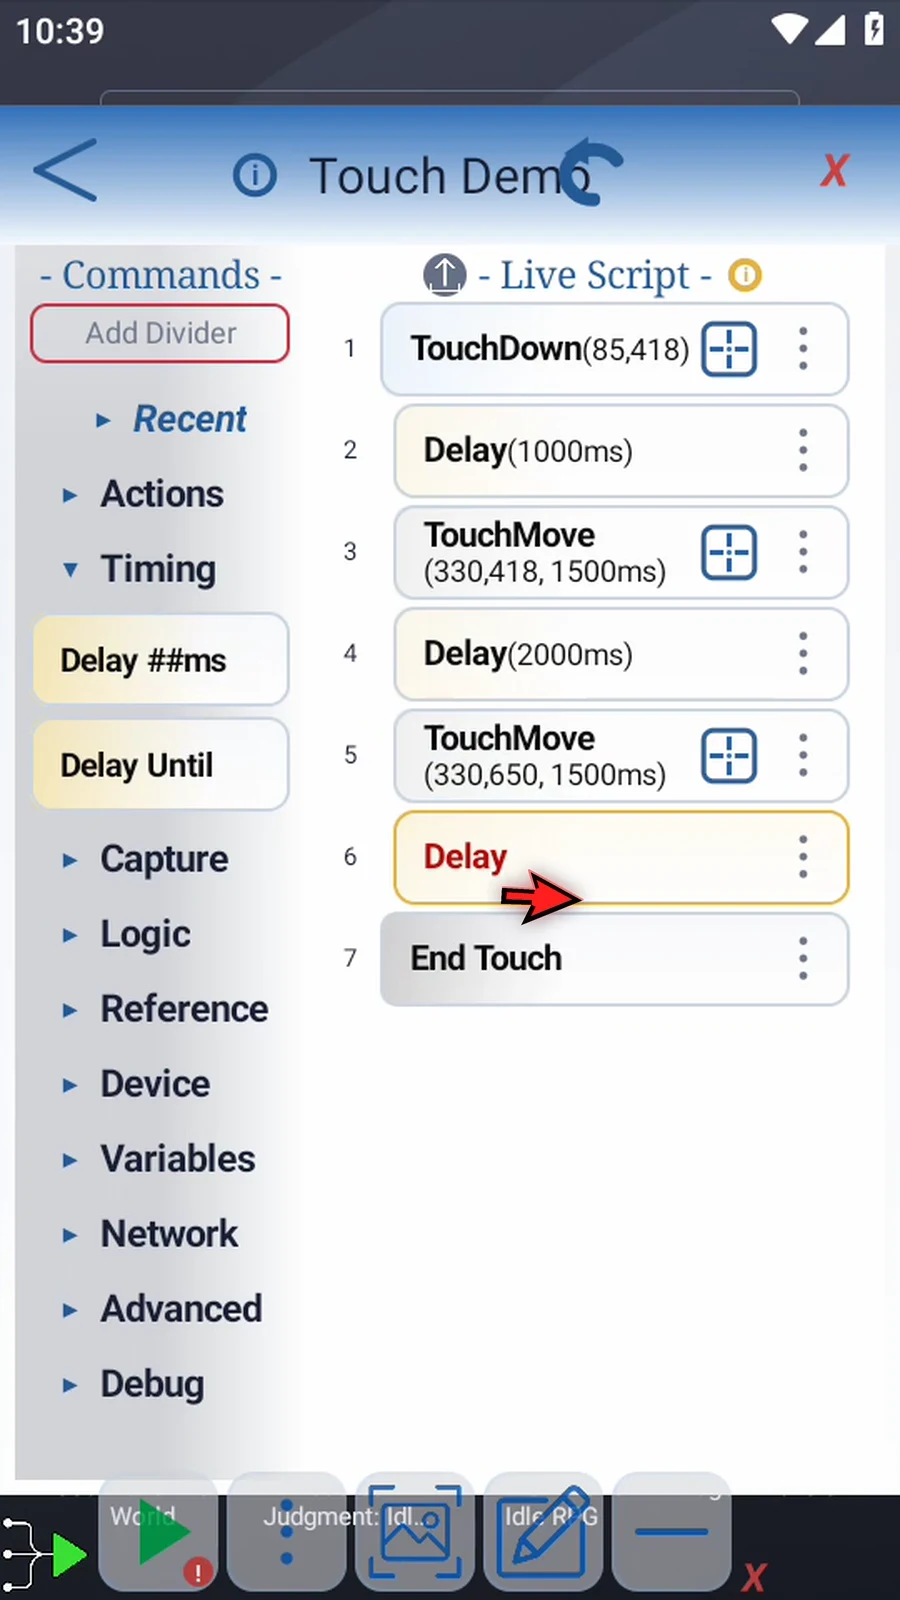
    TouchDown / TouchMove step 21: Add a final Delay before End Touch.
  22. Step 22

    Set two thousand milliseconds again, allowing the second move to finish before release.
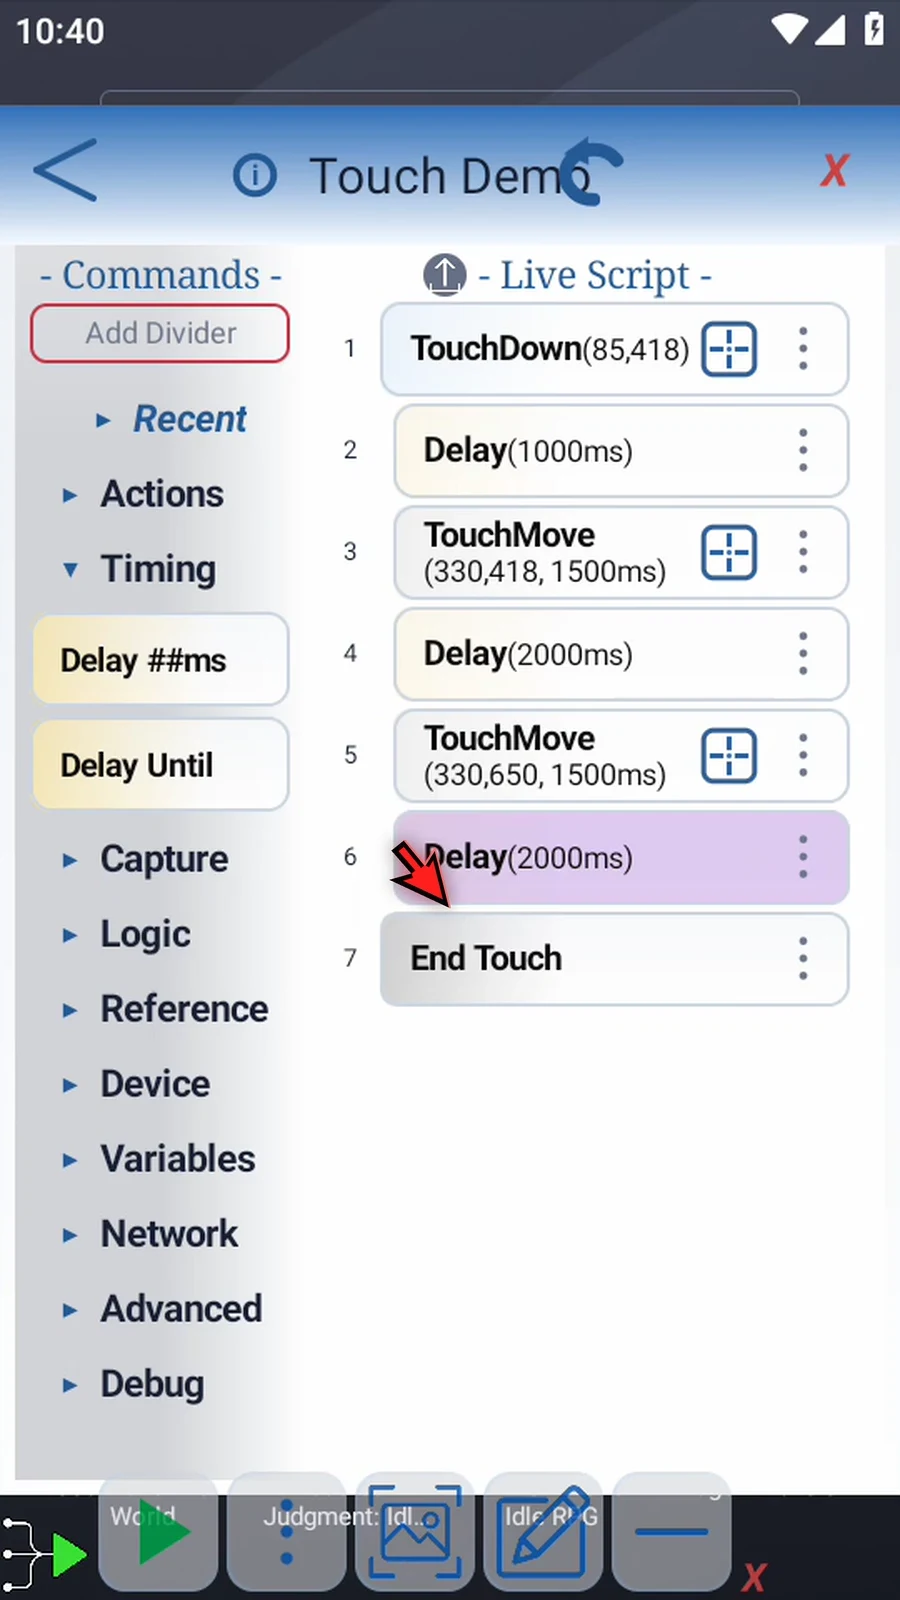
    TouchDown / TouchMove step 22: Set two thousand milliseconds again, allowing the second move to finish before release.
  23. Step 23

    The icon is held, moved twice, then released by End Touch. Keep both TouchMove commands inside their owning TouchDown block.
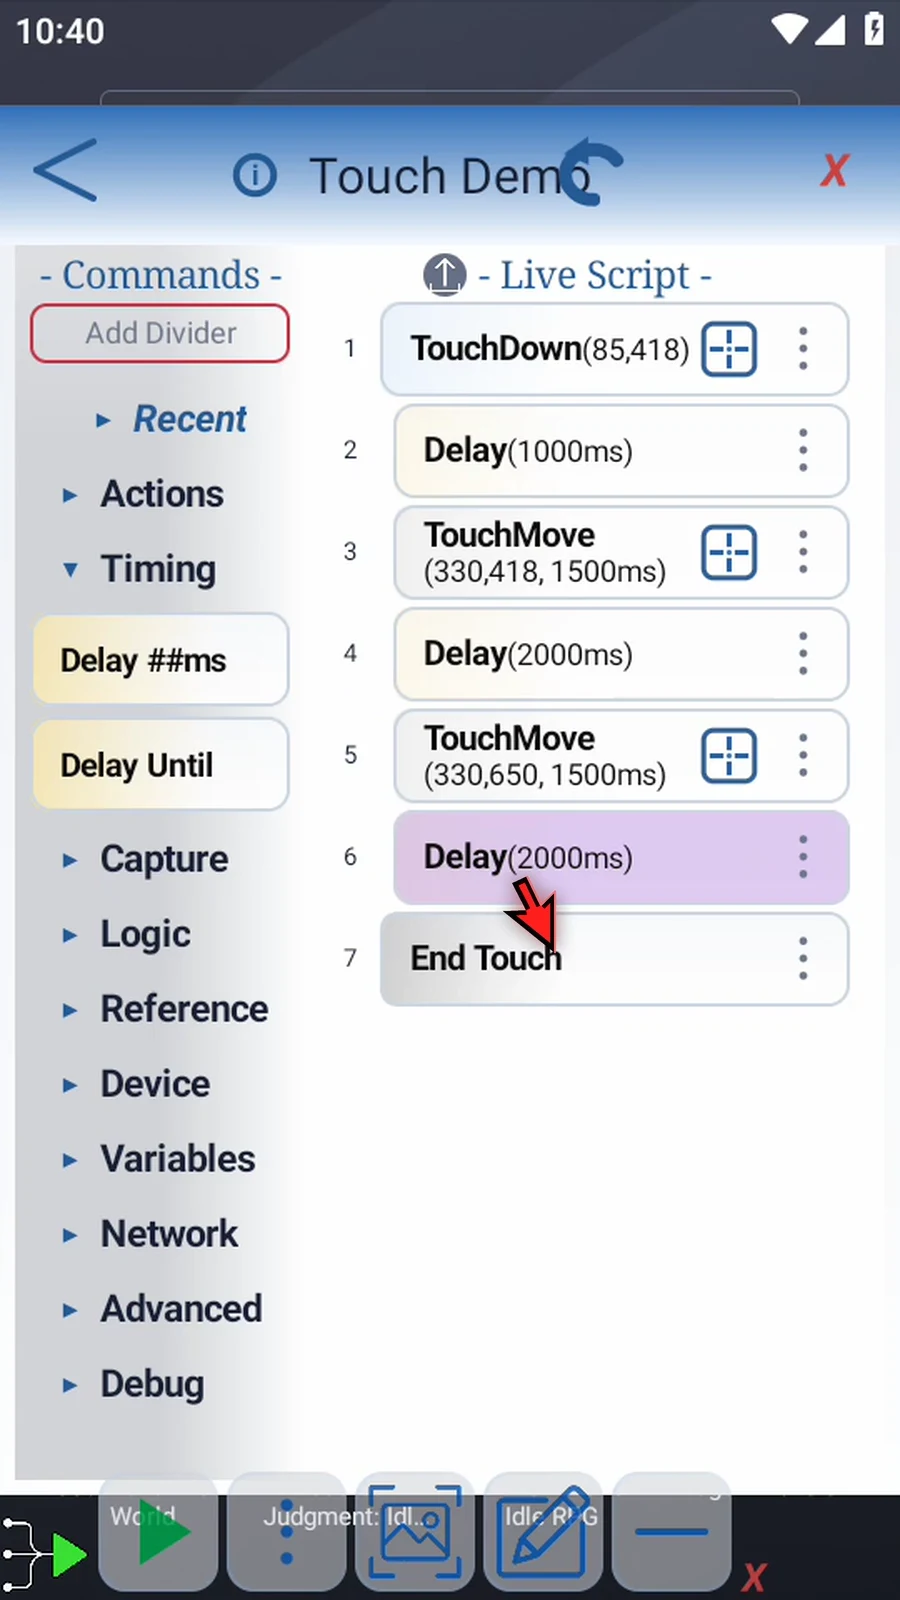
    TouchDown / TouchMove step 23: The icon is held, moved twice, then released by End Touch. Keep both TouchMove commands inside their owning TouchDown block.
  24. Step 24

    Delays are just our example. The purpose of TouchDown is multi-control: other actions can run while the original touch remains uninterrupted.
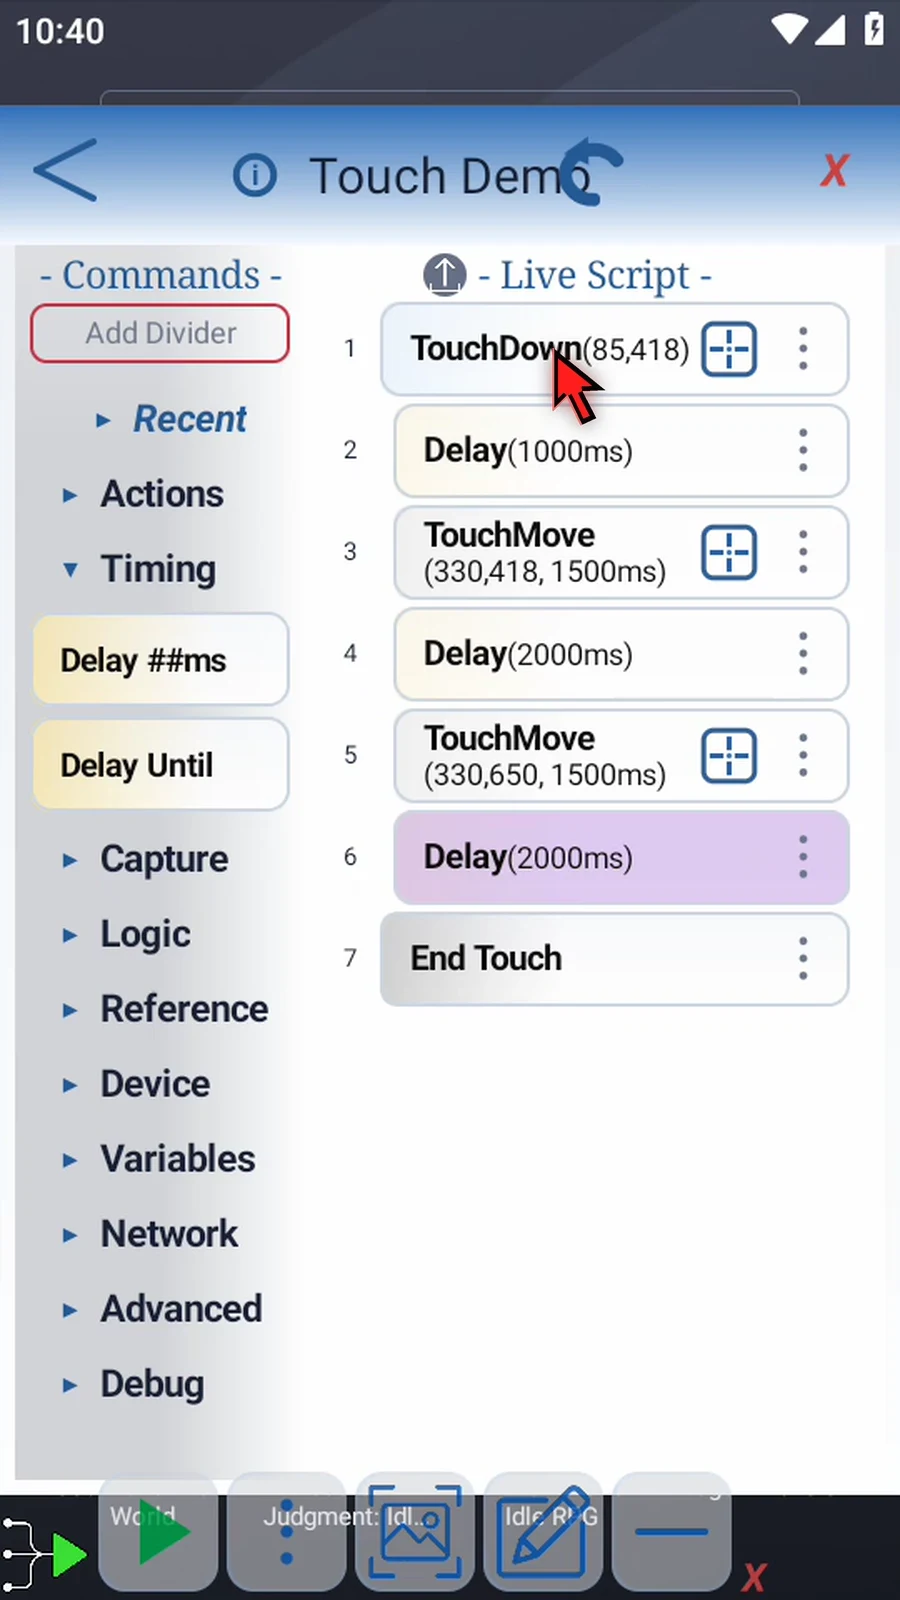
    TouchDown / TouchMove step 24: Delays are just our example. The purpose of TouchDown is multi-control: other actions can run while the original touch remains uninterrupted.
  25. Step 25

    Play is limited by the device’s maximum concurrent gestures. Test scripts using more than five simultaneous gestures; not every device supports more than five.
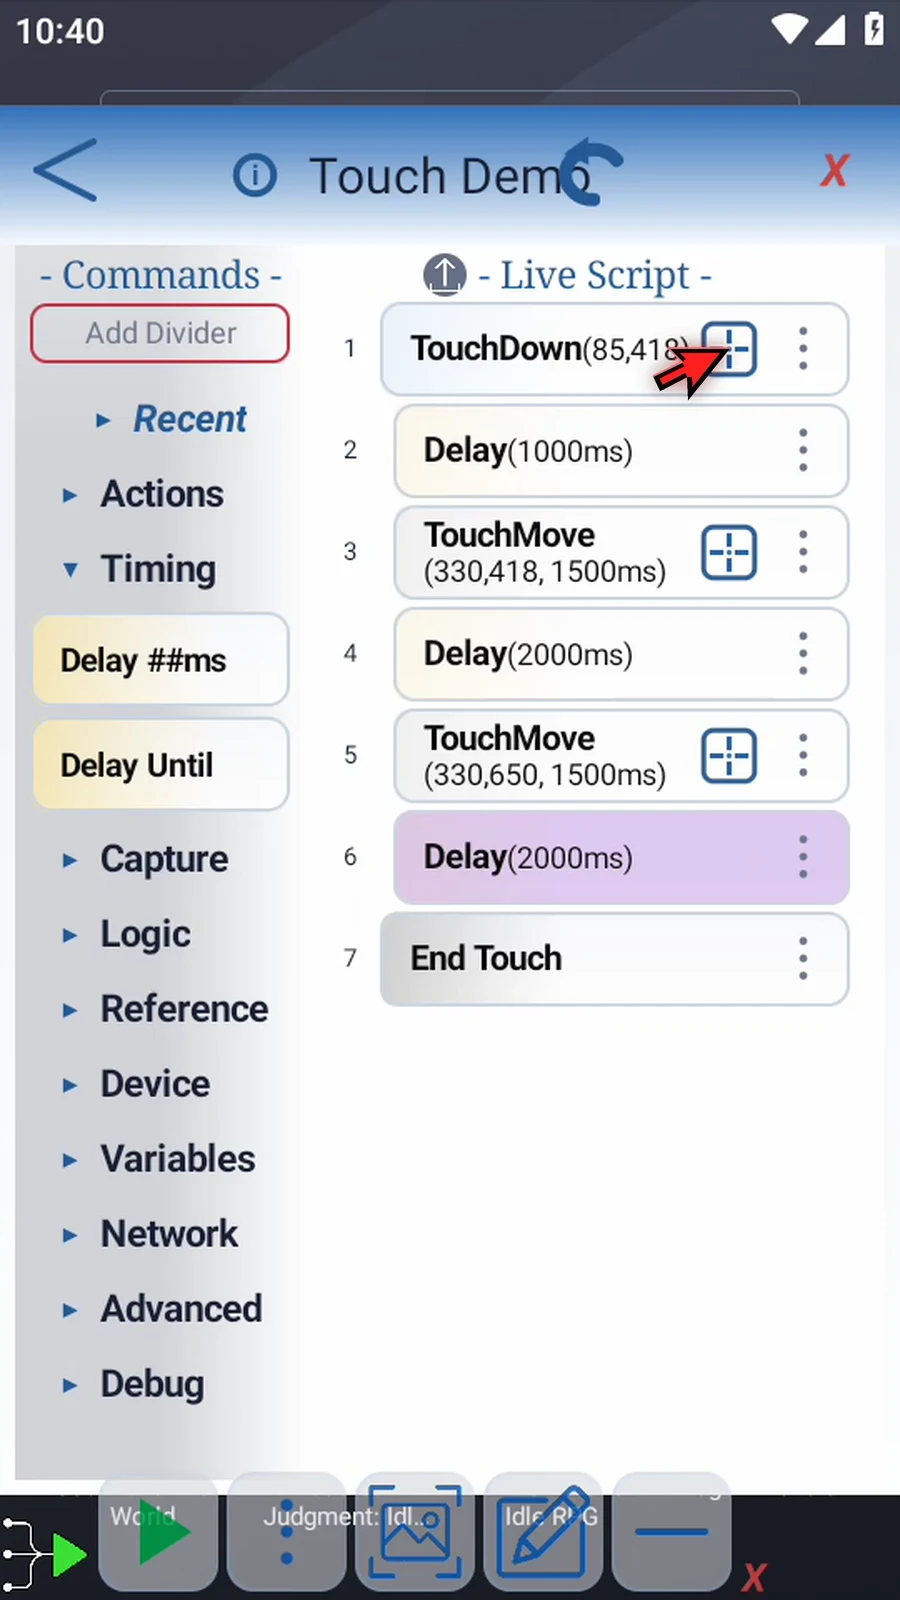
    TouchDown / TouchMove step 25: Play is limited by the device’s maximum concurrent gestures. Test scripts using more than five simultaneous gestures; not every device supports more than five.
  26. Step 26

    Close the editor to return to the home screen.
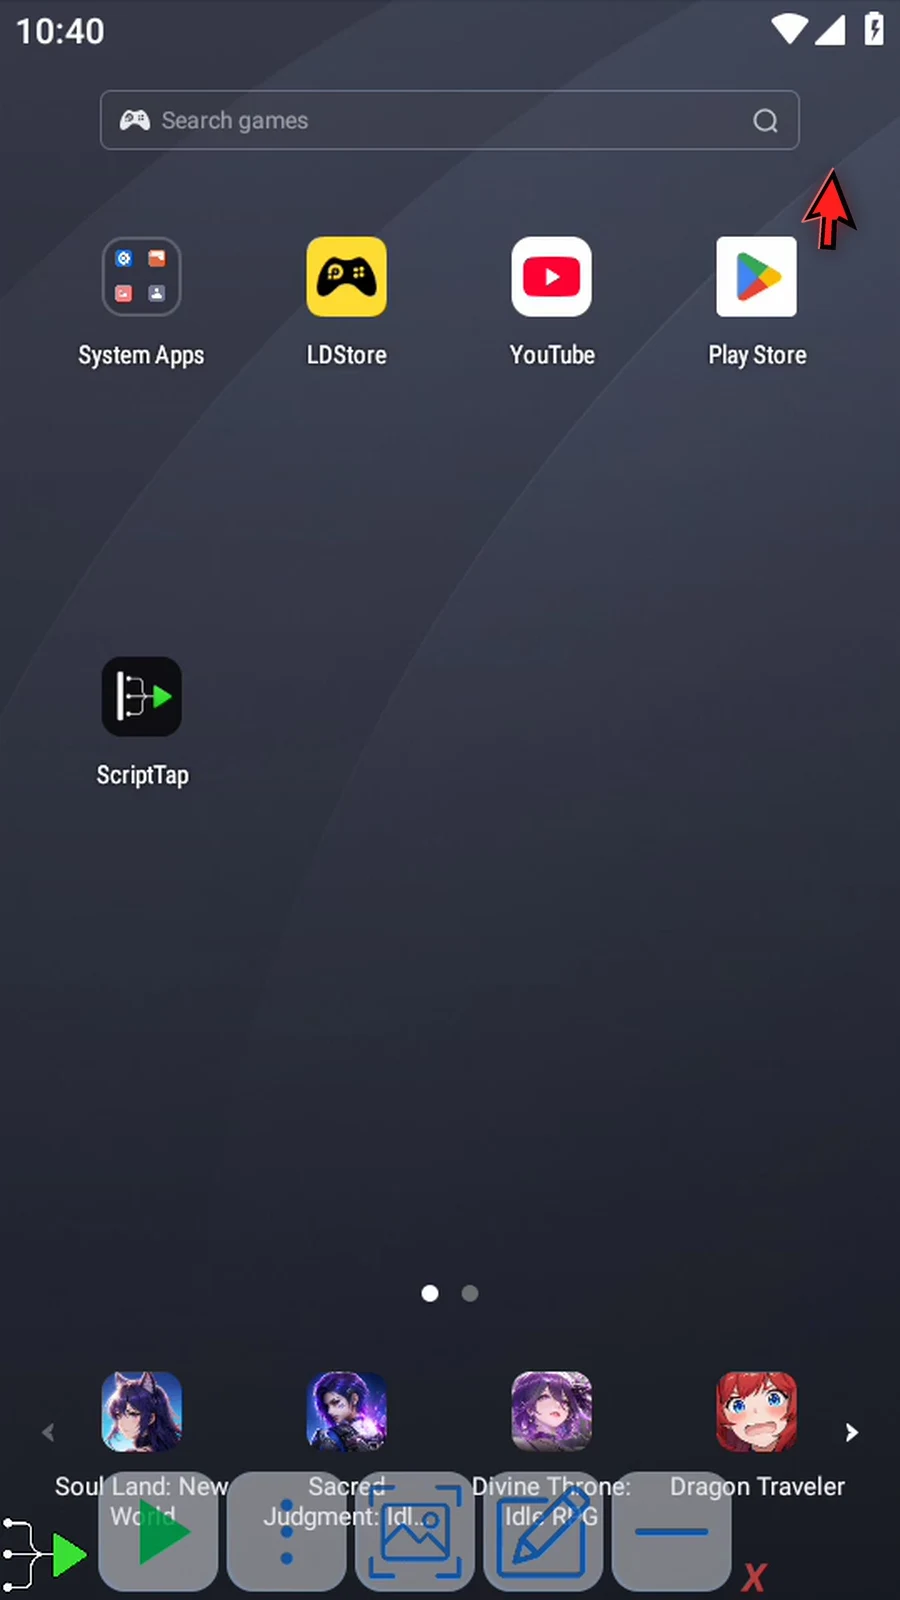
    TouchDown / TouchMove step 26: Close the editor to return to the home screen.
  27. Step 27

    When the script is complete, simply use the Play button in the main overlay.
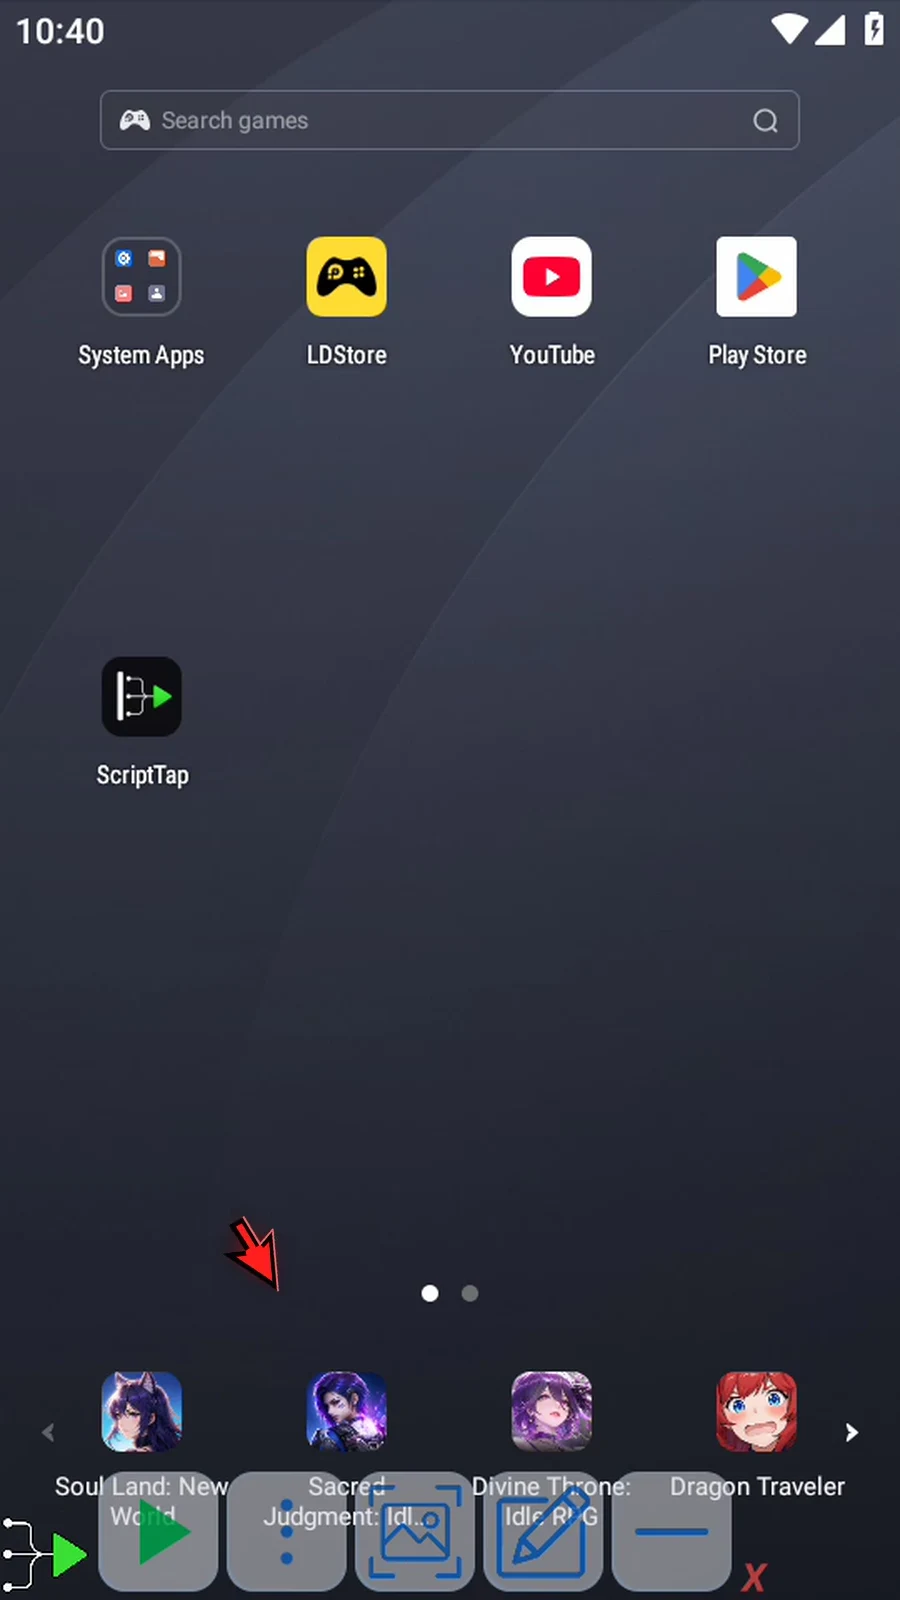
    TouchDown / TouchMove step 27: When the script is complete, simply use the Play button in the main overlay.
  28. Step 28

    The icon stays held through both moves. End Touch releases it, and the script stops automatically.
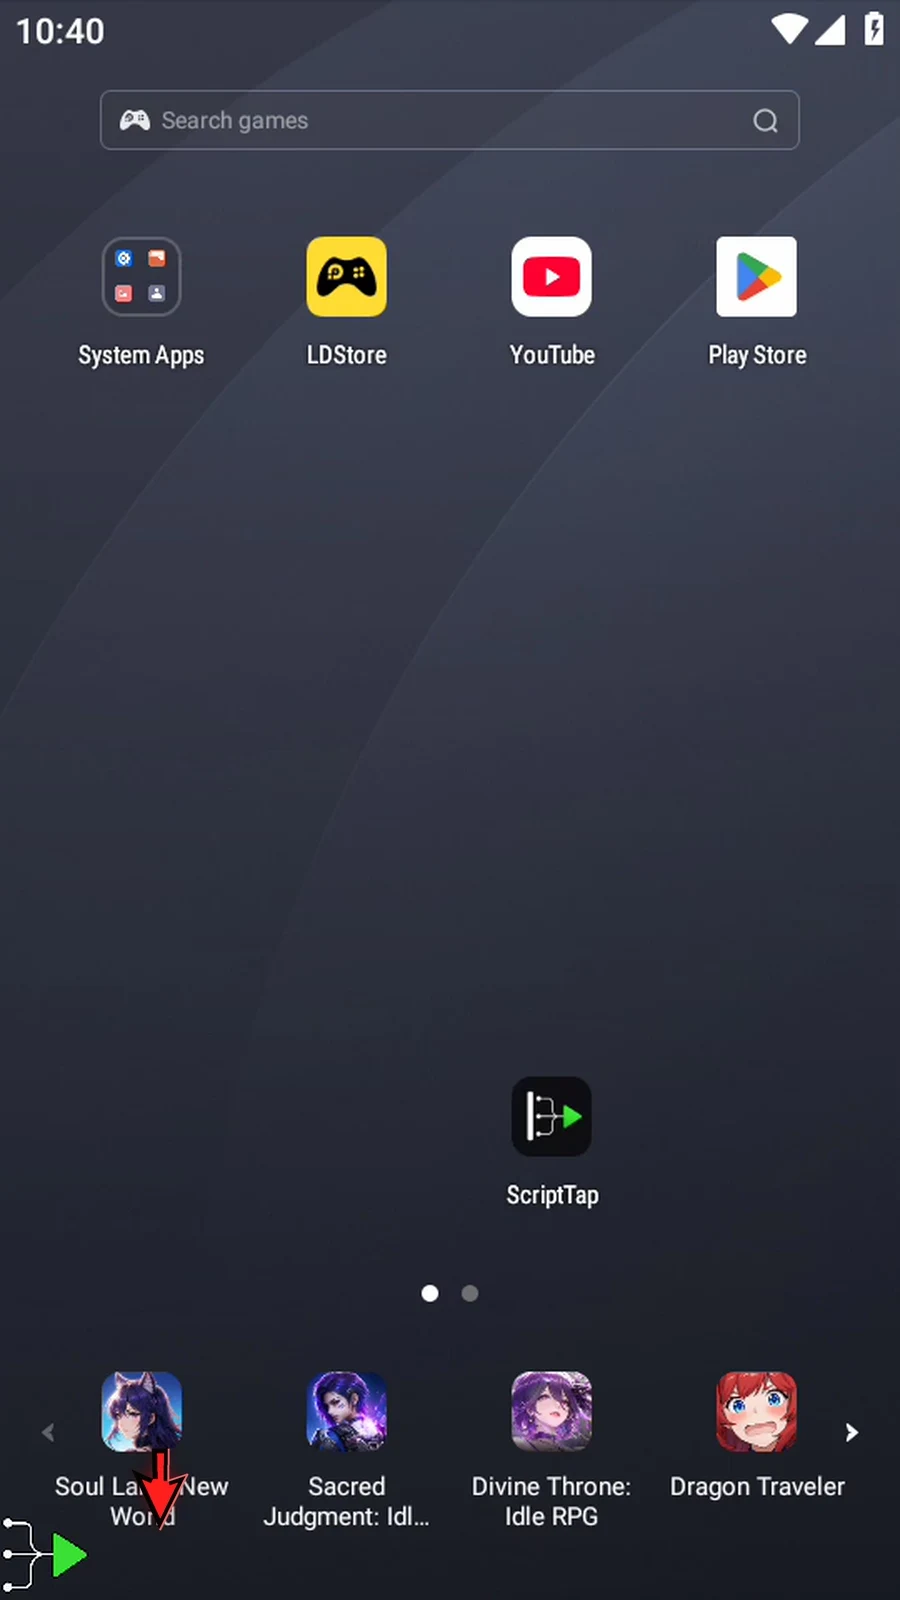
    TouchDown / TouchMove step 28: The icon stays held through both moves. End Touch releases it, and the script stops automatically.